

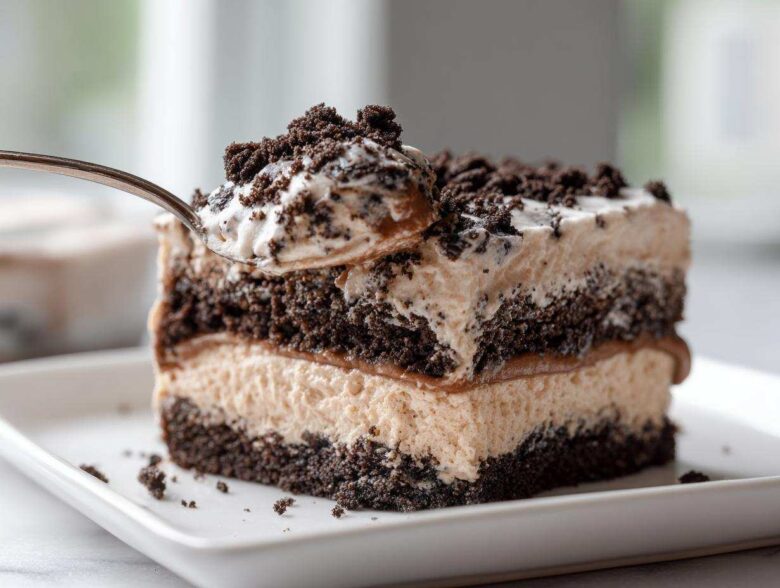
There’s something deeply comforting about a dessert that immediately whisks you back to childhood parties, right? When Noah and I were getting our life organized—building our little Epicure Empire one recipe at a time—we knew we needed those easy winners in our rotation. Our baseline rule is that every recipe has to be treated like a blueprint: tested, strategic, and flawless. This oreo dirt cake checks every single box. It’s the ultimate crowd-pleaser, requiring absolutely zero time near a hot oven, and it never fails to make someone smile.
We’ve refined this dessert so it’s layered perfectly, balancing that required crunch with the silkiest filling imaginable. If you’re looking for a highly operationalized, completely reliable sweet treat for your next gathering, you’ve found the master plan right here on our blog.
Why This is The Best No-Bake Oreo Dirt Cake Recipe
This is hands-down the easy dirt cake recipe you need in your arsenal. Seriously, when Noah and I brought this to our first big family reunion, it disappeared before the mains were cleared! Honestly, if we can manage it while optimizing our business, anyone can make it for a gathering. It’s become our unofficial potluck favorite because it’s foolproof. The beauty is that it’s entirely no-bake, which means less stress for me while I’m busy running operations! If you want to try another simple but impressive sweet treat, check out how we make easy homemade marshmallows.
Quick Preparation for Your Oreo Dirt Cake
We clocked the active prep time for this recipe at just 25 minutes. That’s it! You mix two simple components, layer them up, and let the fridge do the hard work. It’s the definition of a quick chocolate dessert when you need something impressive fast but aren’t turning on the oven. It truly shines as a make-ahead marvel.
The Irresistible Creamy Oreo Treat Layers
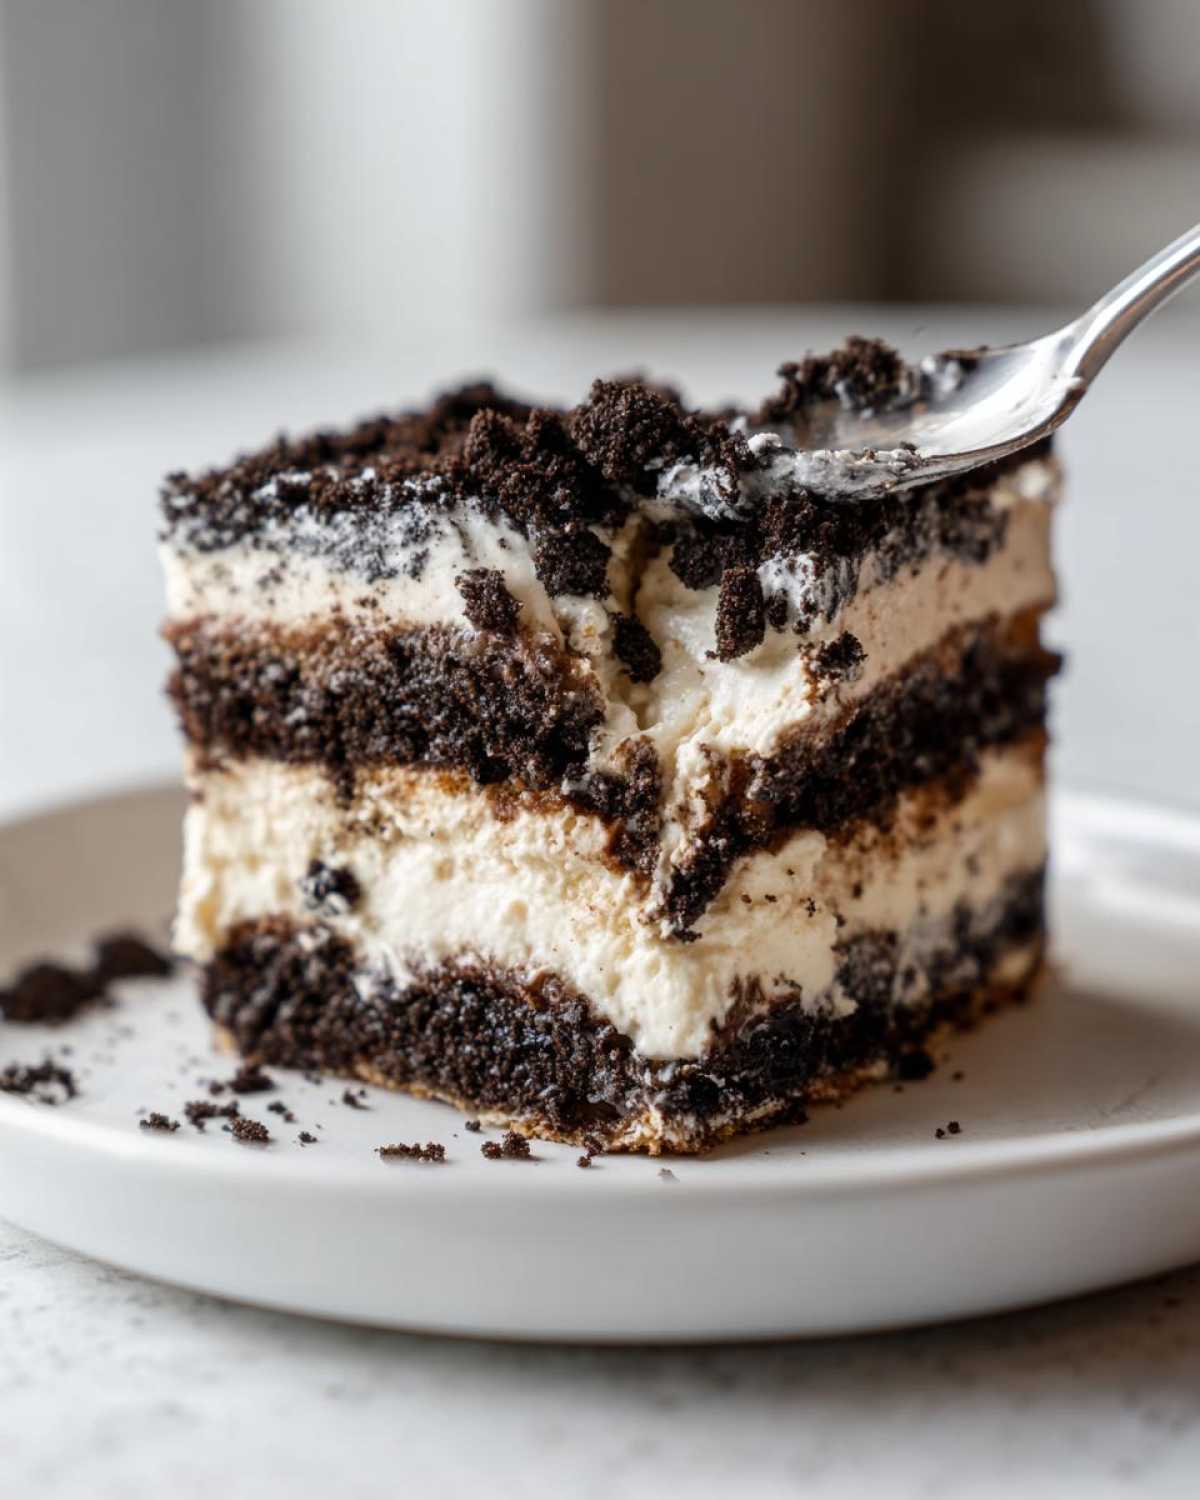
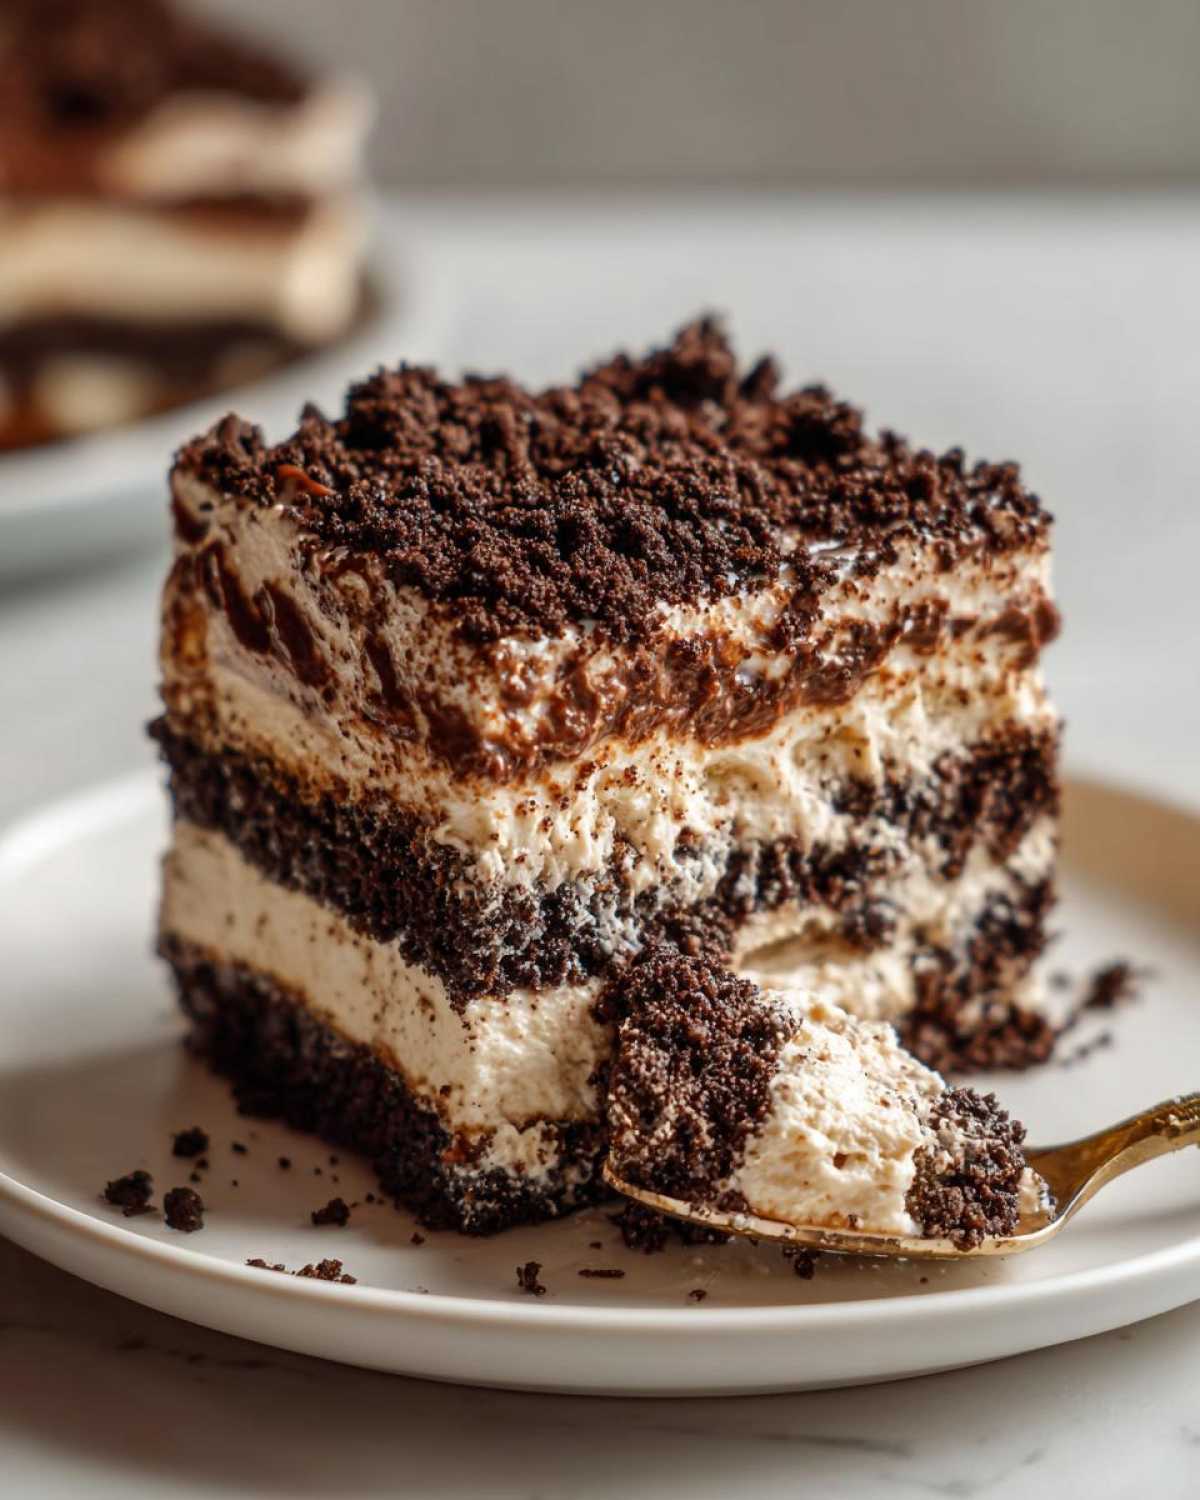
What makes this oreo dirt cake so unbelievably addictive isn’t just that it’s easy; it’s about that texture contrast. You get the silky, cool creaminess from the pudding and cheese mixture right next to these perfectly crunchy, dark Oreo crumbs. It’s the ultimate layered experience that satisfies every craving you could possibly have for chocolate and cream.
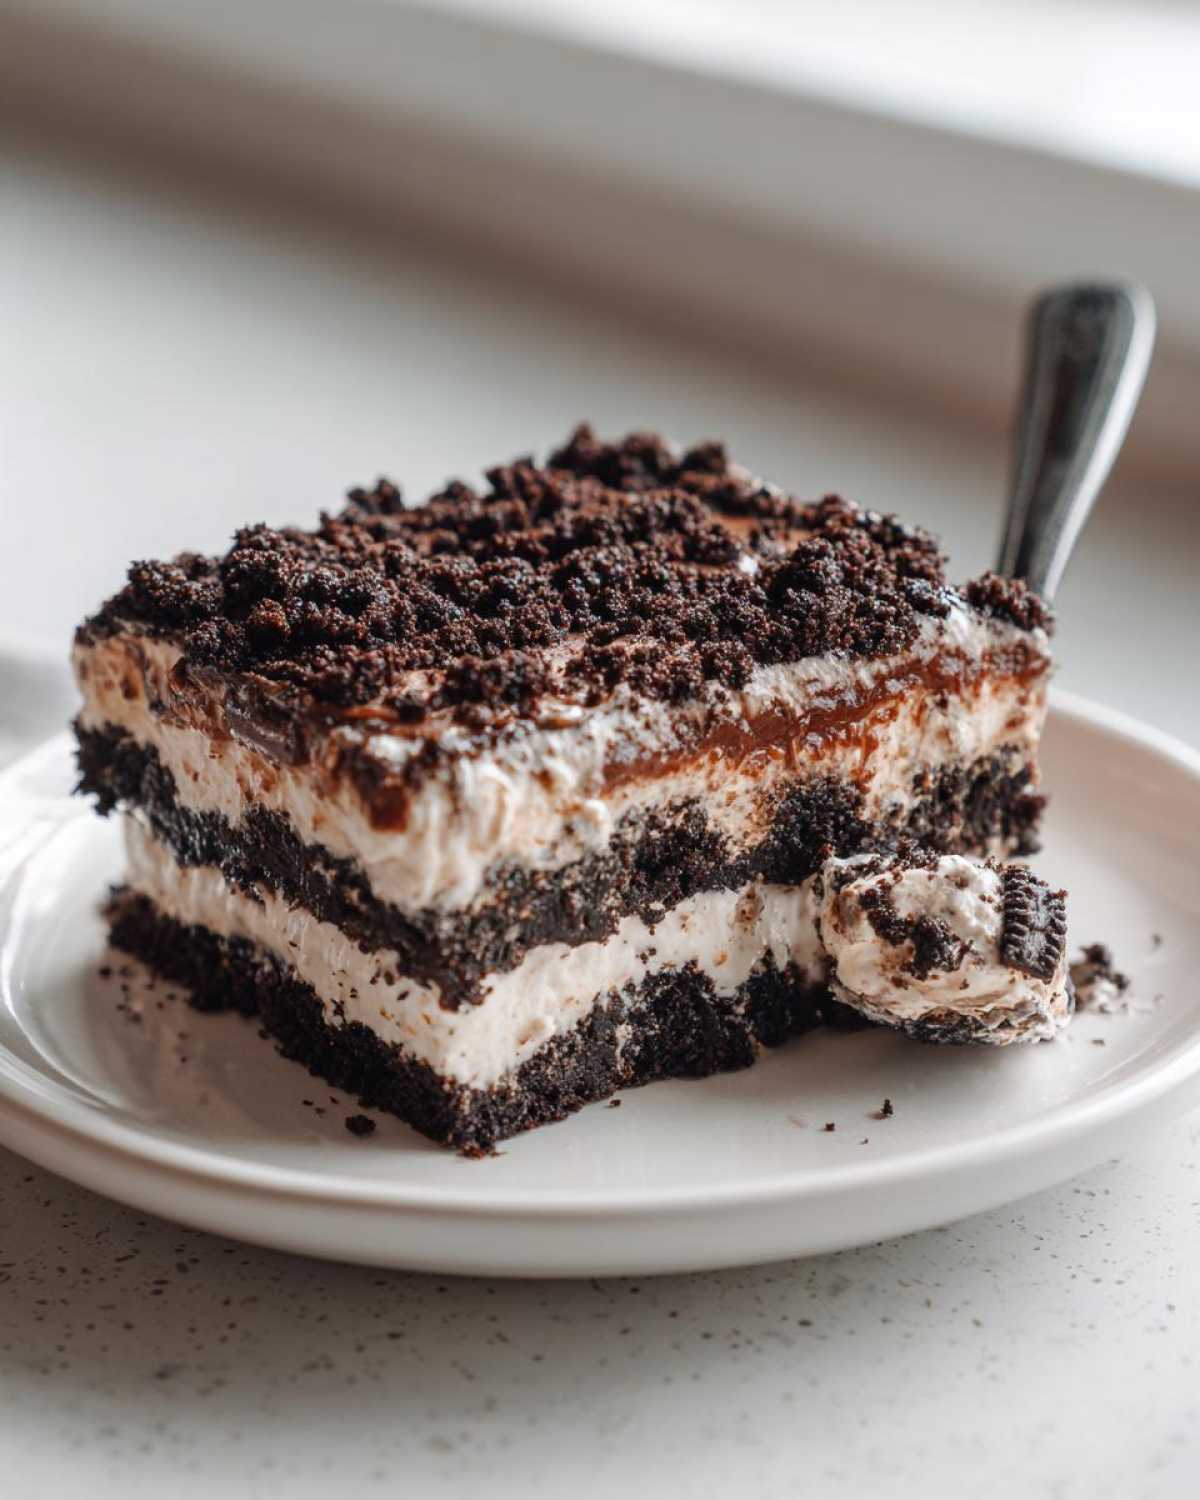
Gathering the Components for Your Oreo Dirt Cake
Okay, now that we know this oreo dirt cake is strategically sound, let’s talk about the operational plan for the ingredients. When Noah and I test recipes, we are super specific about textures and temperatures, because that’s what separates a decent dessert from one that completely blows people away! For this layered cookie dessert, precise ingredient states are non-negotiable, so pay close attention—this is where our expertise shines through.
We aren’t just throwing things into a bowl; we are building a foundation. If you’re planning to substitute the instant pudding with homemade, you absolutely must check out my recipe for homemade chocolate pudding, but note you’ll need to adjust the chilling time significantly!
Cream Cheese Filling Ingredients for the Oreo Dirt Cake
This creamy layer is what gives the standard dessert that amazing lift and tang, making it superior to just plain pudding. You need absolute clarity here. Make sure your cream cheese and butter are truly softened—room temperature soft—so they whip up without any lumps messing up our smooth operation. If they are cold, the whole batter structure suffers!
- 8 ounces of cream cheese, softened (this is key!)
- 1 cup of unsalted butter, also softened
- 1 cup of powdered sugar
- One 12-ounce container of frozen whipped topping, fully thawed (I always thaw this overnight in the fridge, never on the counter!)
Pudding and Crumb Ingredients for the Dirt Pudding Recipe
Next up is the chocolate backbone of this whole operation, paired with those glorious, crunchy crumbs that make it famous. For the best result in this dirt pudding recipe, you need to crush those Oreos properly—we’re aiming for something that looks, well, like rich soil, not chunky rocks!
- Two packages (3.9 ounces each) of instant chocolate pudding mix
- 3 cups of cold milk (whole milk works best for richness)
- One full package (about 14.3 ounces) of Oreo cookies. You need to crush these finely, setting aside just about 1 cup of the crumbs for the very top decorative layer.
Step-by-Step Instructions for the Best Dirt Cake Recipe
Alright, Strategy Chief Noah is out of sight, so Operation Chief Lena is taking over the hands-on execution phase! Getting this best dirt cake recipe assembled is all about sequential execution. We treat this like any project in the Epicure Empire: we tackle the components separately before the final integration meeting. Following these steps precisely ensures you get that perfect structural integrity and that lovely, smooth mouthfeel that makes this oreo dirt cake famous.
Once everything is layered, we move to the crucial stabilization phase. Do not skip the chilling! You need a minimum of four hours, but trust me, overnight storage makes these layers set perfectly, ensuring clean scoops every time. If you want more foundational blueprint ideas for delicious constructions, explore what else we have cooking on our easy layered dessert page.
Preparing the Creamy Base for Your Oreo Dirt Cake
We start with the richest component first. Grab that large bowl—you’re going to need the space! First, use an electric mixer to beat the softened cream cheese and the softened butter together until they look like they’ve made peace with each other—smooth and fluffy. Once you’ve achieved that smooth look, gradually add the powdered sugar and keep mixing until it’s all incorporated. Don’t rush this, or you’ll end up with a sugar dust cloud!
Now for the trickiest part: the whipped topping. You must use a spatula for this next step. Take your thawed whipped topping and gently fold it into the cream cheese mixture. I mean gently! Folding, not stirring, maintains all those lovely air pockets that keep this whole dessert light instead of dense. Set this component aside; it’s ready when it looks like a pale, fluffy cloud.
Assembling the Layers of the Layered Cookie Dessert
Before layering, make the pudding mixture in a separate bowl. Whisk your instant chocolate pudding mix with the cold milk for about two minutes until it starts noticeably thickening. We need that thickness to support our layers in this layered cookie dessert. Remember you crushed your Oreos earlier? Excellent!
Now we build! Start with a layer of crushed Oreos on the bottom of your dish. Then, spread half of your thickened pudding mixture over those beautiful crumbs. Next, take half of that creamy base you made earlier and spread it evenly over the pudding. We repeat!
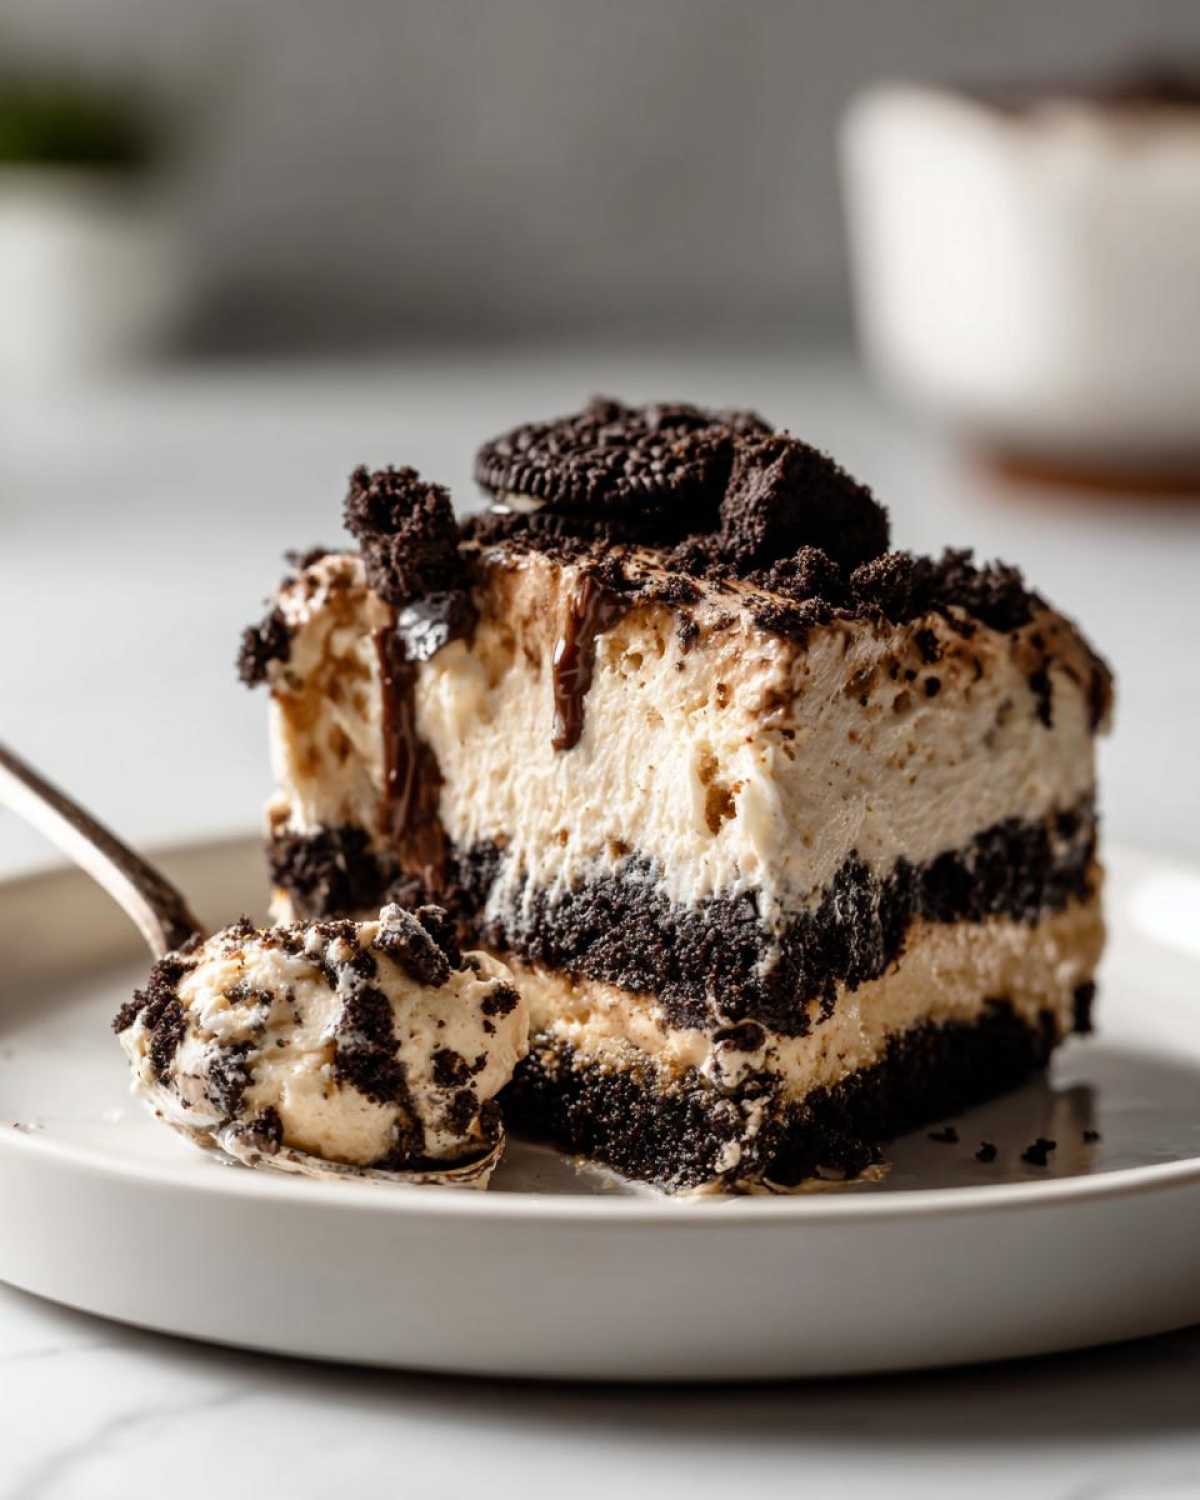
- Add the remaining crushed Oreos over the cream layer.
- Spread the rest of your pudding mixture on top of those cookies.
- Finally, gently spread the very last of the cream cheese/whipped topping mixture on top of the pudding.
Finishing and Chilling the Oreo Dirt Cake
We’re nearly done with the active building phase of our oreo dirt cake. Take that reserved 1 cup of finely crushed Oreos and sprinkle it generously over the top layer. This is what sells the ‘dirt’ look! If you’re making this for the kids, this is when you strategically place your gummy worms so they look like they are crawling out of the earth.
Cover the entire dish tightly—we don’t want any weird fridge smells contaminating our perfect layers. Slide this into the refrigerator for a minimum of four hours. If you can manage it, chilling overnight is the secret to the best dirt cake recipe because it allows all the components to marry together and firm up completely. Less mess, better stability!
Tips for a Perfect Oreo Dirt Cake Presentation
Since Noah and I love making things feel intentional—even our desserts—presentation is almost as important as execution! While a big, beautiful 9×13 dish works perfectly fine for a casual weeknight, when we bring this oreo dirt cake to a party, we like to switch up the serving vessel. This is especially useful if you are making this for a themed event, like a garden party or even Halloween. It really elevates this simple kid friendly dessert!
If you’re looking for more fun, make-ahead ideas, you should definitely check out our blueprint for easy egg muffins. They require a little more assembly, but they are perfect for planning ahead!
The Flower Pot or Milk Carton Trick
This is my absolute favorite way to serve this dessert, mostly because it’s so unexpected! You can use a brand-new, thoroughly cleaned plastic flower pot or even a waxed milk carton (which needs careful prep, I must warn you). The trick here is lining it with plastic wrap—and I mean completely lining it, hanging the edges over the top rim.
Why the plastic wrap? Because nobody wants to eat dessert off a dirty pot, and it makes serving impossible if you don’t have a liner! Once everything is layered up inside this fun container, you cover it and chill. When it’s time to serve, you just use the edges of the plastic wrap to lift out the entire, perfectly layered oreo dirt cake. You can then slice it right on the cutting board. It looks impressive without adding any extra baking time to our schedule!
Gummy Worm Placement Strategy
Gummy worms are mandatory, right? They aren’t just a tasty topping choice; they are essential for selling the whole “dirt” aesthetic! Don’t just scatter them randomly on top of the final layer of crumbs. That looks lazy, and we don’t do lazy in the Epicure Empire!
Instead, when you’re placing that final sprinkle of crumbs on the top layer, intentionally stick the worms halfway in. Let one end peek out of the ‘dirt’ and the other flop over the side of the dish or pot. It gives the illusion that the layer of crumbs is the actual ground, and the worms are wriggling their way out. It’s a small operational detail that creates a huge impact for the kids!
Serving Temperature Matters
Because this is a rich, heavy, no-bake dessert, you want it served cold. It should come straight from the refrigerator when you are ready to serve. If you leave it out too long on the buffet spread—especially if the room is warm—that cream cheese and whipped topping layer will start to weep and lose its structural integrity. We want firm, distinct layers, remember? Keep it chilled until the absolute last minute for the best creamy texture.
Ingredient Notes and Substitutions for Your Oreo Dirt Cake
Even though we treat every recipe like a finalized blueprint here at Epicure Empire, I know life sometimes throws curveballs! Maybe you’re out of chocolate pudding mix, or perhaps you want to try making a slightly less rich version. That’s fine! Understanding *why* we choose certain ingredients helps you adapt successfully. These little tweaks won’t compromise the structure of your oreo dirt cake, but they will change the flavor profile slightly.
First, if you happen to have cacao powder around, you can whip up my recipe for best homemade chocolate milk base if you needed a substitute, but for this specific dessert, sticking to the instant mix is easiest because we need that specific thickener to support the layers.
Choosing the Right Pudding Flavor
The recipe calls for standard instant chocolate pudding mix, and honestly, that’s what gives us that classic, nostalgic flavor and dark color that looks so good under the crushed Oreos. However, sometimes you can get creative! If you want a deeper, richer chocolate flavor, absolutely swap the standard chocolate mix for fudge pudding mix. The texture will be slightly thicker and more intense, which I actually love for the base layer.
What about cookies & cream pudding? That works beautifully too! If you use that, you eliminate one layer of separate cookie crunch and integrate it into the base. It leads to a slightly lighter-colored layer, but the flavor combination is absolutely fantastic for this creamy chocolate crunch.
Modifying the Cream Cheese Component
The cream cheese is non-negotiable for stability and that slight, pleasant tang that cuts through the sweetness. But what if you are trying to make a lighter version of this creamy oreo treat? When prepping for a gathering, maybe you’re trying to keep the richness down a little.
My note suggests substituting half of the cream cheese with an extra container of thawed whipped topping. This works really well! You’ll lose a bit of that characteristic tanginess that the cream cheese provides, making the layer less dense, but it definitely lightens up the overall dessert. It’s a trade-off between richness and lightness, but both ways still result in a spectacular no bake oreo dessert.
Using Different Cracker Bases
While this is strictly the oreo dirt cake, I get asked a lot if vanilla wafers or graham crackers work. Sure, they *work*, but honestly, you lose the core appeal! The Oreo cookie crumbs are essential because they are dark, chocolatey, slightly bitter (in a good way!), and their texture holds up better against the moist pudding than graham crackers do. If you use a different cookie, you’re moving away from the classic dirt look and flavor. Stick to the whole Oreo—including the white filling!
Making Ahead and Storing Your No Bake Oreo Dessert
Because this entire operation is focused on being a make-ahead master—that’s how we run our empire, after all!—discussing storage protocols is super important. You can (and honestly, *should*) make this no bake oreo dessert ahead of time. The beauty of a layered pudding dessert like this is that it actually gets better!
I always tell Noah that the chilling time isn’t just ‘for setting’; it’s for flavor development. The pudding and the cream cheese layers get to mingle with those dark, delicious Oreo crumbs, and the whole thing firms up beautifully. If you are preparing this for a weekend event, my strategy is to assemble it completely, cover it tightly, and stick it in the fridge the night before. Seriously, an overnight chill is the secret refinement that takes this from good to truly strategic perfection.
The Essential Chilling Time for the Oreo Dirt Cake
When you finish layering your magnificent oreo dirt cake, you have to resist the urge to serve it immediately. If you cut it too soon, you’ll end up with a messy “lava flow” of pudding and cream, and that’s just sloppy operations! We need stability for serving, especially if we’re transporting it to a party or a potluck. If you’re looking for other great make-ahead blueprints, you should peek at our notes on easy egg muffins.
Aim for a minimum of four hours, but if you can let it go overnight, you are golden. The chilling process solidifies the fat in the cream cheese and butter mixture, helping the pudding set up firmly, which means your layers stay distinct and clean when you finally cut into it. This is the stabilization phase of our construction project!
How Long Does Dirt Cake Last in the Fridge?
Stored properly, this creamy oreo treat lasts really well, which makes it a planner’s dream! Because of the high dairy content—both the pudding and the whipped topping—you want to keep it covered tightly in the refrigerator. Generally, it stays fantastic for about three to four days.
After day three, the Oreos on the bottom layer might start getting a little too soft for my taste, but the flavor is still great. We usually aim to consume it within 48 hours for peak crunch factor. Don’t even think about freezing it! Freezing is not recommended; the texture of the whipped topping and pudding completely breaks down once thawed, resulting in weeping liquid everywhere. We want a dessert empire, not a soggy mess!
Transporting Your Make-Ahead Dessert
If you’re taking this dessert for gatherings somewhere, transport is critical. Always use a container with a secure, fitted lid, or make sure your plastic wrap is tightly sealed around the edges. If you are using a decorative flower pot (which, trust me, looks amazing), make sure you’ve used that plastic liner so you can lift the entire cake out before you put the lid on the pot base. That way, the top ‘dirt’ layer isn’t getting crushed against the plastic during the car ride. Keep it as cold as possible until you arrive at the party!
Frequently Asked Questions About Oreo Dirt Cake
Noah and I know that even with a solid blueprint, sometimes questions pop up after the first assembly. We get so many messages about making variations or troubleshooting, which is great—it means you’re engaging with the recipe! Here are a few things readers often wonder about when building their own layered cookie dessert structure.
Can I use different pudding flavors in my oreo dirt cake?
This is a super common tactical question! Yes, you absolutely can play with the pudding flavor. However, for the classic, nostalgic visual and taste experience—the one that truly screams oreo dirt cake—sticking with instant chocolate pudding or cookies & cream pudding is best. The chocolate provides that incredibly dark, rich color we’re aiming for in the layers.
If you decide to use vanilla pudding, you will completely change the aesthetic. It ends up looking much lighter, and the dark Oreo crumbs contrast less dramatically. It still tastes great, of course, but it stops looking quite so much like ‘dirt’ and starts looking more like a generic layered dessert. For the true experience, I always recommend chocolate or cookies & cream.
What is the best way to crush Oreos for the dirt layer?
This is vital for texture control! If your crumbs are too chunky, the layers won’t stack nicely, and you risk creating huge air pockets that collapse later. If your crumbs are too fine—like powder—they just dissolve into the cream layers too quickly. For the absolute best control over your oreo dirt cake crumbs, I recommend the food processor. Pulse it a few times until it looks like rich, dark soil.
If you don’t have a processor handy, the rolling pin method works wonders for a slightly coarser texture, which I also really enjoy because it adds a little extra contrast to the soft pudding. Place the Oreos in a sturdy zip-top bag, press out most of the air, and just roll over them until you are happy with the consistency. That slight variation in texture is fantastic!
Is this considered a potluck favorite or party dessert idea?
One hundred percent, yes! If you are looking for a reliable party dessert idea, stop looking right now. This oreo dirt cake is the definition of a crowd-pleaser because it’s nostalgic, feeds a ton of people easily, and requires zero effort on the day of the event since it must be made ahead. It’s famous both as a potluck favorite and a go-to birthday dessert. Honestly, the make-ahead requirement makes it one of the simplest things to contribute when you’re busy planning other things. Just make sure you keep it chilled until serving time!
If you’ve built your own empire with this recipe and have questions I didn’t cover, don’t hesitate to reach out via our contact page!
Nutritional Estimates for This Creamy Chocolate Crunch
Now, Noah is the strategist, and he always likes to see the final numbers laid out. While this oreo dirt cake is pure indulgence and we certainly aren’t claiming it’s a health food (far from it, honestly!), it’s good business practice to have these estimates on hand. This is our operational breakdown based on the standard ingredients listed in the recipe.
Please remember, just like any blueprint, these are estimations! Because we are using whole Oreos—filling and cookie!—and traditional ratios of butter and cream cheese, the final count will vary depending on your exact brands and portion sizes. For the full strategic breakdown on our site policies, you can read our official disclaimer page.
Here’s the ballpark breakdown per serving for this creamy chocolate crunch:
- Calories: Approximately 420
- Total Fat: Around 25g (with about 14g of that being saturated fat—oops! Worth it, though.)
- Carbohydrates: About 48g
- Protein: Roughly 5g
It packs a punch, but boy, does it deliver on flavor! It’s definitely a treat meant for celebrations and gatherings, not an everyday snack. Enjoying this decadent no bake oreo dessert responsibly is just part of building a happy little empire!
Share Your Epicure Empire Oreo Dirt Cake Creations
And just like that, our operation is complete! We’ve gone from zero components to a perfectly chilled, structurally sound, and unbelievably delicious oreo dirt cake. My greatest joy here at Epicure Empire is hearing from you all after you tackle one of our blueprints. Noah loves seeing the data—so please, if you made this, leave a rating right down below. Did it pass the family inspection? Was it the easiest party dessert idea you’ve ever made?
Seriously, tell me everything! Did you successfully pull it off the side of the fake flower pot, or did you stick to the traditional 9×13 dish? Did you dare try the fudge pudding swap? Every bit of feedback helps us streamline the next blueprint for the community. If you had any questions during assembly that I missed answering above, or if you just want to connect, you can always reach out directly through our contact page.
We built this empire one flavor moment at a time, and sharing yours is the best celebration we could ask for. Happy baking, sharing, and building your own delicious life worlds!
PrintThe Best No-Bake Oreo Dirt Cake Recipe

Make this easy Oreo dirt cake, a no-bake dessert featuring creamy layers of pudding, cream cheese, and crushed Oreos. It is a perfect party dessert idea.
- Prep Time: 25 min
- Cook Time: 0 min
- Total Time: 4 hr 25 min
- Yield: 12 servings
- Category: Dessert
- Method: No-Bake
- Cuisine: American
- Diet: Vegetarian
Ingredients
- 1 package (8 ounces) cream cheese, softened
- 1 cup unsalted butter, softened
- 1 cup powdered sugar
- 1 container (12 ounces) frozen whipped topping, thawed
- 2 packages (3.9 ounces each) instant chocolate pudding mix
- 3 cups cold milk
- 1 package (14.3 ounces) Oreo cookies, crushed (about 30 cookies)
- Optional: Gummy worms for decoration
Instructions
- In a large bowl, beat the softened cream cheese and butter together until smooth. Gradually add the powdered sugar and mix until fully combined. Fold in the thawed whipped topping gently. Set this creamy mixture aside.
- In a separate large bowl, whisk together the instant chocolate pudding mix and cold milk for about two minutes until the mixture thickens.
- Crush the Oreo cookies until they resemble fine dirt. You can do this in a food processor or by placing them in a sealed bag and crushing them with a rolling pin. Set aside about 1 cup of the crushed cookies for the top layer.
- Begin layering the dessert in a large trifle dish or 9×13 inch pan. Start with a layer of crushed Oreos on the bottom.
- Spread half of the pudding mixture evenly over the cookie layer.
- Spread half of the cream cheese/whipped topping mixture over the pudding layer.
- Repeat the layers: remaining crushed Oreos, remaining pudding, and finally, the remaining cream cheese mixture.
- Sprinkle the reserved 1 cup of crushed Oreos over the very top layer to create the ‘dirt’ look. Add gummy worms if you are using them.
- Cover the dish and chill in the refrigerator for at least four hours, or preferably overnight, to allow the layers to set properly.
Notes
- You can use a milk container or flower pot for a fun presentation, but make sure to line it with plastic wrap first for easy serving.
- For a richer flavor, use fudge pudding instead of chocolate pudding mix.
- If you prefer a lighter texture, substitute half of the cream cheese with an extra container of frozen whipped topping.
Nutrition
- Serving Size: 1 serving
- Calories: 420
- Sugar: 38g
- Sodium: 350mg
- Fat: 25g
- Saturated Fat: 14g
- Unsaturated Fat: 11g
- Trans Fat: 0.5g
- Carbohydrates: 48g
- Fiber: 1g
- Protein: 5g
- Cholesterol: 45mg