

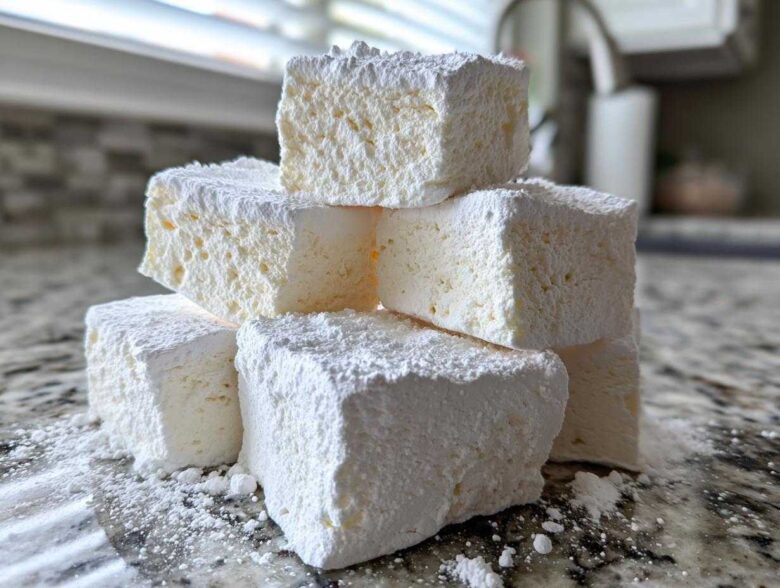
Okay, are you ready to ditch those weird, waxy squares you get in the plastic bag? Seriously, store-bought marshmallows taste like disappointment mixed with glue, right? I spent years trying to get that perfectly soft, pillowy texture, and let me tell you, the secret is way easier than you think. You absolutely *must* try making homemade marshmallows from scratch. I remember the first time I nailed the syrup temperature—the smell alone was heavenly! It turns basic sugar and gelatin into the most gourmet, fluffy candy you’ve ever popped in your mouth. This is my ultimate, straightforward recipe; trust me, once you master the fluff, you’ll never go back. We’re making candy that melts just right!
Why This is the Best Homemade Marshmallows Recipe
If you’ve ever been let down by a store-bought marshmallow that tastes stiff or dissolves weirdly in your cocoa, this is the recipe that changes everything. Moving beyond that is why mastering homemade marshmallows is so rewarding. You get that incredible, perfect fluff that just melts on your tongue.
- They are infinitely softer than anything you buy off the shelf.
- The flavor adjustment is stunning—it tastes pure, like sweet, airy vanilla.
- You totally control the ingredients, which is huge!
Achieving Pillowy Marshmallows Texture
How do we get that cloud-like result? It’s all about the chemistry working at high speed! Gelatin is the backbone, but the magic truly happens when that super-hot syrup hits it, and then we whip, whip, whip! That long, aggressive beating—like 15 minutes on high—is what traps all that air. It transforms a thick liquid into this glossy, stable foam that just screams ‘pillowy.’ Trust me, don’t skimp on the mixing time; that’s where the structure is built.
Gathering Ingredients for Perfect Homemade Marshmallows
Okay, when you’re making candy, precision matters way more than when you’re just throwing a cake together. To get those amazingly fluffy homemade marshmallows that everyone will rave about, we have to be spot-on with our measurements. Don’t even think about guessing on the thermometer reading!
Here’s exactly what you need from your pantry:
- 3 packages of unflavored gelatin (that’s about 7 grams each packet, make sure you count them!)
- 1/2 cup of cold water (just for getting the gelatin ready)
- 1 1/2 cups of granulated sugar
- 1 full cup of light corn syrup
- 1/2 cup of water (this goes into the syrup mixture)
- Just a pinch of salt—about 1/4 teaspoon
- 1 tablespoon of pure, good vanilla extract
- For dusting later: 1/2 cup powdered sugar mixed with 1/2 cup cornstarch
Seriously, that 240 degrees Fahrenheit reading on the candy thermometer is the key to the whole operation. If it’s too low, they won’t set right. If it’s too high, well, we don’t want to think about that!
Essential Equipment for Homemade Marshmallows
You don’t need a ton of fancy stuff, but a few core tools are non-negotiable for getting that professional, pillowy finish.
You absolutely must have:
- Your trusty stand mixer with the whisk attachment—your arms will thank you!
- A reliable candy thermometer. Don’t try to eyeball this one; please don’t!
- A 9×13 inch baking pan. This gives us the perfect slab size.
- Parchment paper. This is your best friend for easy removal later.
Step-by-Step Instructions: How to Make Homemade Marshmallows
Alright, let’s get down to the fun part: mixing! This is truly straightforward easy candy making once you follow the sequence. Remember, we are aiming for those signature homemade marshmallows that are perfectly set and unbelievably soft. Speed is key when the syrup is done, so make sure your mixer is ready to go!
Blooming Gelatin and Preparing the Pan
First things first, we have to set the stage so these bad boys don’t stick everywhere—trust me, sticky marshmallows are a nightmare. Lightly grease that 9×13 pan first. Then, line it with parchment paper, but leave an overhang on the sides. That paper is your handle for lifting the giant slab out later!
Take your powdered sugar and cornstarch and whisk them together until they are totally combined. Now, take that mixture and dust *every single surface* of the pan—bottom and sides. We want a thick blanket of protective, non-stick powder everywhere!
This is the time to bloom the gelatin, too. Whisk that gelatin into 1/2 cup of cold water in your stand mixer bowl. Just let it sit there quietly for about 10 minutes while we tackle the syrup—it will get totally spongy.
Whipping the Marshmallow Fluff
While the gelatin is hydrating, put your sugar, corn syrup, the other 1/2 cup of water, and salt into a saucepan. Heat it up on medium heat, stirring just until that sugar fully disappears. Once it starts bubbling, STOP STIRRING! We just let it go until your candy thermometer screams 240 degrees Fahrenheit. Seriously, watch that gauge!
The second it hits 240°F, pull it off the heat immediately. Switch your mixer on low and *slowly* start pouring that terrifyingly hot syrup right down the side of the bowl—don’t let it splash onto the whisk itself! Once it’s all in, crank that mixer up to high speed. You need to beat this mixture for a full 12 to 15 minutes. I know it sounds long, but keep going! You are looking for the mixture to turn brilliant white, incredibly glossy, and so thick that the whisk leaves stiff, beautiful trails in the bowl. The bowl should only feel warm to the touch when it’s done.
Finish it off by beating in that pure vanilla extract for the last minute. Take it off the heat and work fast!
Cutting and Dusting Your Soft Homemade Candy
This is where things can get sticky, but don’t panic! After waiting those crucial 4 hours (or overnight, which I usually prefer!), it’s time to free our beautiful batch of homemade marshmallows. Make sure your hands are lightly oiled or dusted; this fluff likes to grab onto everything.
First, you need to invert the pan. This seems scary because it’s one giant, wobbly mat of sweetness. Place a large cutting board (one you’ve dusted heavily with the cornstarch/powdered sugar mix) right on top of the marshmallow slab in the pan. Hold them both tight and flip the whole thing over swiftly! If you lined it properly, the slab should release onto the board. Peel off that parchment paper gently.
Now for cutting. Do *not* use a dry knife unless you enjoy wrestling with sticky goo! Take a large, sharp knife or even a pizza cutter, and lightly brush the blade with neutral oil—just a thin coat. Cut straight down through the slab to create your squares. I aim for nice big, fluffy cubes, but you do you!
Once you’ve cut a section, immediately pick up those squares and toss them gently in the remaining dusting mixture. Make sure all those freshly cut sides get coated. This step is essential so your finished homemade marshmallows don’t fuse back together into one giant block inside your storage container!
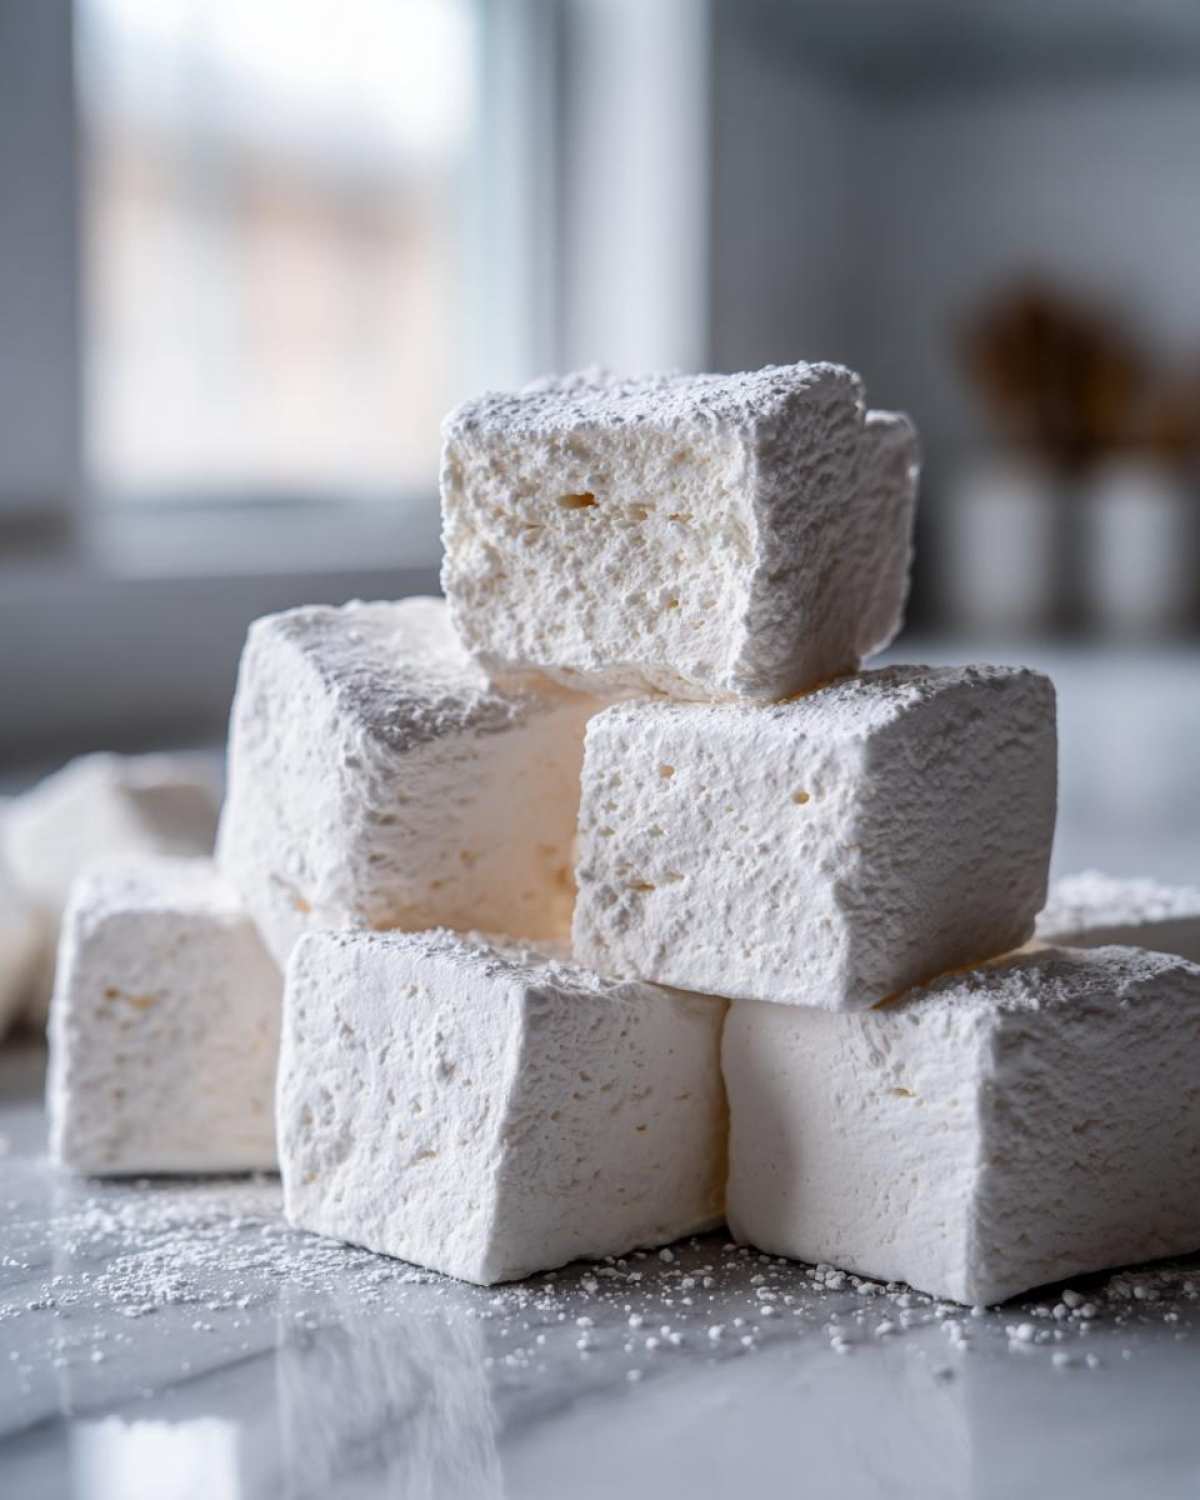
Variations for Gourmet Homemade Marshmallows
Once you’ve got that perfect batch of basic homemade marshmallows down, you can really start getting creative. This base recipe is so perfect that it can handle adding extra flavors, turning your simple treat into something truly gourmet! Next time you make a batch, try one of these easy swaps. Everyone loves a little bit of customization!
Who says you have to stick to just plain vanilla? We can totally make these homemade marshmallows special for holidays or gifts. I love making a batch with specks of real vanilla bean—it looks so rich!
Natural Sweetener Marshmallow Recipe Adjustments
I get asked all the time about making these without corn syrup, and yes, you absolutely can, though I’ll be honest, the texture will shift just a tiny bit. When you want to go with a natural sweetener, like liquid honey or maple syrup instead of light corn syrup, you need to tweak the water ratio to keep things balanced.
If you substitute the corn syrup, you should reduce that initial 1/2 cup of water in the syrup mixture in Step 3 down to just 1/4 cup. That honey or maple syrup is a bit heavier, so it naturally brings a little more moisture to the party. Be prepared, though—the final result might be slightly denser than the corn syrup version. It still tastes amazing, though! It’s a fantastic option if you’re looking for a natural sweetener marshmallow recipe instead of relying on commercial syrups.
Also, if you want that beautiful vanilla bean look I mentioned? Wait until the mix is almost done whipping—say, minute 14—and scrape the seeds right out of one vanilla bean pod directly into the bowl along with the extract. It adds such a beautiful visual pop to your pillowy marshmallows!
Storing Your Homemade Marshmallows Properly
Now that you’ve wrestled your sticky, glorious creation into perfect squares, how do we keep them from turning into one giant block of chewy sadness? Keeping your treats fresh is easy, but you do need to follow a couple of simple rules, especially since these are fresh and don’t have all those weird preservatives store-bought versions rely on.
The most important thing is airtight storage. You need a container that seals tightly—a Tupperware container or a heavy-duty zip-top bag works great. Just make sure those powdered sugar-dusted edges are tossed well, or they will definitely stick together.
Keep them at room temperature. Seriously, resist the urge to put them in the fridge! Cold, damp air is the enemy of fluffy candy; it can make them weep and get tacky very quickly. They are totally happy sitting out on your counter, provided it’s not super humid in your kitchen.
How long do they last? Honestly, these are best eaten within the first few days when they are at their absolute fluffiest peak. But if you store them right, they should last beautifully for up to two weeks. They still taste great after that, sometimes just a *tiny* bit firmer, but never stale. I usually make a batch, and they are gone before week two anyway—they disappear too fast!
Serving Suggestions for Homemade Marshmallows
You’ve done the hard part! You’ve whipped, you’ve timed, and you’ve cut the prettiest, softest things imaginable. Now what? Well, these homemade marshmallows are far too good to just sit in a jar, even though they look gorgeous in one. They deserve to be the star of the show!
My absolute favorite use, hands down, is taking them out on a chilly evening. There is nothing—and I mean *nothing*—better than dropping one of these fresh, pillowy giants onto a cup of rich, dark hot chocolate. They melt slowly and create this incredible swirl of airiness and chocolatey goodness. You’ll instantly understand why we bothered with the candy thermometer!
And let’s talk S’mores. If you think regular marshmallows are good for roasting, wait until you try this. We created an amazing guide over at homemade s’mores ingredients because roasting these babies is magic. They puff up bigger, they toast evenly with that beautiful caramelized crust, and the inside stays gooey without immediately collapsing into a sugary puddle. It’s the ultimate campfire treat!
But don’t forget they make wonderful homemade gift ideas treats, too. Just place a handful of these dusted squares into a cute cellophane bag, tie it with some rustic twine, and you have an instant, thoughtful present that required zero baking time. People go absolutely wild for homemade candy!
Honestly, once you have these homemade marshmallows on hand, you’ll find excuses to eat them everywhere—straight from the container while you’re cleaning up, topping homemade brownies, or just enjoying that perfect vanilla fluff whenever you need a little sugar boost!
Frequently Asked Questions About Making Marshmallows
I know candy making can feel a little intimidating, especially when you’re used to cookies! But honestly, these are almost all straightforward fixes if you run into a snag. Here are the things people ask me most often when they are trying their hand at their first batch of recipe for marshmallows from scratch.
Why are my homemade marshmallows sticky even after dusting?
This is the number one complaint! If your soft homemade candy is sticky, it usually means one of two things happened. Either you didn’t whip them long enough, so the mixture didn’t set up stiff enough before pouring, or, more likely, you didn’t toss the cut edges generously enough in that cornstarch/powdered sugar dust. That dust is your barrier! If they get tacky after a day, just dump them back into a bowl with a little fresh dust and toss gently to recoat those sticky spots.
Can I really skip the corn syrup entirely?
You can adjust it, yes! As I mentioned in the variations section, you can substitute it, but I really recommend keeping *some* form of inversion syrup, like honey or maple. Corn syrup helps prevent crystallization, keeping your candy super smooth. Trying to make gummy candy making without any added syrup often results in a less stable, grainier final texture because simple granulated sugar likes to recrystallize. If you go the natural route, remember to reduce the other water source just a bit!
Is a hand mixer okay to use instead of a stand mixer?
Oh, bless your heart for volunteering your arm strength! While technically possible, I have to be honest, I strongly advise against the hand mixer for this. You have to beat the mixture on high for 12 to 15 minutes, and the sheer volume and thickness the mixture reaches are just too much for most hand mixers. They tend to overheat, or you’ll just burn out the motor before you reach those crucial stiff peaks. If you don’t have a stand mixer, this is one recipe where borrowing one might be worth it for the sake of getting that perfect vanilla fluff recipe outcome!
What temperature is crucial for ensuring fluffy marshmallows?
For the absolute best texture, you must hit that soft-ball stage temperature: 240 degrees Fahrenheit. This measurement relates directly to the sugar concentration, which determines how well the syrup traps air during the whipping process. If you land a few degrees below, they might stay a little too soft. If you go past 245°F, the texture will get chewy and hard, making them terrible for marshmallows for hot chocolate purposes. That 240°F target is your sweet spot for that ultimate bouncy, best marshmallow recipe result.
Nutritional Estimate for Homemade Marshmallows
We know these are a special treat, not an everyday staple, but I always like to give a quick idea of what goes into them nutrient-wise. Remember that the nutrition can swing wildly depending on whether you use the corn syrup version or my honey and maple syrup variation! These estimates are based on the standard recipe.
If you divide this recipe into 48 squares (which are substantial!), here is the general estimate per serving:
- Serving Size: 4 squares
- Calories: 155
- Sugar: 35 grams
- Sodium: 15 mg
- Fat: 0 grams
- Protein: 2 grams
As you can, see, they are almost entirely sugar and air, which is what makes them so delightfully light! For more detailed dietary information, you can check out our full disclaimer page.
Share Your Pillowy Marshmallows Creations
I absolutely love seeing all your beautiful, fluffy squares! Seriously, when you master the technique for these diy holiday candy treats, you have to let me know how they turned out. Did you try the vanilla bean version? Did they roast perfectly over the fire? Head over to our main blog page to leave a comment or rating below, and tag me if you post pictures on social media!
Nutritional Estimate for Homemade Marshmallows
We know these are a special treat, not an everyday staple, but I always like to give a quick idea of what goes into them nutrient-wise. Remember that the nutrition can swing wildly depending on whether you use the corn syrup version or my honey and maple syrup variation! These estimates are based on the standard recipe.
If you divide this recipe into 48 squares (which are substantial!), here is the general estimate per serving:
- Serving Size: 4 squares
- Calories: 155
- Sugar: 35 grams
- Sodium: 15 mg
- Fat: 0 grams
- Protein: 2 grams
As you can, see, they are almost entirely sugar and air, which is what makes them so delightfully light! For more detailed dietary information, you can check out our full disclaimer page.
Share Your Pillowy Marshmallows Creations
I absolutely love seeing all your beautiful, fluffy squares! Seriously, when you master the technique for these diy holiday candy treats, you have to let me know how they turned out. Did you try the vanilla bean version? Did they roast perfectly over the fire? Head over to our main blog page to leave a comment or rating below, and tag me if you post pictures on social media! I can’t wait to see your amazing homemade marshmallows!
PrintUltimate Easy Homemade Vanilla Marshmallows
Make soft, fluffy, and pillowy marshmallows from scratch. This straightforward recipe yields gourmet quality candy perfect for hot chocolate or s’mores.
- Prep Time: 20 min
- Cook Time: 15 min
- Total Time: 4 hr 35 min
- Yield: About 48 large squares
- Category: Candy
- Method: Mixing/No-Bake
- Cuisine: American
- Diet: Vegetarian
Ingredients
- 3 packets unflavored gelatin (about 7 grams each)
- 1/2 cup cold water (for blooming gelatin)
- 1 1/2 cups granulated sugar
- 1 cup light corn syrup
- 1/2 cup water (for syrup)
- 1/4 teaspoon salt
- 1 tablespoon pure vanilla extract
- 1/2 cup powdered sugar (for dusting)
- 1/2 cup cornstarch (for dusting)
Instructions
- Lightly grease a 9×13 inch baking pan. Line it with parchment paper, leaving an overhang on the sides for easy removal. Mix the powdered sugar and cornstarch together in a small bowl. Dust the entire bottom and sides of the prepared pan generously with this mixture.
- In the bowl of a stand mixer fitted with the whisk attachment, combine the gelatin and 1/2 cup cold water. Let this mixture sit for 10 minutes to bloom.
- While the gelatin blooms, combine the granulated sugar, corn syrup, 1/2 cup water, and salt in a medium saucepan. Heat over medium heat, stirring until the sugar dissolves. Stop stirring once it boils.
- Continue to cook the syrup without stirring until it reaches 240 degrees Fahrenheit on a candy thermometer (soft-ball stage). This usually takes about 8 to 10 minutes.
- Once the syrup reaches temperature, remove it from the heat. Turn the stand mixer on low speed and slowly pour the hot syrup down the side of the bowl into the bloomed gelatin mixture. Be careful not to pour it onto the whisk.
- Increase the mixer speed to high. Beat for 12 to 15 minutes until the mixture is very thick, white, glossy, and holds stiff peaks. The outside of the bowl should feel warm, not hot.
- Beat in the vanilla extract during the last minute of mixing.
- Working quickly, scrape the marshmallow fluff into the prepared pan. Use a lightly oiled spatula or your oiled hands to spread it evenly into the pan.
- Dust the top surface generously with the remaining powdered sugar and cornstarch mixture. Let the marshmallows set uncovered at room temperature for at least 4 hours, or preferably overnight.
- To cut, invert the pan onto a cutting board dusted with the sugar mixture. Peel off the parchment paper. Use a large, sharp, oiled knife or pizza cutter to cut the slab into squares. Toss the cut edges in the dusting mixture to prevent sticking.
Notes
- For vanilla bean marshmallows, scrape the seeds from one vanilla bean and add them with the vanilla extract in step 11.
- If you prefer marshmallows without corn syrup, substitute the corn syrup with 1 1/2 cups of liquid honey or maple syrup, but reduce the initial 1/2 cup of water in the syrup mixture to 1/4 cup. Note that the texture may be slightly denser.
- Store cut marshmallows in an airtight container at room temperature for up to two weeks.
Nutrition
- Serving Size: 4 squares
- Calories: 155
- Sugar: 35
- Sodium: 15
- Fat: 0
- Saturated Fat: 0
- Unsaturated Fat: 0
- Trans Fat: 0
- Carbohydrates: 39
- Fiber: 0
- Protein: 2
- Cholesterol: 0