

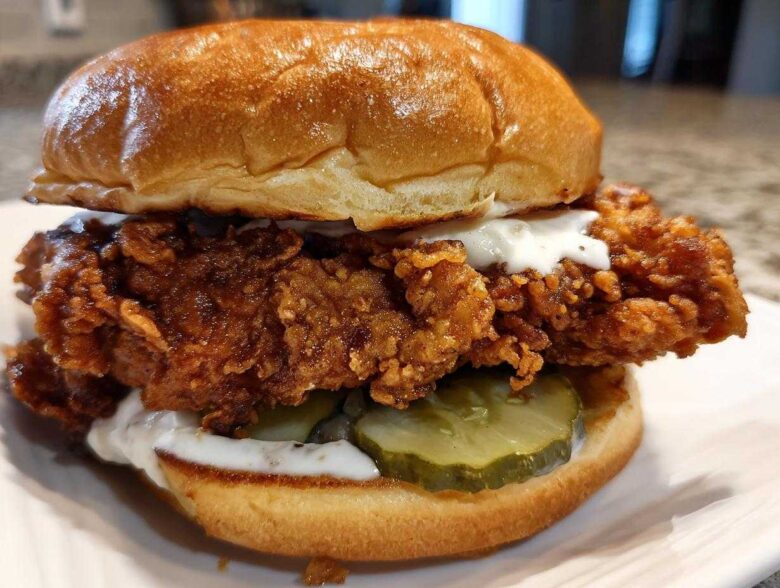
Forget those soggy, disappointing sandwiches you get sometimes! I’m here to tell you that you absolutely *can* beat the drive-thru and make a restaurant-quality crunch right in your own kitchen. I spent way too long trying to replicate that perfect, jagged, super-crispy coating on a fried chicken fillet—you know the one that just shatters when you bite into it?
Well, friends, I found the secret, and it’s all in the double-dredge and the soak time! This recipe is my absolute go-to because it delivers the ultimate Crispy Chicken Sandwich with Garlic Sauce every single time. That homemade garlic sauce? It’s creamy, tangy, and seriously addictive. Trust me on this one; once you nail the prep, you’ll never look back. If you love massive crunch, you might also want to check out my tips for making super crispy, juicy fried chicken wings for your next gathering. The chicken stays juicy inside, and that crust is seriously next level.
Why This Recipe Makes the Best Crispy Chicken Sandwich Recipe
I know there are a million chicken sandwich recipes out there, but ours hits differently. We didn’t just aim for good; we aimed for jaw-dropping crunch! Here’s why this recipe stands above the rest and will become your Best Crispy Chicken Sandwich Recipe:
- Maximum Crunch: That double-dredge in the flour mix locks in every bit of seasoning and creates those crunchy, flaky peaks you see at top restaurants.
- Buttermilk Brine: Soaking the cutlets in buttermilk not only tenderizes the meat but also gives the flour that perfect sticky surface to cling to during frying.
- Flavor Bomb Sauce: The homemade garlic sauce is so simple, yet the fresh minced garlic makes it vibrant and totally complements the rich, fried chicken flavor. I swear, you’ll want to use this garlic naan bread recipe just as a base for this sauce!
- Perfect Balance: The acidity from the pickles cuts right through the richness of the fried coating and the creamy sauce. It’s perfectly balanced.
Ingredients for the Ultimate Crispy Chicken Sandwich with Garlic Sauce
Okay, this is where the magic starts! Getting the right ingredients is crucial because we aren’t cutting any corners here—we want that deep, savory flavor throughout the coating. If you want to make your own mayo base for the sauce, you should totally check out my guide for a super easy blender mayonnaise. But honestly, for this sandwich, keeping it simple works perfectly!
We gotta separate the stuff for the chicken and the stuff for our amazing sauce. Have everything measured out before you start soaking the chicken because once you get into the dredging process, things move fast!
For the Chicken and Breading
This is the foundation for that incredible texture we are trying to achieve. Make sure those chicken breasts are pounded evenly to about half an inch thick—this helps them cook up quick and retain all those internal juices while the outside gets super crunchy.
- 2 boneless, skinless chicken breasts, halved horizontally
- 1 cup buttermilk (don’t skimp on this!)
- 1 teaspoon salt
- 1/2 teaspoon black pepper
- 1 cup all-purpose flour
- 1/2 cup cornstarch (this is a big reason why it gets so crispy!)
- 1 teaspoon paprika
- 1/2 teaspoon garlic powder
- Vegetable oil for frying (you’ll need about 1 inch deep)
- 4 brioche buns (they toast up beautifully)
- 4 slices dill pickle
- 2 tablespoons butter, softened (for toasting those buns)
For the Homemade Garlic Sauce for Chicken
This is our secret weapon! This simple, creamy mixture is what elevates this from a good fried chicken sandwich to the absolute best. This Homemade Garlic Sauce for Chicken takes literally two minutes to mix up.
- 1/2 cup mayonnaise
- 2 cloves garlic, minced (and I mean *minced*—no big chunks allowed!)
- 1 teaspoon lemon juice (for that necessary tang)
- 1/4 teaspoon salt
How to Make Crispy Chicken Breading: The Double-Dredge Technique
Alright, this next part is non-negotiable if you want that Extra Crispy Fried Chicken Sandwich vibe. First things first, we need to get those chicken breasts nice and even. Take your halved chicken breasts and give them a good pound using a meat mallet or even the bottom of a heavy pan. We want them all about a half-inch thick so they cook evenly, otherwise, you end up with dry edges and raw middles. Trust me on this pounding step!
Now for the flavor bath! Whisk up your buttermilk with the salt and pepper, and let those cutlets soak up all that goodness for at least 30 minutes. That acid works wonders to tenderize the meat. When you pull them out, let the excess drip off—we don’t want soup in our flour mix!
The real secret to the heavy, craggy breading is the double-dredge. Dip the wet chicken completely into the flour mixture, press it down hard—really press it in!—then dip it *back* into the buttermilk just for a second, and immediately back into the flour mix for the final, thick coating. That second coat is what builds the crunchy exterior. Make sure you press firmly again. I even let mine sit on a rack for about ten minutes just to let that coating really set up before it hits the oil. If you want another crust idea later, check out my Parmesan-crusted chicken technique, but for sandwiches, this double-dredge is king!
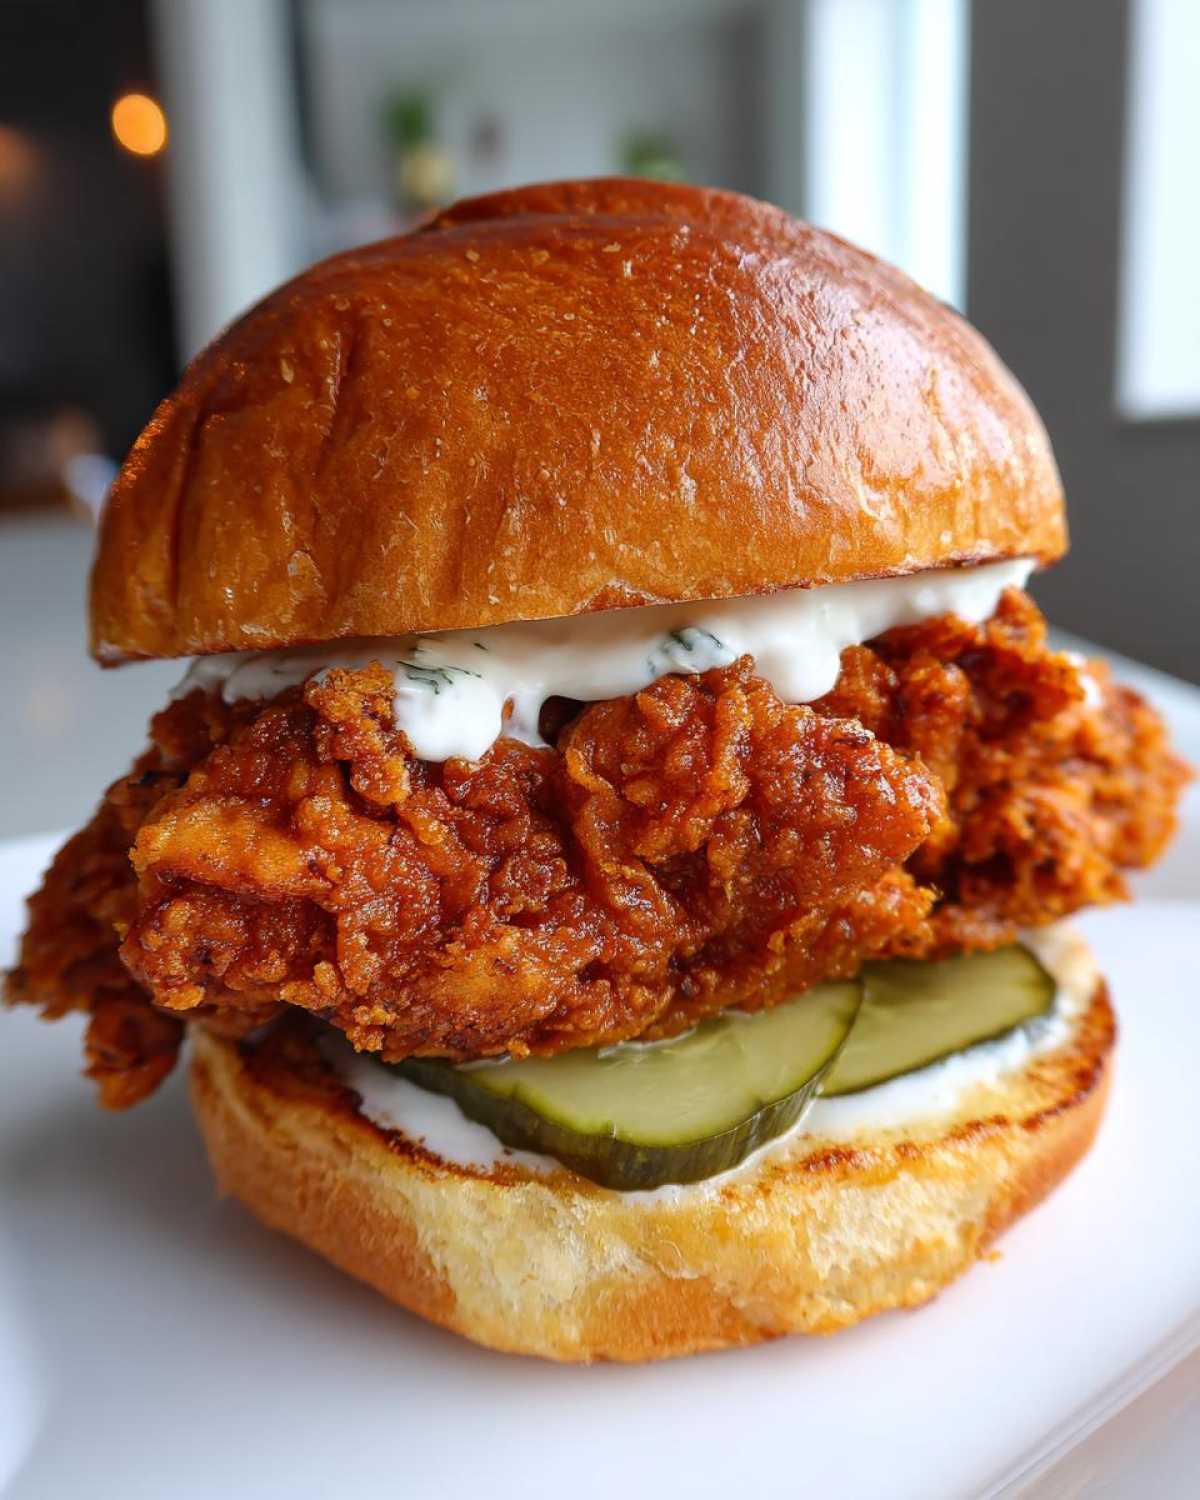
Frying Instructions for a Restaurant Style Crispy Chicken Sandwich
We’ve done all that prep work, and now it’s time for the payoff! Frying correctly is essential for getting that signature crunch without burning the outside before the inside is cooked. You absolutely need that thermometer, folks—don’t try to guess the oil temperature, or you’ll end up with a greasy mess!
Pour about an inch of vegetable oil into a deep, heavy-bottomed skillet. Heat it up slowly until it hits exactly 350 degrees Fahrenheit (175 degrees Celsius). If you don’t have that temperature, the crust will soak up oil and get soggy before it ever turns golden brown.
Carefully lower your heavily breaded chicken pieces into the hot oil. I stress *carefully* because hot oil splatters! Try not to crowd the pan; you want the oil temperature to stay stable. If you put too many pieces in at once, the temperature will drop instantly, and we’ll be back to square one with a pale, thirsty crust.
Let them fry undisturbed for about 4 to 6 minutes. You’ll see that coating start to bubble and turn a gorgeous deep golden color. That’s the crust hardening up! After that initial time, carefully flip each piece over. Continue frying for another 4 to 6 minutes. You have to make sure the internal temperature hits 165 degrees Fahrenheit (74 degrees Celsius) for food safety, but honestly, even if you hit that temp at 5 minutes, give it that extra minute just to really cement that crust’s crispiness.
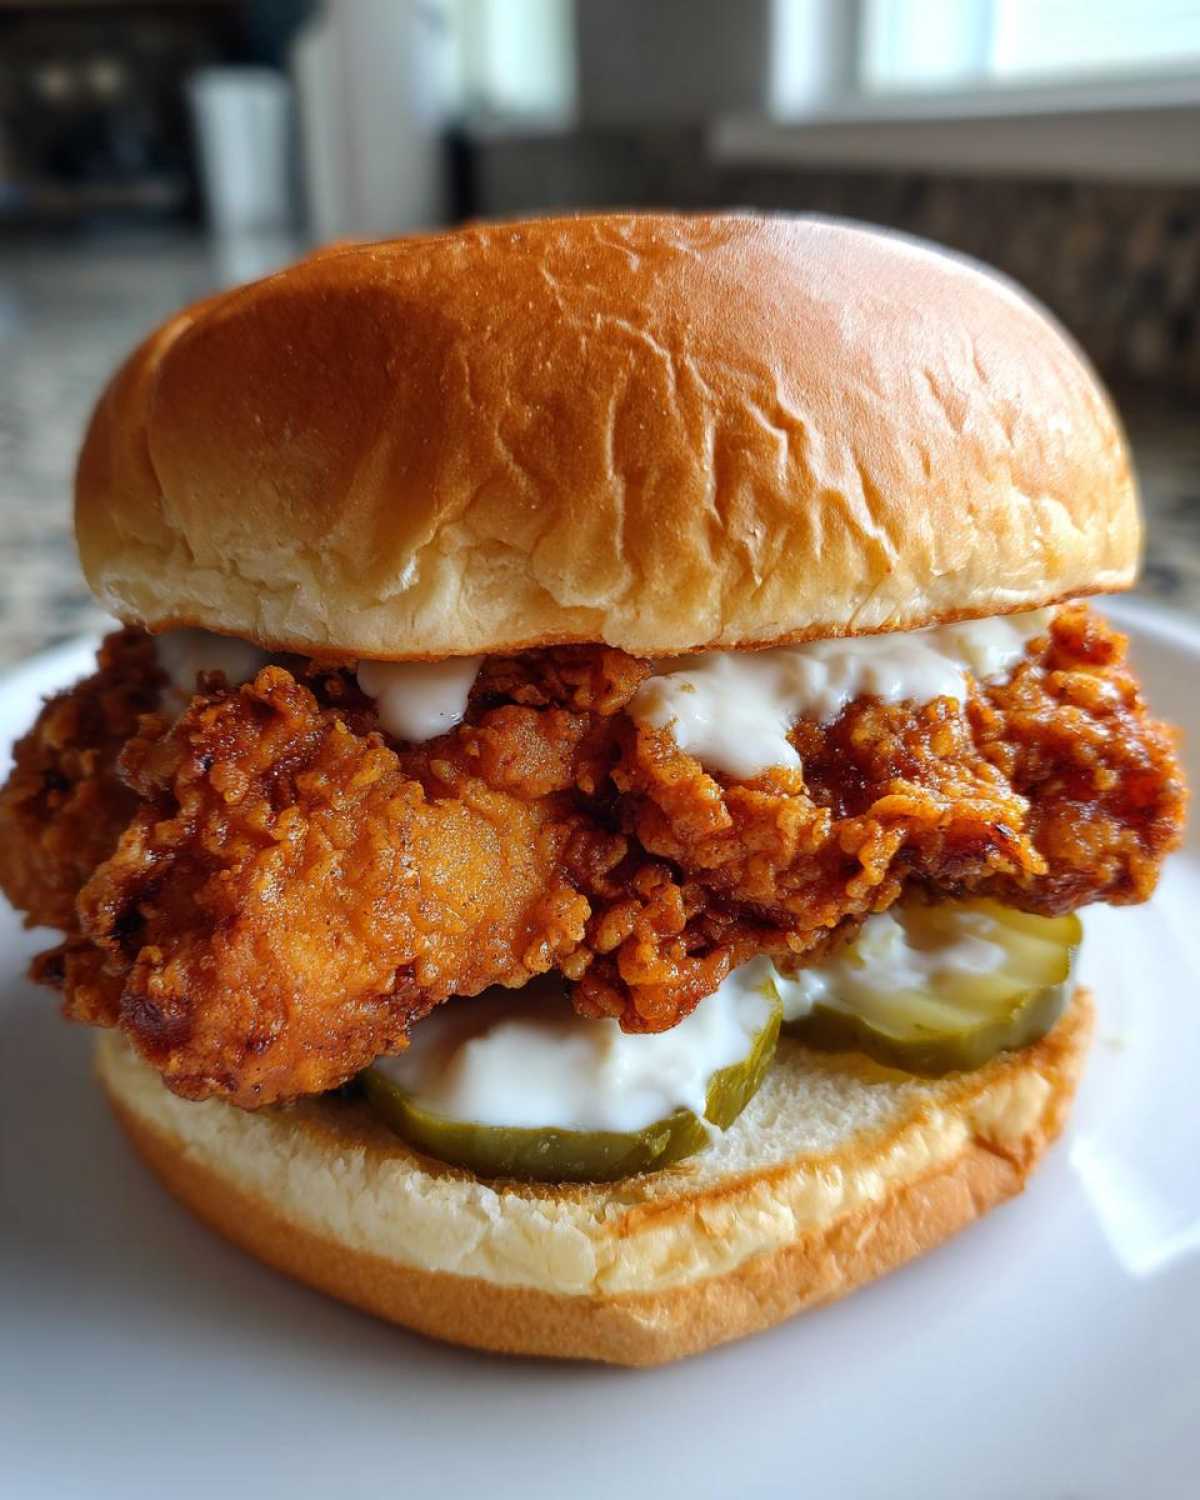
When they look perfectly browned and cooked through, lift them out gently. Skip the paper towel draining—seriously! Paper towels steam the bottom of the chicken, making it instantly limp. Instead, place your cooked fillets on a clean wire rack set over a baking sheet. This allows the air to circulate all around them, draining off the excess oil while keeping that amazing crust perfectly dry and incredibly crisp. If you’re curious about avoiding this step entirely, you can check out my crispy baked chicken thighs recipe guide, but for this sandwich, frying can’t be beaten for that true restaurant crunch.
Assembling Your Crispy Chicken Sandwich with Garlic Sauce
We made it! The chicken is crispy, the garlic sauce is ready to go, and now it’s time for the best part: putting this masterpiece together. You want to build this sandwich quickly so that wonderful crispiness from the frying process doesn’t have time to steam away under the soft bun.
First things first: let’s toast those brioche buns. Forget dry toasting; we’re using butter for a little extra flavor and richness. Melt your softened butter in that same skillet you used for frying (wipe out any dark bits first, though!) over medium heat. Place the buns cut-side down and toast them until they are beautifully golden brown. That slight crisp on the inside of the bun is a game-changer.
Now for the layering! Don’t be shy with the sauce. Slather a generous amount of that creamy Homemade Garlic Sauce on both the bottom and the top bun—this acts as a flavor barrier, protecting the bun from getting soggy too fast. Next, nestle that perfectly fried, ultra-crispy chicken fillet right onto the bottom bun. Top it with a few slices of those bright dill pickles. They provide that essential sharp, vinegary burst to cut through the richness.
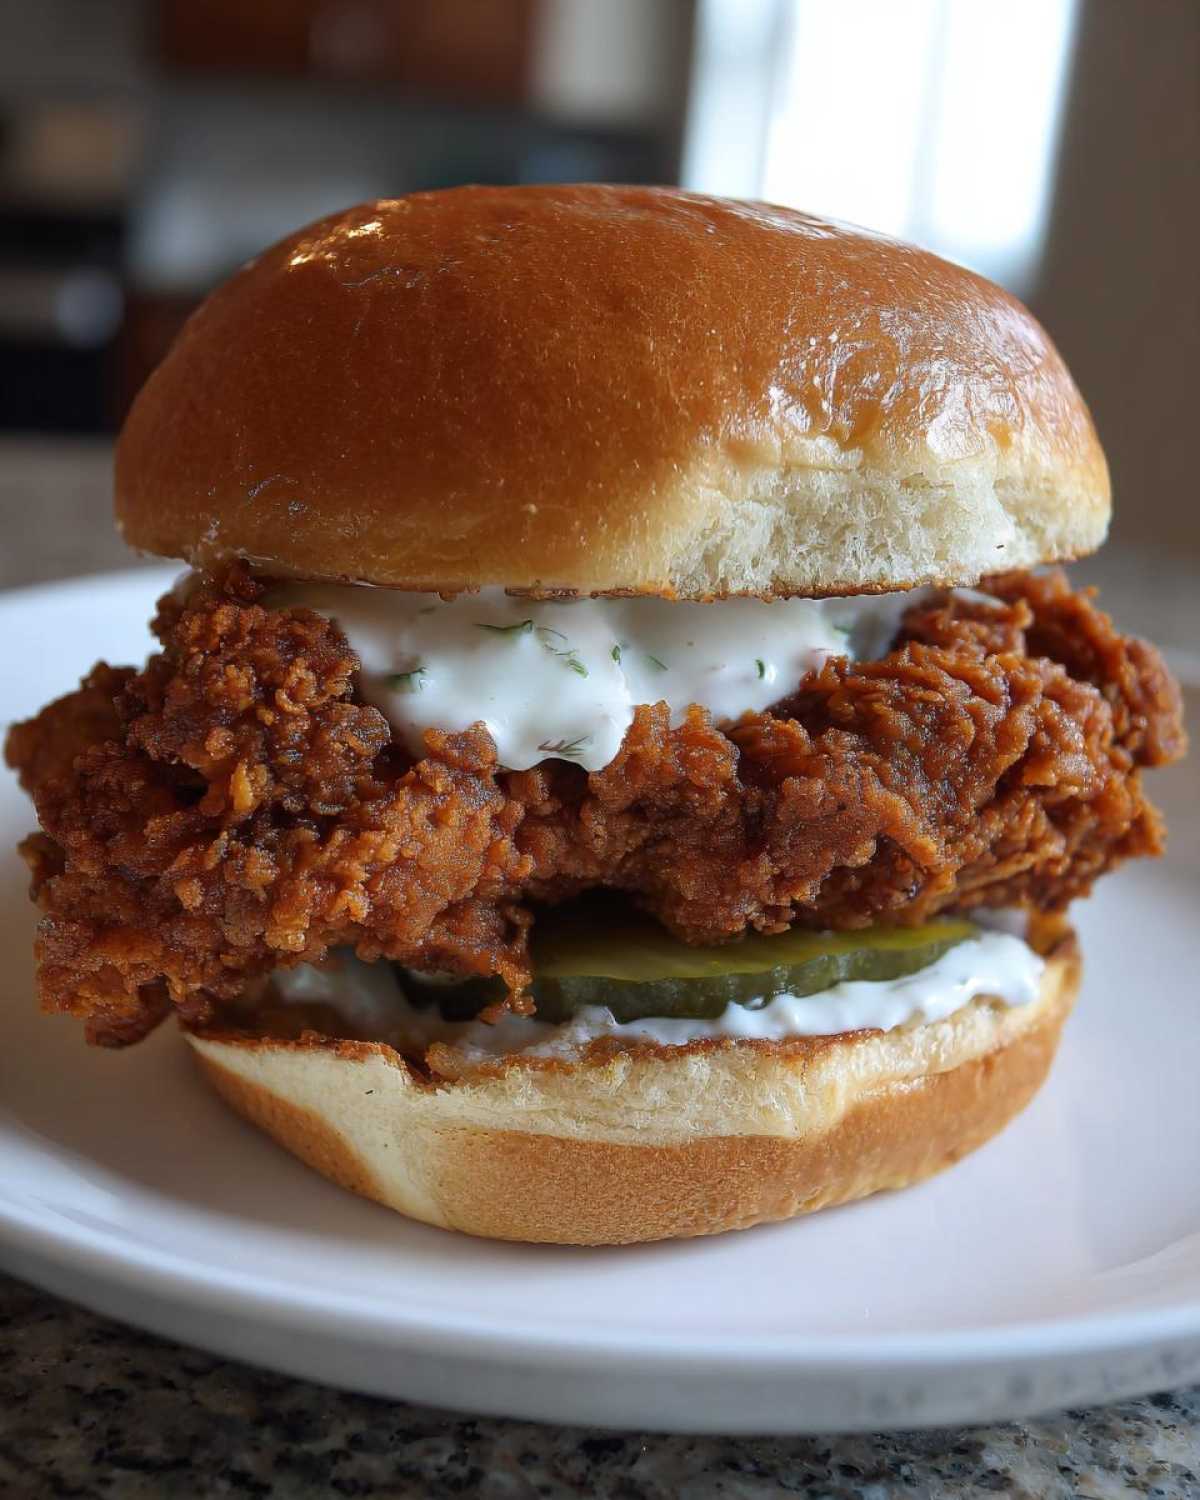
Finally, put the top bun on, press it down gently, and admire your work. Seriously, go make yourself this incredible Crispy Chicken Sandwich with Garlic Sauce immediately. If you want to try something new with your butter next time, I have a fantastic easy homemade garlic butter recipe that would be amazing brushed on those buns!
Tips for Success: Achieving Perfectly Crispy Chicken Coating
Honestly, between the buttermilk soak and the frying temperature, you’re already miles ahead of most folks trying to make a great sandwich. But because I want you to achieve that true, Perfectly Crispy Chicken Coating, I have a couple more insider nuggets from my years deep-frying in my kitchen.
Remember how I mentioned letting the dredged chicken rest for about ten minutes before it goes into the oil? That little bit of waiting time is crucial! It allows the moisture from the buttermilk that migrated into the flour mixture to hydrate just enough, which locks the coating down tight. If you throw it directly from the flour into the hot oil, the coating can sometimes fall off in the splash, leaving you with sad, naked chicken. We don’t want that sad chicken!
Another huge factor in that final crunch is ensuring the oil temperature stays consistently at 350°F. If you have a thermometer, use it. If you don’t, use the classic wooden spoon test: if you dip the handle in and it bubbles gently, it’s usually ready. If it boils violently, it’s too hot! If nothing happens, it’s too cold.
Now, if you’re looking to bump up the heat game, let’s talk about spice! If you want that incredible heat that perfectly balances the creamy garlic mayo, you need to venture into making a Spicy Crispy Chicken Sandwich Tutorial right in your breading mix. Just grab about half a teaspoon of cayenne pepper—or even a full teaspoon if you’re brave—and whisk it right into your dry flour and cornstarch mixture. The spice infuses deep into that crust while it fries, giving you a lovely slow burn instead of just a surface heat.
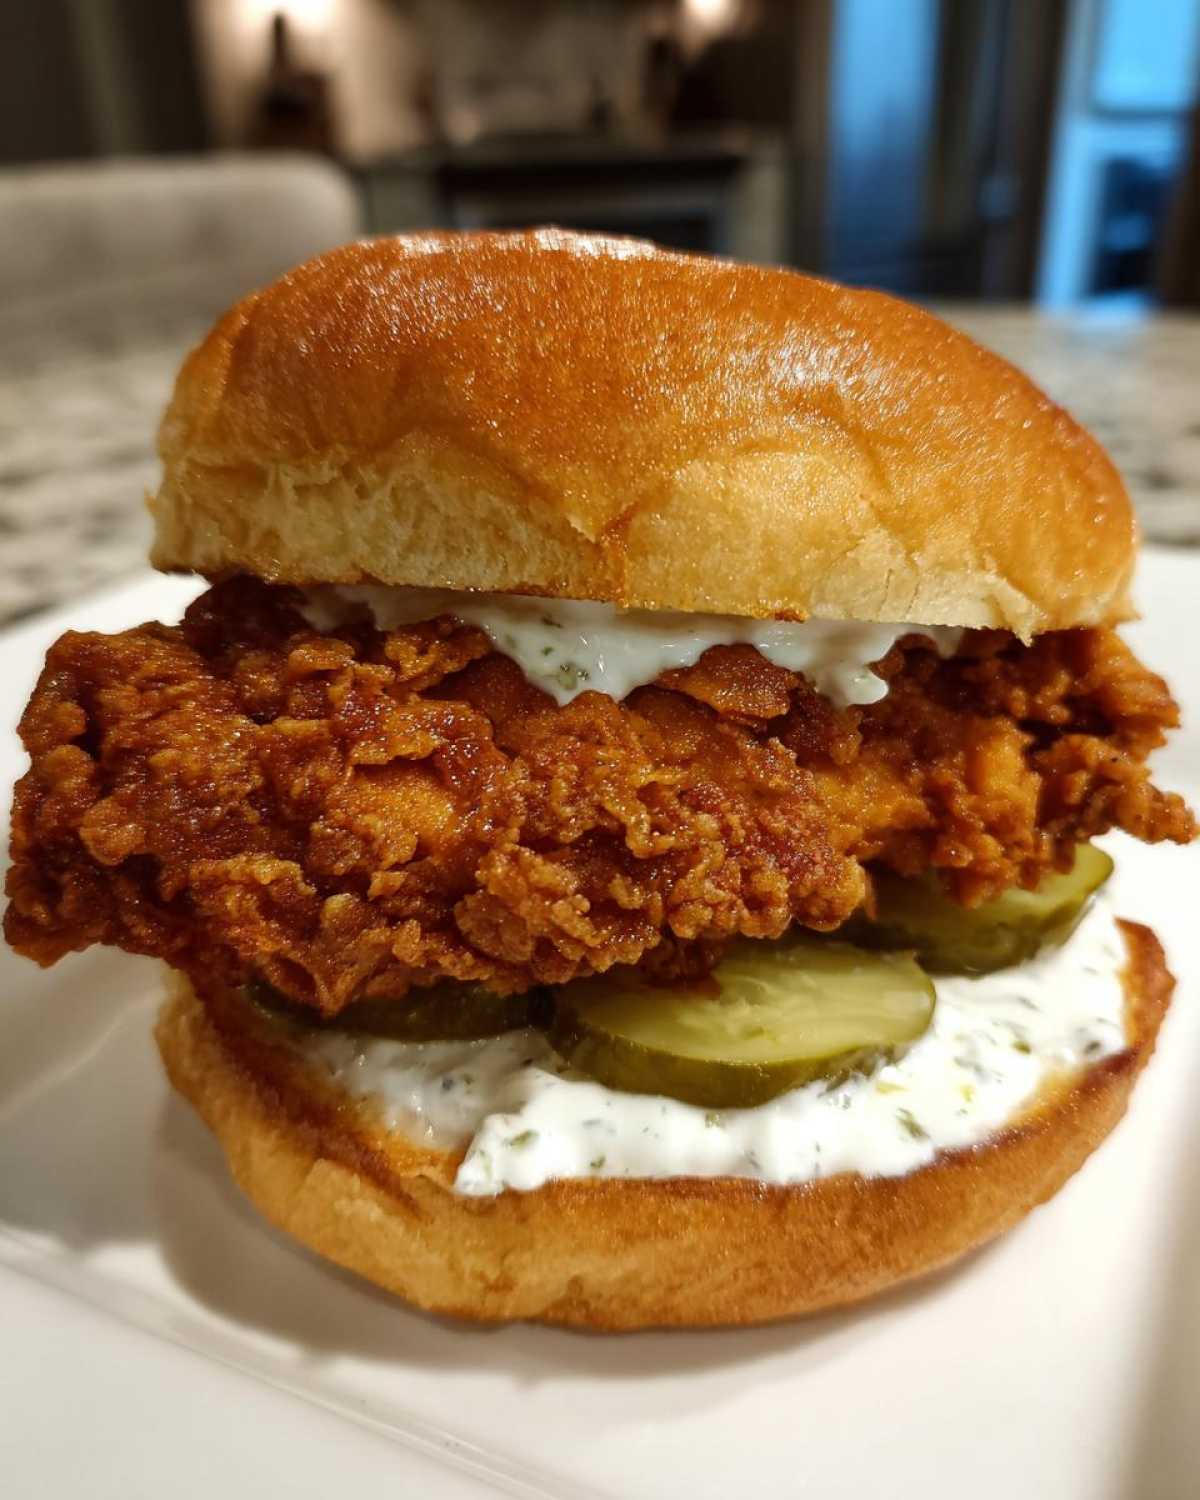
If you ever want to try another way to infuse garlic and Parmesan flavor directly into a main dish, I have a foolproof recipe for easy garlic Parmesan chicken and potatoes. But for the sandwich, keep that cayenne in the flour. It makes all the difference!
Gourmet Chicken Sandwich Toppings and Bun Recommendations
We nailed the chicken and that fantastic garlic sauce, which means we can now get into the fun, personalizing part of the build! A sandwich this good deserves the right supporting cast, otherwise, that glorious crunch we worked so hard for gets lost in the shuffle. Remember, we’re aiming for restaurant quality, so presentation and texture contrast matter!
First, let’s talk about the bread. While I love the soft, slightly sweet hug of a toasted brioche bun (it’s what I suggest in the main recipe), you have other fantastic options if you want to mix it up. Potato rolls are amazing because they are sturdy enough to hold up against the juices but still soft enough to compress nicely when you take a bite. If you want something less buttery, a classic, slightly crusty Kaiser roll adds a little chewiness that is just wonderful.
The toppings are where you really shine! Sure, my recipe calls for those sharp dill pickles, which are essential for balancing the fat, but don’t stop there. Layering on some crisp iceberg lettuce is a must—it adds a cool, watery snap that contrasts beautifully with the hot chicken. If you want to elevate that creamy garlic sauce even further, try mixing in a tiny bit of finely chopped fresh chives or a splash of pickle brine right into your mayo mix. It brightens everything up!
For a real gourmet touch, consider adding a layer of cheese *before* the pickle. A thin slice of pepper jack melts beautifully over the hot chicken and gives you that wonderful stretchy texture. Or, if you’re feeling adventurous, a slightly sweet element really pops against the savory garlic. Think about thinly sliced, caramelized onions—they take a little extra time, but wow, what a flavor explosion.
If you’re looking for non-sandwich ways to use up that delicious garlic sauce, you might want to check out my guide on sweet and savory ricotta toasts for some fun appetizer ideas. But for the sandwich, keep it crisp, keep it sharp, and keep that sauce generous!
Storage and Reheating Instructions for Your Crispy Chicken Sandwich with Garlic Sauce
I know, I know—a Crispy Chicken Sandwich with Garlic Sauce tastes best piping hot, fresh out of the skillet. But let’s be real, sometimes you have leftovers, or maybe you want to prep these bad boys ahead of time for lunch the next day. This is where most people go wrong, so listen closely!
First rule of the crispy club: Do *not* store the sandwich assembled. Seriously, ditch the pickles, put the sauce on the side, and store the crispy chicken patty separately from the toasted bun. Cold air and moisture are the enemies of crispiness, and shoving the whole thing in the fridge overnight guarantees you’ll wake up to soggy sadness.
If you’ve got leftover chicken, wrap the fillet tightly in plastic wrap and then foil, or place it in an airtight container. It should stay reasonably crispy for about two days, but you have to reheat it the right way.
The microwave is your mortal enemy here; it’s guaranteed to steam that beautiful crust into oblivion. For the absolute best results, use your oven or, even better, your air fryer. If you have an air fryer, just toss that cold chicken patty in there for about 4 to 6 minutes at 375°F (190°C). It crisps up unbelievably well! If you use the oven, preheat it to 400°F (200°C) and lay the chicken straight on the rack—no pan underneath!—for about 8 to 10 minutes. This lets the heat circulate and re-crisp that amazing coating.
Once the chicken is piping hot again, quickly toast your bun, spread that cold garlic sauce generously, and reassemble. If you’re looking for another appliance that revives leftovers beautifully, you have to check out my recipe for air fryer potato chips—it’s a lifesaver for snacks!
Frequently Asked Questions About Making the Crispy Chicken Sandwich with Garlic Sauce
I always get so many questions when people try this recipe for the first time, which totally makes sense! We’re aiming for perfection here, and sometimes you need a little adjustment based on what equipment you have on hand. Don’t stress about substitutions; we can usually make it work!
Can I use the Air Fryer Crispy Chicken Sandwich method instead of deep frying?
Oh, absolutely! I know deep frying isn’t for everyone. If you’re looking for an alternative, there are instructions in the main recipe notes about baking, and the air fryer works similarly but gives you a better result than baking alone. Since this recipe is all about that *crunch*, I must warn you: nothing quite beats the texture you get from that hot oil dredge. The air fryer will give you a very respectable, crunchy crust, but it won’t have those deeply craggy, irregular peaks that the deep-fried version creates. You’ll still get a great-tasting fillet, though! If you want the full air fryer breakdown, check out my dedicated air fryer crispy chicken sandwich guide for specific times and temperatures!
How do I make the Garlic Mayo Recipe for Sandwiches even spicier?
That’s a great question! Our base recipe gives you a beautiful, pungent garlic flavor, but if you want to turn that into a full-on spicy aioli, it’s so easy to do right in that little bowl. Other than using cayenne pepper in the flour (which we talked about earlier), you can add a little heat directly to the sauce. I usually recommend a dash of your favorite hot sauce—Sriracha works wonderfully because it blends smoothly—or even a teaspoon of chipotle powder for a smoky kick. Start small, of course, then mix it up until that Garlic Mayo Recipe for Sandwiches is exactly how you like it!
Also, when you’re making the sauce, remember that the lemon juice is important because acid helps balance out the heat and the fatiness. Don’t skip it, even if you’re adding spice!
PrintCrispy Chicken Sandwich with Garlic Sauce

A recipe for a restaurant-quality crispy chicken sandwich featuring a highly crunchy coating and a simple, flavorful garlic sauce.
- Prep Time: 20 min
- Cook Time: 15 min
- Total Time: 35 min
- Yield: 4 servings
- Category: Main Course
- Method: Frying
- Cuisine: American
- Diet: Low Lactose
Ingredients
- 2 boneless, skinless chicken breasts, halved horizontally
- 1 cup buttermilk
- 1 teaspoon salt
- 1/2 teaspoon black pepper
- 1 cup all-purpose flour
- 1/2 cup cornstarch
- 1 teaspoon paprika
- 1/2 teaspoon garlic powder
- Vegetable oil for frying
- 4 brioche buns
- 4 slices dill pickle
- 2 tablespoons butter, softened
- For Garlic Sauce:
- 1/2 cup mayonnaise
- 2 cloves garlic, minced
- 1 teaspoon lemon juice
- 1/4 teaspoon salt
Instructions
- Pound the chicken halves to an even 1/2-inch thickness.
- In a shallow dish, combine the buttermilk, 1 teaspoon salt, and 1/2 teaspoon pepper. Soak the chicken for at least 30 minutes, or up to 4 hours in the refrigerator.
- In a separate shallow dish, whisk together the flour, cornstarch, paprika, and garlic powder.
- Remove one piece of chicken from the buttermilk, letting excess drip off. Dredge thoroughly in the flour mixture, pressing firmly to coat all sides. Repeat the process: dip the floured chicken back into the buttermilk briefly, then immediately dredge it again in the flour mixture, ensuring a thick, craggy coating. Place coated chicken on a wire rack.
- Prepare the garlic sauce: Mix the mayonnaise, minced garlic, lemon juice, and 1/4 teaspoon salt in a small bowl. Set aside.
- Heat about 1 inch of vegetable oil in a deep skillet to 350 degrees Fahrenheit (175 degrees Celsius).
- Carefully place the coated chicken into the hot oil, ensuring not to overcrowd the pan. Fry for 4 to 6 minutes per side, until golden brown and the internal temperature reaches 165 degrees Fahrenheit (74 degrees Celsius).
- Remove the chicken and place it on a clean wire rack set over a baking sheet to drain excess oil.
- Lightly toast the inside of the brioche buns with softened butter in a dry pan over medium heat until golden.
- Assemble the sandwich: Spread a generous amount of garlic sauce on both the top and bottom buns. Place a crispy chicken fillet on the bottom bun, top with pickle slices, and place the top bun on.
Notes
- For extra crispiness, after the second flour dredge, let the coated chicken rest at room temperature for 10 minutes before frying. This helps the coating adhere better.
- If you prefer baking, spray the coated chicken with cooking spray and bake at 400 degrees Fahrenheit (200 degrees Celsius) for 20-25 minutes, flipping halfway. The texture will be less crisp than frying.
- For a spicy version, add 1/2 teaspoon cayenne pepper to the flour mixture.
Nutrition
- Serving Size: 1 sandwich
- Calories: 650
- Sugar: 8
- Sodium: 950
- Fat: 35
- Saturated Fat: 7
- Unsaturated Fat: 28
- Trans Fat: 0
- Carbohydrates: 45
- Fiber: 2
- Protein: 40
- Cholesterol: 120