

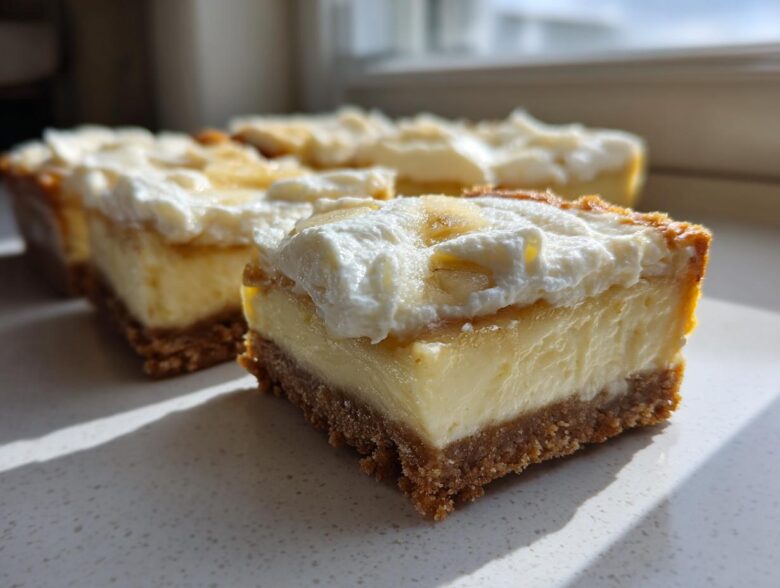
I’m going to let you in on a little secret: I think the best desserts are the ones that break the rules. Why choose between the tangy, creamy magic of cheesecake and the comforting sweetness of homemade banana pudding when you can have both? I spent weeks—seriously, weeks—tinkering, testing crust thicknesses, and perfecting the banana-to-cheese ratio. But trust me, it was worth every messy mixing bowl. What I finally landed on are the most ridiculously decadent, perfectly structured Banana Pudding Cheesecake Bars you will ever taste. They nail every texture: the crunch, the smoothness, and that incredible melt-in-your-mouth feeling. Forget complicated trifles; these bars are the ultimate showstopper for any gathering! If you need a quick chocolate fix while you bake these, I always turn to my recipe for homemade chocolate milk to keep my energy up!
Why These Banana Pudding Cheesecake Bars Are a Must-Try
Look, these aren’t just your average dessert bars, okay? These are potluck gold, guaranteed to disappear the second they hit the table. If you want something that feels Southern and completely indulgent without needing a spoon and a bowl, this is it. You get all the favorite components stacked up just right!
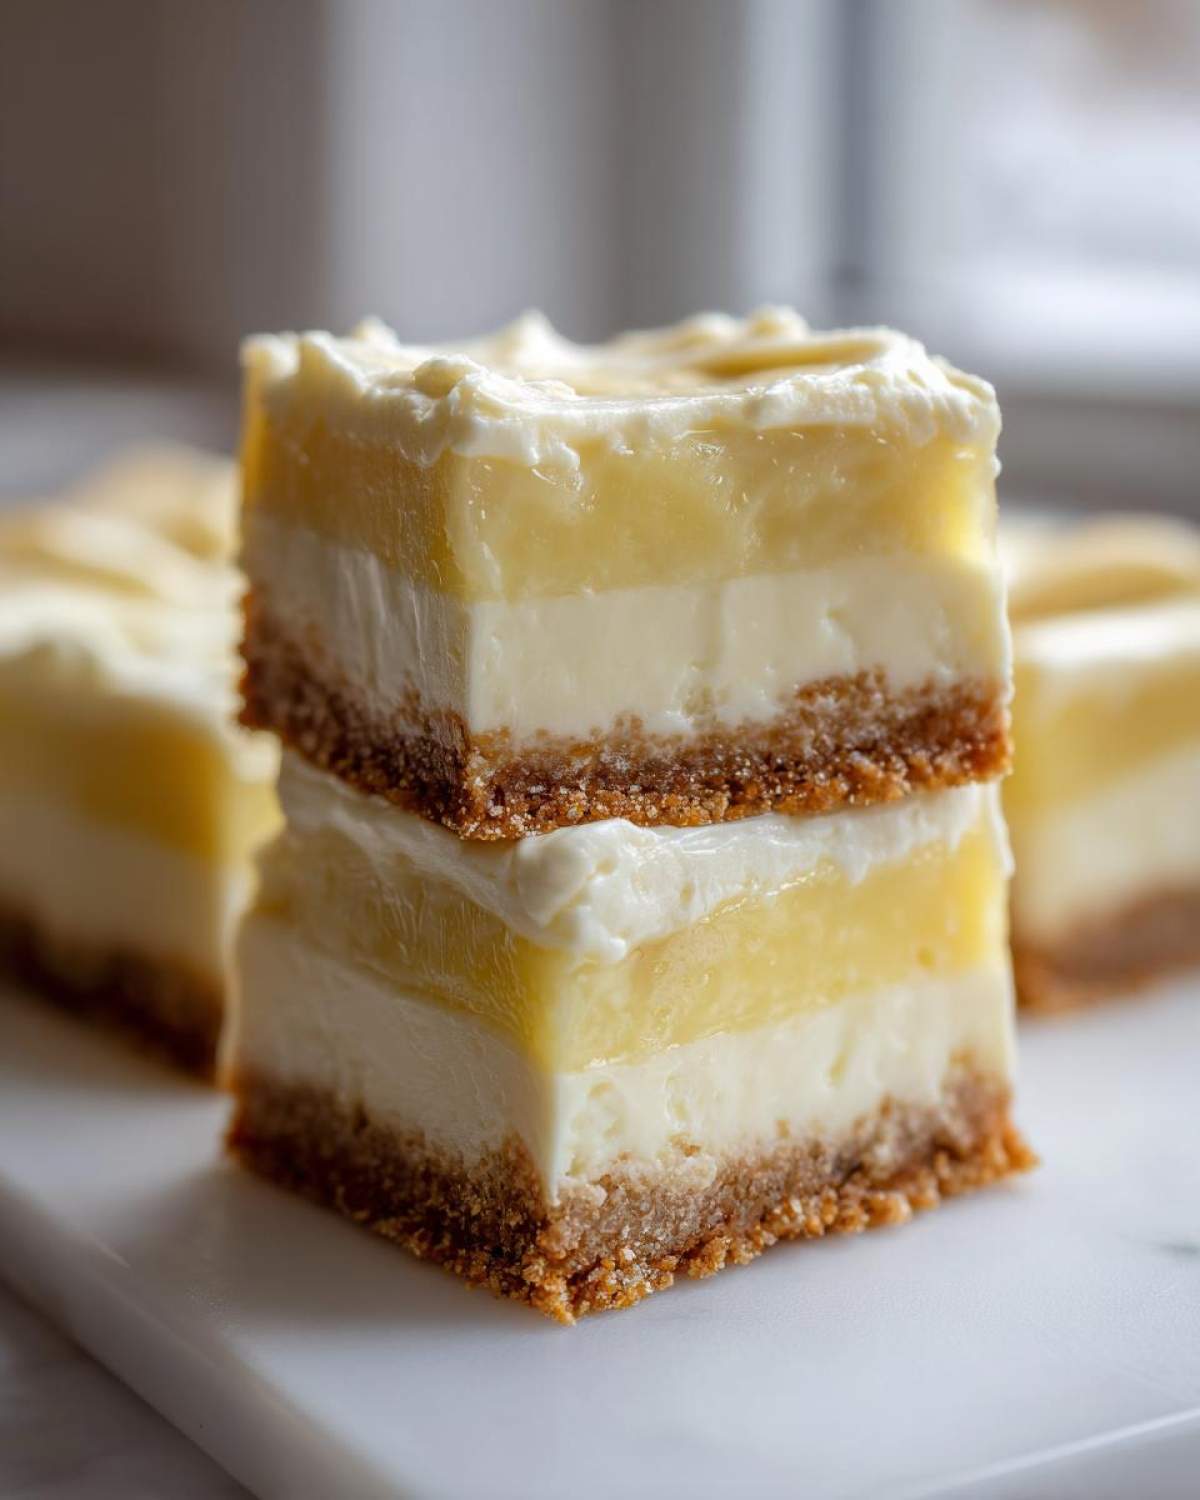
- They are perfect for making ahead of time—in fact, they taste better that way!
- We’ve managed to balance the tartness of the cheesecake against the sweetness of the pudding, so it never feels too heavy.
- You get that satisfying structural integrity you want in great Creamy Cheesecake Bars.
When you need a real crowd-pleaser, these easy banana dessert options are always the answer.
Texture and Flavor Profile of Our Banana Pudding Cheesecake Bars
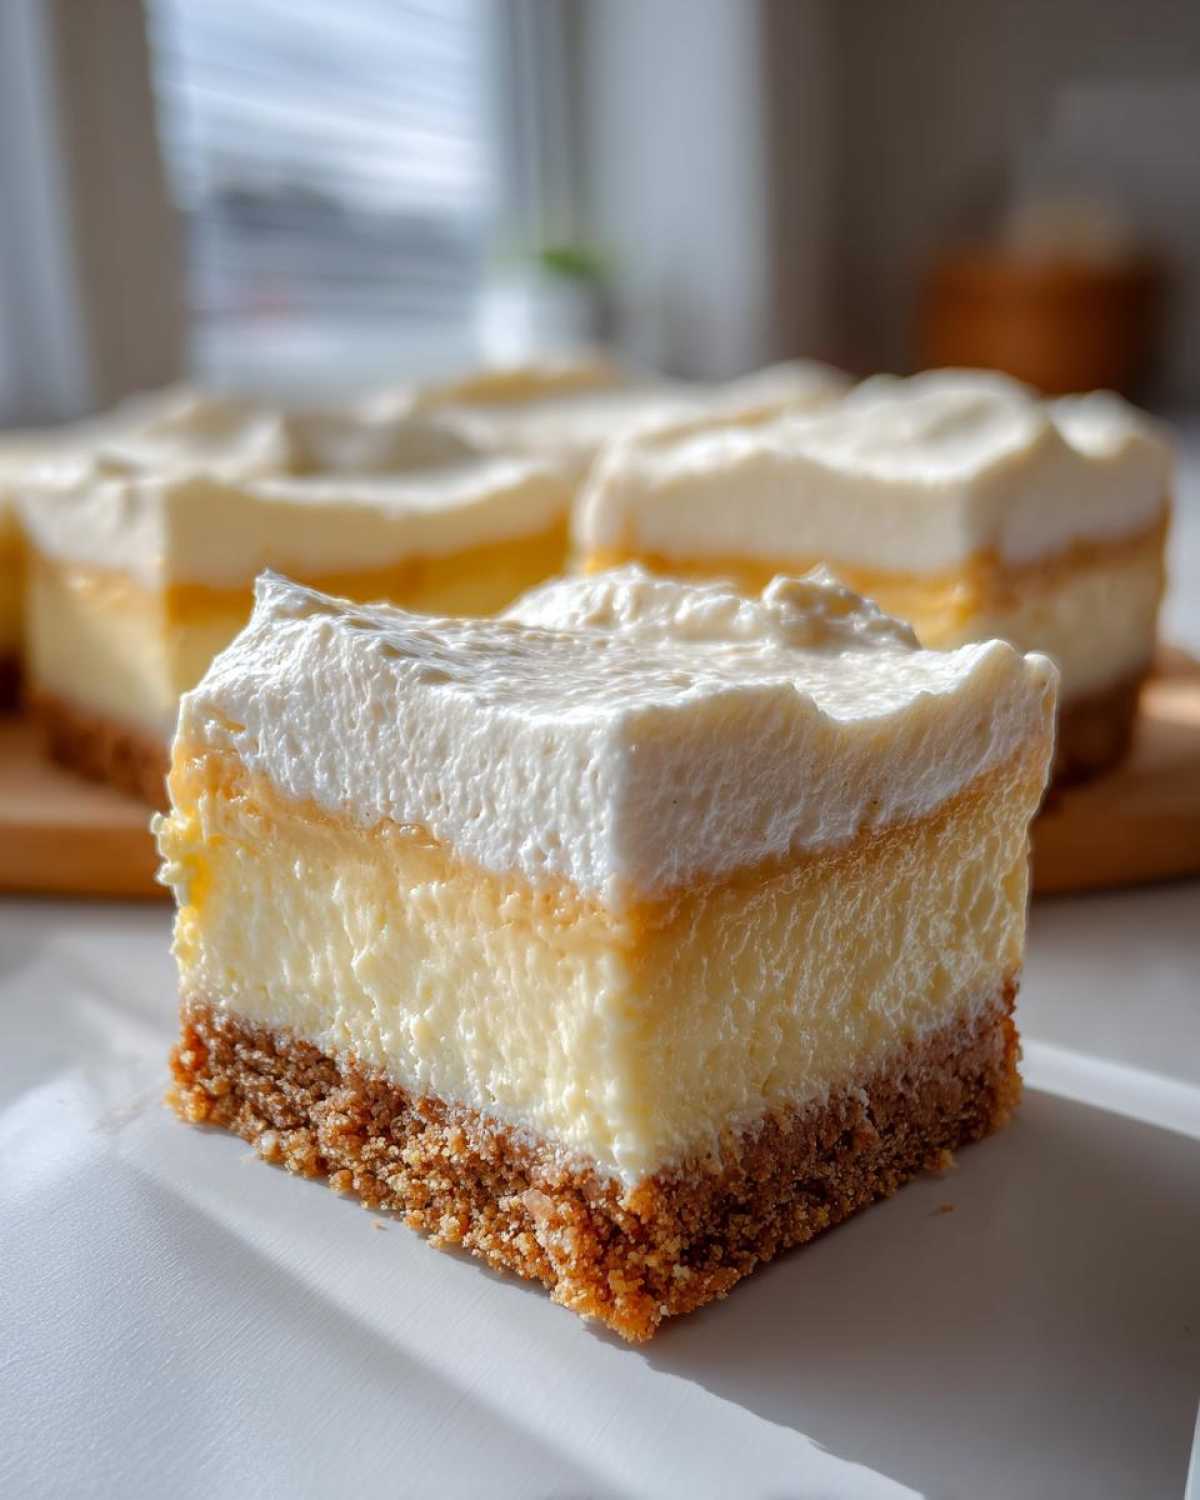
The beauty here is the journey your mouth takes! First, you hit that buttery, crunchy vanilla wafer crust—it snaps just a little. Right under that is the rich, slightly tangy cheesecake layer that holds everything together beautifully. Then, bam—you hit the top layer of sweet, smooth banana pudding, spiked with real banana flavor. It’s everything you love, perfectly contained in one amazing square. These Layered Cheesecake Bars really deliver on contrasting textures!
Gathering Ingredients for Perfect Banana Pudding Cheesecake Bars
Okay, ingredient gathering! This is where we set ourselves up for success. Since these are Banana Pudding Cheesecake Bars that get baked for a short time, we have a few key components that absolutely need to be exactly what the recipe calls for. Don’t try to swap out the cream cheese warmth or the vanilla wafer texture—you’ll regret it later! We need ingredients that are perfectly prepped, like the rule about eggs in that avocado egg salad; timing matters here, too!
For the crust and the cheesecake filling, we need everything at the right temperature. That means really soft cream cheese, and remember we are melting that butter for the base. For the bananas? They need to be the slightly spotty, sweet kind—not too green, not completely black mush! Once you have these laid out, the assembly goes much faster.
Crust and Cheesecake Layer Ingredients for Banana Pudding Cheesecake Bars
Let’s start with the base! For the crust, gather up your vanilla wafer crumbs—yes, you need crumbs, not whole wafers! We mix that with exactly 1/2 cup of melted unsalted butter. Then for that gorgeous middle layer, grab your 8 ounces of softened cream cheese, a bit of granulated sugar, one large egg, and a teaspoon of real vanilla extract. It’s important that the cream cheese is soft so you don’t end up with lumps that bake unevenly.
Components for the Creamy Banana Pudding Topping
For the topping, which is the real heart of the pudding flavor, you’ll need that instant vanilla pudding mix—the box kind works perfectly for the structure we need here. Make sure you have 1 1/2 cups of *cold* milk; cold is non-negotiable for setting up that instant pudding! Plus, two large, perfectly ripe bananas that you’ll mash up yourself. Finally—and this makes all the difference between a good topping and a great one—we whip up some heavy cream with a little powdered sugar and vanilla until it’s stiff. That folding step at the end is pure magic.
Step-by-Step Instructions for Baked Banana Pudding Cheesecake Bars
Alright, it’s time to put this masterpiece together! I promise, even though we have a few layers, the process flows really smoothly once you get going. Just make sure you have your 8×8 inch baking pan ready with that parchment paper sling—that’s your secret weapon for getting these gorgeous bars out later without disaster! If you love baking with banana, you’ve got to check out my blueberry banana bread while you wait for things to bake!
Preparing and Baking the Vanilla Wafer Crust
First things first, get your oven warmed up to 350°F (175°C). That gives it time to heat evenly. In a bowl, mix those vanilla wafer crumbs with your 1/2 cup of melted butter. When they look like wet sand, press that mixture *firmly* into the bottom of your parchment-lined 8×8 pan. Don’t be shy here; press it down hard so it holds up our layers! Pop that into the oven for exactly 10 minutes just to set the base. Once it’s done, pull it out and let it start cooling down while we move on.
Creating the Cheesecake Layer for Your Banana Pudding Cheesecake Bars
Now for the creamy layer! In a separate bowl, beat that softened cream cheese with the granulated sugar until it’s totally smooth. This is important for that smooth, Creamy Cheesecake Bars texture. Gently mix in your egg and the teaspoon of vanilla. Seriously, stop mixing as soon as it comes together—we don’t want too much air, or it puffs up and cracks! Spread this mixture carefully over your slightly cooled crust. Bake this for 15 to 18 minutes. You want the edges set but the very center still wobbling a tiny bit. Let it cool down completely on a rack, and then you must chill it in the fridge for at least an hour before the next step.
Assembling the Banana Pudding Topping
While that cheesecake is chilling, we make the best part! Get your instant vanilla pudding mix, the cold milk, and your mashed bananas in a bowl. Whisk them together vigorously for about 2 minutes until it starts getting thick. Let it rest for five minutes. While that sets up, whip your cold heavy cream, powdered sugar, and vanilla until you have stiff peaks. Then, gently—and I mean gently—fold that whipped cream into the banana pudding mixture. Folding keeps all the air in, which is what makes this topping light and fluffy over that dense cheesecake layer.
Final Chilling and Serving the Banana Pudding Cheesecake Bars
Now spread that heavenly banana topping evenly over the chilled cheesecake layer. This is the moment of truth: covering it up and putting it back in the fridge. You need a minimum of 4 hours, but honestly, overnight transforms these into the most stable, flavorful Banana Pudding Cheesecake Bars imaginable. When it’s time to serve, use the parchment overhang to lift everything out of the pan in one piece. This makes slicing so easy! Wipe your knife between cuts, drizzle on some caramel if you’re feeling fancy, and slice into squares. Perfection!
Tips for Achieving the Best Banana Cheesecake Bars Recipe
I know you want these Banana Cheesecake Bars Recipe to be amazing, and honestly, it’s all in the small details. We used a baked method here because it gives you that lovely structure, but I’ve picked up a few tricks over the years to guarantee success, especially around texture. If you struggled getting that perfect blend of flavors in that avocado egg salad recipe last week, apply those lessons here—don’t overwork the cheese mixture!
My biggest piece of advice for any layered dessert like this? Chill time is your friend. Seriously. You rush the chilling, and your beautiful, creamy layers turn into a sloppy mess when you try to cut them. Patience saves the day when making these wonderful Banana Pudding Dessert Bars.
Ingredient Substitutions for Banana Pudding Dessert Bars
We followed a baked recipe structure, but I get asked all the time about skipping the oven entirely, especially in the summer when my kitchen feels like an oven already! You absolutely can pivot this into a No Bake Cheesecake Bars version if you need to. If you go that route, ditch the steps involving the oven entirely (steps 1, 2, and 4).
For the cheesecake layer in the no-bake option, you skip the egg and the baking time. Instead, mix your softened cream cheese with powdered sugar and a tub of whipped topping until you get a stiff, creamy base before layering it on the wafer crust. That gives you a slightly different—but still delicious—texture that sets up purely in the fridge.
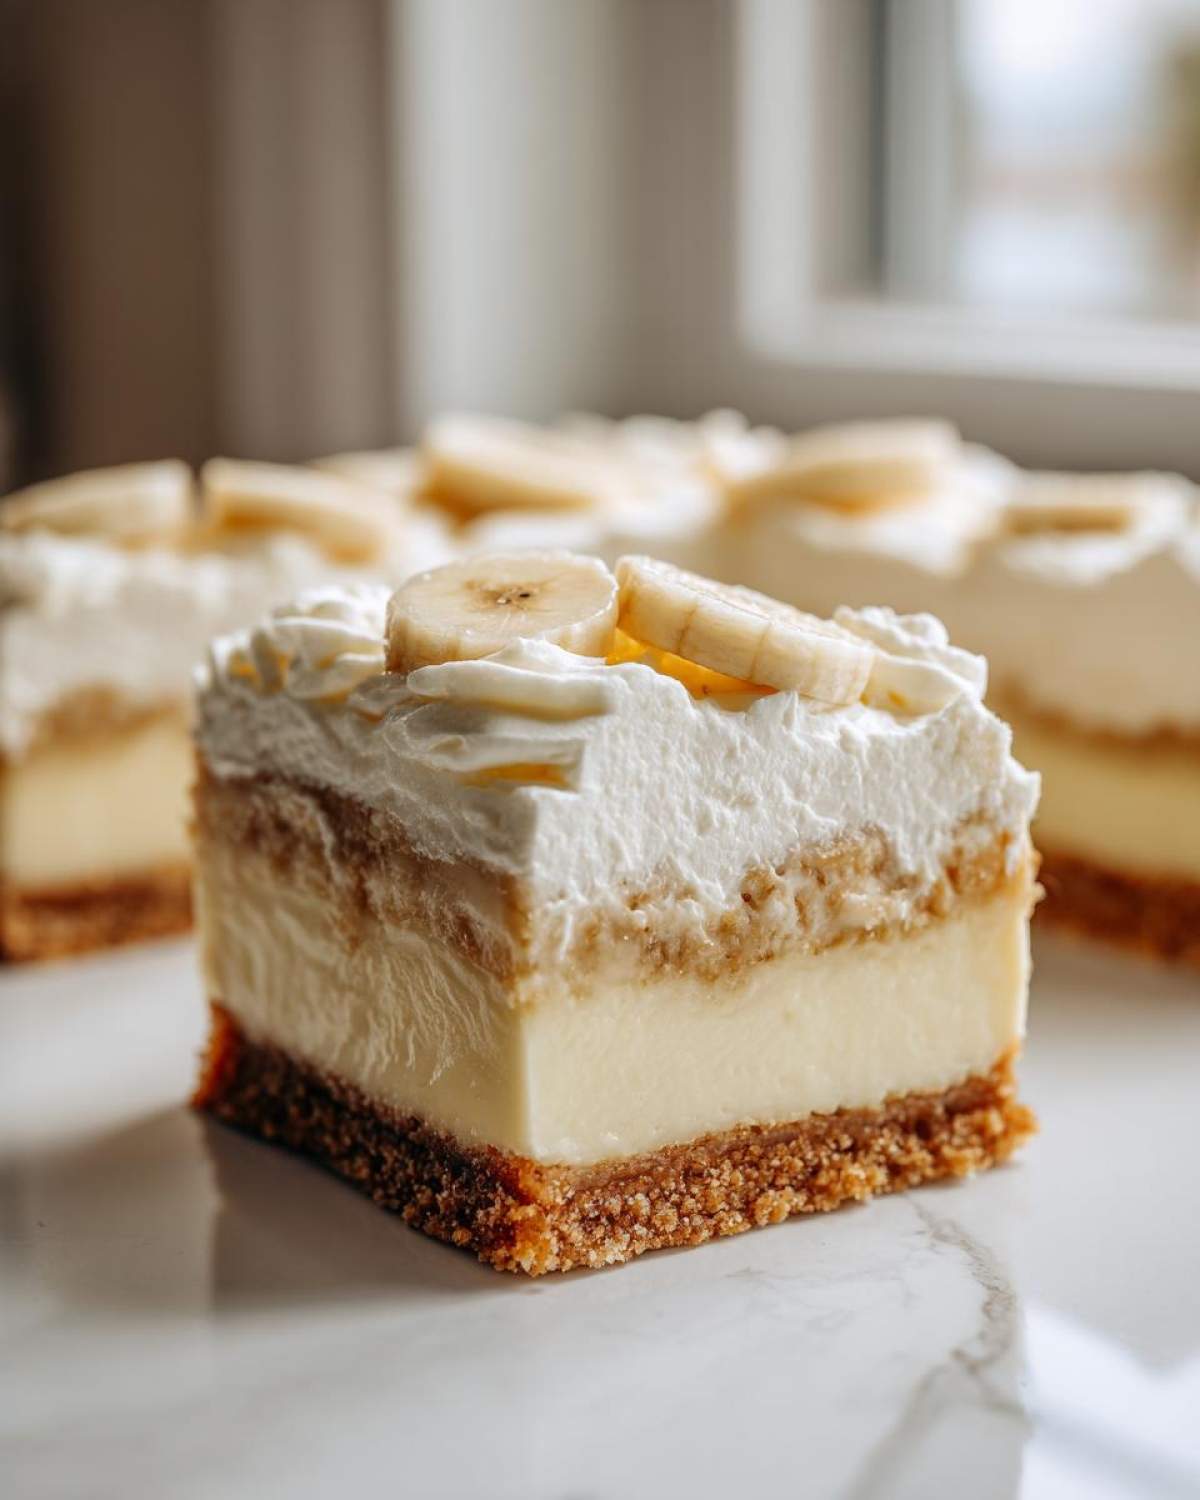
Also, remember those notes about bananas? Use firm, ripe ones for the pudding layer. If they are too brown or soft, they’ll turn your whole pudding layer into soup before you can even fold in the whipped cream. We want amazing flavor, not pudding that can’t stand up!
Storage and Keeping Your Banana Pudding Cheesecake Bars Fresh
So, you’ve made this incredible, layered dessert, and now you have leftovers—lucky you! The good news about these Banana Pudding Cheesecake Bars is that they actually improve after a day in the cold. Because they have that soft pudding top layer, they definitely need to stay chilled. Never try to leave these out on the counter when you’re serving, especially if it’s a warm day, or you risk a melted mess!
I always store mine in the 8×8 pan, covered tightly with plastic wrap that I press right down onto the top layer of the pudding. This keeps everything nice and fresh and stops the top from drying out or absorbing any weird fridge smells. If you plan to store them longer than a day, you might want to put a layer of parchment paper between the pudding and the plastic wrap, just so nothing sticks when you pull it off.
These bars are fantastic made ahead of time, which makes them ideal for parties. They hold up beautifully in the refrigerator for up to three days. Honestly, I think day two is when the flavors really meld together, and the crust gets just the right amount of softness from the moisture in the layers above it. If you want to make them even easier for an upcoming event, you can always bake the crust/cheesecake layer and chill it completely, and then prepare the banana pudding topping the morning you plan to serve them.
When it comes to serving, take them out of the fridge about 15 minutes before you plan to slice them. This isn’t exactly reheating, but it takes the intense chill off the cheesecake layer so it’s softer and easier to bite into. You want it cool, but not rock-hard! If you happen to be storing leftover homemade marshmallows, you can serve those on top instead of caramel for a fun twist!
Serving Suggestions for These Layered Cheesecake Bars
Now that you’ve mastered the layering and chilling, let’s talk about presentation! These Layered Cheesecake Bars are showstoppers all on their own, but what’s a perfect dessert without a little optional flair? Since these are so rich and decadent, I like to keep the garnishes simple but impactful. We talked about it before, but that drizzle of caramel sauce? It’s my absolute favorite way to finish them off.
If you want to take that caramel up a notch, I highly recommend making your own! It’s fantastic, and my recipe for easy, soft, chewy sea salt caramels comes together faster than you think. A salty-sweet swirl cutting through the creamy banana pudding is sensational.
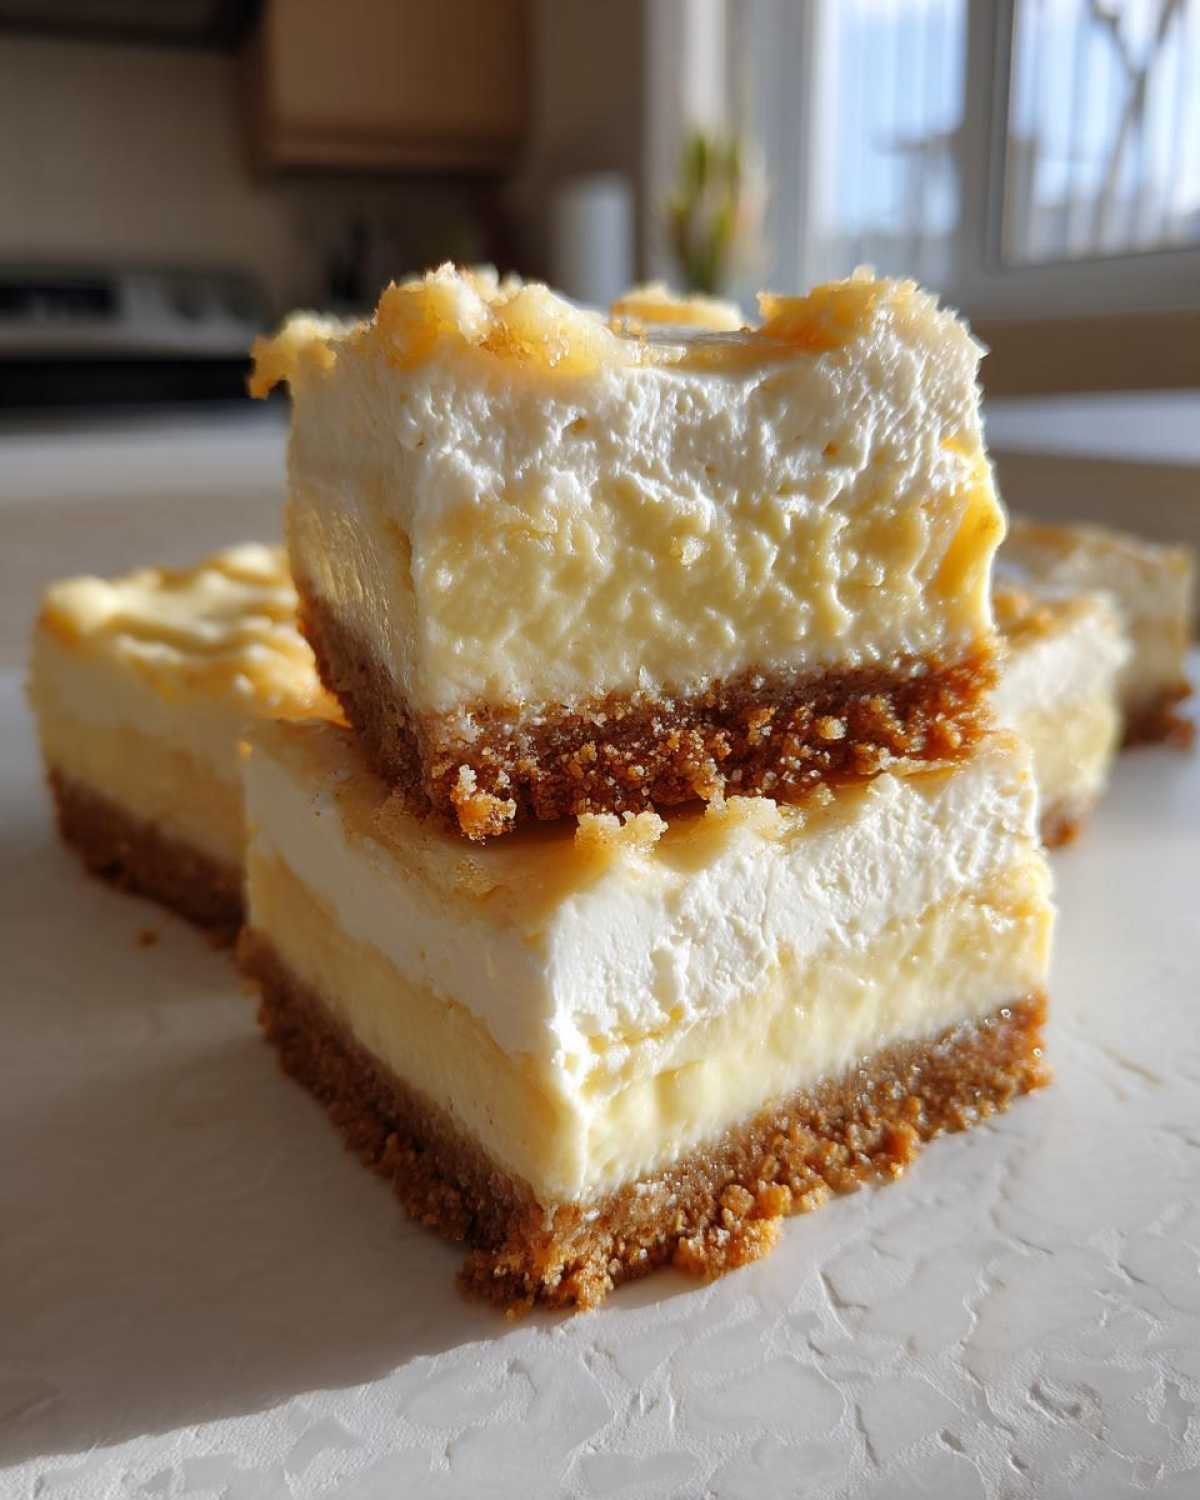
When you’re taking these to a gathering, remember, these are the ultimate Potluck Dessert Bars. To make them super neat for serving on a buffet table, I always slice them *after* they are completely chilled and set—like, right before I put them on the platter. You can line your serving tray with a little piece of parchment paper, and arrange the squares cut-side up. This way, people can easily grab one without disturbing the others!
For a lovely temperature contrast, especially if you’re serving them outdoors in the summer, sometimes I’ll serve a square with just a single, fresh strawberry or a thin slice of kiwi placed right on top of the whipped topping for a pop of color. The slight acidity from the fresh fruit wakes up the palate against all that sweet creaminess. Honestly, though, even naked on a simple white plate, these bars are always the first thing gone!
Frequently Asked Questions About Banana Pudding Cheesecake Bars
I always get the same questions when I bring these out! It’s totally normal when you’re dealing with such a decadent combination of flavors. Since we’re mixing cheesecake rules with pudding traditions in these Banana Pudding Cheesecake Bars, sometimes folks get nervous about the structure. Don’t worry! I gathered the most common things people ask me about to make sure your bar-baking experience is flawless.
If you also need a little energy boost while reading through the baking details, remember you can always rely on my recipe for best homemade chocolate milk!
Can I make these Banana Cheesecake Bars ahead of time?
Oh, please do! I actually insist on it, honestly. These Banana Cheesecake Bars Recipe tastes so much better when everything has had time to really settle into its place. Remember how the instructions emphasized chilling for at least four hours? I find that leaving them overnight in the fridge is the best practice. That long chill time allows the cheesecake layer to firm up perfectly against the soft banana pudding topping, making your slices clean and beautiful. Plus, it means less work for you the day you need to serve them!
What makes this a Southern Style Dessert Bars recipe?
That’s a great question! When we talk about Southern Style Dessert Bars, we’re tipping our hat to tradition, aren’t we? What truly anchors this recipe in Southern desserts is the inclusion of two main players: the vanilla wafers, which are the backbone of classic homemade banana pudding, and the use of that fluffy, creamy pudding mixture as the main topping. While the cheesecake layer is the modern twist, the combination of rich custard flavor and the wafer crust definitely pulls from those beloved, comforting Southern traditions. It’s a fusion, but the heart is very traditional!
Can I use store-bought whipped topping instead of whipping my own cream?
That is the eternal shortcut question, isn’t it? You certainly *can* swap whipping heavy cream for stabilized whipped topping in a pinch to make it easier, especially if you are avoiding dairy fat. However, I strongly suggest using real heavy cream whipped stiffly with powdered sugar. Why? Because the real whipped cream provides a lighter, airier fold into the banana pudding base. If you use a pre-made, stabilized topping, your pudding layer tends to become a bit denser and heavier. For the ultimate light texture that contrasts beautifully with the cheesecake, homemade whipped cream is the way to go for these Creamy Cheesecake Bars.
How long do these layered bars last in the refrigerator?
Because of that fresh banana pudding topping, you don’t want to push these too far past three days in the fridge. Day one is excellent, shaking off the chill, and day two is often when they are at their absolute peak flavor. After that, the banana flavor starts to diminish slightly, and the crust can get a little too soft for my taste. Keep them tightly covered, and try to eat them within 72 hours for the best experience!
Nutritional Estimates for Your Banana Pudding Cheesecake Bars
Now, look, I’m a baker, not a dietician, okay? While these Banana Pudding Cheesecake Bars are pure dessert heaven, they definitely fall on the indulgent side of the spectrum. These numbers are just estimates based on the ingredients breakdown we used, so take them as a general guide, not a hard and fast rule!
The final tally reflects the richness of the cream cheese, the butter in the crust, and the sugar needed to make that perfect sweet treat. If you’re counting macros, you’ll want to remember that this recipe yields 16 glorious squares, so when you slice them, you’re getting a piece of heaven!
For reference, here is what we calculated for one glorious serving:
- Serving Size: 1 bar
- Calories: 320
- Sugar: 25g
- Fat: 18g (with 10g of that being Saturated Fat, which is the butter and cream doing their job!)
- Carbohydrates: 36g
- Protein: 5g
- Sodium: 210mg
It’s always worth it for that combination of tangy cheesecake and sweet banana pudding, trust me! We really aim for flavor over fussiness here. If you’re curious about who is behind all these delicious recipes, feel free to check out our About Us page!
Share Your Experience Making These Banana Pudding Cheesecake Bars
Whew! We made it through the crust, the careful chilling, and the glorious banana pudding topping. Now that you’ve created your own batch of these amazing Banana Pudding Cheesecake Bars, I genuinely want to hear all about it! I put my heart and soul into testing those layers, and the best feeling is knowing they ended up on your family table.
Did you drizzle on the caramel? Did you make the no-bake version? Tell me everything! Your feedback is what keeps me inspired to develop more fun, fused desserts like this one. Don’t be shy—I love seeing your successes!
If you found this recipe helpful and you’re ready to show it some love, please give it a five-star rating right down below. Nothing helps another baker find these perfect treats like good old-fashioned ratings.
And if you snapped a picture of your perfectly layered squares? Please upload it in the comments! I always look for people using the parchment sling technique—did it work like a charm for you? If you have any lingering questions about getting that cheesecake layer just right, that contact page is always open for a quick chat. Happy baking, friends!
PrintBanana Pudding Cheesecake Bars
Make creamy, layered dessert bars that combine a vanilla wafer crust, a rich cheesecake layer, and a banana pudding topping.
- Prep Time: 25 min
- Cook Time: 28 min
- Total Time: 4 hours 53 min
- Yield: 16 bars
- Category: Dessert
- Method: Baking and Chilling
- Cuisine: American
- Diet: Vegetarian
Ingredients
- 1 1/2 cups vanilla wafer crumbs
- 1/2 cup unsalted butter, melted
- 8 ounces cream cheese, softened
- 1/2 cup granulated sugar
- 1 large egg
- 1 teaspoon vanilla extract
- 2 large ripe bananas, mashed
- 1 (3.4 ounce) package instant vanilla pudding mix
- 1 1/2 cups cold milk
- 1 cup heavy cream, cold
- 1/4 cup powdered sugar
- 1 teaspoon vanilla extract
- Optional: Caramel sauce for drizzling
Instructions
- Preheat your oven to 350°F (175°C). Line an 8×8 inch baking pan with parchment paper, leaving an overhang for easy removal.
- Combine the vanilla wafer crumbs and melted butter in a bowl. Press this mixture firmly into the bottom of the prepared pan to form the crust. Bake for 10 minutes. Let cool slightly.
- In a medium bowl, beat the softened cream cheese and granulated sugar until smooth. Beat in the egg and 1 teaspoon vanilla extract until just combined. Do not overmix.
- Spread the cream cheese mixture evenly over the cooled crust. Bake for 15 to 18 minutes, or until the edges are set but the center still has a slight wobble. Cool completely on a wire rack, then chill in the refrigerator for at least 1 hour.
- While the cheesecake chills, prepare the banana pudding layer. In a large bowl, whisk together the instant vanilla pudding mix, cold milk, and mashed bananas for 2 minutes until the mixture thickens. Let it stand for 5 minutes.
- In a separate bowl, beat the cold heavy cream, powdered sugar, and 1 teaspoon vanilla extract until stiff peaks form. Gently fold the whipped cream into the thickened banana pudding mixture until just combined.
- Spread the banana pudding mixture evenly over the chilled cheesecake layer.
- Chill the bars for at least 4 hours, or preferably overnight, before slicing.
- Before serving, drizzle with caramel sauce if desired. Lift the bars out of the pan using the parchment overhang and cut into squares.
Notes
- Use firm, ripe bananas for the best flavor in the pudding layer.
- For a more Southern style, you can substitute Nilla Wafers for the crust.
- If you prefer a no-bake option, skip steps 1, 2, and 4, and press the crust mixture into the pan, then top with the chilled cheesecake mixture (made with softened cream cheese, powdered sugar, and whipped topping instead of egg/baking), and then the banana pudding layer.
Nutrition
- Serving Size: 1 bar
- Calories: 320
- Sugar: 25
- Sodium: 210
- Fat: 18
- Saturated Fat: 10
- Unsaturated Fat: 8
- Trans Fat: 0
- Carbohydrates: 36
- Fiber: 1
- Protein: 5
- Cholesterol: 55