

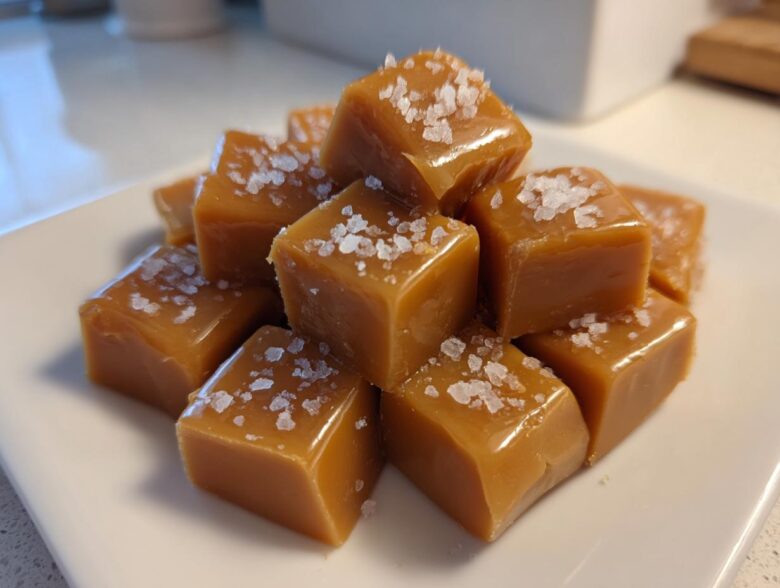
Oh my goodness, there is absolutely nothing on this earth that beats the magic of fresh, homemade candy, and if you think making those perfect, melt-in-your-mouth caramels from scratch is impossible or requires a chemistry degree, you are dead wrong! I’ve been messing around with this recipe for years—seriously, my kitchen counter has seen every possible stage of burned sugar—but I finally nailed it down to something foolproof.
I’m going to show you how to make the absolute dreamiest soft and chewy sea salt caramels. And here’s the best part: whether you love hanging out over the saucepan or you want to use the microwave to skip the whole candy thermometer headache, I’ve got both paths covered for you. Trust me, once you bite into these buttery little squares, store-bought candy is never going to cut it again. I’m so excited for you to try this!
If you want to learn more about my baking philosophy and why ingredient quality matters so much to me, you can always check out my About Page!
Why You Will Love These Soft and Chewy Sea Salt Caramels
I know there are a million candy recipes out there screaming for your attention, but this one truly stands out. I wouldn’t bother sharing it if it didn’t save me time while delivering maximum flavor. Here’s why you absolutely need to make a batch of these this week:
- They are perfectly soft caramels—they pull gently without snapping your teeth, making them addictive!
- You get that gorgeous contrast between the deep, rich caramel flavor and a welcome little kick of finishing sea salt.
- This is truly an easy caramel candy recipe. Seriously, the microwave method is a total game-changer for quick candy.
- We use real butter, which gives you that luxurious, buttery caramel flavor you just can’t fake.
- The texture is reliably chewy caramels without being tough or overly sticky after they cool down.
- It’s a fantastic holiday candy recipe starter—imagine these wrapped up and placed on everyone’s pillow! (Okay, maybe just the kitchen counter.)
Essential Ingredients for Perfect Homemade Caramels
Okay, let’s talk about what goes into these gorgeous little squares. Because we are making these caramels from scratch, the quality of what you put in really matters. I won’t lie, you need a few basic pantry staples, but I absolutely insist on using good quality butter here. That rich, fresh flavor is what turns these into heavenly buttery caramels instead of something just… fine.
Here is exactly what you need to grab before you start mixing. Make sure you measure everything out first—this process moves quickly once you hit the heat!
- 1 cup granulated sugar
- 1 cup light corn syrup
- 2/3 cup heavy cream
- 1/2 cup (1 stick) unsalted butter, cut into pieces
- 1 teaspoon vanilla extract
- 1/2 teaspoon sea salt, plus extra for topping
Ingredient Notes and Substitutions for Chewy Caramels
Now, before you decide to swap things out, let me just tell you why these specific ingredients work magic for achieving that soft, chewy caramels texture. The most important one to leave alone? The corn syrup!
Corn syrup might sound weird if you haven’t done much candy making, but it’s your secret weapon against grainy sugar. It keeps the sugar crystals from locking up on each other, which is what leads to hard, brittle candy instead of the soft chew we want. If you don’t have it, you might have to add a tiny splash of lemon juice to help keep things smooth, but honestly, corn syrup is worth tracking down.
Also, please use heavy cream, not half-and-half or regular milk. The fat content in heavy cream is vital for that super smooth mouthfeel when the caramel sets up. Don’t skimp on the fat when it comes to candy making; it pays off beautifully!
Stovetop Method: Mastering the Art of Classic Caramel Candy
If you’re feeling brave and want the deep, slow-cooked flavor that only comes from the stovetop, this is your route to the best caramels you’ve ever tasted. This is true from scratch candy making, but don’t panic! We just need patience, especially around the temperature.
First, forget about stirring the sugar and corn syrup once it hits the boil—we need that heat to work its magic toward that crucial 245°F target. If you don’t have a thermometer (and I totally get it, they look scary!), you cook it until it’s a deep amber color, which usually takes about 10 to 12 minutes after that steady boil starts. Watch it like a hawk—it goes from perfect to burnt in one breath!
Once you pull it off the heat to whisk in the butter, be ready, because it is going to bubble up like a science experiment! It’s totally normal, but keep whisking until it’s smooth before you even *think* about adding the cream. Once the cream is in and you’re back on low heat, that’s when you stir, stir, stir until you hit that temperature again. Better temperature control means better texture, and we want chewy, not brittle!
If you’re looking for other great uses for heavy cream and sugar, check out my thoughts on making Maple Pecan Granola! It’s a totally different process, but still requires that good old attention to detail.
Crucial Steps for Cooking Your Caramels to Perfection
The first phase is just letting the sugar and corn syrup merge and reach the firm-ball stage—that’s the 245°F marker. Once you add the melted butter, things look thick, but the real drama starts with the cream. Do NOT rush adding the cream back over the heat!
When you return it to medium-low heat, you have to stir constantly. Seriously, keep that spoon moving! Stirring prevents the sugar solids from settling on the bottom and scorching, which would ruin the flavor of your beautiful caramels. Keep stirring until it clouds up and hits that temperature again. If you’re relying on the visual cue, you’re looking for a mix that is significantly deeper in color than when you started—like rich, dark maple syrup. That intense color means flavor!
Quick Candy Recipe: Making Microwave Caramels Without a Thermometer
Okay, I promised the shortcut, and here it is! If I’m being honest, sometimes I don’t even want to pull out the heavy saucepan or deal with the candy thermometer. This brilliant microwave trick is how I whip up a batch of these amazing caramels when I need a quick homemade gift or sudden craving hits.
This method is fantastic because it’s so hands-off during the initial cook time, which really lowers the stress factor involved in candy making. You’re going to combine your sugar, corn syrup, butter, and heavy cream right into a large, sturdy, microwave-safe bowl. Remember: big bowl! This mixture foams up like crazy, and nobody wants exploded caramel residue all over their microwave walls—oops!
The instructions are simple: Microwave it on high for four minutes. Take it out, stir it really well (careful, it’s hot!), and then you return it to the microwave to continue cooking in one-minute bursts. I usually have to do about six or seven more minutes total after that initial four-minute zap for the perfect consistency.
Pay super close attention to the color during those extra rounds. You are looking for a deep, rich amber color. That rich brown signal means the sugar has caramelized just right to give you those wonderful microwave caramels! Once it hits that gorgeous hue, yank it out, stir in your vanilla and salt, and then you treat it exactly like you would the stovetop batch—pour it into the prepared pan!
If you want to see another super fast and easy treat I recommend, you should definitely check out the directions for my quick candy recipe collection!
Finishing and Cutting Your Sea Salt Caramels
Once your beautiful, rich caramel mixture has reached that perfect stage—either by thermometer or by heavenly color—it’s time for the quick finale! Get that vanilla extract and the initial measure of sea salt ready. Whisk them in quickly right after you take the pan off the heat. It won’t look like much changes, but the vanilla really deepens that classic flavor profile in your sea salt caramels.
Then, immediately pour that gorgeous, hot liquid into your prepared 8×8 pan. Don’t try to scrape every last bit out; just pour it smoothly. Now, here’s the visual payoff: grab your flaky sea salt and sprinkle it liberally over the top. Don’t be shy! That salty crunch is what makes these so addictive.
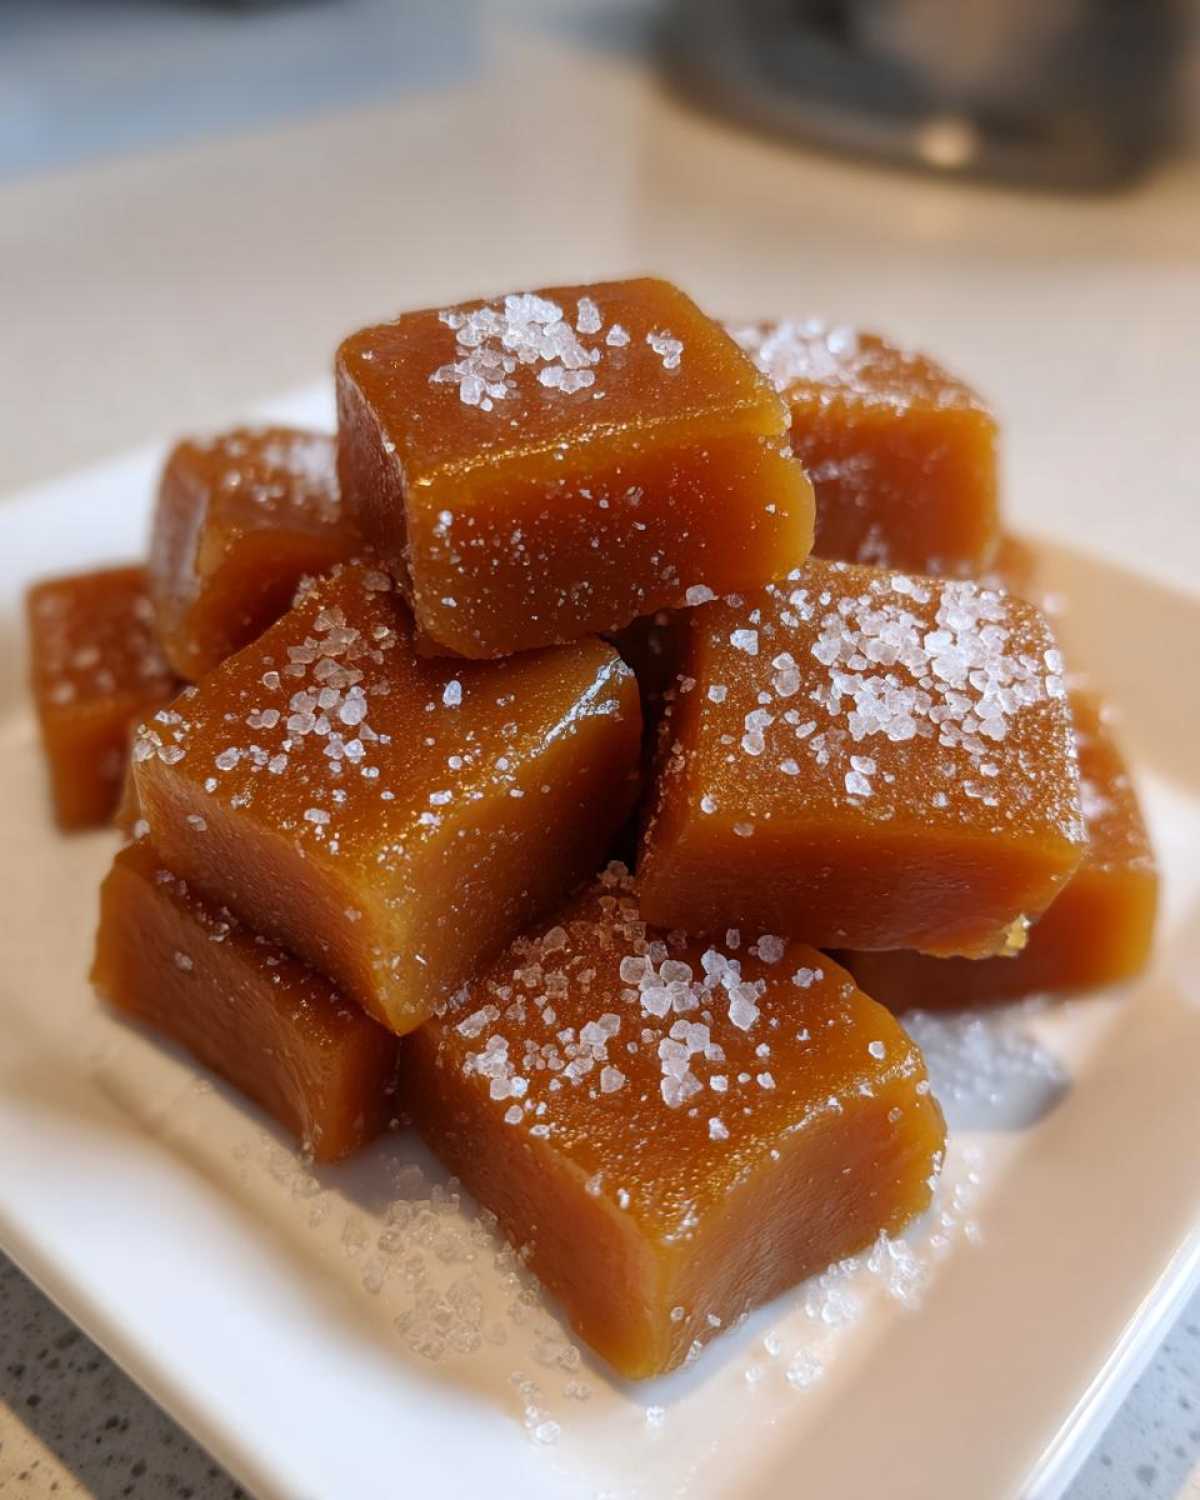
Resist the urge to touch it! These need to chill out completely at room temperature for at least three hours. You seriously have to let them cool completely before slicing. Once they are firm, lift the whole block out using those parchment paper overhangs we put in place earlier—like lifting a giant, chewy blanket. Then, just run a sharp knife through them to get your perfect squares!
Tips for Success When Making Homemade Caramels
Listen, even with the best instructions, candy making can throw you a curveball. That’s why I learned the hard way all the little things that keep your batches of homemade caramels perfect every single time. Don’t let a little crystallization scare you off—we’re going to troubleshoot!
First, let’s talk about your setup. Get your pan ready *before* you even turn on the stove. Lining that 8×8 pan with parchment paper and leaving those long flaps sticking up on two sides is non-negotiable. When the caramel gets rock hard, you need those handles to lift it out cleanly. Lightly greasing the paper helps too, just for good measure. A poorly prepped pan equals a broken caramel block, and trust me, nobody wants that frustration!
Next, temperature control isn’t just for the stovetop, even if you use the microwave! If you can, try to let your heavy cream sit on the counter for about 20 minutes before you use it. Room temperature cream shocks the boiling sugar mixture a lot less than ice-cold cream does. A less drastic temperature shift helps keep everything smooth when you pour it in.
If you are making these for gifting, don’t skip the final sprinkle of salt! That flaky salt on top is what elevates this from simple sugar to gourmet treats. Try to sprinkle it evenly across the top right after you pour it into the pan. The final product looks so professional, and it’s the first thing people will comment on!
Finally, if you are worried about burning the butter or the sugar mixture sticking while you whisk, try wiping the sides of your pot down with a wet pastry brush while you are waiting for the boil. This washes stray sugar crystals back into the liquid, preventing those little hard bits from forming and seeding crystallization throughout your whole batch of caramels. It’s an old-school trick that keeps things super clean!
If you are interested in another recipe where browning the butter makes a huge, delicious difference, you have to try my Brown Butter Chocolate Chip Cookies next!
Storage and Gifting Your Gourmet Homemade Candy
Now that you’ve made these incredible caramels, the biggest challenge is keeping your hands off them until you’re ready to share! Luckily, these things keep really well, which is perfect if you’re like me and plan on making them way ahead of schedule for the holidays.
The best way to store these soft beauties is in a single layer, or stacked separated by small squares of wax paper, inside a completely airtight container. You need that seal to keep moisture out, otherwise, they can get sticky! I always store mine at cool room temperature—never the fridge. Refrigerating them tends to make the texture a little too firm for my liking, and we are going for soft and chewy here, remember?
If you store them correctly, these caramels should stay perfectly soft and delicious for at least two weeks. Sometimes longer, but honestly, they never last that long around here!
Wrapping for Homemade Gifts
If you’re planning on packaging these up for homemade gifts—and you absolutely should, because who wouldn’t want this?—I have a couple of tips for wrapping. Leaving them unwrapped and touching each other in a jar is a recipe for a sticky, unified caramel blob. Don’t do that!
You need to cut them into squares first, obviously. Then, take little squares of wax paper or clear cellophane and wrap each one individually. Twist the ends tightly like little candies from the old-fashioned movie theaters. This keeps the moisture locked in and keeps them from sticking to one another in the gift bag or tin.
If you wrap them like this, they look so professional and gourmet! Tossing a handful of these beautifully wrapped treats into a tin alongside some homemade cookies? Instant holiday magic! You can find some neat wrapping ideas on my page dedicated to homemade gifts if you need a little visual inspiration before you start wrapping your bounty of candy.
Frequently Asked Questions About Soft Caramels Recipe
I know you might have a few last-minute questions swirling, especially if this is your first adventure getting into candy making! That’s totally fine. I’ve answered the usual speed bumps people hit when trying to achieve these perfect soft caramels recipe results. I want this to be easy for you!
Can I make these caramels ahead of time?
Oh, absolutely! That’s the best part about making holiday candy recipes. Once they are completely cooled, cut, and individually wrapped, they store beautifully at room temperature for up to two weeks in that airtight container we talked about. They actually seem to improve slightly after about 24 hours—the flavor deepens! Just make sure your kitchen isn’t scorching hot, as that can make them stick together, even when wrapped.
What causes my caramels to become grainy?
This is the big fear for anyone trying from scratch candy making, right? Graininess almost always comes down to crystallization. It happens when sugar molecules regroup into crunchy crystals instead of staying dissolved in the syrup. The main culprit is usually stirring when you shouldn’t—like while the sugar is dissolving, or right after it starts boiling vigorously before you add the mix-ins.
If you follow my advice about using corn syrup, that should prevent 90% of graininess. But if you notice little sugar grains forming on the side of your pot during cooking, grab a clean pastry brush dipped in hot water and gently wipe those rogue crystals back down into the syrup. That cleans up the edges and keeps your batch smooth. Don’t worry, it happens to everyone now and then!
What is the best pan size for these caramels?
I specifically developed this recipe to fit perfectly into an 8×8 inch square baking dish. This size ensures that the depth of the caramel is just right to hit the perfect setting point for that ideal chewy caramels texture—usually around 1 inch thick before cutting. If you go much bigger, say a 9×13 pan, the layer will be too thin, and those homemade caramels will cook faster and end up too hard.
If you prefer a thicker square, you could use a smaller 7×7 pan, but you will definitely need to increase your cook time because the heat takes longer to get through the thicker mixture. Stick to 8×8 for the best, most reliable results with this recipe!
Is the vanilla extract essential for these vanilla caramels?
While the main body of the flavor comes from the cooked sugar and butter, please don’t skip the vanilla! It’s the flavor that ties everything together and pushes these over the edge into gourmet homemade candy territory. It adds warmth and complexity that balances the sweetness. Seriously, even a tiny amount really wakes up the flavor on your tongue.
If you have any other burning questions while you’re organizing your candy station, feel free to get in touch through my Contact Page! Happy cooking!
Nutritional Estimate for Classic Caramel Candy
Since we are dealing with pure, simple ingredients like butter, sugar, and cream, you know these are a treat! However, I always like to give folks a heads-up on what they are enjoying. Remember, these numbers are highly estimated, based on the exact ingredient amounts listed, and they assume you get about 40 perfect squares out of the batch. If you cut them smaller—which I advise!
Here’s a quick look at the general estimates for one single square of these classic caramel candy squares:
- Serving Size: 1 square
- Calories: 105
- Fat: 3.5g
- Saturated Fat: 2.2g
- Carbohydrates: 18g
- Sugar: 18g (Yes, that’s most of the carbs!)
- Protein: 0.2g
- Sodium: 35mg
Enjoy them in moderation, knowing every single one was made with love! For more information on how I calculate nutrition estimates on the site, please check out my Disclaimer Page. Enjoy those caramels!
Nutritional Estimate for Classic Caramel Candy
Since we are dealing with pure, simple ingredients like butter, sugar, and cream, you know these are a treat! However, I always like to give folks a heads-up on what they are enjoying. Remember, these numbers are highly estimated, based on the exact ingredient amounts listed, and they assume you get about 40 perfect squares out of the batch. If you cut them smaller—which I advise!
Here’s a quick look at the general estimates for one single square of these classic caramel candy squares:
- Serving Size: 1 square
- Calories: 105
- Fat: 3.5g
- Saturated Fat: 2.2g
- Carbohydrates: 18g
- Sugar: 18g (Yes, that’s most of the carbs!)
- Protein: 0.2g
- Sodium: 35mg
Enjoy them in moderation, knowing every single one was made with love! For more information on how I calculate nutrition estimates on the site, please check out my Disclaimer Page. Enjoy those caramels!
PrintEasy Soft and Chewy Sea Salt Caramels
Make soft, chewy sea salt caramels easily using this recipe, which offers both a stovetop and a no-thermometer microwave option.
- Prep Time: 10 min
- Cook Time: 20 min
- Total Time: 190 min
- Yield: About 40 pieces
- Category: Dessert
- Method: Stovetop or Microwave
- Cuisine: American
- Diet: Vegetarian
Ingredients
- 1 cup granulated sugar
- 1 cup light corn syrup
- 2/3 cup heavy cream
- 1/2 cup (1 stick) unsalted butter, cut into pieces
- 1 teaspoon vanilla extract
- 1/2 teaspoon sea salt, plus extra for topping
Instructions
- Prepare an 8×8 inch pan by lining it with parchment paper, leaving an overhang on two sides for easy removal. Lightly grease the paper.
- Combine the sugar and corn syrup in a heavy-bottomed saucepan over medium heat. Stir until the sugar dissolves.
- Stop stirring once the mixture boils. Cook until the mixture reaches 245 degrees Fahrenheit on a candy thermometer (firm-ball stage). If you are not using a thermometer, cook for about 10 to 12 minutes after it starts boiling, watching carefully.
- Remove the pan from the heat. Carefully whisk in the butter until it melts completely. The mixture will bubble vigorously.
- Slowly pour in the heavy cream while whisking constantly. Return the pan to medium-low heat. Stir continuously until the mixture reaches 245 degrees Fahrenheit again, or cook for another 3 to 5 minutes after the cream is added.
- Remove from heat. Stir in the vanilla extract and 1/2 teaspoon of sea salt.
- Pour the hot caramel mixture into the prepared pan. Sprinkle the top evenly with extra sea salt flakes.
- Let the caramel cool completely at room temperature for at least 3 hours, or until firm.
- Use the parchment overhang to lift the block of caramel out of the pan. Cut into small squares. Wrap individually if desired.
Notes
- For the microwave method: Combine sugar, corn syrup, butter, and cream in a large, microwave-safe bowl. Microwave on high for 4 minutes. Stir well. Microwave in 1-minute intervals, stirring after each, until the mixture reaches a deep amber color (about 6 to 8 minutes total after the first 4 minutes). Stir in vanilla and salt. Proceed to step 4.
- If you prefer a softer caramel, slightly reduce the cooking time or temperature.
- Store caramels in an airtight container at room temperature for up to two weeks.
Nutrition
- Serving Size: 1 square
- Calories: 105
- Sugar: 18g
- Sodium: 35mg
- Fat: 3.5g
- Saturated Fat: 2.2g
- Unsaturated Fat: 1.3g
- Trans Fat: 0.1g
- Carbohydrates: 18g
- Fiber: 0g
- Protein: 0.2g
- Cholesterol: 8mg