

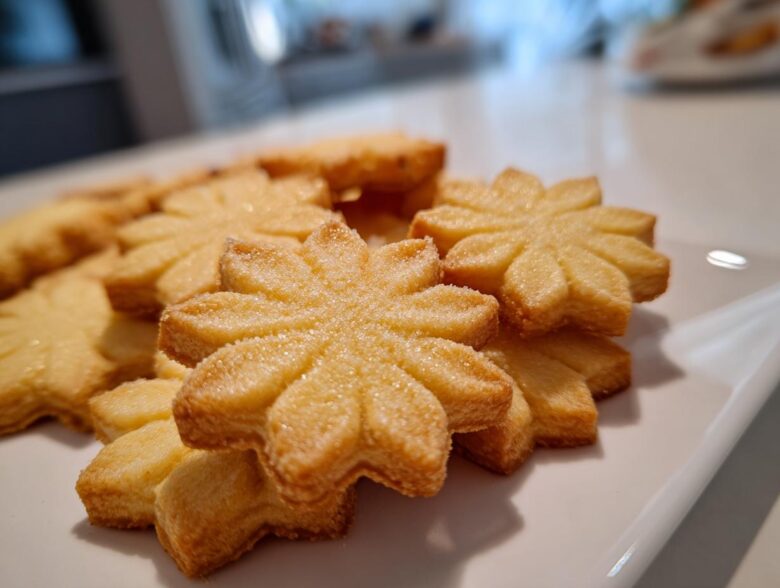
Oh, I swear, there is nothing that smells better than a fresh batch of homemade butter cookies baking in the oven. That rich, sweet aroma just pulls you right back to childhood holidays, doesn’t it? Well, stop hunting through those massive tins full of dry, packaged ones! I’ve spent years—and trust me, I mean *years*—perfecting this recipe to make sure these turn out perfectly tender, like they actually melt the second they hit your tongue. This is, without a doubt, the easiest recipe for classic melt-in-your-mouth cookies you will ever find. We aren’t fooling around with weird chilling times or complicated steps. We want simple, buttery perfection, and we want it now!
Why This Is the Best Classic Butter Cookies Recipe (Easy Homemade Butter Cookies)
If you’re tired of complicated Christmas cookie ideas that require you to wait overnight, you’re going to love this. This recipe delivers the ultimate soft, buttery cookie experience without all the fuss. Seriously, these are the gold standard for easy homemade butter cookies.
Here’s why you need to stop what you’re doing and make this batch of the best butter cookie recipe right now:
- Super Quick Prep: You can have the dough mixed and ready to bake in under 20 minutes. It’s basically a no chill cookie recipe waiting to happen!
- Texture Heaven: They really are melt in your mouth cookies. The balance of ingredients gives that satisfying, tender crumb every time.
- Totally Versatile: Whether you have a piping bag ready for fancy piped butter cookies or you just want to use tablespoons for scooped butter cookies, it handles both beautifully.
- Basic Baking Recipes Only: We are sticking to basic baking recipes here—just the good stuff, like real butter and vanilla.
Ingredients for Tender Butter Cookies
When you’re making something this simple, the quality of the ingredients really shines through! You only need six things, but make sure you bring them all to room temperature before you start mixing. That’s crucial for getting those buttery cookies just right.
Here is exactly what you’ll need for about three dozen tender little bites:
- 1 cup (2 sticks) unsalted butter, softened—and I mean *softened*, not melted!
- 3/4 cup granulated sugar
- 1 large egg yolk (just the yolk!)
- 1 teaspoon vanilla extract
- 2 1/2 cups all-purpose flour
- 1/4 teaspoon salt
Ingredient Notes and Substitutions for Your Butter Cookies
The butter is non-negotiable. Please use unsalted butter so you can control the salt level yourself. If you splurge on a higher-quality European-style butter, you’ll notice a richer flavor, which is key for these rich vanilla cookies.
And about that egg yolk? It’s not a mistake! That extra fat helps keep these melt in your mouth cookies from spreading too thin and keeps them wonderfully tender. If you want a deeper vanilla kick—go for vanilla bean paste instead of the extract. It gives you those lovely little black specks, too!
Step-by-Step Instructions for Perfect Butter Cookies
Okay, let’s get baking! Remember, the oven needs a good head start, so go ahead and preheat it to 350°F (175°C) right now. Line those baking sheets with parchment paper too—it makes cleanup so much easier, trust me. We only have a few steps until you have those amazing tender butter cookies!
Creaming and Dough Preparation for Classic Butter Cookies Recipe
Grab your largest bowl for this. You need to beat that softened butter and sugar together until it looks pale yellow and fluffy. This is called creaming, and it adds air! Then, blend in that single egg yolk and the vanilla extract really well until everything is happy and combined.
Now, add the flour and salt gradually. And here’s the big warning for this classic butter cookies recipe: Mix on the lowest speed only until the flour disappears. If you overmix your butter cookies dough here, they turn tough, and we want melt-in-your-mouth heaven! Stop as soon as it forms a soft dough.
Shaping Your Piped Butter Cookies or Scooped Butter Cookies
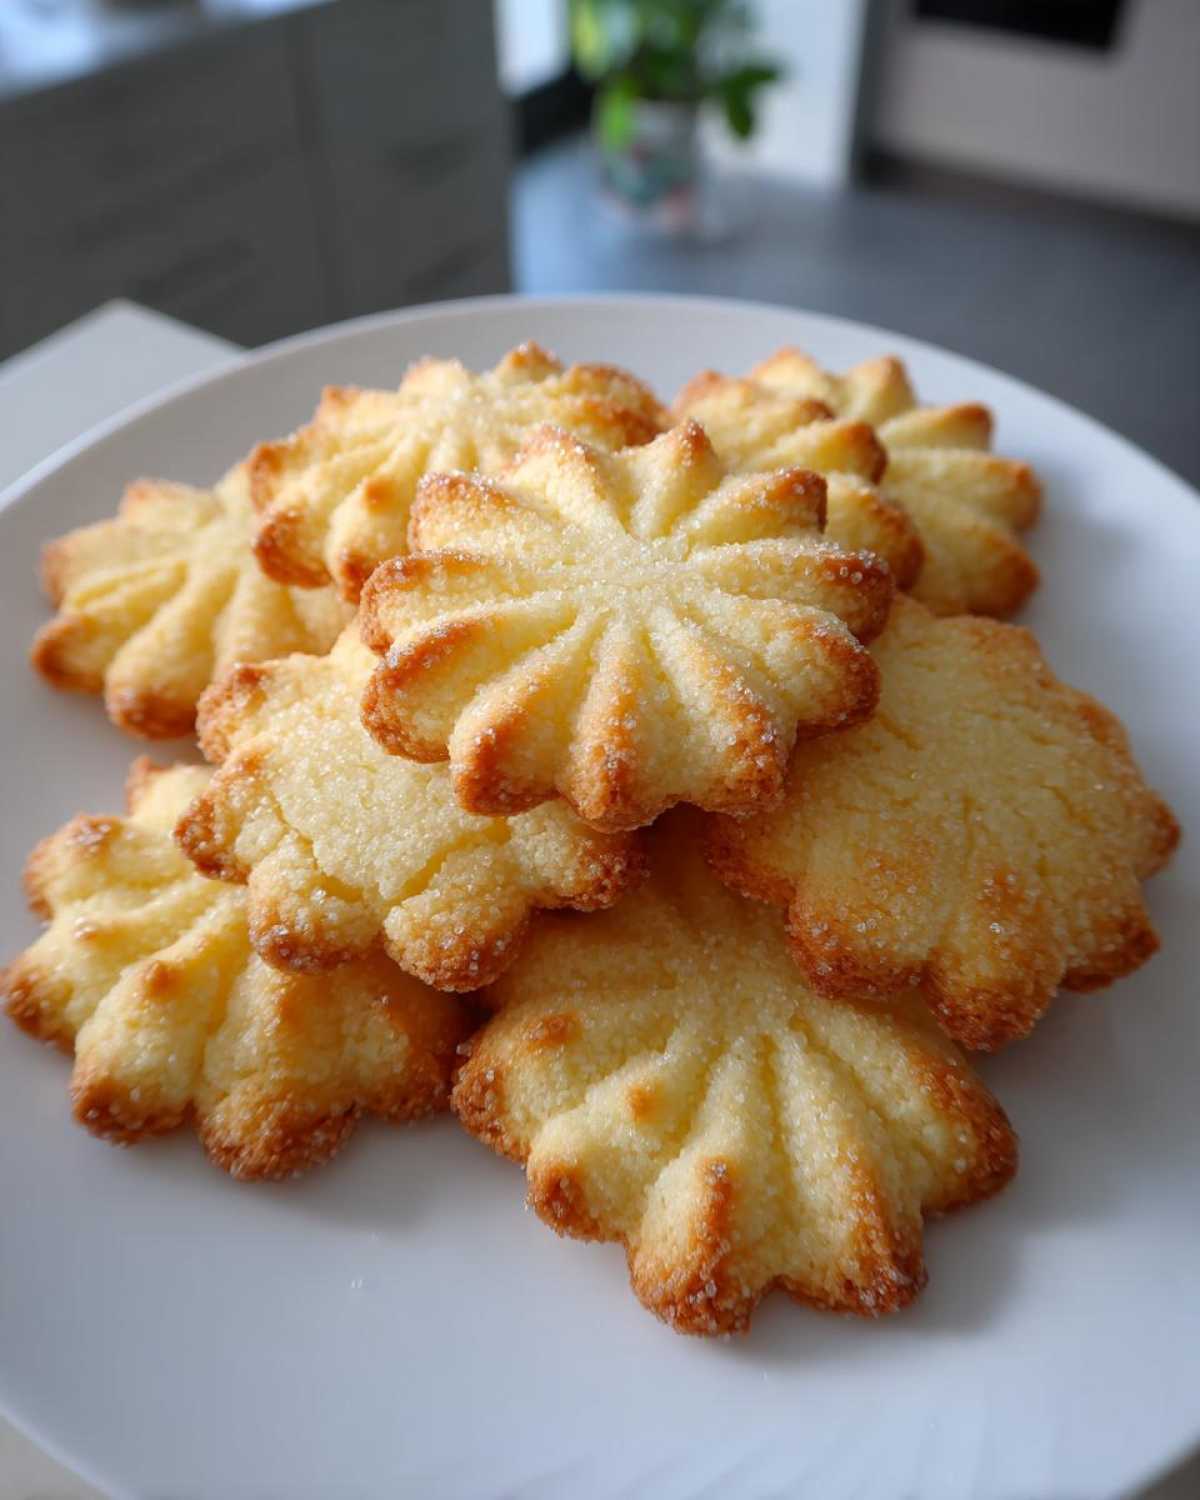
Now you choose your adventure! If you want those pretty ridged tops, scoop all that dough into a pastry bag fitted with a star tip. You can pipe any little shape you like—rosettes are my favorite for fancy piped butter cookies.
If you are skipping the piping bag because you want speed, just use two spoons or a small cookie scoop to drop rounded tablespoons of dough onto your lined sheets. If you’re scooping, just gently press down on the top of each mound with the tines of a fork to flatten them slightly. You’re making gorgeous scooped butter cookies!
Bake these rich vanilla cookies for just 10 to 12 minutes. You want the edges to just *barely* start turning golden brown. Pull them out right then! They finish baking outside the oven, which keeps the centers super soft.
Tips for Achieving Flawless Butter Cookies Every Time
Baking is all about paying attention to the little details when you’re working with something as delicate as this butter cookies dough. Listen, ovens lie! Don’t just trust the dial; trust your eyes. My biggest tip for perfect buttery cookies that don’t end up crispy instead of tender is watching the color.
You are looking for pale gold edges, nothing more. If you see them turning dark brown, pull the tray out immediately—I promise, they cook way faster than whatever the timer tells you!
Here are a few things I learned the hard way over the years when trying to get these right for my neighbor’s potlucks:
- Don’t Skip the Five-Minute Wait: When they come out, leave those cookies right there on the hot baking sheet for five full minutes before you touch them. They look fragile, and they are! That short cooling period on the hot metal lets them set up just enough so they don’t crumble when you move them.
- Chill for Crisper Piping: If you want really sharp, professional-looking piped butter cookies, the dough needs to be cold. If your kitchen is warm, or if the dough feels greasy while you’re bagging it up, pop the whole bag into the fridge for 30 minutes. The cleaner the dough, the sharper the edges when baked.
- Rotate Your Pans: Ovens always have hot spots. If you are baking a huge batch of these simple cookie recipes, halfway through the baking time, I spin my pans around 180 degrees just to make sure everything browns up evenly.
For more helpful advice on mastering your kitchen adventures, check out my main baking blog for general tips and tricks!
Making Danish Butter Cookie Recipe at Home Variations
Now, I know a lot of you searched for the Danish butter cookie recipe at home, and while this recipe leans toward the American pantry style, shhh—it’s basically a cousin! These are very similar to shortbread style cookies because they rely so heavily on real butter for that melt-in-your-mouth quality. If you want that distinct Danish snap, you have two easy options.
First, temperature matters when you’re talking about mimicking that texture. If you decide to chill this dough a little longer—say, an hour—it firms up, and you can use a traditional cookie press with that patterned disc. That’s how you get those beautifully detailed, firm butter cookies that look like they came straight from Copenhagen!
Second, flavor modification! For a slightly different profile, try swapping out half the vanilla extract for almond extract. Almond gives that specific, subtle nuttiness that many associate with the classic imported tins. It turns these rich vanilla cookies into something extra special.
And for a fun twist that’s perfect for holiday butter cookies, don’t forget the chocolate dipping! Once these cooled treats are completely cold, just melt down some good quality semi-sweet chocolate. Dip half the cookie, lay it on parchment paper, and let it set up. It makes them look fancy, but it’s so easy! If you want to see how I handle other classic baked goods, check out my recipe for apple cinnamon muffins—it uses similar techniques for great texture!
Storage and Making Ahead Tips for Your Butter Cookies
The best part about having a reliable, fantastic recipe for these cookies is that you can totally make them ahead for parties or stock up for the holidays! Nobody wants to be stressed out baking on Christmas Eve, right? The good news about these simple cookie recipes is that they hold up beautifully, which makes planning gatherings a breeze.
For the fully baked cookies, you absolutely must use an airtight container. Don’t even think about using plastic wrap alone! If you stack them, put a small square of parchment paper between the layers. This keeps them from sticking together and protects that perfect, slightly crumbly texture we worked so hard to achieve. Stored this way at cool room temperature, they stay fresh and tender for a solid week. Honestly, they usually don’t last that long around here!
If you’re planning a huge event or just want to save some fresh dough for later, freezing is your best friend. You can easily freeze the dough either shaped or as a log. If you shaped them already—maybe you piped little swirls—layer them onto a baking sheet and flash freeze them until solid. Then, move those frozen rounds into a freezer bag. When you’re ready to bake, pop them straight from the freezer onto the prepared sheet and add maybe 3 to 4 extra minutes to the baking time. Easy peasy!
If you want to freeze the dough in a log, just roll it up tightly in plastic wrap, maybe even wrapping it in foil for extra protection against freezer smells. You can slice them right from the freezer, though they might be a tad colder than room temperature dough. For more great tips on prepping food ahead of time, especially great for busy seasons, take a peek at my advice on freezer breakfast burritos—the freezing methodology is very similar!
Frequently Asked Questions About Classic Butter Cookies Recipe
This happens every time I post a recipe! People always have the *best* questions, and I love digging into the nitty-gritty details to make sure your classic butter cookies recipe turns out exactly how you hoped. Here are a few things I get asked most often about making these amazing cookies.
Can I make these butter cookies without a piping bag?
Oh, absolutely, yes! Don’t let a lack of piping equipment stop you. Piping just makes them look fancy, but you get the exact same amazing flavor and texture when you go the scoop route. For truly easy homemade butter cookies, just use a spoon or a small cookie scoop to drop balls of dough onto the sheet. Then, grab a fork and gently press down on each ball to flatten it slightly before baking. They might spread a tiny bit more than the piped ones, but they are still going to be wonderfully soft and delicious!
What is the best way to get rich vanilla cookies flavor?
Since this recipe is built around such simple, pure flavors, using high-quality vanilla makes a huge difference. If you can find *real* vanilla bean paste, that is my number one suggestion for those luxurious rich vanilla cookies. You see those tiny black specks? That’s quality right there! If you can’t find paste, make sure you use a pure vanilla extract, not the imitation stuff.
Also, if you want to mix things up next time, try swapping out maybe a quarter teaspoon of the vanilla for pure almond extract. It won’t taste like marzipan, but it adds this amazing depth that really enhances the richness of the butter without overpowering the main flavor.
What makes these ‘butter cookies’ different from shortbread?
That’s a fantastic question, especially since both are so buttery! The main difference is the egg yolk and the sugar ratio. Traditional shortbread usually has no eggs—it’s just butter, flour, and sugar. That lack of egg binder is why shortbread is usually crispier and crumblier, almost like a sturdy wedge. These butter cookies include that single yolk, which adds just enough moisture and richness to keep them very soft and tender, making them much closer to that melt in your mouth cookies texture we are aiming for, rather than a hard snap.
Can I use salted butter for these cookies?
You *can*, but I really, really advise against it for your first batch. Since this is such a simple recipe, the salt level is one of the few variables you can control! If you use salted butter, make sure you omit the 1/4 teaspoon of salt listed in the ingredients. Keep in mind, the salt content varies wildly between butter brands, so you might end up with cookies that taste too salty. Stick to unsalted, and add precisely what the recipe calls for!
Estimated Nutritional Values for These Butter Cookies
Now, I know finding out the numbers isn’t always the fun part of baking, but if you’re keeping track, it’s good to have a ballpark idea of what you’re enjoying! Since homemade recipes vary based on exact ingredients (like the brand of flour or butter you use), please keep this information handy as a very close estimate only. This breakdown is calculated based on dividing the entire recipe yield into 36 cookies.
Think of these figures as a general guide for a single, perfectly baked treat. For official verification, you’d want to refer to professional USDA databases, but for our kitchen purposes, this should give you a good snapshot of the ingredients you’re using!
Here is the estimated nutrition based on one cookie serving size:
- Calories: 110
- Total Fat: 7g (That’s where that incredible flavor comes from!)
- Saturated Fat: 4.5g
- Carbohydrates: 11g
- Sugar: 7g
- Protein: 1g
- Sodium: 35mg
As you can see, these are rich! They’re best enjoyed in moderation with a great cup of coffee or black tea. Remember, this data is based on the ingredients listed above, and for complete details, you can always review my general site disclaimer regarding nutritional calculations.
Share Your Best Butter Cookies Creations
Whew! You made it! You’ve got the absolute best, time-tested, melt in your mouth butter cookies recipe right here, and now it’s time to put it to the test in your own kitchen. I truly hope that warm, buttery smell fills your house!
But don’t let the baking stop here! I absolutely live for hearing about how these recipes turn out for you all. Did you stick to the classic scoop? Did you conquer the star tip and make beautiful piped butter cookies? Did you cave and dip half of them in dark chocolate—I hope you did!
Please, please leave me your feedback below. Tell me how many stars this recipe gets from your family! Comments and ratings really help other bakers know that this is the real deal when they’re hunting for simple cookie recipes.
If you tried a fun variation—maybe you added a sprinkle of sea salt right before baking, or tried making them into tiny sandwich cookies—snap a picture and tag me on social media! I love seeing your versions of my favorite holiday cookies. It always gives me ideas for what to try next time. If you need to get in touch with me directly with complex questions or just to say thank you, you can always reach out via my contact page. Happy baking, my friends!
PrintClassic Melt-in-Your-Mouth Butter Cookies
A simple recipe for classic butter cookies that yield a tender, rich vanilla flavor. You can pipe or scoop these cookies.
- Prep Time: 15 min
- Cook Time: 12 min
- Total Time: 27 min
- Yield: About 3 dozen
- Category: Dessert
- Method: Baking
- Cuisine: American
- Diet: Vegetarian
Ingredients
- 1 cup (2 sticks) unsalted butter, softened
- 3/4 cup granulated sugar
- 1 large egg yolk
- 1 teaspoon vanilla extract
- 2 1/2 cups all-purpose flour
- 1/4 teaspoon salt
Instructions
- Preheat your oven to 350°F (175°C). Line baking sheets with parchment paper.
- In a large bowl, beat the softened butter and sugar together until light and fluffy.
- Beat in the egg yolk and vanilla extract until combined.
- Gradually add the flour and salt. Mix on low speed until just combined into a soft dough. Do not overmix.
- For piped cookies: Transfer the dough to a pastry bag fitted with a star tip. Pipe desired shapes onto the prepared baking sheets.
- For scooped cookies: Drop rounded tablespoons of dough onto the prepared baking sheets, leaving about 2 inches between each cookie. Flatten slightly with a fork if desired.
- Bake for 10 to 12 minutes, or until the edges are lightly golden brown.
- Let the cookies cool on the baking sheet for 5 minutes before transferring them to a wire rack to cool completely.
Notes
- For a richer flavor, use high-quality European-style butter.
- If you prefer a firmer cookie, chill the dough for 30 minutes before piping or scooping.
- You can dip the cooled cookies halfway into melted chocolate for variation.
Nutrition
- Serving Size: 1 cookie
- Calories: 110
- Sugar: 7
- Sodium: 35
- Fat: 7
- Saturated Fat: 4.5
- Unsaturated Fat: 2.5
- Trans Fat: 0
- Carbohydrates: 11
- Fiber: 0.2
- Protein: 1
- Cholesterol: 25