

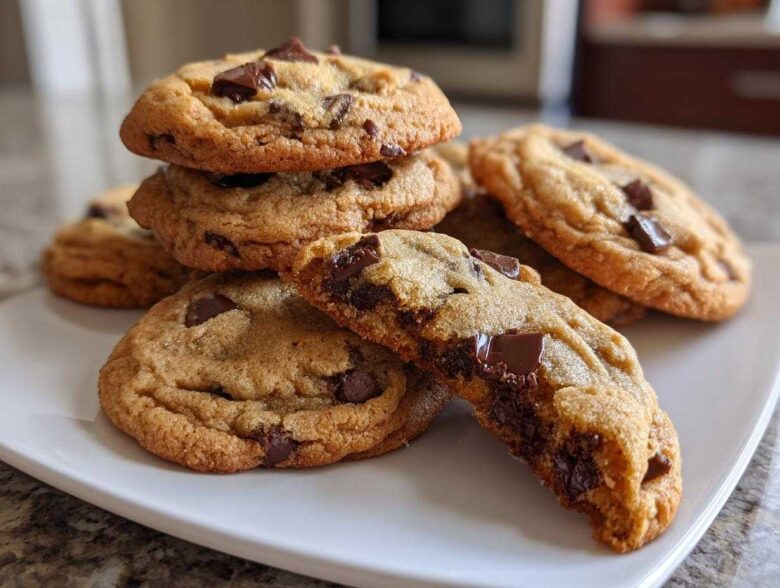
Are you tired of sinking into that moment of pure craving, only to bite into a cookie that’s flat, crunchy, or just… sad? Oh, trust me, Noah and I have been there! We treated our early baking attempts like data entry, and the results showed it. But when we decided to focus our strategy on happiness instead of spreadsheets, we knew the project needed a baseline standard: the homemade chocolate chip cookies of our dreams. After weeks of testing different fats, sugars, and mixing speeds, we finally cracked the code. This isn’t just a recipe; it’s our perfected blueprint for achieving that thick, bakery style cookie with those unbelievably soft, chewy centers every single time. Welcome to the foundation of the Epicure Empire! You can learn more about our mission here.
Why This Recipe for Homemade Chocolate Chip Cookies is Your New Favorite
If your kitchen quest always ends in flat, crunchy, or just… sad cookies, stop right now! We have been there, treating baking like data entry, but when we decided to focus our strategy on happiness, we knew we needed the homemade chocolate chip cookies of our dreams. This blueprint for cookies finally delivers that bakery style thickness, those unbelievably soft, chewy center textures, and those perfectly crisp edges! We’ve crowned this the Best Chocolate Chip Cookie Recipe testers have ever tasted. I remember the day we nailed it—Noah tweaked the sugar, and the cookie snapped perfectly while staying soft inside. That moment secured the Perfect Cookie Texture for our empire!
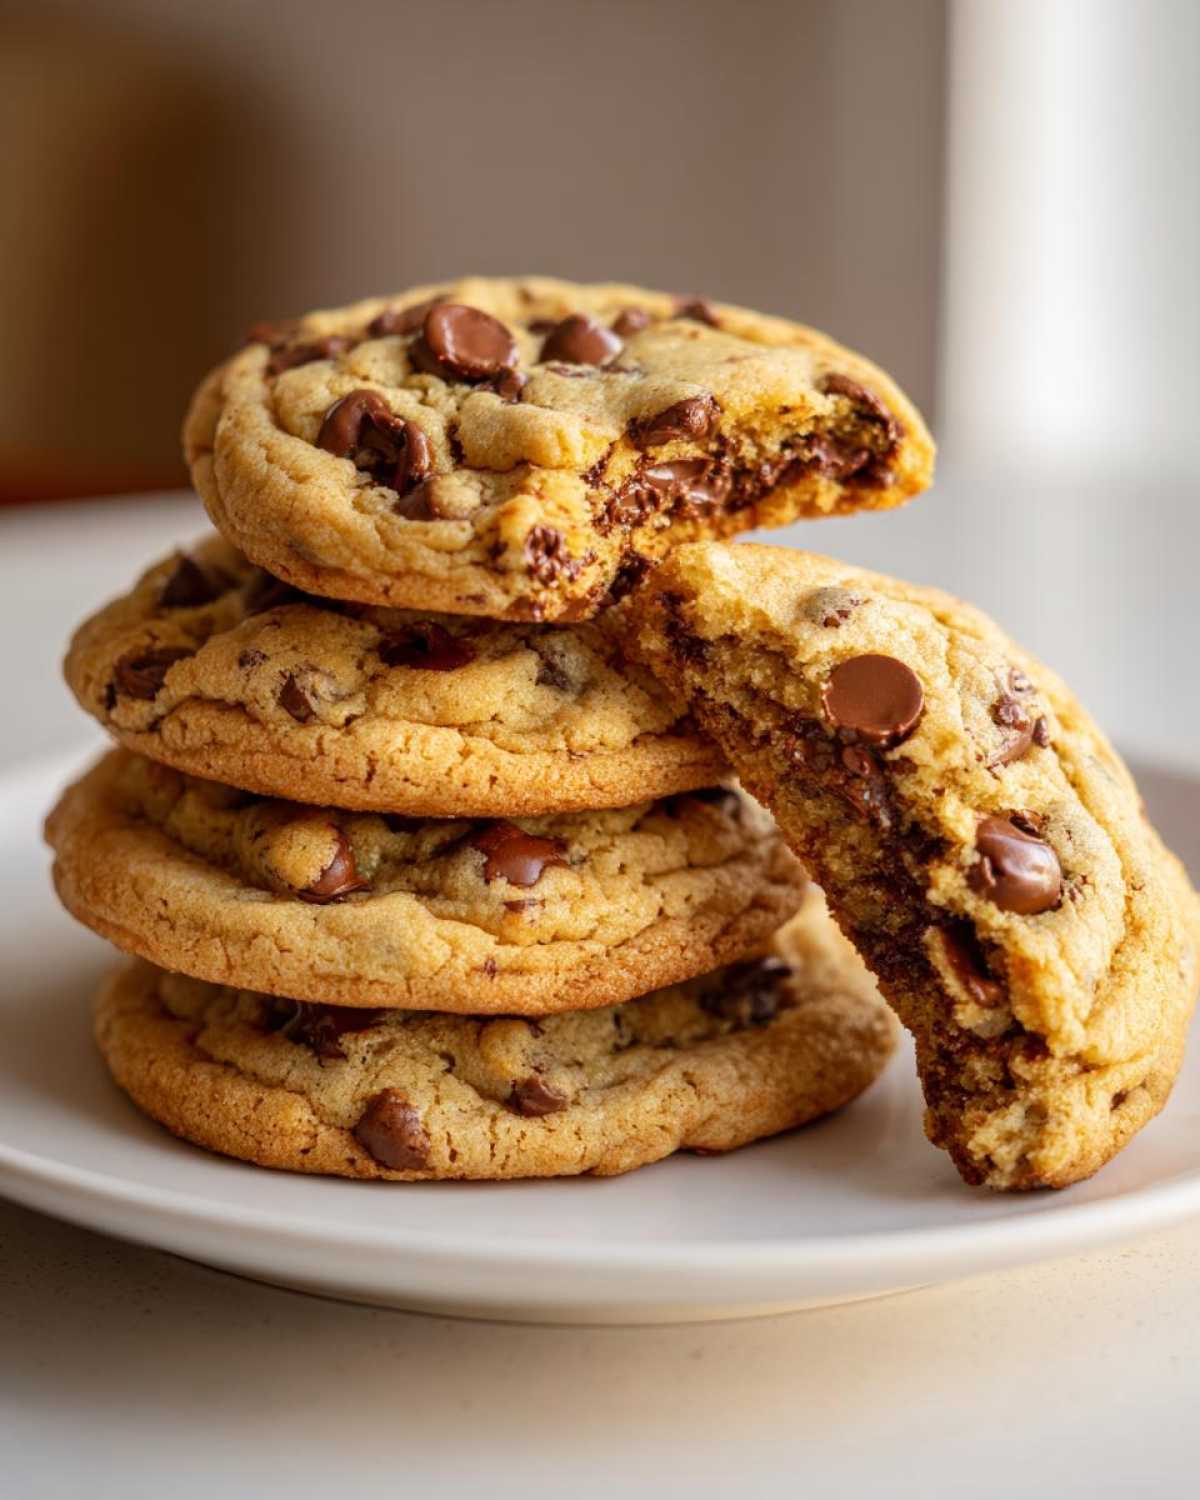
Achieving Bakery Style Cookies Texture
It really comes down to a couple of tactical temperature decisions that Noah obsessed over. We really need room-temperature, but not warm, butter, and we need that specific balance between brown sugar for moisture and white sugar for structure. That precise ratio is what keeps our cookies from spreading right away. It’s the tactical application of fat that guarantees those stunningly thick results you see everywhere.
Quick Cookie Recipe 30 Minutes Prep Time
The best part about this entire project is how fast it is! Once you get the creaming down, you’re looking at maybe 15 minutes of active work before they go into the oven. That makes this one of the absolute best Easy Homemade Cookies solutions when a craving hits fast. Trust me, a fresh batch of homemade chocolate chip cookies always saves the day!
Ingredients Needed for Ultimate Homemade Chocolate Chip Cookies
Okay, here is the ingredient blueprint for our **ultimate homemade chocolate chip cookies**. This isn’t a time to guess! Every single measurement matters if you want those thick, chewy, bakery-style results. Get your measuring cups ready, because precision is how we win this flavor battle.
- 1 cup (2 sticks) unsalted butter, softened to room temperature (remember, unsalted allows us to control the salt level!)
- ¾ cup granulated sugar
- ¾ cup packed light brown sugar (make sure it’s packed tight!)
- 2 large eggs, at room temperature
- 1 tablespoon vanilla extract (use the good stuff, it makes a difference!)
- 2 ¼ cups all-purpose flour
- 1 teaspoon baking soda
- 1 teaspoon salt
- 2 cups semi-sweet chocolate chips (see my notes below for the secret switch!)
Ingredient Notes and Substitutions for Buttery Chocolate Chip Cookies
I know it seems tedious, but please listen to me about a few of these steps; they move us from ‘good’ cookies to ‘epic’ cookies. First, your eggs and butter absolutely need to be at room temperature. If they are cold, they don’t cream properly, and you won’t get the air pockets we need for that soft texture.
Also, we use unsalted butter because we control the salt right alongside the baking soda. If you only have salted, just cut the added teaspoon of salt down to ¼ teaspoon. This ensures we get that ultra-buttery flavor we love.
Now for the chocolate chips! The recipe calls for two cups of semi-sweet, but my favorite trick—and this is a note from Noah—is to use 1 ½ cups semi-sweet and ½ cup milk chocolate chips. That little bit of milk chocolate melts creamier and gives it that perfect gooey pull. You can find some great banana bread recipes using similar baking principles over here, but stick with your palate for the chocolate!
Step-by-Step Instructions for Perfect Homemade Chocolate Chip Cookies
Alright, let’s get into the operational plan! Following these steps ensures you move past just ‘making cookies’ and start building our **homemade chocolate chip cookies** empire. Preheat your oven to 375 degrees—don’t even think about putting dough in until that temperature is locked in. Line those sheets with parchment paper, too; Noah calls that oven readiness, and it saves us scrubbing later!
Creaming Butter and Sugars for Soft Gooey Center Cookies
This is the most important tactical move. We need that butter and sugar mixture to be light and fluffy because that’s where all the air gets trapped. Trust me, if your mixture looks dense or grainy going into the eggs, you’ve lost the battle for that soft, gooey center. Beat these two ingredients until they look truly pale and fluffy—it needs time! Then, beat in those room-temperature eggs one by one, mixing until everything is fully incorporated before you even think about touching the flour. This air structure is what separates a good dessert from a spectacular one.
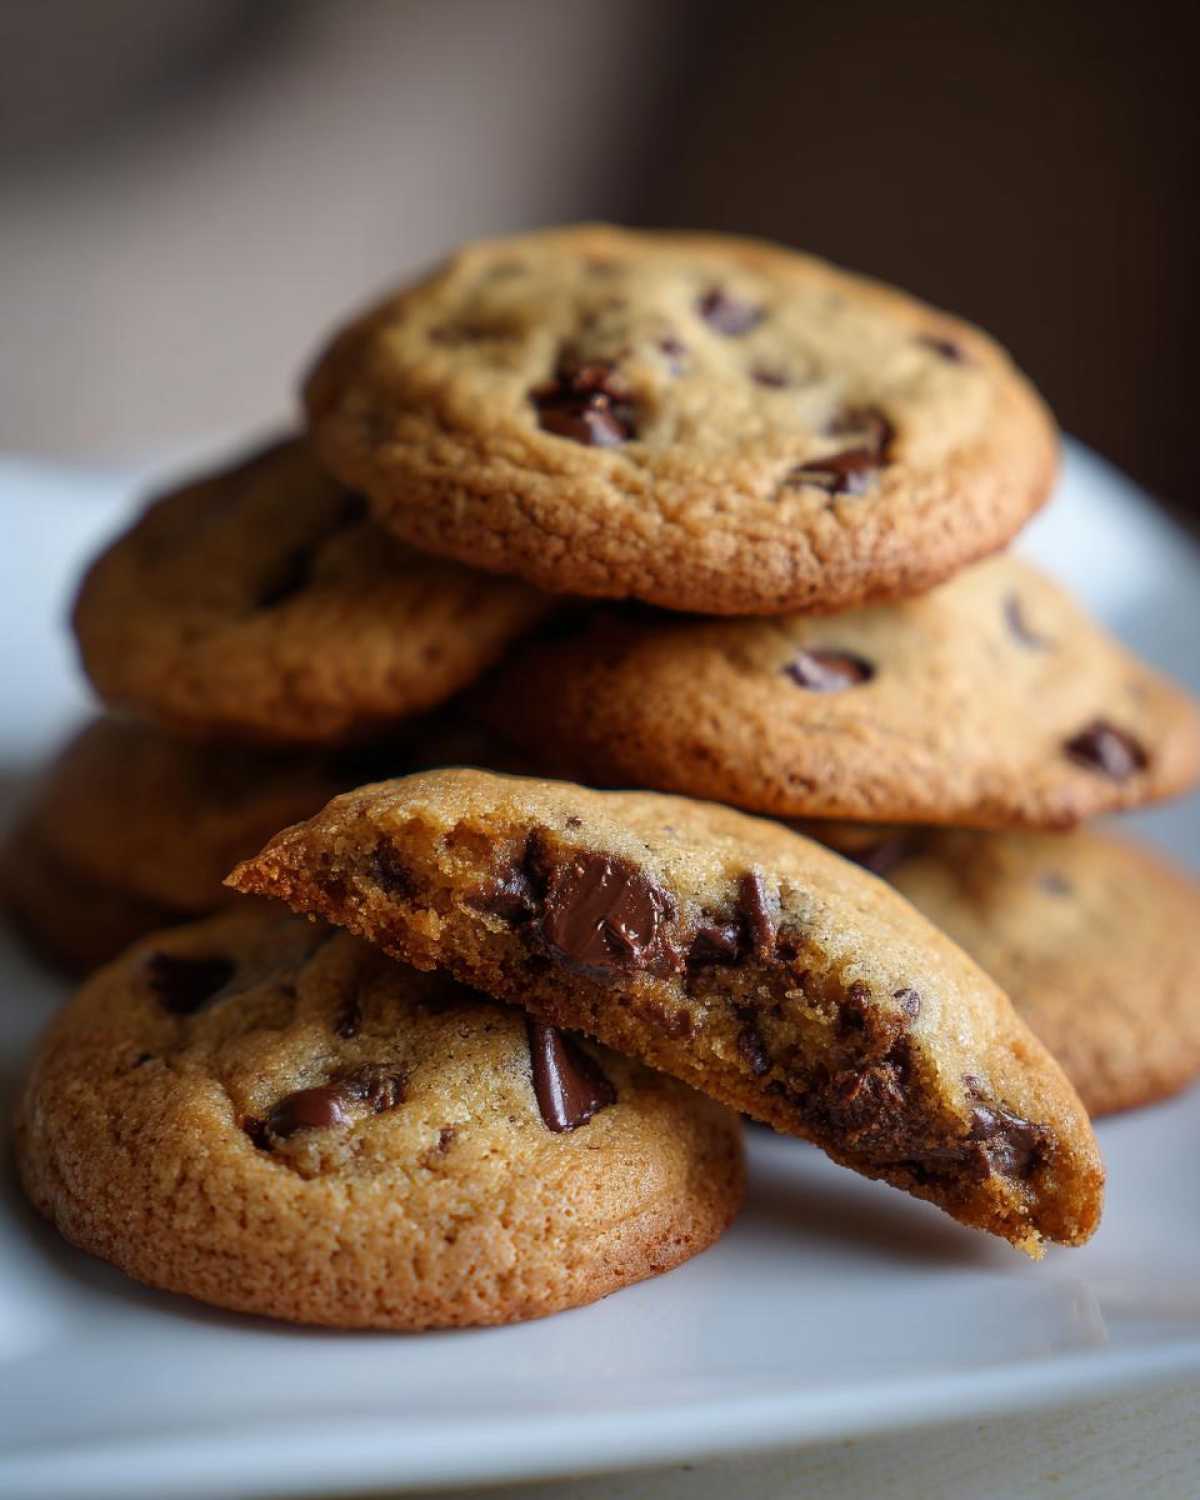
Baking Homemade Chocolate Chip Cookies: Timing and Temperature
Whisk your dry stuff separately, and then add it slowly to the wet ingredients, mixing on low. Don’t overdo it! Once the flour streaks are almost gone, fold in those gorgeous chocolate chips. Drop tablespoon mounds onto your prepared sheets, giving them space to breathe. Now, here is the key timing for our **homemade chocolate chip cookies**: 9 to 12 minutes. You want the edges golden brown, but the centers *must* look slightly undone. If they look fully done, they will be crunchy when cool! Let them sit on that hot pan for a full five minutes before you move them to the rack. That carry-over heat sets the center just right for that perfect chew. You can check out some of our lighter recipes, like our chocolate chip pancakes, if you need a break from rich baking!
Tips for Success: Mastering Homemade Chocolate Chip Cookies
Even with this perfect blueprint, a few final tactical maneuvers guarantee you the absolute Best Chocolate Chip Cookie Recipe. The single most important thing we learned is chilling the dough. Seriously, if you want those thick, bakery-style results, chill that dough for at least 30 minutes. It stops them from spreading into thin, sad puddles in the oven. I saw a great example of technique over at their guide on achieving those perfect edges!
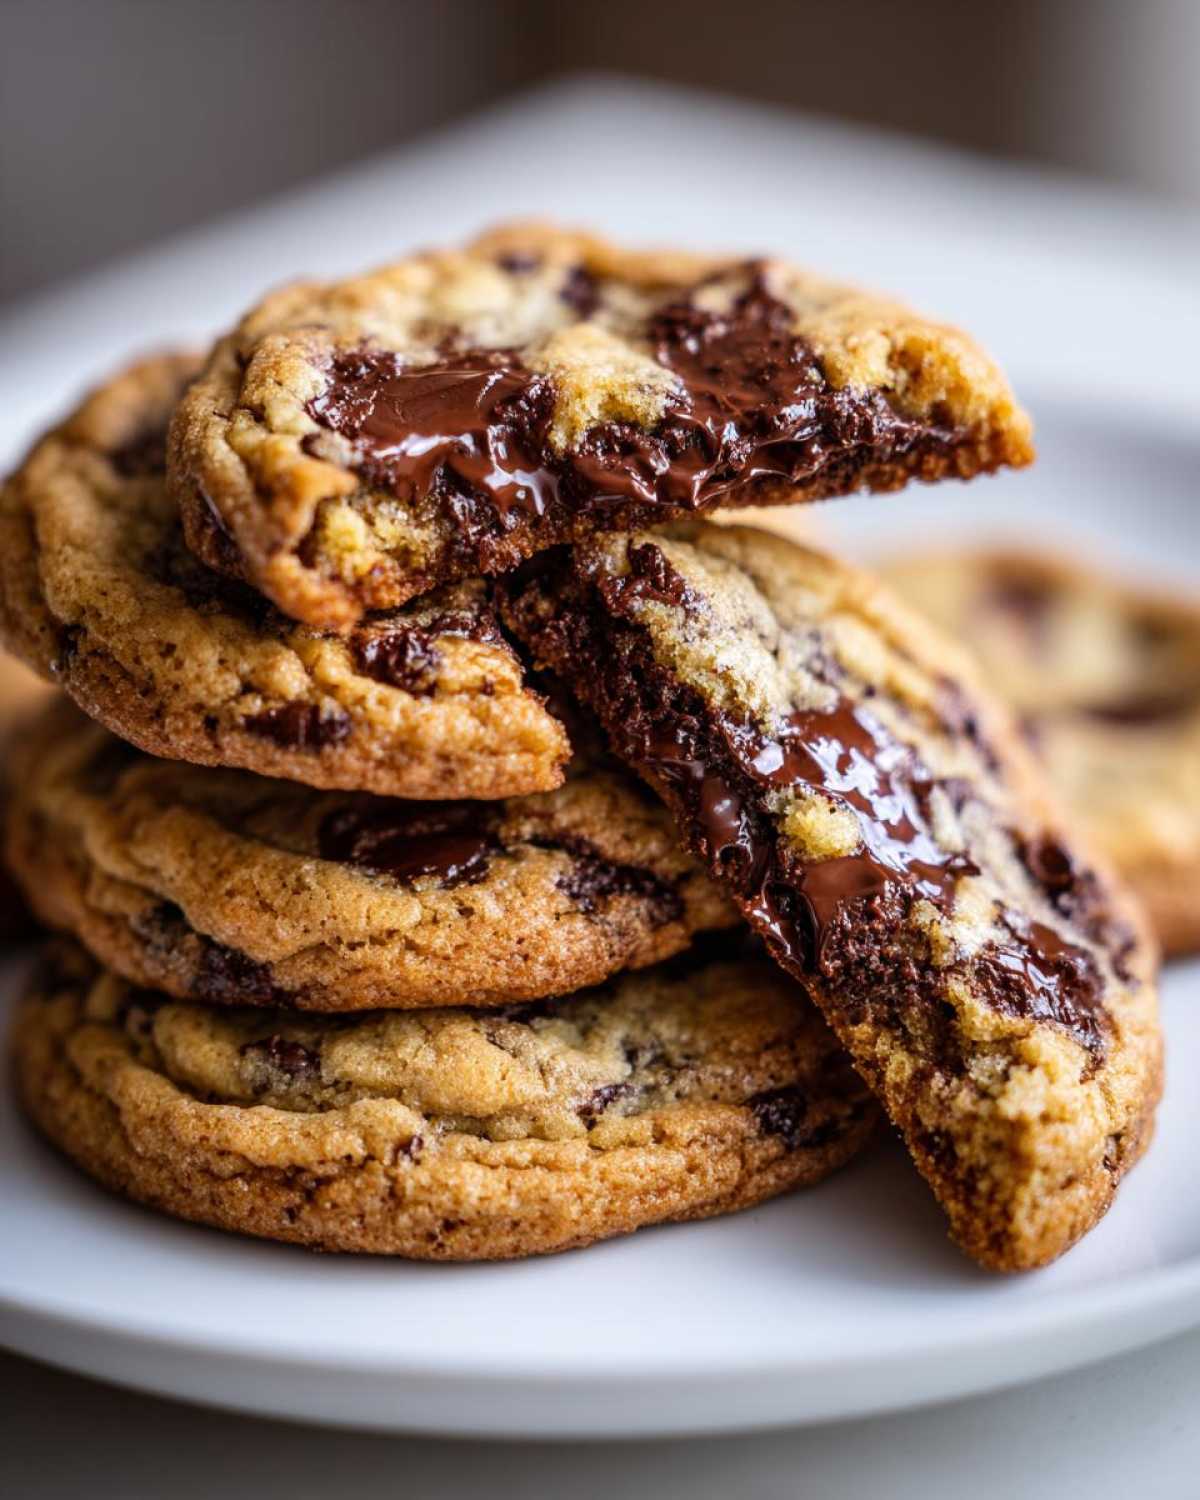
Also, you control the final shape! If you want a slightly crisp edge cookie, flatten the dough ball *before* baking. If you are laser-focused on the thickest possible cookie, leave the dough mounded high. Noah, my resident strategist, always checks the dough right before chilling and says, “If it looks too soft to hold its shape against gravity, it needs more time in the cold.”
Follow these deployment instructions, and you’ll have world-class homemade chocolate chip cookies every time. You can browse our brown butter variations here if you want to experiment later, but stick to this base for now!
Storage and Reheating Instructions for Classic Chocolate Chip Treats
Whew! You made them, and now you have to resist eating every single one in one sitting—I know, it’s the hardest part of the whole operation! Luckily, these classic chocolate chip treats store beautifully, which means you can save some for your team later, or just ration them out strategically.
For baked cookies, always use an airtight container. If you stack them, place a small square of parchment paper between the layers. This stops them from sticking together, especially since our cookies have those nice, melted pockets of chocolate. They stay wonderfully soft and chewy at room temperature for about four to five days if you seal them up right after they cool completely.
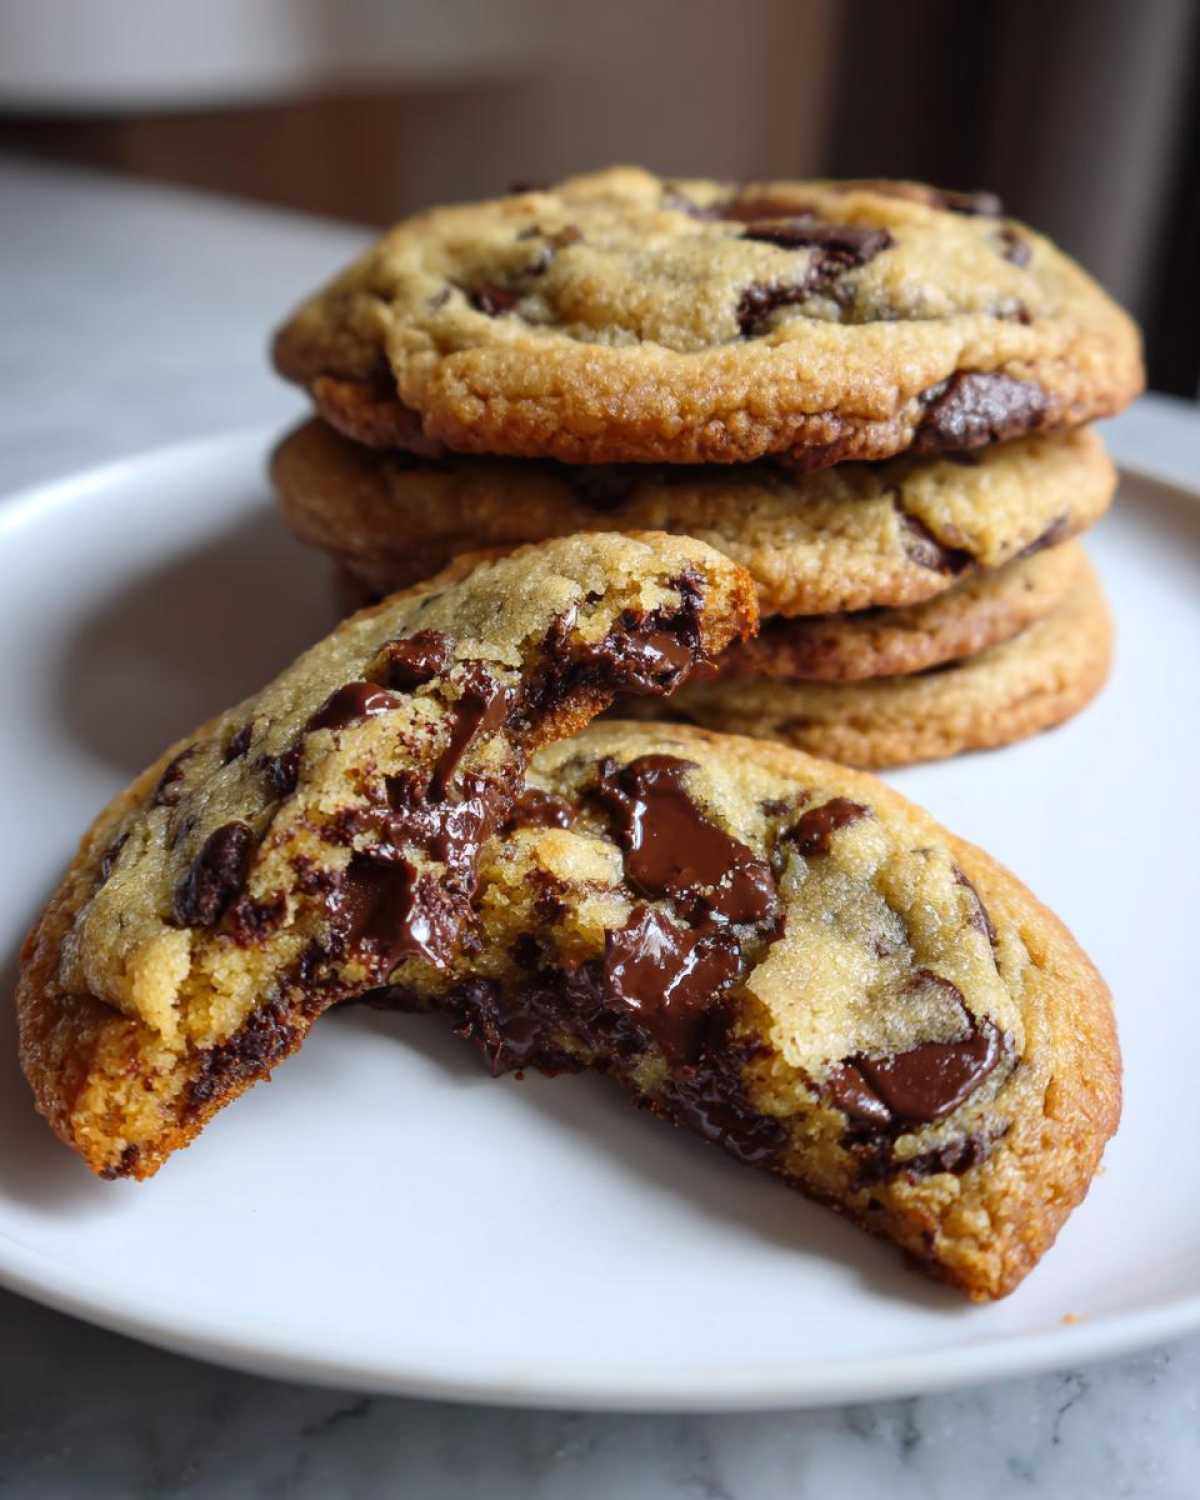
Now, for reheating—this is where we bring back that fresh-from-the-oven magic. If you want that gooey center back, a quick trip to the microwave works wonders. About 10 to 15 seconds seems like the sweet spot for bringing that chewiness back. If you’re warming up a whole batch or just don’t like the microwave, pop them on a baking sheet at 325 degrees Fahrenheit for just four minutes. That gentle warmth re-melts the chocolate just enough!
If you want to see how we store other goodies, you can check out our guide for easy homemade marshmallows; they need slightly different air management!
Troubleshooting Common Issues with Homemade Chocolate Chip Cookies
Every great construction project hits a snag, right? Baking the **homemade chocolate chip cookies** of your dreams is no different! Noah and I always go into testing knowing we need contingency plans. If your cookies aren’t turning out exactly as planned, don’t stress—we’ve got the strategic fixes here to make sure your next batch is perfect. This is about anticipating the failure points so we can lock in that ultimate treat!
When Cookies Spread Too Thin and Flat
If your cookies look less like thick bakery treats and more like chocolate pancakes, we have two usual suspects. First, did you chill the dough? Seriously, if you skipped that 30-minute time-out, the butter melted too fast in the oven. No chilling, no thickness. That’s the number one fix we apply for our **homemade chocolate chip cookies**.
Second, let’s talk flour. Did you scoop the flour straight from the bag? If you did, you likely packed too much in, which actually makes the dough *less* stable when it melts. For the absolute best results, use the spoon-and-level method for measuring flour. If they still spread, chill them for an hour next time—it’s worth the wait for those chewy centers!
When the Cookies End Up Being Too Cakey
Cakey cookies are usually a sign that we introduced too much air during the creaming phase, or sometimes, the ingredients are past their prime. If your cookies feel light and puffy rather than dense and chewy, check your baking soda or baking powder. If those leavening agents are old, they work too aggressively, making the cookie rise too fast and stay light.
Also, look back at your mixing technique. If you beat the flour in too long after adding the dry ingredients, you start developing gluten, which creates a tougher, almost bready texture instead of that soft, melt-in-your-mouth wonder. Remember, mix the flour in until it *just* disappears. We want structure, but we sure don’t want a muffin top!
If you want to see how we handled liquid measurement issues in baking drinks, check out our apple cider mule recipe—it’s a different world, but the precision is key there too!
Why Aren’t My Homemade Chocolate Chip Cookies Brown Enough?
A common issue we see when people don’t use our brown sugar recommendation is pale cookies. Brown sugar is what gives us that gorgeous golden edge and the deeper, almost caramelized flavor profile that makes these the Best Chocolate Chip Cookie Recipe.
If you used all white sugar or didn’t bake them quite long enough, they might look underdone. Remember the visual cue: edges should be golden! If they look pale, just put them back in for 1-2 minutes. You can see the technique for getting that perfect color balance when we explore our chewy favorites over at this link.
Frequently Asked Questions About Homemade Chocolate Chip Cookies
Can I use melted butter instead of softened butter for these cookies?
Oh, if you use melted butter, you are entering a totally different recipe zone! Melting the butter dissolves those microscopic air pockets we worked so hard to create during the creaming phase. If you use melted butter, you will absolutely get a **crispy edge cookie** that spreads way faster, turning into something thinner and maybe a bit greasy. For our signature thick and chewy cookies? Stick to softened, room-temperature butter. It’s a non-negotiable tactical move for this **best dessert recipe homemade**!
What is the trick to making my cookies have crispy edges but still stay soft inside?
This is the secret sauce of the bakery style! It all boils down to timing and temperature. You need that initial bake at 375°F to set the edges quickly—that’s where the crispness comes from. But you pull them out when the centers still look slightly underdone, maybe even a tiny bit gooey. Those remaining few minutes of carry-over heat on the baking sheet are what finish cooking the center just enough to be delightfully soft and gooey without hardening. That’s how you get those perfect **melt in your mouth cookies**!
Can I freeze the cookie dough for later?
Yes, and this is a strategy Noah often deploys! Freezing the dough balls works great for our **simple baking recipes**. Just scoop your dough onto parchment-lined trays, freeze them solid, and then transfer the frozen balls to an airtight container or freezer bag. When you’re ready to bake, pull out what you need and add about 2 to 3 minutes extra to the baking time. That little bit of extra time ensures they bake through while still retaining that nice, thick shape.
How do I guarantee these are the best chocolate chip cookie recipe for beginners?
Don’t sweat it! Even though these cookies are next-level in taste, they are still considered **Cookie Recipes for Beginners** because the process is so straightforward. The most important thing for a beginner is to really watch the creaming step until it looks fluffy, and never, ever overmix the flour. Mix until *just* combined, and you will have amazing **classic chocolate chip treats**!
If you are interested in some simpler, non-cookie recipes we’ve developed for quick weeknights, you can check out my guide for making fluffy homemade naan bread. It’s super easy!
Nutritional Estimates for Your Homemade Chocolate Chip Cookies
Okay, team, now for the data analysis part of the operation! Noah always insists we look at the numbers, even if we try to ignore them when we’re devouring the results. This section details the estimated nutritional breakdown for one cookie based on our full recipe yield. Remember, this is our best operational estimate for one serving, and since we are baking from scratch, quality of ingredients matters!
- Serving Size: 1 cookie
- Calories: 190
- Total Fat: 11g (with 7g saturated fat)
- Carbohydrates: 23g
- Sugar: 18g
- Protein: 2g
- Sodium: 120mg
We always keep trans fat at 0g, which is a major win for our family favorite cookies! Because we use real butter and a good amount of chocolate chips, the fat and sugar content definitely reflects a truly decadent treat. This isn’t meant to be a guilt-free snack, it’s meant to be the best possible handheld indulgence!
As always, these figures are calculated based on the ingredient amounts provided in our blueprint. Since these are just estimates, if you swap out brown sugar for maple syrup or use dark chocolate instead of semi-sweet, those numbers will shift slightly. For our official statements on recipe calculations and ingredient sourcing disclaimers, you can check out our full policy here.
Share Your Perfect Homemade Chocolate Chip Cookies Experience
Well, we’ve delivered the blueprint, walked you through the strategy, and overcome the potential roadblocks. Now it’s your turn to execute this masterful plan and bake up a batch of truly epic homemade chocolate chip cookies! When you follow these steps exactly, I’m telling you, the results speak for themselves. We aren’t messing around; anything less than five stars means we missed a vital tactical step, so be honest!
We built the Epicure Empire on sharing and iterating, and we absolutely want to see your successes. Snap a picture of those thick, gorgeous, bakery-style cookies! When you post them online, please tag us in your creations. Tagging us is the best way to let us know this recipe blueprint is working well for you and your family.
If you made these, please click right over and leave a comment with your rating below. Seeing those 5-star confirmations is what keeps Noah and me motivated to develop the next great strategy in flavor. Tell us if they were thick enough or how fast they disappeared! Happy baking, everyone. Enjoy the spoils of your successful operation!
PrintThe Ultimate Thick and Chewy Homemade Chocolate Chip Cookies (Bakery Style)

Follow this foolproof recipe to bake the best homemade chocolate chip cookies. You will achieve thick, bakery-style cookies with soft, gooey centers and perfectly crisp edges every time you bake.
- Prep Time: 15 min
- Cook Time: 12 min
- Total Time: 57 min
- Yield: 24 cookies
- Category: Dessert
- Method: Baking
- Cuisine: American
- Diet: Vegetarian
Ingredients
- 1 cup (2 sticks) unsalted butter, softened
- ¾ cup granulated sugar
- ¾ cup packed light brown sugar
- 2 large eggs
- 1 tablespoon vanilla extract
- 2 ¼ cups all-purpose flour
- 1 teaspoon baking soda
- 1 teaspoon salt
- 2 cups semi-sweet chocolate chips
Instructions
- Preheat your oven to 375 degrees Fahrenheit. Line baking sheets with parchment paper.
- In a large bowl, cream together the softened butter, granulated sugar, and brown sugar until the mixture is light and fluffy. This step is key for texture.
- Beat in the eggs one at a time, mixing well after each addition. Stir in the vanilla extract.
- In a separate medium bowl, whisk together the flour, baking soda, and salt.
- Gradually add the dry ingredients to the wet ingredients, mixing on low speed until just combined. Do not overmix the dough.
- Fold in the chocolate chips using a spatula.
- Drop rounded tablespoons of dough onto the prepared baking sheets, spacing them about 2 inches apart. For thicker cookies, slightly mound the dough.
- Bake for 9 to 12 minutes. The edges should be golden brown, but the centers should still look slightly soft and underbaked.
- Let the cookies cool on the baking sheet for 5 minutes before transferring them to a wire rack to cool completely. This allows the centers to set into that perfect chewy texture.
Notes
- For the best results and a slightly deeper flavor, use a mix of semi-sweet and milk chocolate chips.
- To get those perfect bakery-style thick cookies, chill the dough for at least 30 minutes before baking. This prevents spreading.
- If you want crispy edges, slightly flatten the dough balls before baking; for thicker cookies, leave them mounded.
Nutrition
- Serving Size: 1 cookie
- Calories: 190
- Sugar: 18g
- Sodium: 120mg
- Fat: 11g
- Saturated Fat: 7g
- Unsaturated Fat: 4g
- Trans Fat: 0g
- Carbohydrates: 23g
- Fiber: 1g
- Protein: 2g
- Cholesterol: 30mg