

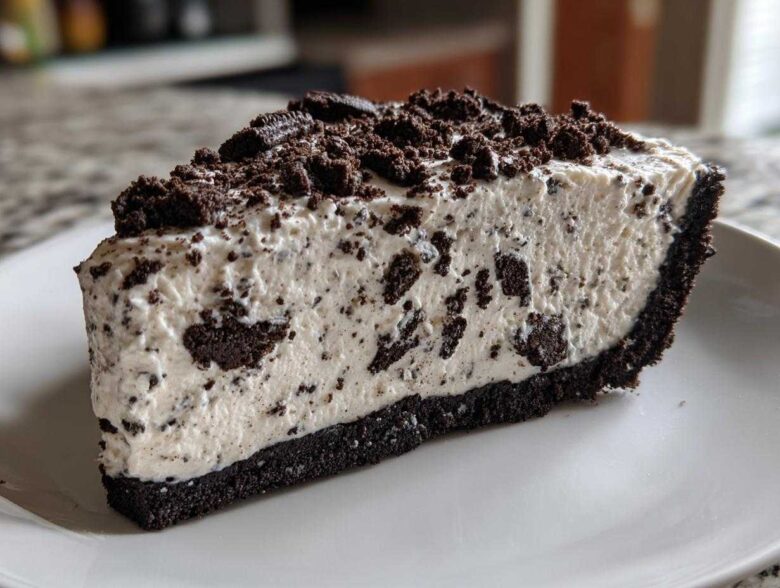
Listen, I’ve made my share of fussy desserts that look like they belong on a magazine cover but taste… well, just okay. You know the kind! I spent years perfecting quick treats perfect for summer barbecues or those last-minute holiday panics, and I finally landed on the absolute pinnacle of simplicity: my Best Easy No-Bake Oreo Cream Pie. This thing is pure magic, an actual crowd-pleaser, and honestly, it’s better than anything you’ll pay top dollar for at that fancy bakery chain.
If you are hunting for a rich, dreamy, and unbelievably creamy oreo pie that requires zero oven time, stop scrolling right now. You’re in the right place. I’m talking about a crunchy crust holding the fluffiest filling imaginable, ready to impress everyone. Trust me, after years messing around in the kitchen, I know what works, and this recipe is one of my go-to secrets. Check out my latest baking adventures over on the blog if you want more simple wins!
Why This Easy Oreo Pie Recipe Works (Crowd Pleaser Desserts)
I know you’re busy, and honestly, sometimes I just don’t *want* to fire up the oven in July, right? That’s why this recipe stays taped right above my mixing station. It delivers massive flavor with unbelievable ease. You’ll be shocked how few steps are involved for something that tastes this decadent. It’s designed to be a foolproof dessert for parties!
- It’s Completely No-Bake! Seriously, the crust goes straight into the freezer, not the oven. This makes it one of my favorite Summer Dessert Recipes because nothing gets heated up.
- Minimal Ingredients for Maximum Impact. We’re keeping this collection of items lean—just the basics needed for a rich, creamy structure. No weird specialty stuff you have to hunt down.
- That Dreamy, Fluffy Texture. We beat the heavy cream separately and fold it in gently. This is the secret to achieving that light, airy, almost mousse-like center that perfectly complements the crunch.
- It Sets Up Perfectly Every Time. Because we rely on cold ingredients (cream cheese and heavy cream), the chilling process does all the heavy lifting to create a firm slice that won’t collapse the second you look at it.
- It’s the Ultimate Crowd Pleaser. Whether you serve it to the family or bring it to a potluck, this Cookies and Cream flavor is universally loved. Everyone asks for the recipe!
Ingredients for the Best No Bake Oreo Pie
Okay, let’s talk ingredients! This is where so many people think they need twenty different things, but for this incredible oreo pie, we’re keeping things simple and sticking to what works. Having everything ready—mise en place, as the fancy chefs say—makes the assembly so fast. Just make sure your cream cheese is actually soft because hard cream cheese is the enemy of smooth filling!
- 1 1/2 cups Oreo cookie crumbs (That’s about 25 cookies, crushed up nice and fine. If you don’t have a food processor, put ’em in a Ziploc and whack ’em with a rolling pin—it’s therapeutic, trust me!).
- 1/4 cup unsalted butter, melted. This is what binds our delicious crust together.
- 8 ounces cream cheese, make absolutely sure this is softened to room temperature.
- 1 cup powdered sugar (don’t substitute this, we need it finely sifted!).
- 1 teaspoon vanilla extract—the real stuff makes a huge difference here!
- 1 1/2 cups heavy whipping cream, and I mean ICE COLD. This is for folding in later to make it fluffy.
- 1 cup crushed Oreo cookies—these are extra chunks to mix right into the filling!
- 1/2 cup whipped topping (like Cool Whip), thawed, if you want that extra cloud-like topping. This is optional, but I usually add it for height.
- Extra Oreo cookie crumbs for sprinkling on top for the final flourish!
Step-by-Step Instructions for Your Simple Oreo Pie
This is where the magic happens, and I promise, it’s so streamlined you’ll wonder why you ever bothered with a hot oven! We’re building layers of crunchy crust and impossibly smooth filling. Read through these steps once, get all your bowls ready, and you’ll have this wonderful Simple Oreo Pie mixed together in about 20 minutes flat. Remember, patience in the chilling phase is the hardest, but most important, part!
Preparing the Crunchy Oreo Crust Dessert Base
First things first: the foundation! Grab those 1 1/2 cups of Oreo crumbs and pour them into a bowl with your 1/4 cup of melted butter. Mix it up with a fork until every bit of crumb looks totally saturated. You want that consistency where it clumps if you squeeze it in your hand. Press that buttery mixture firmly into the bottom and up the sides of your 9-inch pie plate. Press, press, press to make it sturdy! Now, slide that whole plate into the freezer for at least 15 minutes while we handle the creamy center. It needs to firm up nice and solid.
Creating the Creamy Oreo Pie Filling
In a large bowl, take your softened cream cheese and beat it with the powdered sugar and vanilla until it looks absolutely gorgeous—smooth, creamy, no lumps anywhere. Now, grab a separate, chilled bowl (this is important for big volume!) and whip that cold heavy cream until you get stiff peaks. Don’t stop too soon! Once that cream is stiff, you need to fold it gently into the cream cheese mixture. I mean *gently*. Then, carefully fold in that extra cup of broken Oreo chunks. We are folding, not stirring, so we don’t deflate all that air we just whipped in!
Assembling and Chilling the Oreo Pie
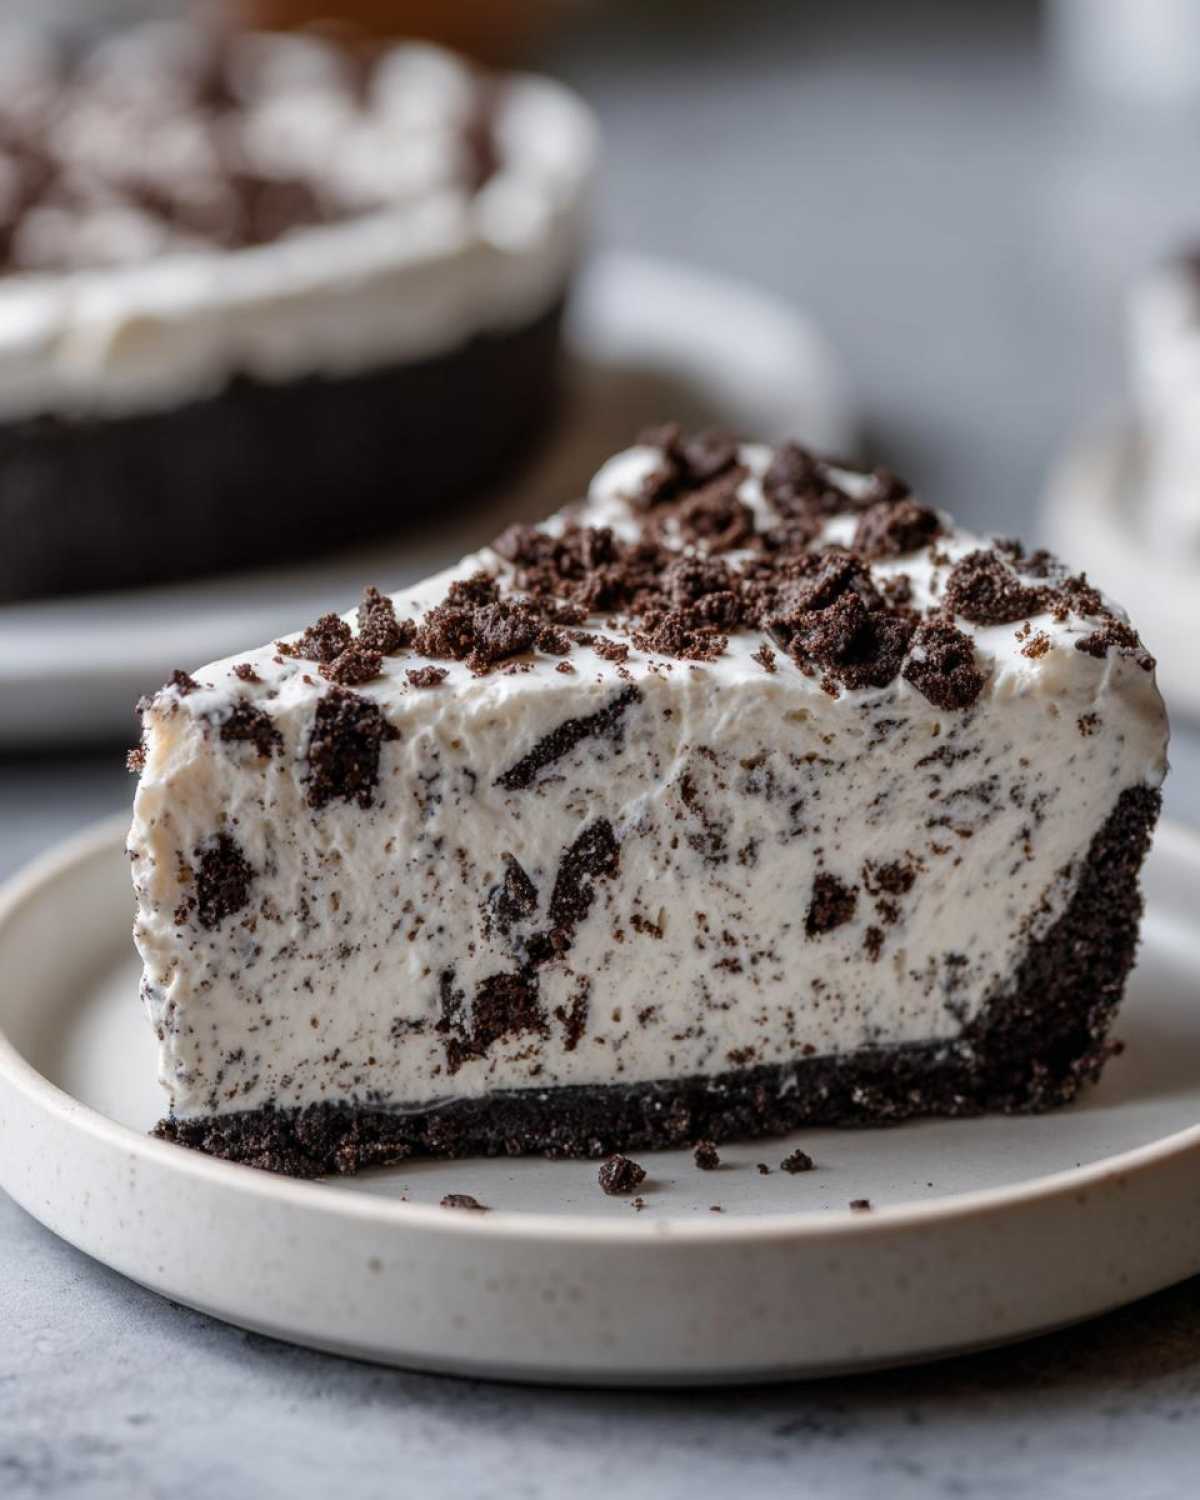
Time to marry the crust and filling! Spoon all that beautiful, chunky, creamy filling right into your chilled base. Use an offset spatula or the back of a spoon to smooth out the top so it looks pretty. Cover it loosely with plastic wrap—don’t let the wrap touch the filling, or you’ll mess up the surface! Shove this beauty into the refrigerator. You absolutely have to chill it for a minimum of 4 hours, but honestly, if you can wait overnight, this oreo pie sets up like a dream. You can find some neat tips on timing over at our baking guide!
Tips for the Perfect Creamy Oreo Pie
Listen, even though this is a no-bake recipe, we still need to treat it with respect so we don’t end up with soup! The biggest mistake I see people make with any creamy dessert is over-mixing once the whipped cream goes in. If you stir too vigorously, you knock all the air out, and suddenly your dreamy filling is dense and sad. Go slow and fold gently! That’s the whole key to maintaining that delicious fluffy texture in your final oreo pie.
Also, don’t cheat the chill time! If you try to slice this pie only two hours in, it’s going to run right off the plate. It needs that solid time in the fridge—aiming for six hours is safer than four hours, honestly. If you want more deep-dive cleaning tips on mixing bowls, check out my guide for the best cookie recipes; the principles are the same!
Variations on This No Bake Oreo Pie
Part of the fun of a simple dessert like this is making it uniquely *yours*! While the classic setup is incredible, sometimes you need a little twist, especially when you’re making it for the fifth time this year because everyone loves it so much. Don’t worry, this foundation is perfect for playing around with. This No Bake Oreo Pie is totally adaptable!
If you’re looking for something slightly different from the standard cream cheese filling, you have options. Think about what you have in the pantry! You can easily pivot this toward an Oreo Pudding Pie by swapping out some of the heavy cream for prepared vanilla or chocolate instant pudding mix—just make sure you cut back on the powdered sugar a bit so it doesn’t get overly sweet.
Want something even lighter? That calls for an Oreo Mousse Pie! For that, you’d use slightly less cream cheese and maybe replace the whipped topping with stabilized egg whites, but honestly, that’s getting fussy. I prefer to keep it easy by just adding other fun things to the filling!
- Chocolate Overload: Fold in 1/2 cup of mini semi-sweet chocolate chips right along with your crushed Oreos. Instant deep chocolate flavor boost!
- Peanut Butter Swirl: Mix a half cup of creamy peanut butter into the cream cheese base before folding in the whipped cream. That combination with the chocolate? Unbeatable.
- Mint Chocolate: Add a few drops of peppermint extract along with the vanilla. Perfect for the holidays, but delicious anytime you need a refresh!
If you want to see how I adapt other creamy crust desserts, check out my recipe for No Bake Butterfinger Pie! The mechanics are almost identical, so you’ll be an expert in no time.
Storage and Make-Ahead Tips for Your Oreo Dessert
One of the *best* parts about this oreo dessert is that it is practically begging you to make it ahead of time! Unlike cakes that get soggy or cookies that flatten out, this pie actually *improves* overnight. I usually make it the night before any big gathering I’m hosting.
When you’re ready to store it, you need to be careful how you cover it. If plastic wrap touches the filling, you’ll end up with sticky spots when you pull it off later. My trick is to stick a few toothpicks poking up out of the filling around the edges before covering it; this creates a little tent and keeps the wrap suspended away from that beautiful creamy top.
It stays wonderfully fresh in the refrigerator, covered tightly, for about three to four days. Seriously, the crust stays crisp enough, and the filling remains dreamy and firm the entire time. If you are planning way ahead—like, *way* ahead—you can technically freeze this! Wrap the whole pie tightly in a couple of heavy layers of plastic wrap and then another layer of foil. Freeze it for up to three weeks.
- Thaw a frozen pie in the refrigerator overnight before serving. Pull off the plastic wrap, but leave the foil on until it’s mostly thawed so it doesn’t absorb any fridge smells.
- For make-ahead sanity, I highly recommend chilling it for at least six hours, or ideally overnight, to ensure it slices cleanly. No one wants a sloppy slice of pie!
- If you want to learn more about freezing things efficiently, I’ve put together some great guides on freezer meal prepping that might help you prep other things for your party too!
Frequently Asked Questions About Making an Oreo Pie
I get so many messages about this recipe, which just proves how much everyone loves a good, easy oreo pie! Most people are asking about timing or crust substitutions, which I totally get. You want this to come out perfectly the first time, especially if you’re depending on it for a big event. Let’s tackle the most common questions I hear about achieving that perfect, creamy texture.
Can I make this Oreo Pie ahead of time?
Oh, please do! This is seriously the best part about making this No Bake Oreo Pie. It absolutely thrives on chilling time. While you must chill it for four hours minimum to ensure it firms up enough to slice, making it the day before is my recommendation. When it sits overnight, the filling settles in perfectly, the flavors—that chocolate and cream cheese magic—really meld together beautifully, and the crust holds up even better. It’s a genuine make-ahead marvel!
What is the best way to crush Oreos for the crust?
If you don’t have a food processor, don’t panic! I’ve made this crust a thousand times with just a rolling pin, which is great for working out a little kitchen stress, too. Just toss your cookies (the whole thing, filling and all!) into a very sturdy, high-quality zip-top freezer bag. Get the air out, seal it up, and lay it on a heavy cutting board or the floor. Use that rolling pin, or even the bottom of a heavy saucepan, and just roll and press until it’s finely crushed. You want mostly fine crumbs, but a few slightly larger bits are totally fine—it just adds texture to that amazing Oreo Crust Dessert base.
How long must the oreo pie chill before serving?
This is non-negotiable, friends! Because we skip the oven, the refrigerator has to do all the hard work of setting this filling. You need a bare minimum of four hours in the fridge to be able to slice it without it turning into a glorious puddle. However, to get those clean, beautiful wedges everyone wants, I push everyone toward six hours or, ideally, overnight. If you check out my About Page, you’ll see I’m all about making cooking efficient, and chilling overnight means less stress on party day!
Nutritional Estimation for This Cookies and Cream Pie
Okay, so let’s be real for a minute. Because this Cookies and Cream Pie involves cream cheese, heavy whipping cream, and a whole stack of Oreos, it’s definitely not the diet food of the year! But hey, who’s counting when something tastes this spectacular? This is special occasion food, right? I pulled together some estimates based on standard ingredient measures, but remember, this is just a general guide.
When you’re serving up a slice of this decadent No Bake Oreo Pie, you’re generally looking at the following breakdown per serving (we based this on 8 servings, as listed in the details):
- Calories: Around 450 Cal—that’s a good, solid dessert number!
- Total Fat: Right around 30 grams, with about 15 grams of that being saturated fat from the cream and cheese.
- Carbohydrates: About 45 grams total, mostly coming from the sugars and cookie base.
- Sugar: We’re looking at 35 grams of sugar here for that perfect sweetness.
- Protein: A modest 5 grams per slice.
Just a little flag here—these numbers are estimates based on the ingredients listed, especially if you use the optional whipped topping. Every kitchen brand and every cookie size can make these numbers shift a little. But honestly, if you’re here for the nutrition facts, you’re probably looking at the wrong kind of dessert anyway! This is pure, dreamy comfort food!
Share Your Experience Making This Easy Oreo Pie Recipe
Whew! We made it! Now that you have all the secrets to creating the fluffiest, creamiest, no-bake dream dessert, I genuinely want to hear from you. Don’t just walk away and eat this glorious oreo pie in silence!
I put all my best tips and tricks into these instructions because I want everyone to experience the joy of serving something this impressive with almost zero effort. Did you try the overnight chill test? Did you add a secret swirl of caramel? I want the scoop!
If you loved how simple and delicious this turned out, please do me a huge favor and come back here and leave a quick rating. Five stars when you love it, obviously! And definitely hit up the comments section below or connect with me over at the contact page to share how your Easy Oreo Pie Recipe turned out.
Baking, especially the no-bake kind, is all about sharing the fun. Tell me one modification you made! I’m always testing new versions, and your ideas might just inspire the next batch I whip up for a summer cookout. Happy baking (or rather, happy chilling)!
PrintEasy No-Bake Oreo Cream Pie

Make this simple, creamy, and dreamy Oreo pie with a crunchy crust. This no-bake recipe requires few ingredients and is perfect for any gathering.
- Prep Time: 20 min
- Cook Time: 0 min
- Total Time: 4 hr 20 min
- Yield: 8 servings
- Category: Dessert
- Method: No Bake
- Cuisine: American
- Diet: Vegetarian
Ingredients
- 1 1/2 cups Oreo cookie crumbs (about 25 cookies)
- 1/4 cup unsalted butter, melted
- 8 ounces cream cheese, softened
- 1 cup powdered sugar
- 1 teaspoon vanilla extract
- 1 1/2 cups heavy whipping cream, cold
- 1 cup crushed Oreo cookies (for mixing in)
- 1/2 cup whipped topping (like Cool Whip), thawed (optional, for topping)
- Extra Oreo cookie crumbs for garnish
Instructions
- Prepare the crust: Mix the 1 1/2 cups of Oreo cookie crumbs with the melted butter until fully combined. Press the mixture firmly into the bottom and up the sides of a 9-inch pie plate. Place the crust in the freezer while you prepare the filling.
- Make the cream cheese base: In a large bowl, beat the softened cream cheese, powdered sugar, and vanilla extract until the mixture is smooth and creamy.
- Whip the cream: In a separate, chilled bowl, beat the cold heavy whipping cream until stiff peaks form.
- Combine fillings: Gently fold the whipped cream into the cream cheese mixture until just combined. Do not overmix.
- Fold in cookies: Gently fold in the 1 cup of crushed Oreo cookies.
- Assemble the pie: Spoon the filling evenly into the chilled Oreo crust. Smooth the top with a spatula.
- Chill: Cover the pie loosely with plastic wrap and refrigerate for at least 4 hours, or until firm.
- Garnish and serve: Before serving, top the pie with whipped topping (if using) and sprinkle with extra Oreo cookie crumbs. Slice and serve cold.
Notes
- For an even richer flavor, use all cream cheese and skip the whipped topping.
- If you do not have a food processor, place cookies in a zip-top bag and crush them with a rolling pin.
- This pie sets best when chilled for 6 hours or overnight.
Nutrition
- Serving Size: 1 slice
- Calories: 450
- Sugar: 35
- Sodium: 280
- Fat: 30
- Saturated Fat: 15
- Unsaturated Fat: 10
- Trans Fat: 0.5
- Carbohydrates: 45
- Fiber: 1
- Protein: 5
- Cholesterol: 55