

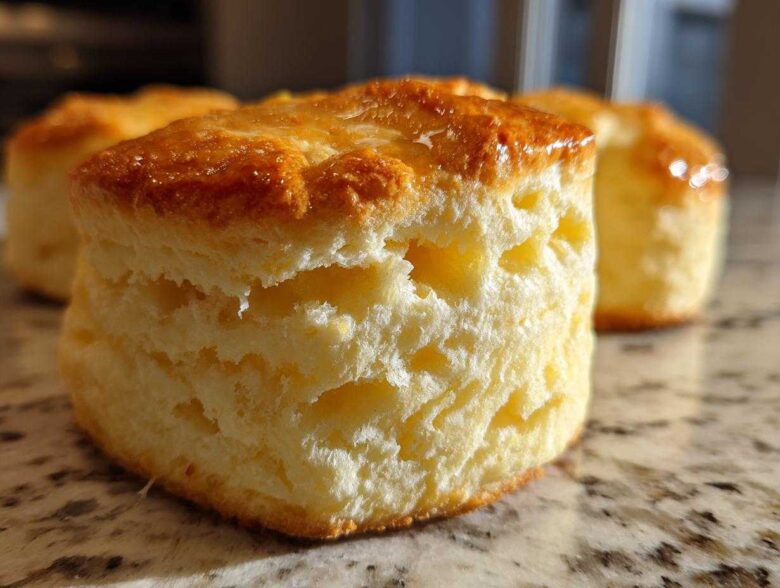
Let’s be honest, there’s that distinct, flaky, towering biscuit you get down South, and then there’s… everything else. For the longest time, achieving that perfect, melt-in-your-mouth Southern texture felt like an impossible mission in our kitchen. It took some serious strategic planning, which, naturally, is where Noah stepped in. He treated these buttermilk biscuits like a complex architectural project, mapping out exactly which chill factor and folding sequence would yield maximum loft. Forget guesswork; what you are looking at here is the perfected blueprint—our *Tall and Flaky Southern Buttermilk Biscuits*—guaranteed to bring that wonderful comfort staple right to your table. I’m Lena, and I promise, Noah’s methodical approach finally cracked the code on truly spectacular scratch baking. You can read more about how we started this whole journey when we realized cooking should be our priority over spreadsheets here at the Epicure Empire.
Why These Are the Best Buttermilk Biscuits You Will Ever Make
I’m Noah, and if there’s one thing a strategist loves, it’s solving a tangible problem, and the problem here was floppy, flavorless biscuits. We’ve dialed in the exact science to ensure you get results that stand up tall—literally. These are not just good; they are what I consider the gold standard for best buttermilk biscuits. You’ll see why they rise above the rest!
- Guaranteed height and incredible loft.
- A tender, never-tough, buttery crumb.
- That unmistakable, slight tang from real buttermilk.
Achieving Truly Flaky Buttermilk Biscuits Recipe Layers
Flakiness isn’t luck; it’s math and temperature control. When that cold butter hits the super-hot oven, it explodes into steam, forcing those layers apart. Our recipe focuses heavily on keeping everything—the butter, the flour, the buttermilk—ice cold. That little bit of folding we do, which Lena will detail later, builds those foundational layers needed for a perfect flaky buttermilk biscuits recipe structure.
Quick Biscuit Recipe: Ready in Under an Hour
I know you’re busy building your own empire, so we optimized for efficiency without sacrificing quality. You can go from pantry to plate in about 30 minutes total! That’s 15 minutes of prep and just 15 minutes baking time. It’s truly a spectacular turnaround for a quick biscuit recipe that tastes like it took all morning.
Gathering Ingredients for Tall Biscuits Recipe
Okay, now that we have the strategy, it’s time for operations: gathering our simple components. You won’t find any weird specialty ingredients here, just the basics done right! Remember how Noah mentioned this whole process relies on technique? That technique starts right here with sourcing. For these tall biscuits recipe dreams to come true, temperature is your absolute number one priority. Seriously, if you skip anything, don’t skip keeping your main players frigidly cold. It’s the secret to stacking those layers high.
- 2 cups all-purpose flour
- 1 tablespoon baking powder
- 1 teaspoon salt
- 1 teaspoon sugar
- 6 tablespoons cold unsalted butter, cut into small cubes
- 3/4 cup cold buttermilk
- 2 tablespoons melted butter, for brushing
Ingredient Notes and Substitutions for Buttermilk Biscuits
Listen closely: you absolutely must use unsalted butter here. Why? Because we are controlling the salt content ourselves with that teaspoon we added to the dry mix. If you use salted, they’ll taste like the ocean! Trust me on this one—we tested it, and Noah’s strategy required consistent calibration.
And the buttermilk! That’s what makes them great buttermilk biscuits. The acid in the buttermilk reacts with the baking powder to give us that beautiful rise and the tender crumb we are aiming for. That’s non-negotiable if you want those super fluffy buttermilk biscuits. If, and only if, you are completely out, you can create a substitute by taking regular milk and stirring in a teaspoon of white vinegar or lemon juice and letting it sit for five minutes. But the real stuff tastes better, I won’t lie!
How to Make Buttermilk Biscuits: The Step-by-Step Blueprint
Okay, empire builders, this is where the magic happens! We’ve mixed the dry components, and now we move into the critical phase. Remember, we are executing Noah’s strategy for the flaky buttermilk biscuits recipe. Don’t rush any of these steps, especially when dealing with the butter. I’ve linked up some general baking tutorials if you need a refresher on general mixing techniques, but for these biscuits, pay close attention to the feel of the dough!
Cutting the Butter for Fluffy Buttermilk Biscuits
This step is non-negotiable for getting those fluffy buttermilk biscuits. Grab your cold butter cubes and toss them into that flour mix. You need to work quickly here so the butter doesn’t warm up; I often run my hands under cold water first just to ensure I don’t melt the fat with my body heat!
You want to use a pastry blender—that’s my tool of choice for this—or just use your fingertips, squeezing and cutting the butter into the flour. Stop when it looks like coarse crumbs, but you *must* have some pieces of butter still visible, about the size of small peas. Those pea-sized pieces are your steam pockets waiting to happen!
The Folding Technique for Southern Style Biscuits
Once the buttermilk goes in, mix just until it barely comes together. It will look awful and shaggy—that’s perfect! Turn that mess out onto a lightly floured spot on your counter. Now, this is key for those beautiful southern style biscuits.
Gently pat or roll it into a rectangle, about an inch thick. Take the bottom edge and fold it up about a third of the way. Then fold the top edge down over that, just like folding a business letter. Turn that folded dough 90 degrees (so the short folded edge is facing you) and repeat the fold one more time. This lamination process builds the vertical structure you want instead of just mixing everything into a dense lump.
Cutting and Placing Your Buttermilk Biscuits
After that second fold, pat the dough out to about 3/4-inch thick. Now, grab your sharp biscuit cutter. Are you listening? Do not twist the cutter when you press it down. Just push straight through firmly. Twisting seals the edges shut, and guess what happens? They won’t rise tall! That’s the fastest way to deflate all our hard work.
When placing them on the baking sheet, you have a choice. If you put them close together, touching, the sides will steam against each other and stay very soft. If you put them an inch or two apart, you get those crispier, golden sides. I usually do close together for maximum tenderness!
Baking Tips for Tender Buttermilk Biscuits
Alright, we’ve assembled our beauties, and now they’re staging for landing! The oven temperature is crucial here if we want maximum puff. Preheat your oven to a blazing hot 425 degrees Fahrenheit (that’s 220 Celsius). High heat is non-negotiable; it shocks the dough into rising upward immediately before the cold butter melts completely.
I try to bake these buttermilk biscuits straight from the fridge on an ungreased sheet pan—you don’t want any slippery sides inhibiting that vertical climb! They only need about 12 to 15 minutes. Keep an eye on them! Once they are golden brown on top, pull them out so they stay tender inside.
And this is my final, favorite step: as soon as they hit the cooling rack, brush the tops immediately with that reserved melted butter. That locks in moisture and gives them that irresistible shiny, buttery biscuits glaze we all crave.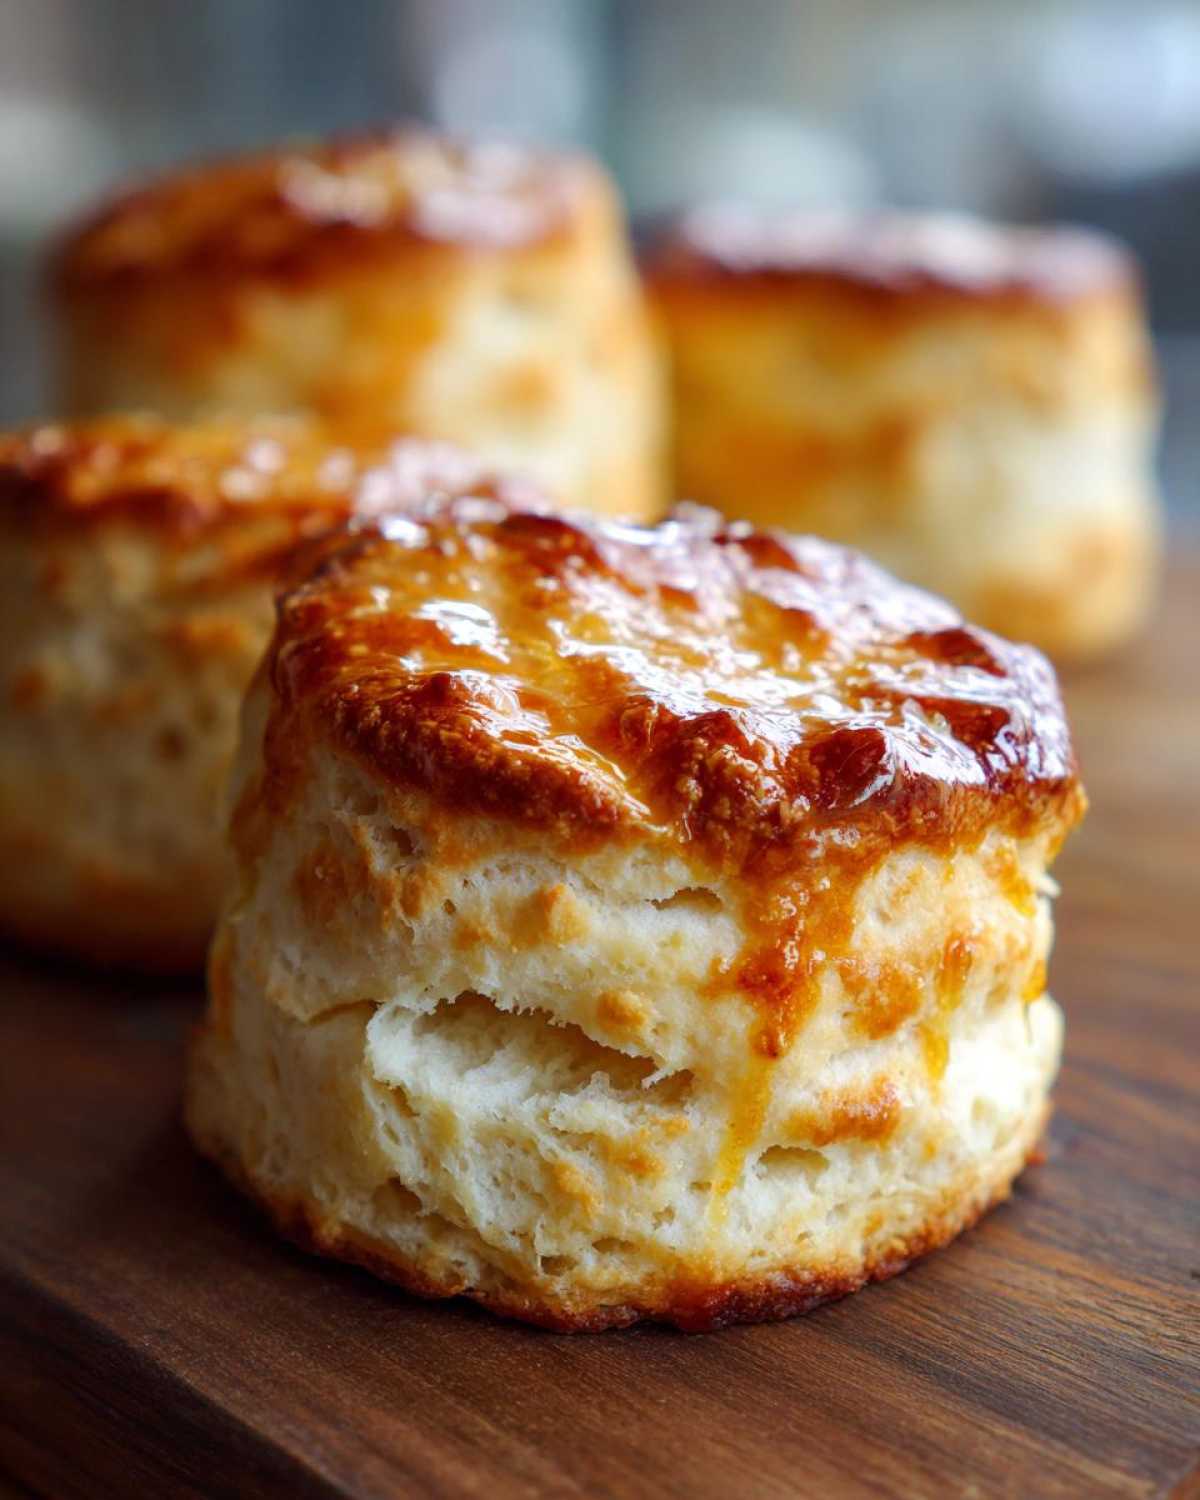 If you want to see someone else’s take on getting that quick rise, check out these tips on fluffy biscuits online here.
Mastering Scratch Baking Biscuits: Troubleshooting Common Issues
Even with the best blueprint, sometimes things go wonky in the kitchen. Don’t sweat it! Troubleshooting is just another layer of strategy for perfect scratch baking biscuits. The most common issue I hear about is biscuits that look flat, even after all that folding work. If your biscuits aren’t rising, nine times out of ten it’s because your butter wasn’t cold enough, or you twisted that cutter!
If they turn out tough instead of tender, you mixed too long after adding the buttermilk. Remember, we want shaggy! If you overwork the dough, you develop too much gluten, and that’s how you end up with little hockey pucks instead of light pillows. For great troubleshooting advice on why layers sometimes fail, you can look at tried-and-true tips from bakers online over here. We’ve all been there, trust me!
Serving Suggestions for Buttery Biscuits
Honestly, these buttery biscuits are wonderful all on their own, warm from the oven with just a smear of soft butter.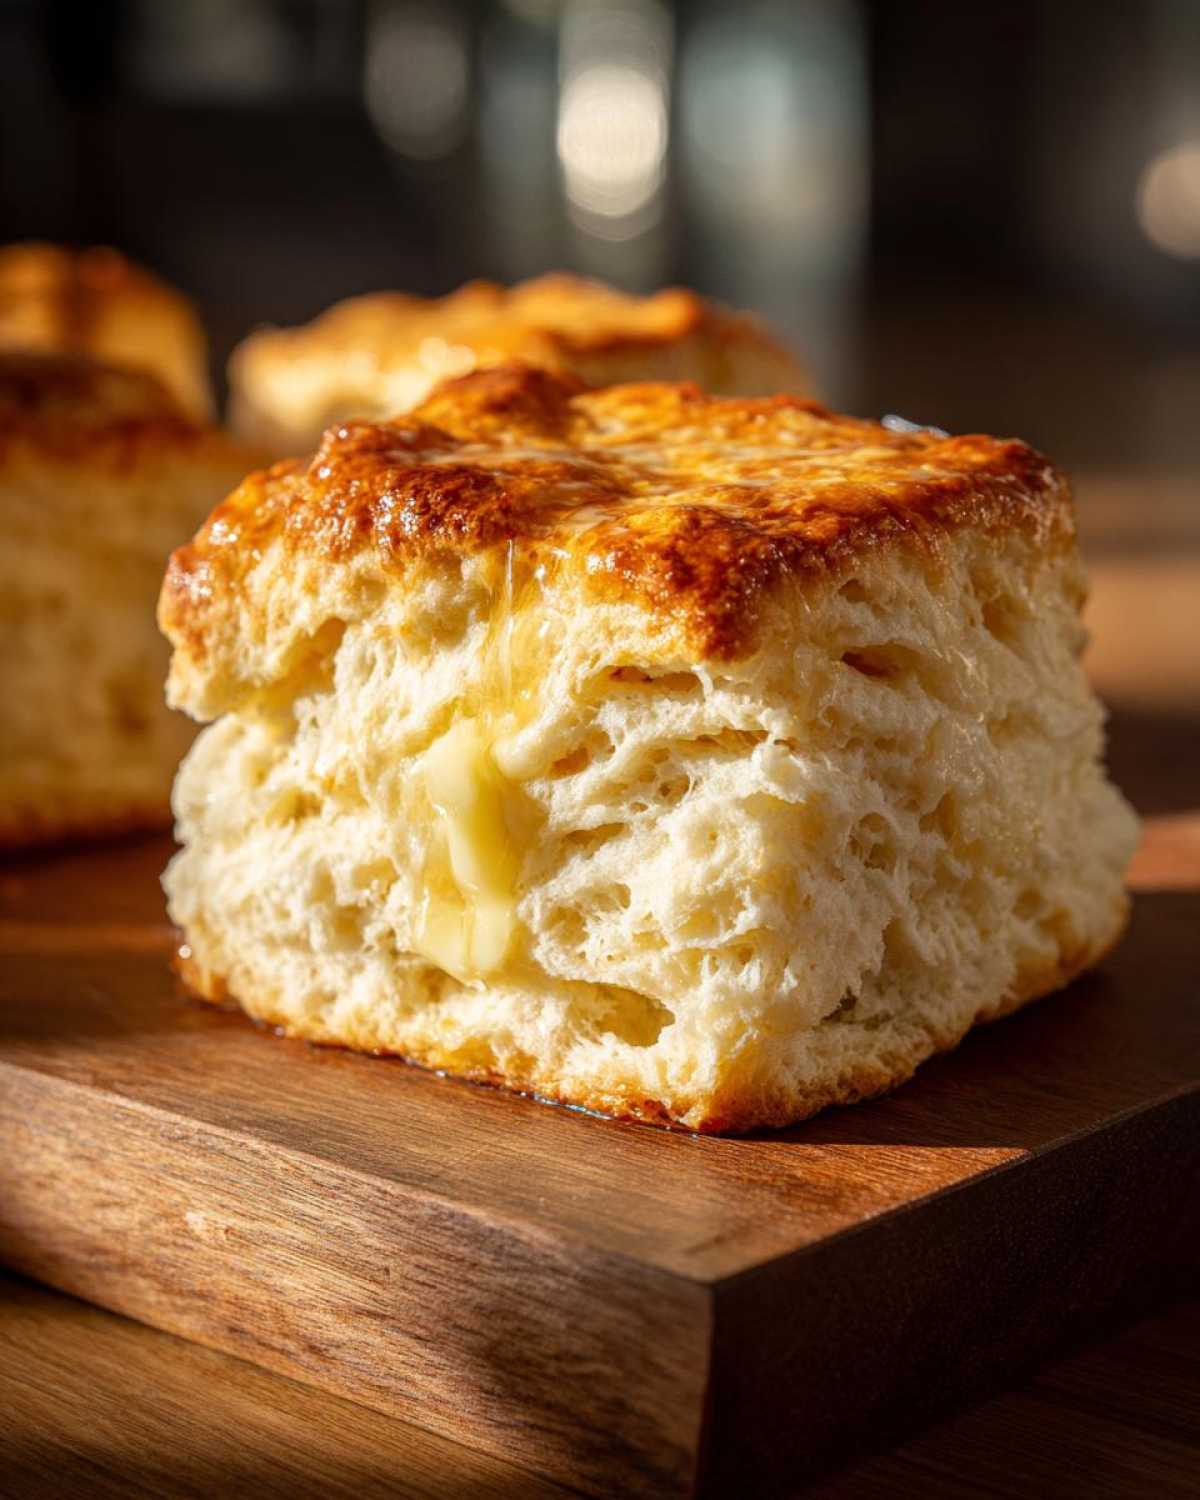 But they are truly the foundation of some amazing comfort food baking memories we’ve built here. If you are going savory, you absolutely have to pair them with real sausage gravy—we even perfected a make-ahead casserole version if you need a quick deployment plan!
If you’re leaning sweet, grab your favorite seasonal jam or homemade apple butter. The saltiness of the biscuit cuts beautifully through that sweetness. They make a phenomenal substitute for dinner rolls any night of the week!
Storage and Reheating Instructions for Buttermilk Biscuits
If you manage to have any leftover buttermilk biscuits—which honestly, I rarely do—you need a solid game plan for storage. Skip the plastic bag; it traps moisture and makes them soggy, and we worked too hard for soggy biscuits!
Store them in an airtight container at room temperature for up to two days. They will lose a little loft, but don’t worry; we can bring them back!
When reheating, the microwave is fast but makes them chewy. I always recommend popping them in a toaster oven or a regular oven set to 350°F for about five minutes. That quick blast of dry, high heat reawakens their crispy edges and restores near-fresh tenderness. Trust me, oven reheating is the superior strategy here!
Frequently Asked Questions About Fluffy Buttermilk Biscuits
Lena here! We hear from so many of you who have tried this recipe and perfected it for your own families. It’s fantastic to see how this blueprint works even for those who claim they can’t master easy homemade biscuits. Don’t forget, we keep all our favorite morning bakes linked in our main breakfast category!
Can I use regular milk instead of buttermilk in this recipe?
That is a super common question, especially for folks stocking up on groceries! While you *can* substitute it, you won’t get those real fluffy buttermilk biscuits without the acid present. The acid in the buttermilk reacts with the baking powder to give us that light, airy lift we are obsessed with.
If you’re in a pinch, here’s the emergency workaround: take your regular milk—about a cup’s worth—and stir in one tablespoon of white vinegar or fresh lemon juice. Let it sit on the counter for about five minutes until it looks slightly curdled. That buttermilk substitute gives you the necessary acidity to activate everything correctly, but honestly, going out for that real, tangy buttermilk is always my first recommendation!
What makes these *southern style biscuits* so tall?
This is where Noah’s strategic approach really shines! Height comes from building air and steam pockets, not just chemistry. We achieve that dramatic lift in southern style biscuits primarily through two methods we detailed in the steps above:
- The Cold Fat: Leaving those pea-sized chunks of butter intact ensures they don’t just mix in; they create defined horizontal separation in the dough.
- The Folding/Lamination: We folded that dough twice like a letter and turned it 90 degrees between folds. That action layers the dough vertically. When these distinct layers hit the heat, they separate and puff straight up!
And I’ll remind you one last time: press down hard and don’t twist that cutter! Twisting seals the edges and traps the rising action, making short, squat biscuits instead of the towering breakfast bread recipes we love.
Share Your Epicure Empire Baking Success
Now that you have the blueprint for these phenomenal biscuits, it’s time for you to execute the mission! I really want to know how they turned out. Did your folding technique work perfectly? Are yours scraping the ceiling of your oven?
Please take a moment to jump down to the comments section below. Rate these buttermilk biscuits for me, and more importantly, tell me about your results! Did you serve them with gravy? Did you manage to resist eating them all before breakfast was even over? Hearing your successes—or even the minor hiccups you solve along the way—helps us continue to refine the strategy for everyone building their own Epicure Empire.
If you snap a photo of your towering layers, tag us on social media! We absolutely love seeing your creations come to life. Your feedback is what keeps our culinary construction site buzzing. If you have questions, you can always reach out directly through our contact page!
PrintTall and Flaky Southern Buttermilk Biscuits
Follow this simple method to create tall, flaky, and buttery buttermilk biscuits from scratch. This recipe focuses on technique to achieve classic Southern texture.
- Prep Time: 15 min
- Cook Time: 15 min
- Total Time: 30 min
- Yield: 8 servings
- Category: Breakfast
- Method: Baking
- Cuisine: American
- Diet: Vegetarian
Ingredients
- 2 cups all-purpose flour
- 1 tablespoon baking powder
- 1 teaspoon salt
- 1 teaspoon sugar
- 6 tablespoons cold unsalted butter, cut into small cubes
- 3/4 cup cold buttermilk
- 2 tablespoons melted butter, for brushing
Instructions
- In a large bowl, whisk together the flour, baking powder, salt, and sugar. This is your dry mix.
- Add the cold, cubed butter to the flour mixture. Use a pastry blender or your fingertips to cut the butter into the flour until the mixture resembles coarse crumbs with some pea-sized pieces of butter remaining. These pieces create the flaky layers.
- Make a well in the center of the dry ingredients and pour in the cold buttermilk all at once.
- Use a fork to gently mix until the dough just comes together. Do not overmix; the dough will look shaggy.
- Turn the dough out onto a lightly floured surface. Gently pat the dough into a rectangle about 1 inch thick.
- Fold the dough into thirds, like a letter. Turn the dough 90 degrees and repeat the folding process one more time. This creates layers for tall biscuits.
- Pat or gently roll the dough to an even 3/4-inch thickness.
- Use a sharp biscuit cutter (do not twist the cutter) to cut out rounds. Press straight down. Gather the scraps, gently re-pat, and cut out any remaining biscuits.
- Place the cut biscuits close together on an ungreased baking sheet for softer sides, or slightly apart for crispier sides.
- Brush the tops lightly with melted butter.
- Bake in a preheated oven at 425 degrees Fahrenheit (220 degrees Celsius) for 12 to 15 minutes, or until the biscuits are tall and golden brown on top.
- Remove from the oven and immediately brush the tops with the remaining melted butter for extra flavor. Serve warm.
Notes
- Keep your butter and buttermilk as cold as possible. Cold fat creates steam pockets, which results in flaky layers.
- When cutting the biscuits, press the cutter straight down without twisting. Twisting seals the edges and prevents the biscuits from rising tall.
- For extra height, you can stack the cut biscuits on top of each other before baking, though this slightly reduces the flakiness on the sides.
Nutrition
- Serving Size: 1 biscuit
- Calories: 250
- Sugar: 2
- Sodium: 450
- Fat: 14
- Saturated Fat: 9
- Unsaturated Fat: 5
- Trans Fat: 0
- Carbohydrates: 28
- Fiber: 1
- Protein: 5
- Cholesterol: 35