

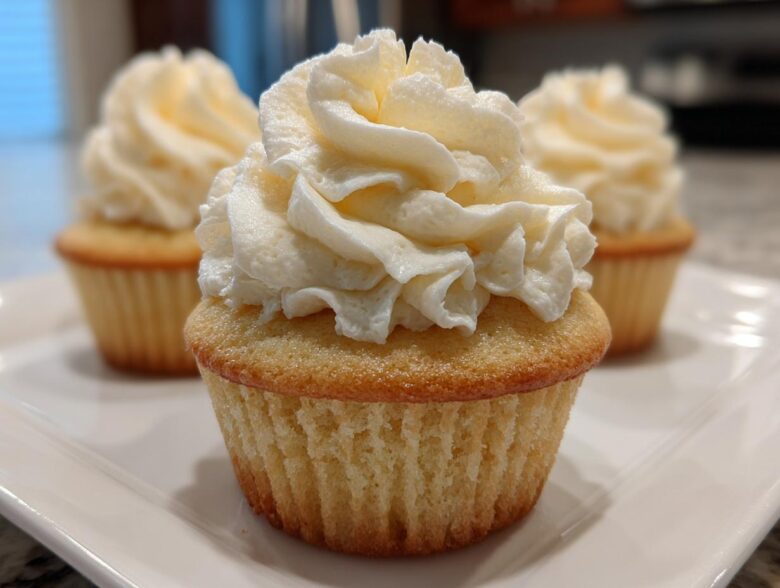
If you’ve ever taken a bite of a cloud-light, impossibly soft cupcake from a fancy bakery and thought, “I could never make that at home,” well, get ready to eat your words! Noah and I—Lena—believe that the best things in life, even perfect **vanilla cupcakes**, aren’t left up to chance; they are strategically built. We approached this recipe like we approach everything in our Epicure Empire: research, planning, and flawless execution. If you love learning about how we built this whole thing from the ground up, you can read all about our blueprint over on our About page.
Our goal here was simple but challenging: create the ultimate homemade version that beats the box mix every time. We spent weeks testing ingredient ratios because we needed that bakery-quality texture that is both unbelievably moist and perfectly fluffy. Trust me when I say this blueprint delivers. You are about to master the soft cupcake recipe that will become famous in your own circles.
We went through at least ten different variations before Noah finally agreed it was “operationally flawless.” We knew we had struck gold when the crumb was so tender it almost melted before you even tasted the vanilla. If you’re ready to build your own legacy of deliciousness, start here!
Why These Are the Best Vanilla Cupcakes You Will Ever Bake
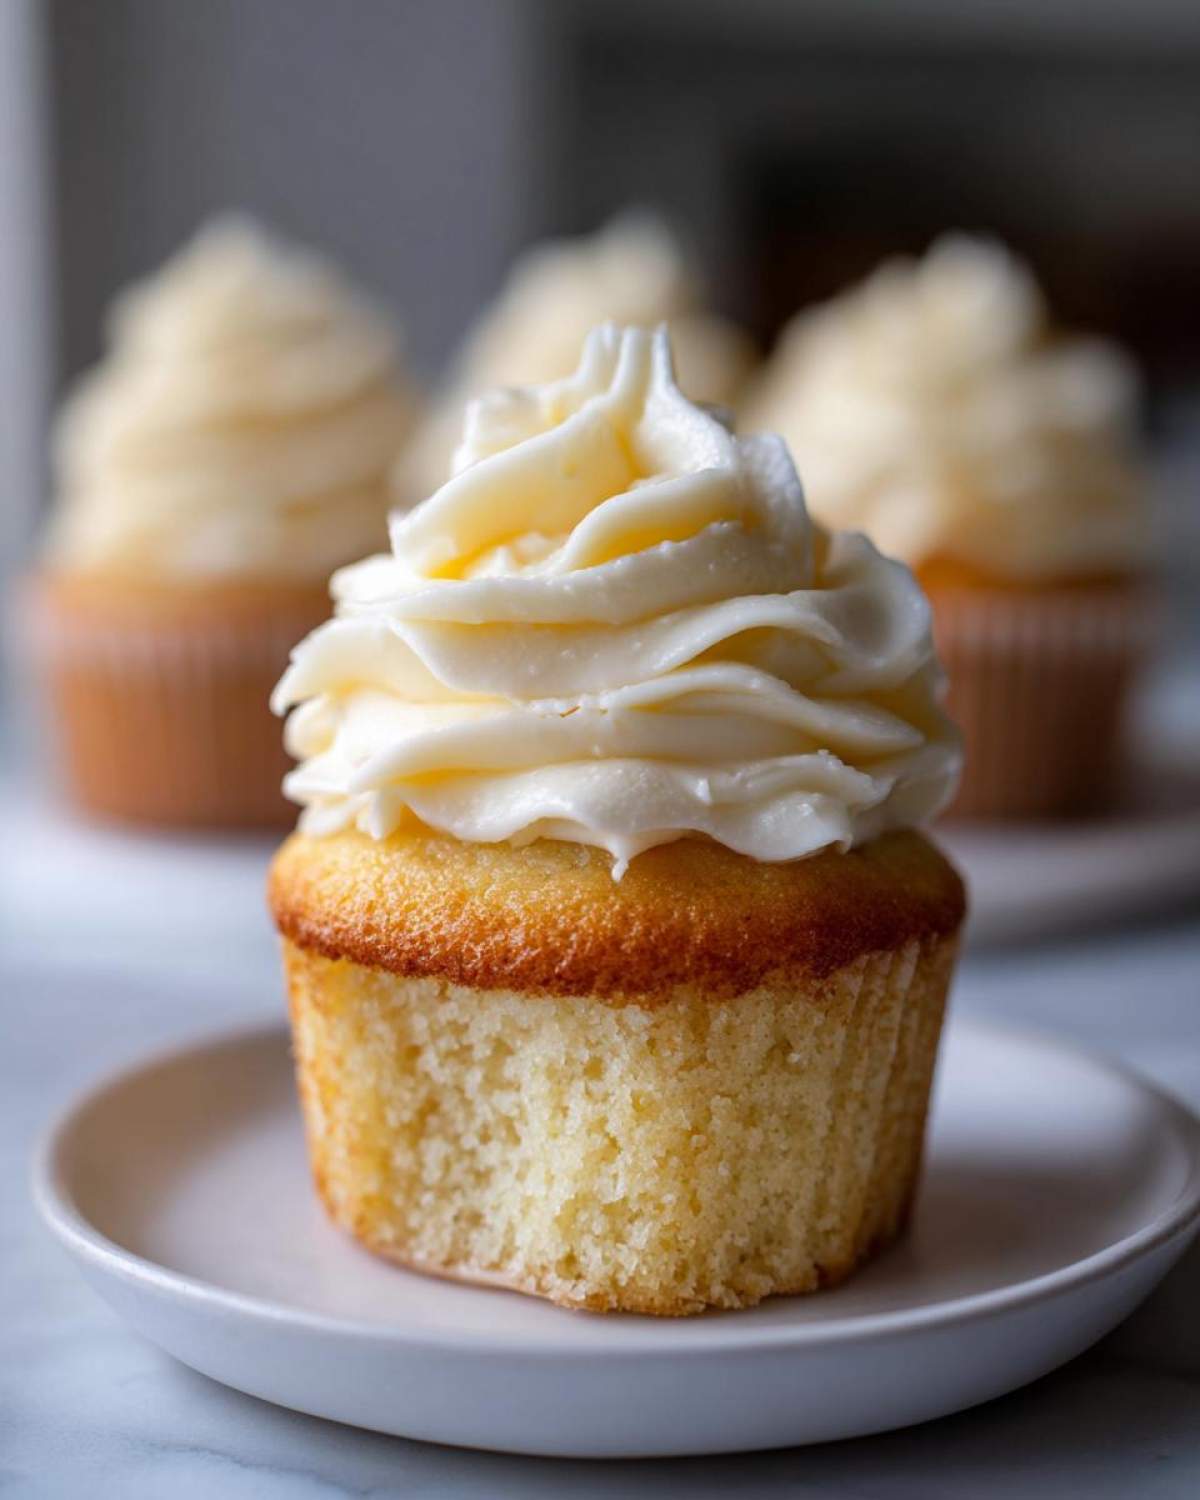
I know, everyone claims they have the “best” recipe, but we actually reverse-engineered flavor science here. Our focus wasn’t just on taste—though that’s amazing—it was entirely dedicated to texture. When people talk about Bakery Style Vanilla Cupcakes, they are talking about that specific crumb that holds up beautifully but feels like eating a cloud. We cracked that code.
This blueprint guarantees you hit the sweet spot between light and substantially satisfying. It’s the difference between a good cupcake and a legendary one you keep forever.
Achieving Superior Moist Vanilla Cupcakes Texture
It all starts with temperature, trust me on this. Using room temperature eggs and milk lets them blend seamlessly into the butter during the creaming stage. When the wet ingredients emulsify properly, they trap air and lock in moisture far better than if they are cold. You’re creating structure from the very beginning, which sets us up perfectly for that Perfect Vanilla Cupcake Texture.
The Secret to Fluffy Cupcake Recipe Results
The single technique that makes these vanilla cupcakes so airy? Step five: stop mixing the second the batter comes together! Seriously. Overmixing develops the gluten in the flour, turning tender sweetness into something chewy and sad. We only mix on that low speed until just combined after adding the liquids. That’s the key to lightness—don’t wake the gluten up!
Gathering Ingredients for Your Classic Vanilla Dessert
Before we dive into the assembly of these incredible vanilla cupcakes, we need to get our supply chain organized. Noah is all about having everything prepped and measured—he calls it Mise en Place, I call it preventing stress—so let’s get those ingredients lined up. Accuracy matters here because we are aiming for a bakery-style product from scratch, so please double-check those measurements!
For the Vanilla Cupcakes Cake Batter
Here’s what you need for the 12 dream-worthy cakes. Remember what I said about temperature? Make sure your butter is softened (not melted!) and your eggs and milk are sitting out for at least 30 minutes before you start. This simple step makes a massive difference in everything that follows.
- 1 3/4 cups all-purpose flour
- 1 3/4 cups granulated sugar
- 1 tablespoon baking powder
- 1/2 teaspoon salt
- 1/2 cup unsalted butter, softened
- 2 large eggs, room temperature
- 1 cup whole milk, room temperature
- 2 teaspoons pure vanilla extract
For the Simple Vanilla Buttercream Frosting
This frosting is non-negotiable! It’s the perfect creamy complement to the light cake. Make sure that butter is soft, and if you skip the pinch of salt, your frosting will taste just sweet, not complex. We add the powdered sugar slowly so we don’t create a sugar cloud explosion across the kitchen!
- 1 cup unsalted butter, softened
- 4 cups powdered sugar
- 1 teaspoon pure vanilla extract
- 3-4 tablespoons heavy cream
- pinch of salt
Step-by-Step Instructions for Easy Homemade Cupcakes
Now it’s time for assembly! This is where the strategy really pays off. Because we prepped everything so carefully, putting these fantastic vanilla cupcakes together is actually quick. I always get excited when I get to the part where we beat the butter and sugar—that’s when you can smell the potential sweetness wafting up! If you want more tips on mastering prep work in the kitchen, check out Noah’s guide on streamlining kitchen prep.
Preparing the Vanilla Cupcakes Batter
First things first: Get your oven hot—350°F (175°C)—and line that muffin tin, friends. Remember the dry mix? Whisk the flour, sugar, baking powder, and salt. Then, we start the creaming stage (Step 3). You add that softened butter to the dry stuff and beat it on low until it genuinely looks like coarse sand. This step is crucial for that tender crumb! Next, mix your wet stuff—eggs, milk, vanilla—separately.
When adding the wet to the dry, we only add half the liquid first and beat until just combined. Scrape down the sides, then add the rest of the liquid and mix on medium for just 30 seconds until smooth. Seriously, step away from the mixer if you see streaks! Don’t overmix, or you’ll wake up the gluten, and we want light cakes, not chewy sponges.
Baking and Cooling the Vanilla Cupcakes
Fill those liners about two-thirds full—don’t be tempted to overfill them, or they’ll dome right over the paper edges. Pop them into the hot oven for 18 to 20 minutes. You’re looking for a toothpick to come out clean when you test the center. Once they look done, let them hang out in the pan for five minutes before moving them gently to a wire rack. They absolutely must be completely cool before you try to frost them, or chaos—and melting buttercream—will erupt! If you want to see how even the famous Magnolia Bakery gets their texture, take a look at this fascinating article.
Making and Applying the Best Vanilla Cupcake Frosting
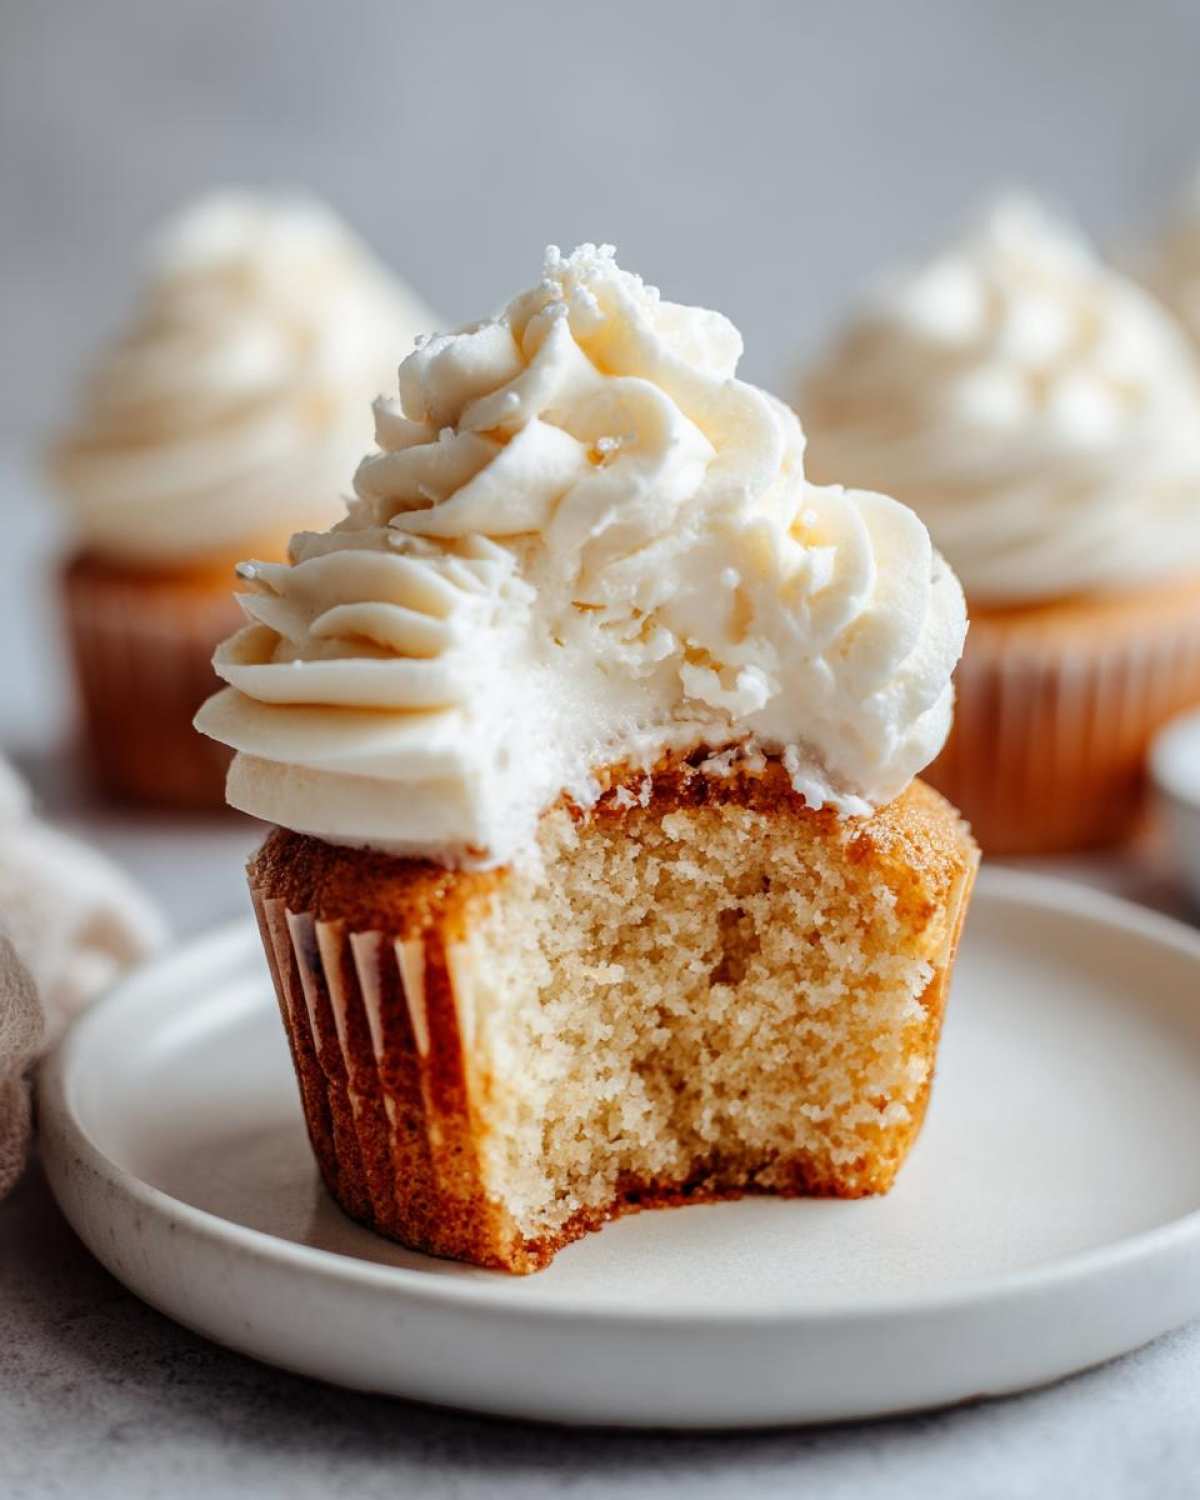
While they cool, let’s whip up the frosting. Beat that soft butter until it’s creamy, then slowly introduce the powdered sugar so you don’t choke on it! Once incorporated, add your vanilla, salt, and start with 3 tablespoons of heavy cream. I encourage you to use a higher speed here until it’s light and fluffy—this is your chance to incorporate air for a beautiful Simple Vanilla Buttercream finish. If it looks stiff, splash in that final tablespoon of cream. Once the cakes are cold, you can pipe or spread away!
Tips for Success Making Soft Cupcake Recipe Batches
Even with the best blueprint, baking can have hiccups! But don’t panic; these little things Lena pulled straight from the ‘Notes’ section of our master file ensure your vanilla cupcakes come out flawlessly every single time. These aren’t just suggestions; they are mission-critical checks for bakery-level results.
- Room Temp is Required: Seriously, make sure your eggs and milk are at room temperature before you even touch the mixer. When cold ingredients fight the fat, the batter separates, and we lose that essential aeration needed for soft cakes.
- Go Big on Vanilla: If you want that intense flavor that screams “homemade heaven,” swap out one teaspoon of the extract for a half teaspoon of vanilla bean paste. It adds those lovely little black specks that just look so elegant!
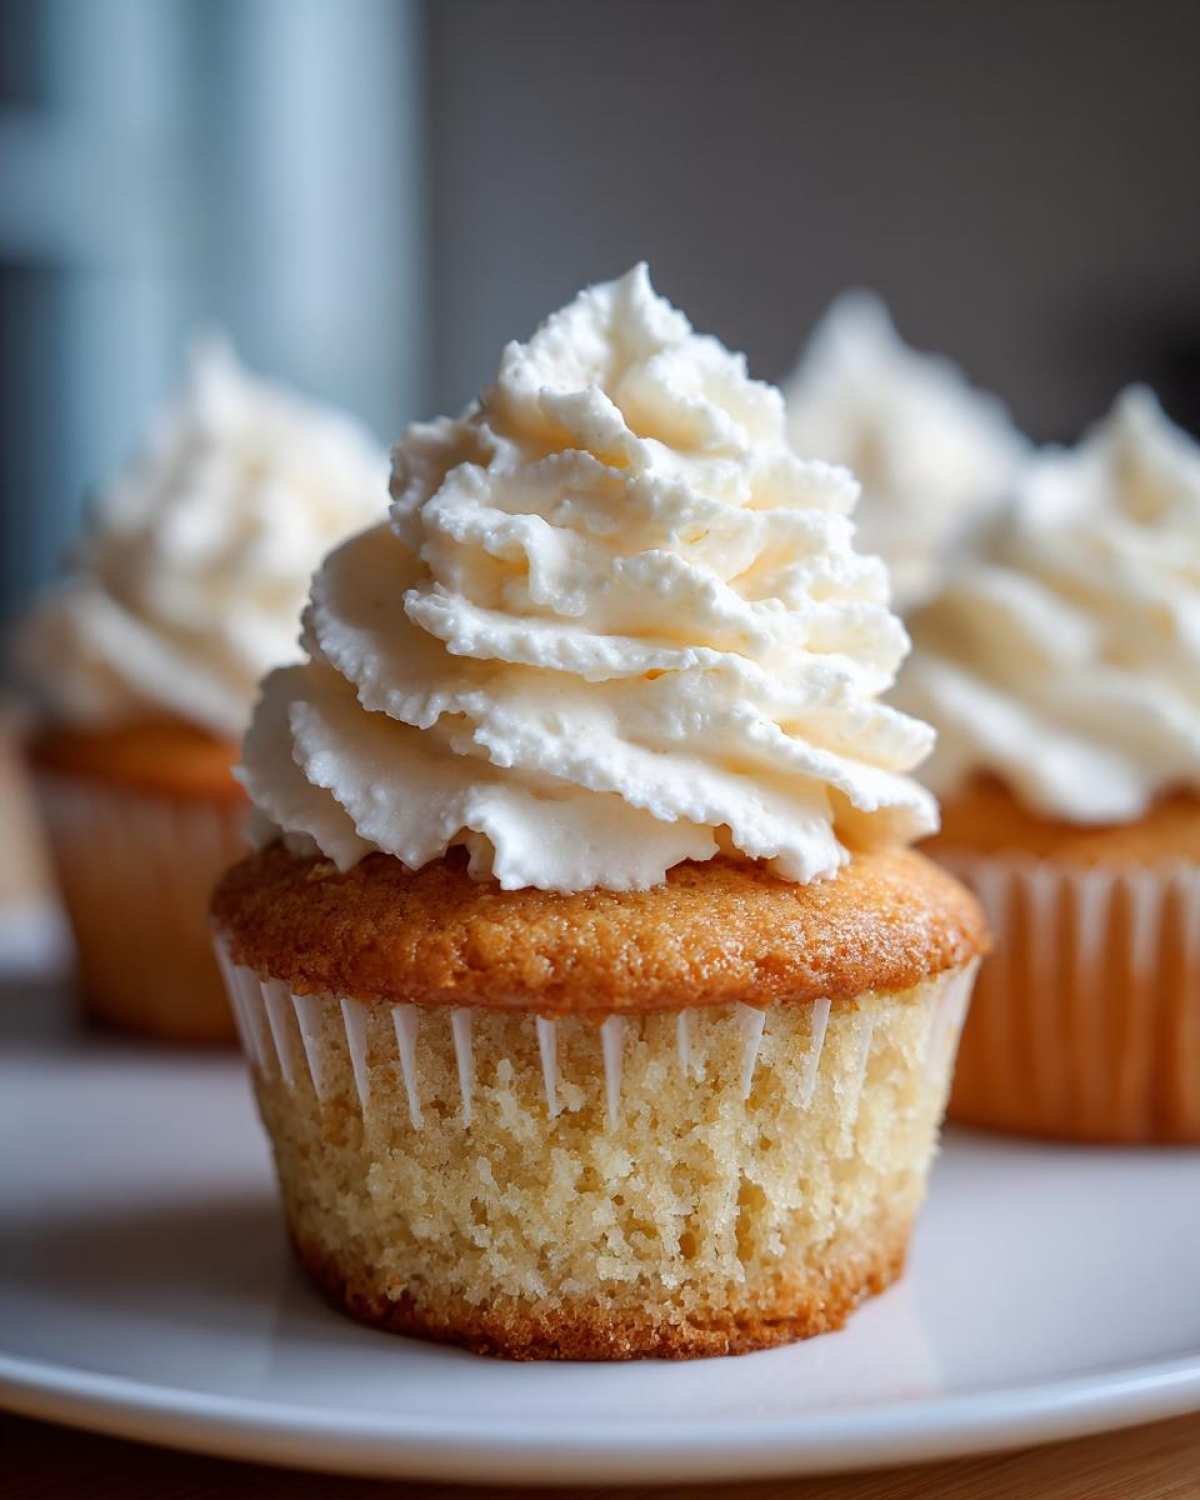
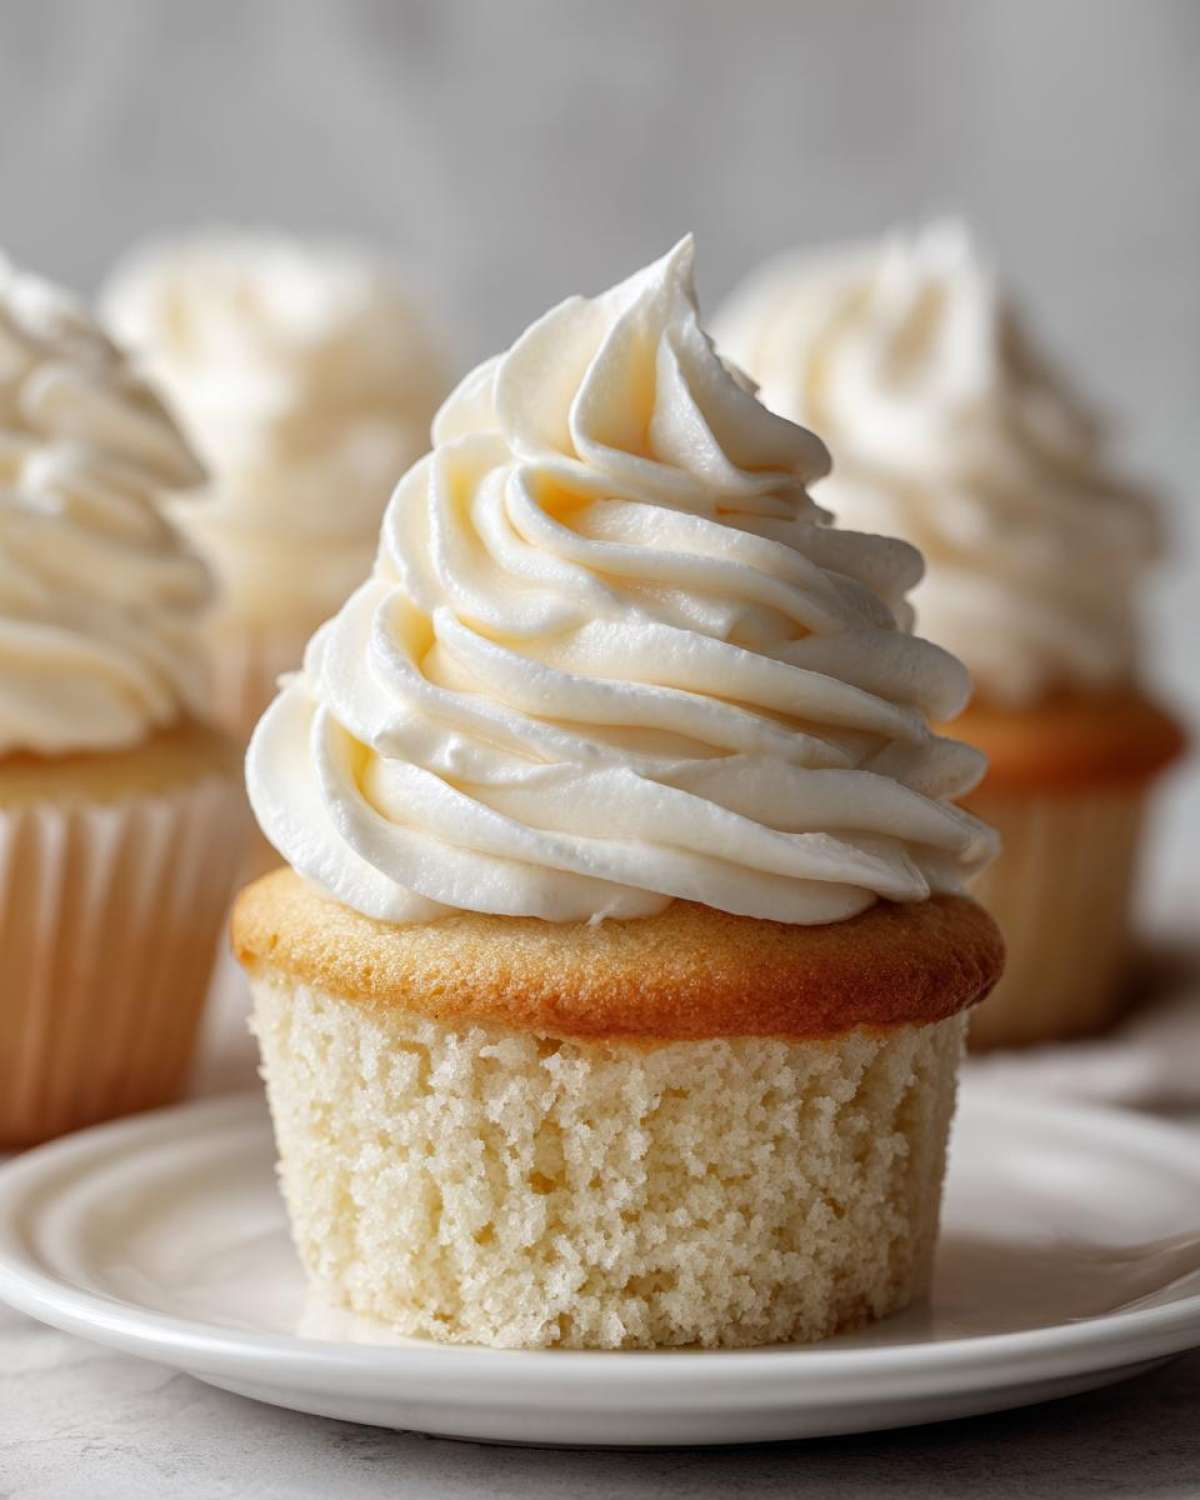
- Piping for Presentation: If you want that gorgeous, professional, sky-high look, grab yourself a large star tip for your piping bag. It makes all the difference for these vanilla cupcakes when serving them at a party.
Variations for Your Vanilla Cupcakes
Once you master the *perfect* texture, the sky’s the limit! Noah always says that once the foundation is solid, you can start experimenting with the flavor profile. These easy homemade cupcakes are a wonderful canvas for subtle changes that can make them feel brand new for different occasions. Try these simple tweaks next time you want to mix things up without having to rewrite the entire recipe blueprint.
If you’re feeling extra decorative and want to push the envelope on flavor complexity, we have a spectacular Boston Cream Pie Cupcake recipe you absolutely need to try next, but for right now, let’s stick to small additions in *this* vanilla batch.
- Citrus Zing: Add the zest of one whole lemon or orange right when you add the vanilla extract. The oils lift the whole flavor profile and make them feel incredibly bright—perfect for spring gatherings!
- Almond Swap: For a taste reminiscent of classic wedding cakes, try swapping out half a teaspoon of the vanilla extract for almond extract. Just be careful; almond is potent, so start small!
- Extra Depth: If you slightly brown your butter before adding it to the dry ingredients (just let it melt and foam gently on the stove until nutty brown bits form on the bottom), you get a gorgeous, rich base note that completely transforms the flavor profile. It’s a sneaky little trick that adds complexity.
- Mocha Treat: For the chocolate lovers in your life who still want a light cake, whisk 1 tablespoon of instant espresso powder into your dry ingredients during Step 2. It intensifies the vanilla flavor without making the cupcake taste like coffee!
Serving Suggestions for Your Classic Vanilla Dessert
These vanilla cupcakes are the ultimate blank canvas for any celebration! Since they are so reliably soft and delicious, they are truly the best choice for last-minute Birthday Cupcake Ideas because nobody will ever complain about a classic this good. If you’re planning large Vanilla Cupcakes for Parties, I always think presentation matters as much as flavor.
For birthdays, skip the simple swirl and pipe that buttercream high, then top it with colorful sprinkles or even a single fresh strawberry. They also pair incredibly well with other fruit desserts. For a really elegant spread, try serving these next to my Strawberry Shortcake Cupcakes—the contrast is lovely! Check out this gorgeous example of how others style their moist vanilla cupcakes for inspiration, too!
Storage and Reheating Instructions for Vanilla Cupcakes
Since we went to all this trouble to achieve these incredibly moist vanilla cupcakes, we have to protect our work! The way you store them totally depends on whether or not they have that glorious frosting piled on top. Noah and I have tested the durability of these cakes, and they hold up really well if you follow these quick storage guidelines.
If you’re not serving them right away, you want to keep them away from anything that might dry them out or introduce funky fridge smells. We aim to serve them the day they are baked, but honestly, they are still fantastic on day two!
- Unfrosted Cakes: If you baked them but aren’t frosting until tomorrow, just leave them totally alone on the cooling rack and cover them loosely with foil or plastic wrap. They are happy sitting right out on the counter at room temperature for up to two days. They don’t need the fridge!
- Frosted Cakes: Once that beautiful simple vanilla buttercream is on top, you should definitely cover them loosely. Room temperature is usually fine for 12 to 24 hours, especially if your kitchen isn’t super humid or hot. If you need them to last longer than a day, or if your kitchen is blazing hot, pop them in the fridge in an airtight container.
- Bringing Them Back: If the frosted cakes have been chilling in the fridge, please don’t serve them instantly! Cold cake always seems dense. Take them out about 30 to 45 minutes before you plan to serve them so they can come back up to room temperature. That little bit of warmth restores that perfect, light and airy cupcake softness we worked so hard to achieve.
Frequently Asked Questions About Making Vanilla Cupcakes
Whenever Noah and I present this recipe to friends, they always have a few questions about troubleshooting, especially regarding texture. It’s totally normal! Baking is chemistry, and sometimes even the best scientists need a little guidance when swapping ingredients or techniques. Here are the most common things people ask me about ensuring their vanilla cupcakes turn out perfectly light and delicious every single time.
We even pulled in some external wisdom from fellow bakers to round out the answers when needed. If you want to see more general baking know-how from our archives, check out our main blog page!
Why are my vanilla cupcakes dense instead of fluffy?
Nine times out of ten, density comes down to one of two things. First, you overworked the batter! That means you mixed it too long after adding the flour and liquids, which builds gluten and makes the texture chewy instead of soft cupcake recipe perfection. Second, your ingredients, especially the eggs and milk, were cold. Cold ingredients don’t blend properly, which prevents the batter from capturing enough air during the creaming stage. Always use room temperature!
Can I use oil instead of butter in these vanilla cupcakes?
You technically *can*, but I strongly advise against it for this particular blueprint if you’re chasing that bakery style vanilla cupcakes vibe. Butter provides superior flavor, which is a baseline requirement for a great classic dessert. More importantly, butter helps create structure during the creaming process that oil just can’t replicate. Oil makes things moist, yes, but it makes them greasy; butter gives you that perfect, structured, yet tender crumb you’re looking for.
What is the best way to store frosted vanilla cupcakes?
It’s all about temperature control to keep your frosting nice and the cake from drying out. If it’s a cool day, storing them loosely covered on the counter is fine for maybe 12 hours. But generally, if you need them to last longer than that, pop them into an airtight container in the fridge. The key is letting them warm up before serving. Take them out at least 30 minutes before eating so they lose that fridge chill—this brings back the amazing soft texture. For more great advice, I always love checking in with Cake Whiz when I have specific texture questions!
Estimated Nutritional Data for These Vanilla Cupcakes
I wanted to wrap up our blueprint with a quick overview of the estimated nutritional breakdown for these delightful treats. Remember, Noah and I don’t obsess over calories when we are building our culinary empire—we focus on flavor and technique! But for accountability, here is the projected data based on our recipe layout. Please keep in mind, this is all just a guide; if you use full-fat cream cheese in your frosting or different sized eggs, the numbers will shift a tiny bit.
We always advise checking the specific ingredients you use if you have serious dietary tracking to do. You can read our full thoughts on recipe variation and nutritional estimates on our official disclaimer page.
- Serving Size: 1 cupcake
- Calories: 350
- Sugar: 45g
- Sodium: 180mg
- Fat: 17g
- Saturated Fat: 10g
- Unsaturated Fat: 7g
- Trans Fat: 0.2g
- Carbohydrates: 48g
- Fiber: 0.5g
- Protein: 4g
- Cholesterol: 55mg
There you have it! A completely foolproof plan for achieving the best vanilla cupcakes that are both soft and incredibly moist. Happy baking, friends!
PrintThe Ultimate Moist and Fluffy Classic Vanilla Cupcakes with Creamy Vanilla Buttercream
Follow this easy, from-scratch recipe to bake bakery style vanilla cupcakes that are incredibly soft, moist, and light. This blueprint delivers the perfect texture for your next birthday or party treat.
- Prep Time: 20 min
- Cook Time: 20 min
- Total Time: 40 min
- Yield: 12 servings
- Category: Dessert
- Method: Baking
- Cuisine: American
- Diet: Vegetarian
Ingredients
- 1 3/4 cups all-purpose flour
- 1 3/4 cups granulated sugar
- 1 tablespoon baking powder
- 1/2 teaspoon salt
- 1/2 cup unsalted butter, softened
- 2 large eggs, room temperature
- 1 cup whole milk, room temperature
- 2 teaspoons pure vanilla extract
- For the Buttercream: 1 cup unsalted butter, softened, 4 cups powdered sugar, 1 teaspoon pure vanilla extract, 3-4 tablespoons heavy cream, pinch of salt
Instructions
- Preheat your oven to 350°F (175°C). Line a 12-cup muffin tin with paper liners.
- In a large bowl, whisk together the flour, sugar, baking powder, and salt. This is your dry mix.
- Add the softened butter to the dry mix. Beat with an electric mixer on low speed until the mixture resembles coarse sand. This step helps create a tender crumb.
- In a separate bowl, whisk together the eggs, milk, and vanilla extract. This is your wet mix.
- With the mixer on low speed, gradually add half of the wet mix to the flour mixture, beating until just combined. Scrape down the sides of the bowl.
- Add the remaining wet mix and beat on medium speed for about 30 seconds until the batter is smooth. Do not overmix.
- Divide the batter evenly among the 12 cupcake liners, filling each about two-thirds full.
- Bake for 18 to 20 minutes, or until a toothpick inserted into the center comes out clean.
- Let the cupcakes cool in the pan for 5 minutes before transferring them to a wire rack to cool completely.
- To make the frosting, beat the softened butter until creamy. Gradually add the powdered sugar, one cup at a time, mixing well after each addition.
- Add the vanilla extract and 3 tablespoons of heavy cream. Beat on medium-high speed until light and fluffy. Add the last tablespoon of cream if the frosting seems too stiff.
- Once the cupcakes are completely cool, pipe or spread the creamy vanilla buttercream on top.
Notes
- For the best texture, make sure your eggs and milk are at room temperature before starting. This helps them emulsify better into the batter.
- To achieve that bakery style look, use a piping bag fitted with a large star tip for frosting.
- If you want a deeper vanilla flavor, substitute 1 teaspoon of vanilla extract with 1/2 teaspoon of vanilla bean paste.
Nutrition
- Serving Size: 1 cupcake
- Calories: 350
- Sugar: 45g
- Sodium: 180mg
- Fat: 17g
- Saturated Fat: 10g
- Unsaturated Fat: 7g
- Trans Fat: 0.2g
- Carbohydrates: 48g
- Fiber: 0.5g
- Protein: 4g
- Cholesterol: 55mg