

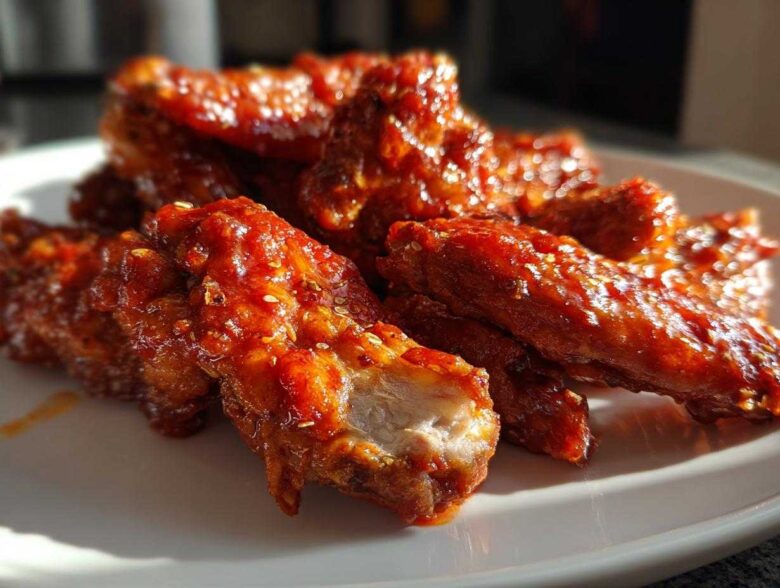
Oh my goodness, if you’re anything like me, there’s nothing better than sinking your teeth into a wing that’s simultaneously crispy, sweet, spicy, and dripping with sauce, right? But that usually means deep frying, and honestly, who has the time (or the cleanup!) for that mess? Forget it! I spent years tweaking my oven technique, and I finally cracked the code for unbelievable **Sticky Sweet Chili Chicken Wings Oven Baked**.
Trust me when I say this recipe bypasses the fryer completely. We’re using a simple secret weapon—baking powder—that pulls all the moisture out of the skin, leaving you with wings that deliver that satisfying crackle. Then, we coat them in the easiest, most perfectly balanced sweet and spicy glaze you’ve ever made. This is game day food, weeknight dinner, or just a Tuesday craving solved right here.
You can read all about my kitchen adventures over on the About Us page, but for now, let’s just get these wings into your life!
Why You Will Make This Sticky Sweet Chili Chicken Wings Oven Baked Recipe Often
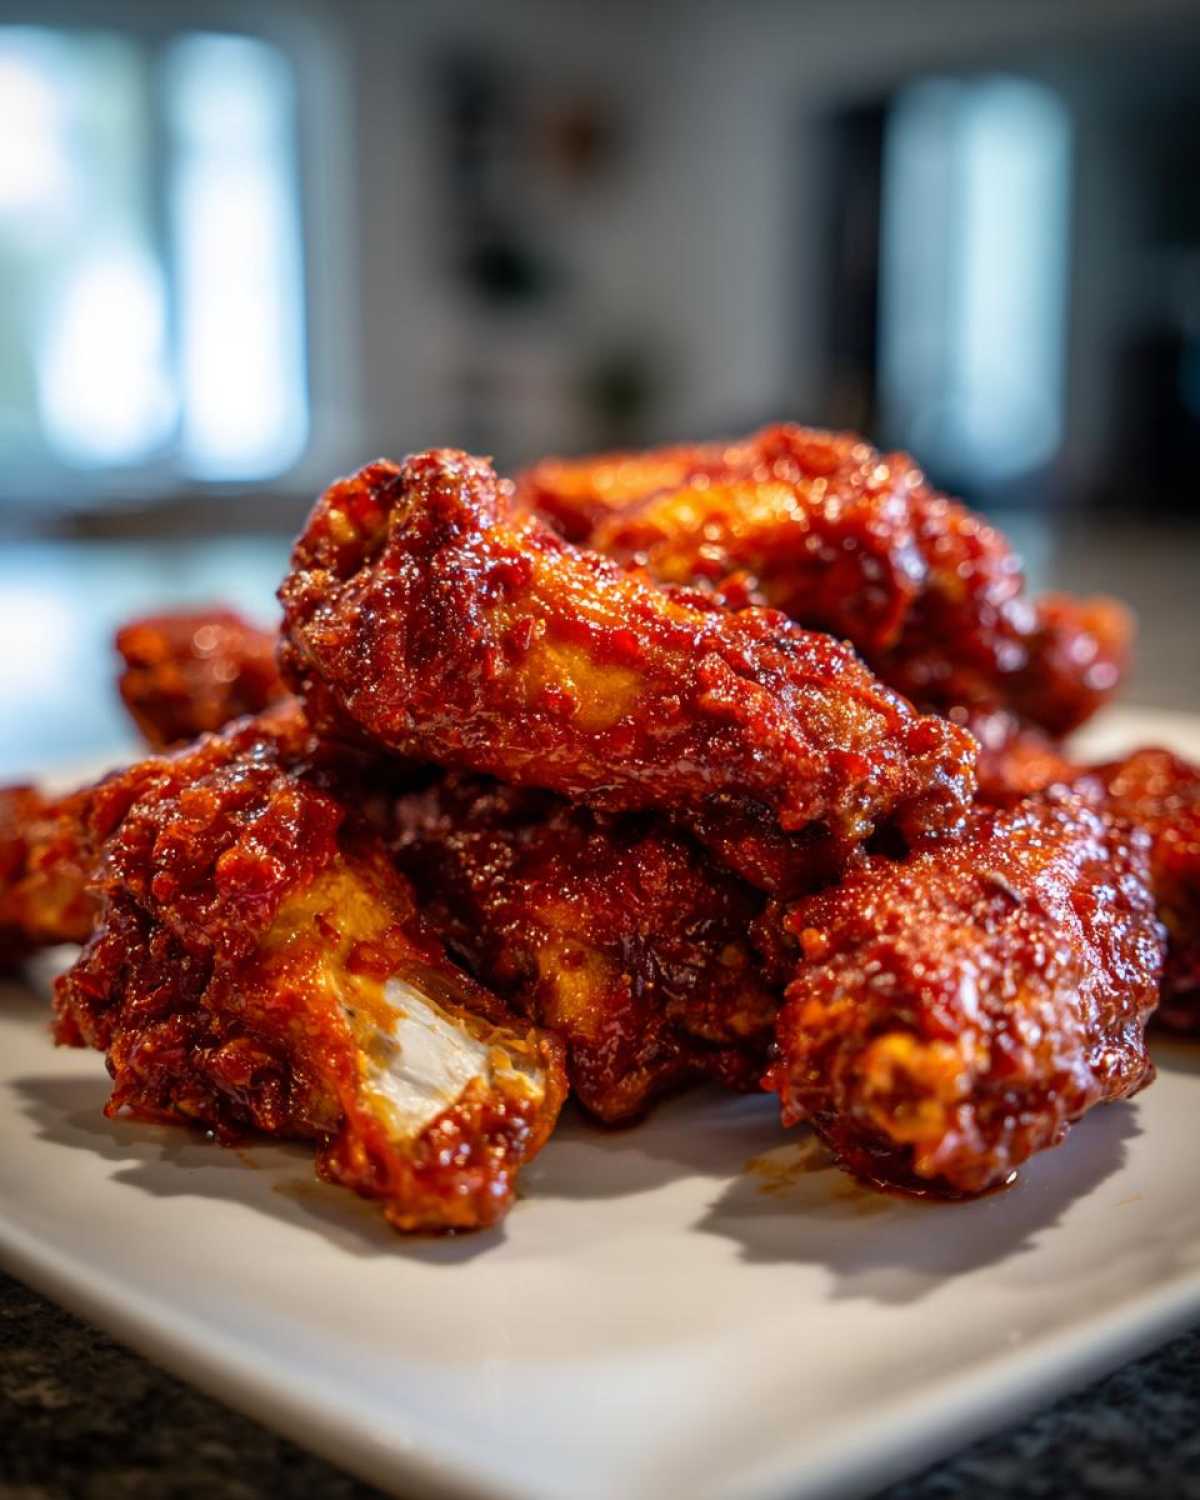
Okay, I know everyone promises the best wings, but these **Sticky Sweet Chili Chicken Wings Oven Baked** are the real deal. I wouldn’t keep them secret if they weren’t absolutely perfect every single time. Here’s why they will become your new go-to appetizer or dinner:
- Seriously, zero deep frying involved! This is the ultimate **no fry sticky wings recipe** that still delivers that addictive crunch.
- The texture is unmatched: super crispy skin that holds up perfectly under a thick, sticky glaze.
- The sauce is incredibly fast—it comes together on the stovetop while the wings are doing their thing in the oven.
- You get that phenomenal sweet and spicy balance that keeps you reaching for just one more wing.
- Cleanup is a breeze because we line our pan—I’ll show you how! It makes these perfect for a **weeknight chicken wing dinner**.
- The baking powder trick guarantees you get that professional-level crispiness that most home cooks struggle with when baking wings.
Honestly, after you nail the **crispy oven wings technique** once, you won’t even look at your deep fryer for wings again! They are just so straightforward.
Essential Ingredients for Perfectly Glazed Sticky Sweet Chili Chicken Wings Oven Baked
Gathering the right ingredients is half the battle, and I promise you, this list is simple. No weird, hard-to-find items here! The secret to achieving those **Oven baked chicken wings** that actually snap is almost entirely down to one specific ingredient. Speaking of ingredients, before you begin assembling anything, make sure you’ve reviewed our site disclaimer; we want everyone cooking safely and confidently!
We are dividing what you need into two quick groupings: what makes the chicken crispy, and what makes that amazing sauce. Keep it clean, measure carefully, and you’ll be golden.
For the Crispy Wing Base
This is where we set up the texture. Remember what I said about drying them? Don’t skip that! You can’t get that great **crispy oven wings technique** if the skin is wet.
- 2 lbs chicken wings, separated into flats and drumettes
- 1 tablespoon baking powder (Okay, listen up! You absolutely want to grab the aluminum-free kind. It reacts perfectly on the skin without leaving any funky metallic taste, trust me!)
- 1 teaspoon salt
- 1/2 teaspoon black pepper
For the Simple Sweet Chili Glaze Recipe
This sauce comes together so fast. I usually multitask and get the sauce going right after I toss the wings in the baking powder magic dust. Make sure your garlic is truly minced and that your fresh ginger is finely grated so they dissolve nicely into the glaze as it cooks down.
- 1/2 cup sweet chili sauce
- 2 tablespoons soy sauce
- 1 tablespoon rice vinegar
- 1 tablespoon brown sugar
- 1 teaspoon grated fresh ginger
- 1 clove garlic, minced
That combination creates the perfect base for our **simple sweet chili glaze recipe**. It’s sweet, it’s got a little tang from the vinegar, and the ginger/garlic give it just enough depth!
Step-by-Step Glazed Chicken Wings Cooking Instructions
Now that we have our ingredients ready, let’s get down to the actual cooking. This is where the magic happens, and trust me, following these **glazed chicken wings cooking instructions** exactly will ensure you nail the texture. We are looking for that signature crunch from the baking powder—that’s our **crispy oven wings technique** in action—before we even think about the sauce. You can find our main dinner categories here if you’re planning a full meal!
Preparing the Wings for Maximum Crispiness
First things first: oven preheat to 425°F (220°C). Get your baking sheet lined with foil (for my sanity later!) and place that wire rack right on top. The rack is non-negotiable because we need air circulating all around those wings so they can truly crisp up on the bottom, not just steam. Next, pat those wings aggressively dry with paper towels. I mean it—get them as dry as possible. Toss them gently in a bowl with the baking powder, salt, and pepper until they look dusty. Arrange them on the rack in a single layer; if they’re touching, they’ll steam. Bake them for a solid 25 minutes.
Making the Easy Homemade Chicken Wing Sauce
While those wings are getting their first blast of heat, whisk together everything for the sauce in a small saucepan. We’re combining the sweet chili, soy sauce, vinegar, brown sugar, ginger, and garlic. Set it over medium heat and just bring it to a gentle simmer. Keep stirring until that sugar dissolves completely. Let it bubble gently for about two minutes—we just want it slightly reduced and mixed, remember, we’re not trying to make candy here!
Once it thickens just a tiny bit, pull it off the heat. This is your **simple sweet chili glaze recipe** base, ready whenever those wings come out for their flip.
The Double Bake and Final Sticky Sweet Chili Chicken Wings Oven Baked Glaze
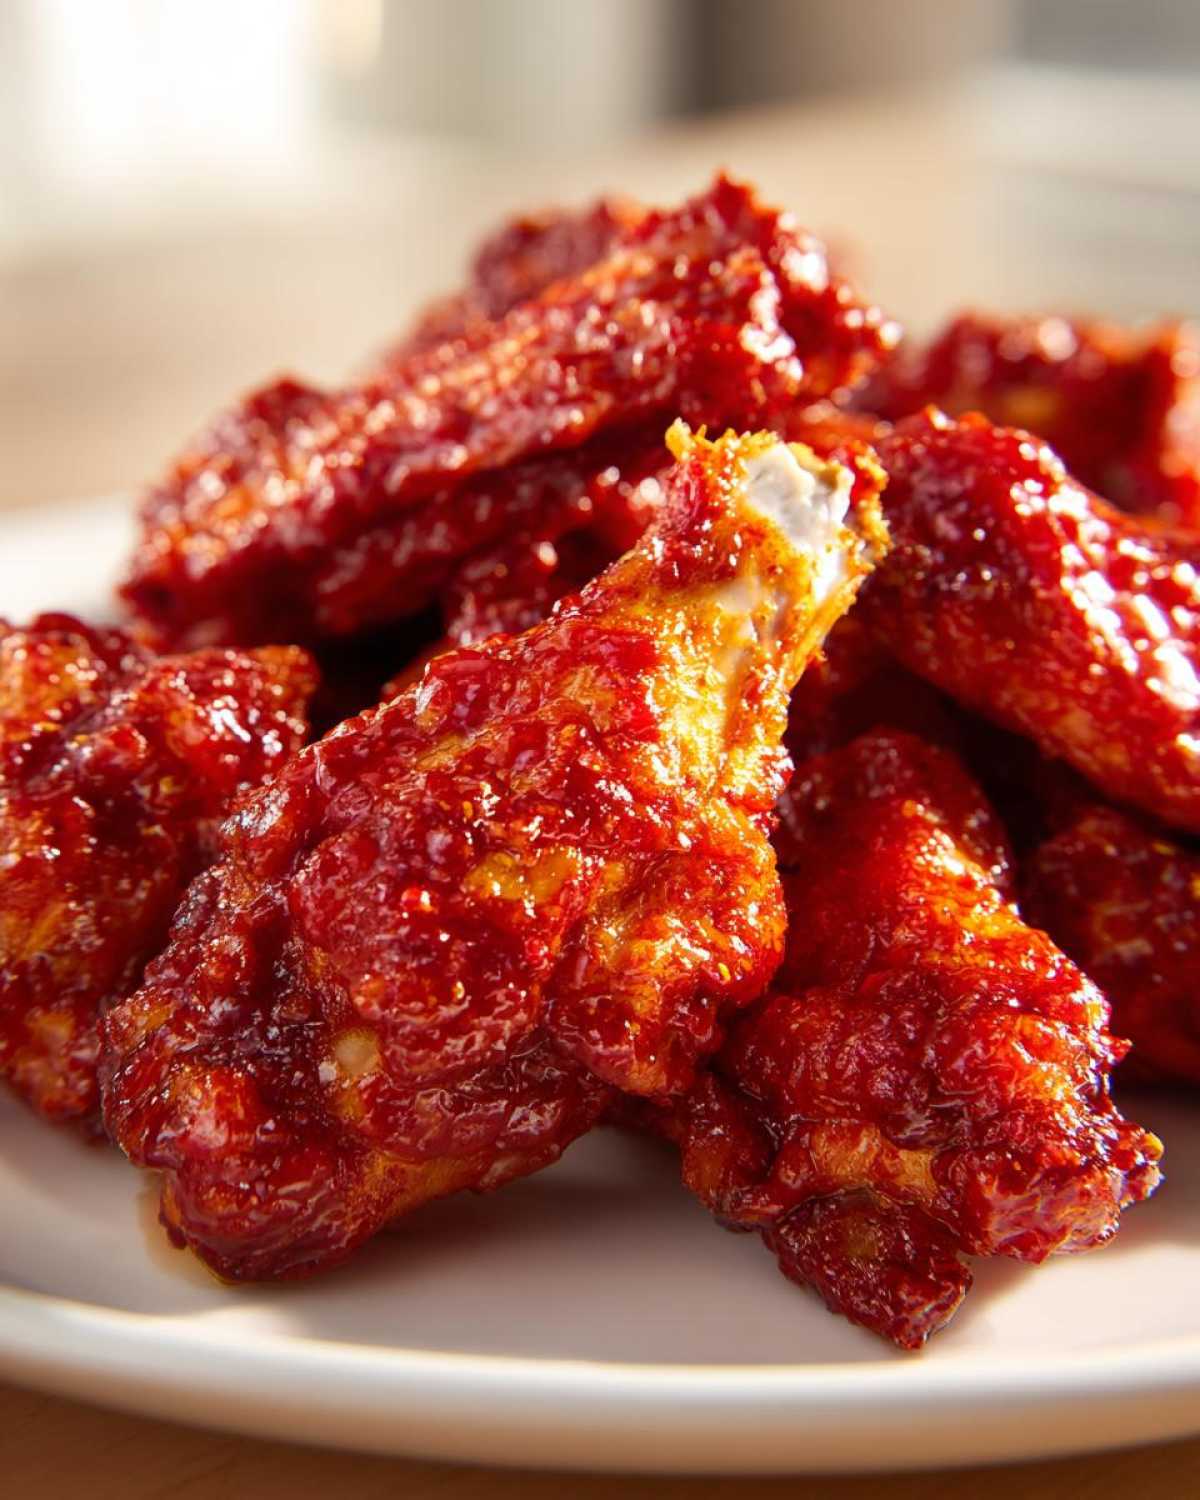
After 25 minutes, pull the trays out. Flip every single wing over carefully—they should be starting to look golden. Pop them back in for another 15 to 20 minutes until they hit that safe temperature zone. Now comes the main event for **how to glaze chicken wings in the oven**! Take the wings out and dump them into a clean bowl. Pour about half the sauce over and toss until they are totally coated. Get these glazed wings back onto the rack, and bake them for just 5 more minutes. That last little blast of heat caramelizes the sugars, making them perfectly sticky and shiny. Don’t let them sit too long before serving!
Tips for Perfect Oven baked chicken wings Every Time
Now we’ve covered the basic steps for achieving **perfectly cooked baked chicken wings**, but let me give you the insider secrets that separate a good batch from an absolute showstopper. If you find your wings sticking to the rack, it’s almost always because you skipped the wire rack step entirely, or your oven temperature wasn’t quite right. Remember, that 425°F blast is essential!
A huge mistake people make trying to get a **no fry sticky wings recipe** to work is glazing them too early. If you toss them in that sugary sauce before the skin is fully rendered and crispy, that sugar melts right away, turning into a sad, wet coating instead of a sticky lacquer. That’s why we bake them bare first, then we glaze, *then* we give them that quick 5-minute bake to set it.
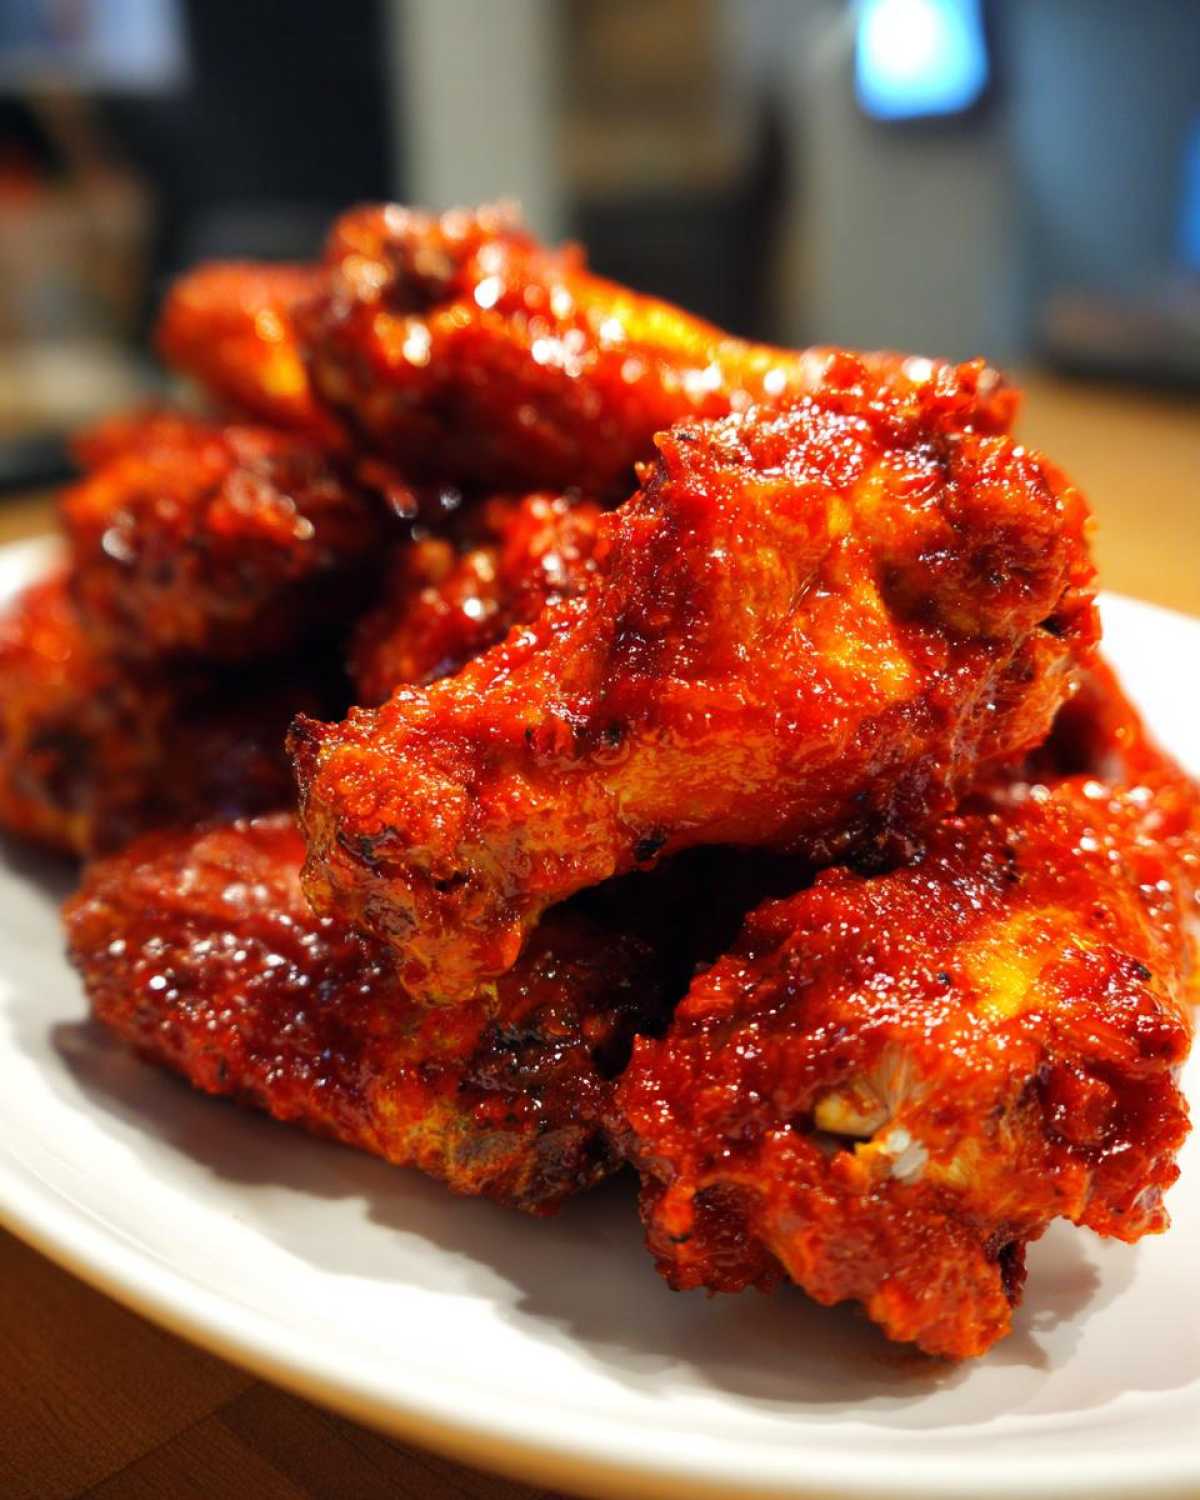
Also, and this is so important for cleanup, make sure you put down a fresh sheet of foil under that rack before seasoning your wings. You don’t want that baking powder, salt, and rendered fat sticking to your sheet pan, because cleaning that baked-on mess is just misery. You can check out some great snack pairing ideas right here!
Ingredient Notes and Substitutions for Sweet chili chicken wings
I get a ton of questions about substitutions, especially since not everyone keeps specialty vinegars lying around. For these **sweet chili chicken wings**, the ingredients are pretty specific, but they are chosen for a reason! Let’s talk about getting the best results, even if you have to shop a little differently.
When it comes to the sweet chili sauce itself, please try to grab the kind that you see with visible chili flakes suspended in it, usually bottled by brands like Mae Ploy or Thai Kitchen. The cheap, super clear, flavorless syrup doesn’t have that necessary punch. It’s the star of our sauce, so a good one makes all the difference in your **simple sweet chili glaze recipe**.
Another big thing: the vinegar. You absolutely must use rice vinegar here. If you swap it for regular white distilled vinegar, the flavor is totally different—it’s too harsh and sharp. Rice vinegar is milder and has a slight sweetness that complements the brown sugar perfectly. If you absolutely cannot find rice vinegar, apple cider vinegar is your absolute last resort, but use only half the amount and taste as you go!
For the soy sauce, low sodium is my standard choice, especially since we are glazing them, and sodium can sneak up fast. If you need to make this gluten-free for a friend, swap the regular soy sauce immediately for tamari. It acts just like soy sauce binder and flavor-wise, so no need to change the cooking instructions at all!
Serving Suggestions for Your Sticky Sweet Chili Chicken Wings Oven Baked
Okay, the wings are glazed, they are sticky, and they are ready to go! Now, how do we present these beauties? These aren’t just wings; they are the centerpiece of any gathering, especially when you are hosting for the big game. They truly are the **best oven baked wings for game day**!
First, we need some color and texture contrast. Remember those notes about garnishes? You have got to use them! Sprinkle those wings generously—and I mean shower them—with toasted white sesame seeds. They give a little nuttiness and look incredible against that glossy, deep red glaze. Then, take some fresh green onions, slice them thin on a sharp angle, and scatter them over the top. That little bit of fresh, sharp onion cuts right through the sweetness perfectly.
If you are serving these as an appetizer spread, they are fantastic on their own with some simple toothpicks, but if you are bringing these out as a main event, you need a good sidekick. Since this glaze has a nice sweet-heat profile, you want something cool or creamy to balance it out. I always do a side of simple rice—plain white or jasmine rice is perfect for soaking up any extra bits of sauce that drip off. It’s essential for making these feel like a proper meal!
If you’re looking for something more exciting than plain rice, you could always check out my recipe for Creamy Chicken Tortilla Soup! Now, I know that sounds like a huge deviation, but hear me out: a small, cool bowl of creamy soup alongside a couple of these spicy wings is such a surprising and satisfying pairing. It’s warm, comforting, and just different enough to impress everyone!
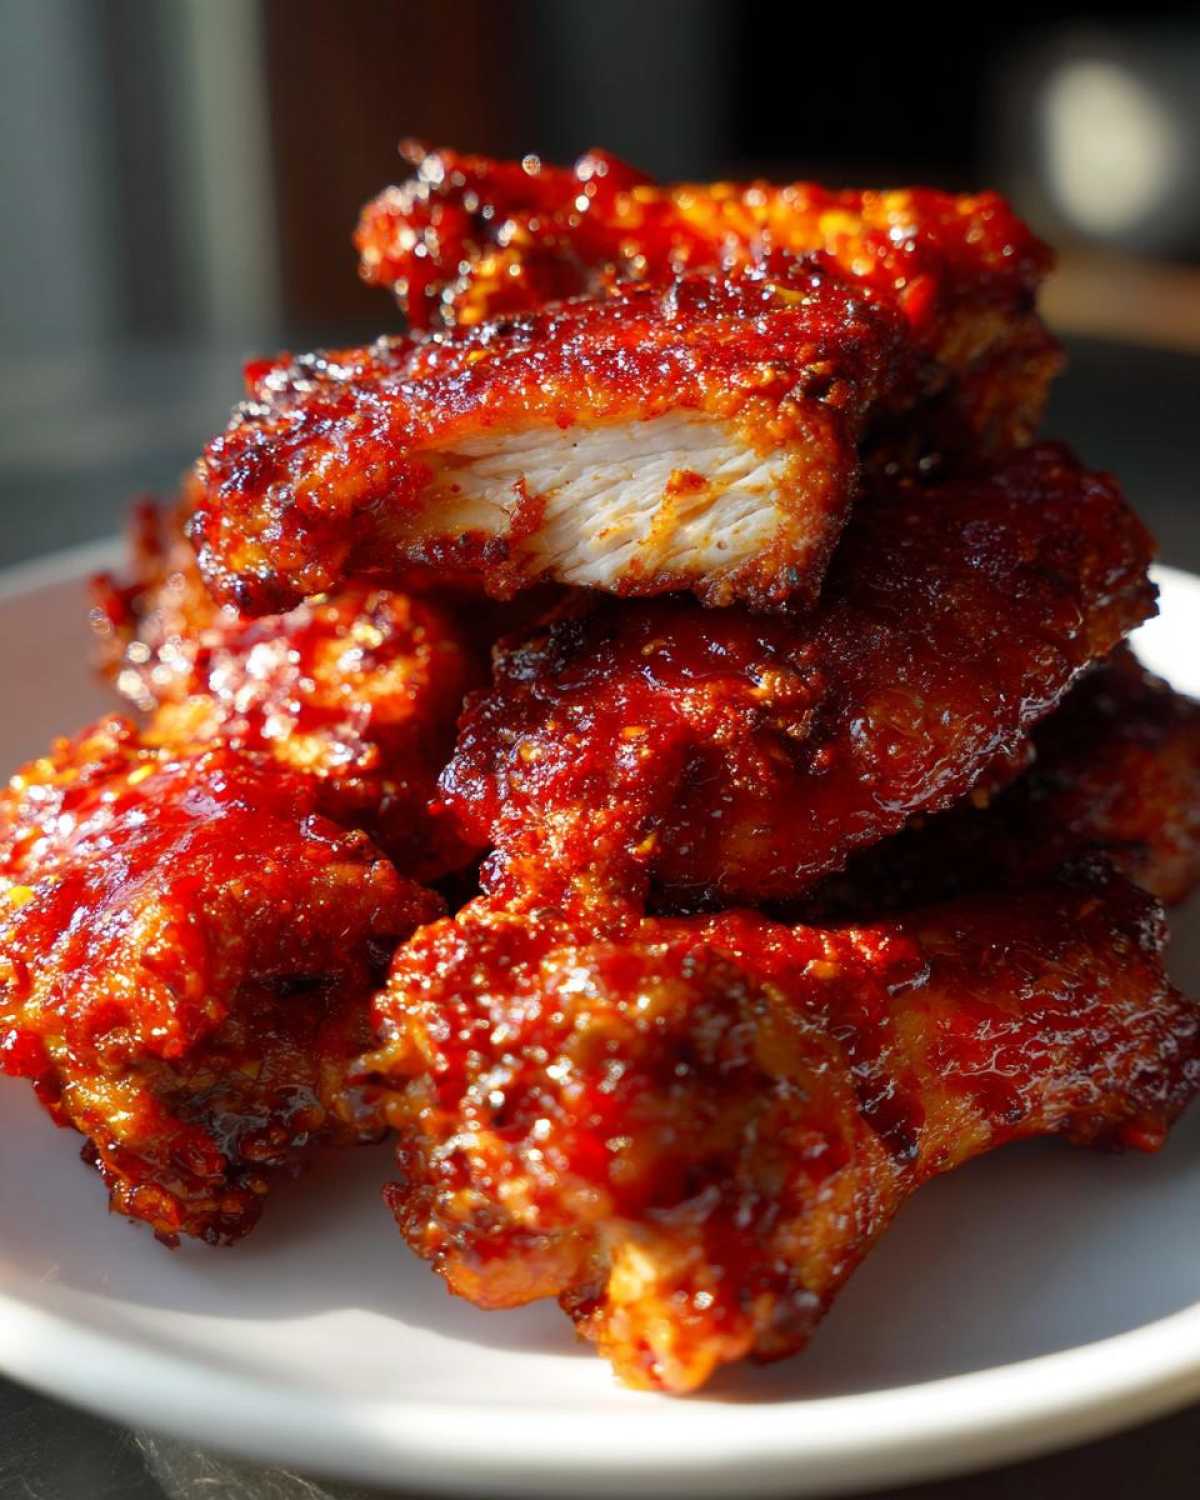
Ultimately, these **sweet chili chicken wings** truly stand on their own, but a sprinkle of green and white never hurt anyone!
Storage and Reheating Instructions for Leftover Sticky Sweet Chili Chicken Wings Oven Baked
Oh, leftovers! I always hope for them because these **Sticky Sweet Chili Chicken Wings Oven Baked** are genuinely delicious the next day, but you have to treat them right. The biggest mistake you can make is just chucking them in the fridge and nuking them in the microwave later. No, no, no! That sauce will turn the skin into soggy despair. Don’t let that happen!
First, the storage rules. Once the wings are totally cooled down—and I mean completely cooled, or you’ll steam them in the container—store them in an airtight container. Don’t forget, we added a good amount of sugar to that glaze, so they are best eaten within three days. Four days max, but three is my personal limit for the absolute best texture.
When you’re ready to bring them back to life, you must use dry heat to reactivate that crispiness we worked so hard to achieve. Forget the microwave entirely!
Restoring the Crispiness in the Oven
The oven is your best friend here, just like when we made these the first time. Preheat your oven—not quite back to 425°F, though—set it to about 375°F (190°C). Line a baking sheet with foil, and here’s the key: put a wire rack on top of that foil, just like we did before! If you don’t have a rack, just place them directly on the foil, but the rack helps the air flow underneath so they don’t get steamy bottoms.
Spread the wings out in a single layer—again, no touching!—and bake them for about 8 to 10 minutes. You are basically just reheating the meat and drying out the glaze again. They should come out piping hot and surprisingly crispy again. This method keeps the flavor bright while restoring that snappy exterior!
Using Your Air Fryer for Quick Reheating
If you have an air fryer, this is actually even faster! Set it up for 360°F (180°C). Place the wings in the basket—make sure they aren’t stacked on top of each other. They usually only need about 4 to 6 minutes. You’ll smell that amazing glaze heating up again, and they come out fantastic.
If you have any questions about the cooking times or if you just want to chat about wing techniques, feel free to send a message through the contact page. Happy eating!
Frequently Asked Questions About Oven Baked Wings
I know sometimes when you read a recipe, even a really good one, a few random thoughts pop up. That’s totally normal! I’ve tried to preemptively answer the top questions I get about making **perfectly cooked baked chicken wings** in the oven. If you have a burning question about making these **sweet chili chicken wings**, chances are it’s covered below. For anything else, don’t hesitate to reach out via the contact page!
Can I use baking soda instead of baking powder for crispier wings?
This is a classic debate in the **oven baked chicken wings** world! Technically, some folks swear by baking soda mixed with a little salt. Why? Baking powder already has an acid in it to make it react, but strictly using baking soda requires you to add an acid, like lemon juice, to get the skin reaction. For this recipe, stick to the baking powder we called for! It already has the perfect balance of components to lower the skin’s pH just enough to make it dry out and crisp up beautifully during the baking process. Baking soda tends to create a slightly different texture that isn’t quite right for this **no fry sticky wings recipe**.
What is the best way to prevent the glaze from burning during the final bake?
Ah, the age-old problem with anything high in sugar, like our **simple sweet chili glaze recipe**! Since we bake the wings naked first, the skin is dry and ready for the glaze, but that sugar can go from beautiful and sticky to burnt real fast in a 425°F oven. My absolute best advice here is to watch that clock closely during that final 5-minute glaze bake. If you check them at 3 minutes and notice the glaze is darkening really quickly—especially around the edges of the wings—pull the heat back immediately.
Try dropping the oven temperature down to 375°F (190°C) for those last 2 minutes. That gives the sugar time to set and get wonderfully sticky without actually scorching. Remember, that glaze is already cooked from the stovetop phase; the oven is just helping it adhere and firm up!
Estimated Nutritional Data for This Recipe
Alright, let’s talk numbers. I try not to obsess over calories when I’m making wings, because let’s be honest, they are a game day masterpiece, not a diet staple! But for those of you who track things—and I totally respect that!—here is the rough breakdown for these **Sticky Sweet Chili Chicken Wings Oven Baked**.
Keep in mind that since these are based on 2 lbs of wings and the sauce is tossed around, these figures are estimates based on the ingredients provided, specifically dividing the total batch among four servings. You can read more about how we handle site data and privacy over at our Privacy Policy page!
This data is based on about 4 wings per serving:
- Serving Size: 4 wings
- Calories: About 350 per serving
- Fat: Roughly 20g
- Saturated Fat: 6g
- Protein: A very solid 25g!
- Carbohydrates: Around 18g
- Sugar: 15g (That’s where that wonderful stickiness comes from!)
- Sodium: 550mg (Soy sauce adds up, so be mindful!)
- Cholesterol: 90mg
See? Great protein, manageable fat, and enough sweetness to make them addictive!
PrintSticky Sweet Chili Chicken Wings Oven Baked
Follow this simple recipe to make crispy, oven-baked chicken wings coated in a sticky, sweet chili glaze.
- Prep Time: 10 min
- Cook Time: 50 min
- Total Time: 60 min
- Yield: 4 servings
- Category: Appetizer
- Method: Baking
- Cuisine: Asian-Inspired
- Diet: Low Lactose
Ingredients
- 2 lbs chicken wings, separated into flats and drumettes
- 1 tablespoon baking powder (aluminum-free)
- 1 teaspoon salt
- 1/2 teaspoon black pepper
- 1/2 cup sweet chili sauce
- 2 tablespoons soy sauce
- 1 tablespoon rice vinegar
- 1 tablespoon brown sugar
- 1 teaspoon grated fresh ginger
- 1 clove garlic, minced
Instructions
- Preheat your oven to 425°F (220°C). Line a baking sheet with aluminum foil for easier cleanup, and place a wire rack on top of the foil.
- Pat the chicken wings completely dry using paper towels. This step is key for crispiness.
- In a large bowl, toss the dry wings with baking powder, salt, and pepper until evenly coated.
- Arrange the wings in a single layer on the wire rack, ensuring they do not touch.
- Bake for 25 minutes.
- While the wings bake, prepare the sauce. In a small saucepan, combine the sweet chili sauce, soy sauce, rice vinegar, brown sugar, ginger, and garlic.
- Bring the sauce mixture to a simmer over medium heat, stirring until the sugar dissolves. Cook for 2 minutes until slightly thickened. Remove from heat.
- After the initial 25 minutes of baking, flip the wings. Return them to the oven and bake for another 15-20 minutes, or until the internal temperature reaches 165°F (74°C) and the skin is golden brown and crisp.
- Remove the wings from the oven. Place them in a large, clean bowl.
- Pour about half of the prepared sweet chili sauce over the wings. Toss gently until every wing is coated.
- Return the glazed wings to the wire rack. Bake for a final 5 minutes to set the glaze and make it sticky.
- Remove from the oven, toss with any remaining sauce if desired, and serve immediately.
Notes
- For extra crispiness, do not skip the baking powder step; it helps dry out the skin.
- If you prefer a thicker glaze, simmer the sauce longer until it reduces by one-third.
- Garnish with sesame seeds or sliced green onions before serving.
Nutrition
- Serving Size: 4 wings
- Calories: 350
- Sugar: 15
- Sodium: 550
- Fat: 20
- Saturated Fat: 6
- Unsaturated Fat: 14
- Trans Fat: 0
- Carbohydrates: 18
- Fiber: 0
- Protein: 25
- Cholesterol: 90