

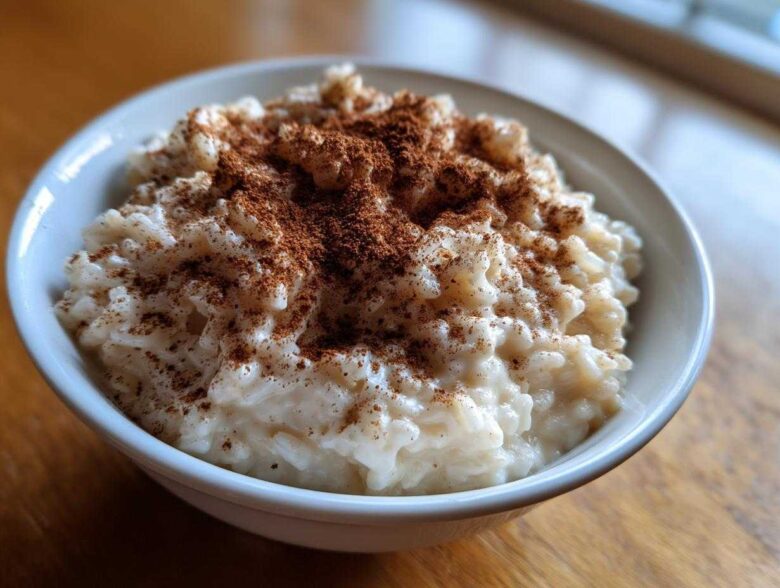
Oh my gosh, if there’s one thing that instantly makes me feel cozy, safe, and like a kid again, it’s the smell of milk slowly simmering on the stove. Forget fancy desserts; sometimes you just need something pure and warm, right? That’s exactly what we’re making today with my signature rice pudding recipe. This isn’t some weird, quick-set disaster; this is the real deal—a truly creamy, old-fashioned stovetop rice pudding. My mom used to make this every Sunday when I was sick, and honestly, the aroma alone cures everything. It proves that the best rice pudding recipe is actually the simplest one.
Why This Creamy Old-Fashioned Rice Pudding Recipe Works
People try to rush rice pudding, and that’s where they go wrong! This old fashioned rice pudding shines because we are leaning into patience, not shortcuts. It’s all about harnessing simple methods to make something truly luxurious. I learned so much just reading through old family cooking notes, which makes me feel connected to the kitchen every time I make it—you can read more about our philosophy over at our little culinary corner!
Here’s what takes this dessert from good to absolutely legendary:
- Achieving Silky Smooth Texture: We rely on the starch from the rice to do the heavy lifting. That slow cook time is non-negotiable for that perfect melt-in-your-mouth feel.
- Simple Dessert Recipe with Pantry Staples: You don’t need fancy trips to the store for this. This is the ultimate simple dessert recipe—comfort food straight from what you already have!
Once you see how rich this gets, you’ll understand why I never bother with the egg-yolk heavy, complex versions. Trust me on this; the easy way is the best way here.
Achieving Silky Smooth Texture
The secret weapon here is the short-grain rice. Unlike long-grain rice that just sits there, short-grain releases tons of wonderful starch when cooked low and slow in the milk. You absolutely have to stand there and stir, especially toward the end! That friction is what gives you that gorgeous, silky smooth texture instead of something grainy or watery. Don’t walk away!
Simple Dessert Recipe with Pantry Staples
Honestly, I developed this specific rice pudding recipe because I needed a reliable treat after a long day without requiring a grocery run. Milk, a little sugar, rice, and vanilla—that’s it! It’s such a wonderfully satisfying and affordable classic dessert recipe. It truly proves that the most comforting things are often the easiest to make.
Gathering Ingredients for Your Rice Pudding Recipe
Okay, let’s talk about what you actually need to pull this classic dessert recipe together. Look, this is meant to be straightforward, so don’t panic if your pantry looks a little sparse. You just need the core elements so we can focus on the stirring!
We start with short-grain rice—and I stress short-grain! That’s what gives us the gooey starchiness we all crave in a good stovetop rice pudding. You combine that with whole milk, sugar, a pinch of salt, and vanilla extract at the end. That’s your base for this beautiful vanilla rice pudding. Remember, we’re not doing anything fancy here, just focusing on quality basics for that perfect result.
Ingredient Notes and Substitutions
Here’s where I, a very opinionated home cook, tell you to listen up about the ingredients! Long-grain rice just doesn’t absorb the milk the same way; it stays too firm. Stick to short-grain, please! For the milk, while the recipe calls for whole milk—which is my standard recommendation—you absolutely can swap out half of that for heavy cream if you feel like splashing out. That little half-cup switch moves this from a great comfort food dessert to an unbelievably rich experience. Trust me; if you need that extra decadence, the heavy cream trick is listed in the notes because it works!
The Stovetop Rice Pudding Recipe: Step-by-Step Instructions
Alright, now we get to the fun, slightly meditative part of making a truly great rice pudding recipe—the cooking! This whole stovetop process takes about an hour total, but I promise you, that hour melts away when you’re stirring this creamy mixture. It’s the best way to ensure you get that luscious, thick result. We’re going to take this slowly, just like Grandma taught me to bake bread!
Preparing the Rice and Initial Simmer
First things first, we need to wash that rice. Don’t skip rinsing! Put your half-cup of short-grain rice in a fine-mesh sieve and run cold water over it until the water looks completely clear, not cloudy anymore. This washes off the excess surface starch that just makes things gloppy too fast. Then, pour in all four cups of milk, the sugar, and that little bit of salt into your saucepan. Bring that whole pot up over medium heat, stirring constantly until you just see those little bubbles starting to surface and it begins to simmer gently. It’s warm, but not boiling yet!
Cooking Down to a Creamy Rice Pudding Recipe Consistency
This is the most important, but easiest, part of making this creamy rice pudding! As soon as you see that initial simmer, drop that heat down to low. Like, the lowest setting your stove will manage without going totally off. Now comes the stirring. You need to stir frequently—I’d say every three or four minutes—to stop the bottom from scorching. Nobody wants burnt milk bits stuck to the bottom, ew! This slow simmering should last between 45 and 60 minutes. You’ll see it thickening up beautifully as the rice absorbs the milk and releases its starch. Be patient!
If you are checking out the terms of use for my kitchen, you can see that patience is often rewarded!
Finishing Touches and Vanilla Incorporation
When the rice is tender and the mixture is thick enough that swirling your spoon leaves a trail that slowly fills in, you know it’s done. Immediately pull the whole thing off the heat source. Seriously, take it completely off the burner. That residual heat is still working! Now, stir in that teaspoon of pure vanilla extract. You’ll immediately notice the aroma lift and the whole pudding look slightly looser and glossier. That’s the sign it’s ready to eat warm or chill down for later!
Tips for the Best Old Fashioned Rice Pudding
I have a few tricks up my sleeve that stop this old fashioned rice pudding from turning into a sad, skin-covered puddle. You want that creamy consistency, right? That’s the whole point of a perfect comfort food dessert!
The biggest headache is that skin that forms on top if you let it sit cooling on the counter. To stop that, right after you stir in the vanilla, take a small square of plastic wrap and press it directly onto the surface of the pudding. I mean touching the surface—no air gaps allowed! This seals in the moisture. It’s such a simple trick, but it works wonders for keeping that silky top layer intact. You can always find more baking wisdom over at the official blog!
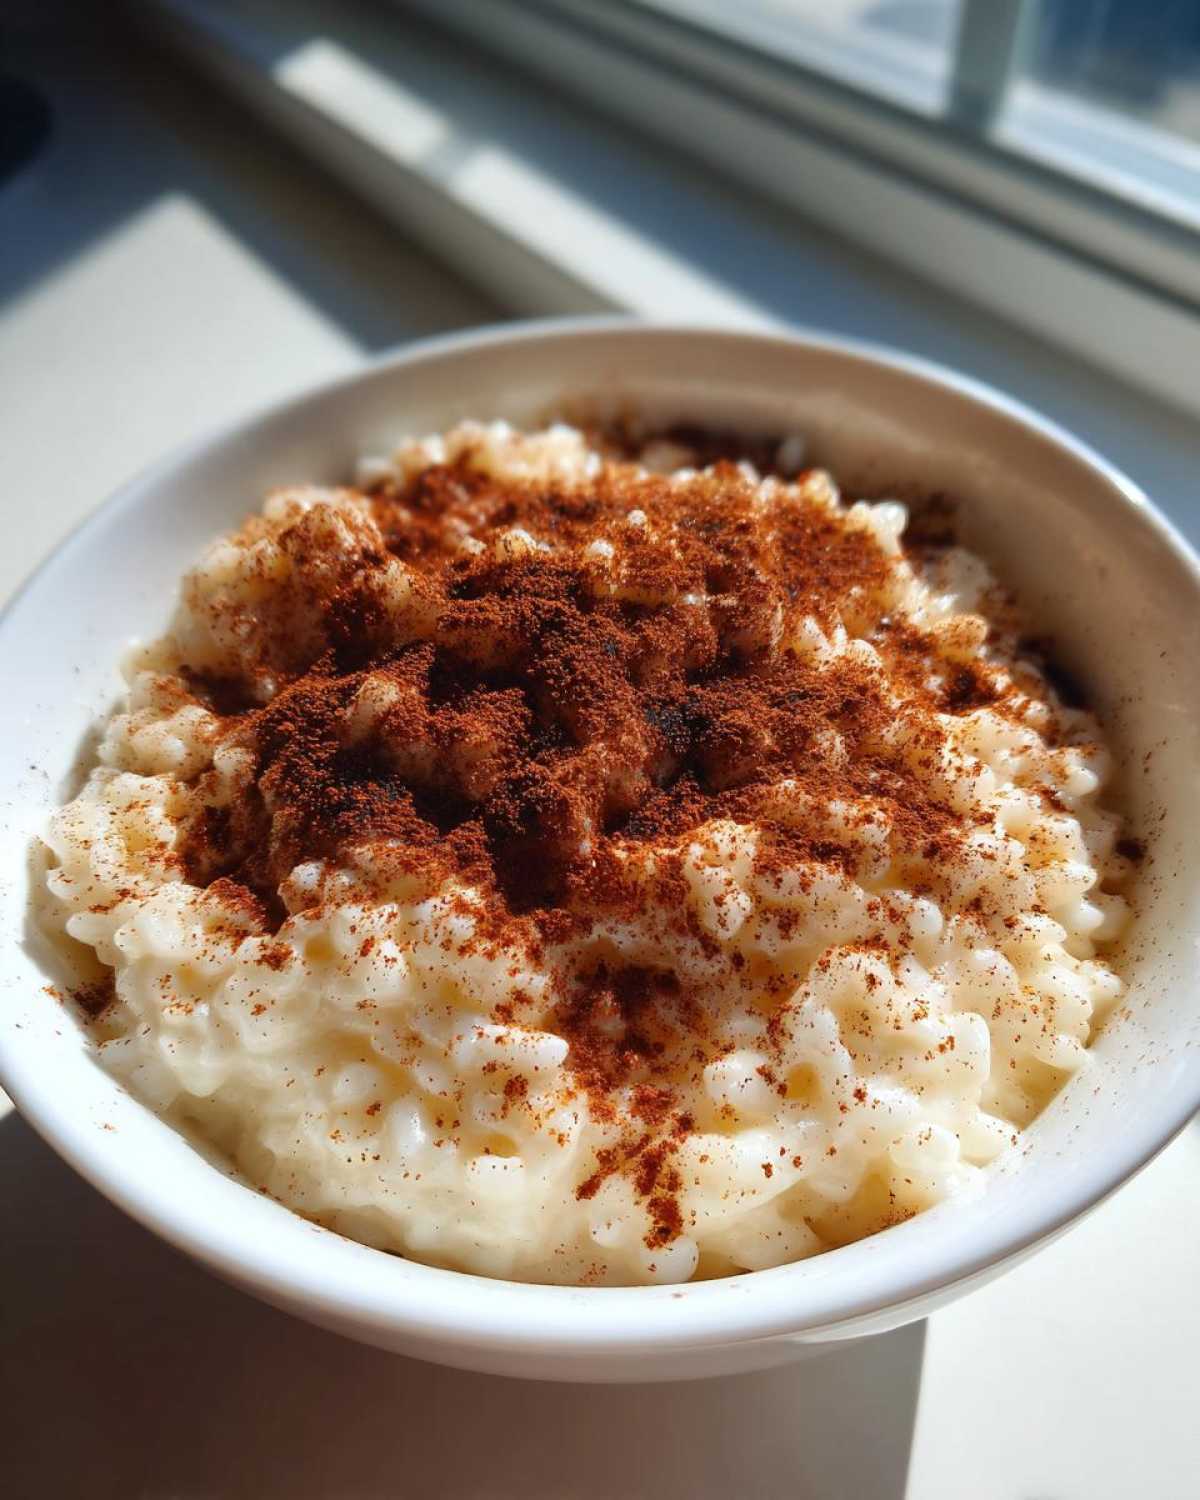
Also, remember the thickness check! It should look slightly too thin when you pull it off the heat because it’s going to set up significantly as it cools down. If you cook it until it’s super thick on the stove, you’ll end up with a dense brick later. Trust me on this!
Serving Suggestions for Your Vanilla Rice Pudding
So you’ve nailed the cooking time, and your kitchen smells incredible—like pure nostalgia! Now, how do we serve this masterpiece? While this vanilla rice pudding is fantastic all by itself, a few simple additions really elevate it from a tasty snack to a show-stopping cinnamon dessert.
The recipe calls for a light dusting of ground cinnamon on top, and I absolutely insist you do not skip that step! The warm spice contrasts just beautifully with the sweet, creamy base. It’s the perfect final flourish for presentation. I love seeing those little reddish-brown specks scattered across the white surface.
As for temperature, you have options, and both are amazing! If you’re eating it right away, the warm pudding—almost like a thin, sweet porridge—is pure comfort. It really highlights the silkiness. But honestly, I think it gets even better after being chilled completely. When cold, it sets up nice and firm, making it easier to eat with a spoon and giving you that satisfying, dense texture.
If you are feeling adventurous, try topping it with stewed apples or tart cherries—the fruit cuts right through the richness! Speaking of great pairings, you might also want to check out my recipe for apple cinnamon muffins; it’s another fantastic cozy treat!
Storage and Make Ahead Dessert Options for this Rice Pudding Recipe
This is exactly the kind of comfort food dessert you want in your back pocket, and luckily, it’s an amazing make ahead dessert! You can store leftovers in an airtight container in the fridge for up to three days. I always make a double batch just so I don’t have to cook during the week. You can find some great ideas for meal prepping freezer treats, like my breakfast burrito guide, but this pudding is best fresh in the fridge!
Now, be warned: it gets *very* firm when cold. That’s the starch working hard! If you pull it out and it seems too solid for your liking, don’t panic. Just stir in a little splash of milk—maybe a tablespoon at a time—until it loosens back up to that creamy consistency you loved right off the stove. It’s so forgiving!
Rice Pudding Variations
While this traditional pudding recipe is perfect as is—a testament to simplicity—I know some of you like to play a little in the kitchen, and that’s totally fine by me! This base setup is incredibly versatile. You can easily explore all sorts of rice pudding variations just by changing up the flavorings added right at the end. Don’t feel limited just because it starts as a simple vanilla rice pudding!
My favorite variation, especially when I make a big batch, is kicking up the citrus notes. A little bit of finely grated orange or lemon zest stirred in with the vanilla totally brightens up the whole dish. It makes it taste lighter, kind of like a bright springtime treat instead of strictly heavy warm dessert ideas.
For spices, nutmeg is a lovely addition alongside the cinnamon sprinkle, giving it a deeper, warmer profile. Or, if you want something really unexpected, try adding a teaspoon of maple extract instead of vanilla. Speaking of maple, if you like those deeper, warm spice notes, you have to check out my maple chai latte recipe; it has that same cozy vibe!
If you’re adventurous, you can move into the realm of Arroz Con Leche territory by adding a whole cinnamon stick while the pudding is simmering and then pulling it out before you add the vanilla. That infuses a really subtle, woodsy spice flavor throughout the milk. See? It’s still easy, but suddenly you’ve got a whole new dessert!
Frequently Asked Questions About This Classic Dessert Recipe
I get so many questions every time I post this recipe because everyone wants that one perfect bowl! I’ve gathered the most common ones here so you never have to worry about your pudding turning out wrong. If you have other questions, please feel free to buzz over to the contact page and shoot me a note!
Can I make this rice pudding recipe faster?
Oh, I totally get the desire for a quick rice pudding, but here’s the real talk: if you rush it, you miss the magic! The reason this is the best rice pudding recipe is that long, slow simmer. That 45 to 60 minutes is what allows the short-grain rice to gently release its starch into the milk. If you try to speed it up by using higher heat, you’ll end up with burnt milk on the bottom and undercooked, hard rice in the middle. You just can’t rush true creaminess!
What is the best rice to use for creamy rice pudding?
This is a huge one! You absolutely must use short-grain rice—I prefer Arborio or Calrose if I can find them, but any short-grain white rice works. Long-grain rice, like what you’d use for dinner, just doesn’t have the necessary starch content to break down and thicken the milk naturally. We need that starch to create that decadent, thick coating around every grain, which is the hallmark of truly creamy rice pudding.
How long should I cook this stovetop rice pudding?
As noted in the instructions, aim for 45 to 60 minutes on a very low, slow simmer after it first starts to bubble. You’ll know it’s done when the rice is completely tender throughout—give a grain a little press against the side of the pot—and the pudding is significantly thicker than soup. If you stir and the back of the pot stays empty for a second or two before the pudding flows back in, you’re golden!
Can I use something other than whole milk?
You certainly can, but remember, whole milk gives you that classic richness specified in the recipe. If you use skim or 1% milk, you’ll need to rely more on that heavy cream substitution I mentioned earlier, or you risk getting a thinner pudding because the fat content is crucial for texture. I wouldn’t recommend using plain water, of course, but alternative milks like almond or soy can work, though they won’t provide the same satisfying body as real dairy milk.
Nutritional Estimate for This Rice Pudding Recipe
Now, I always say that when we cook from the heart, the calories don’t count, but for those of you who like to keep track, here’s a little breakdown. Based on the recipe above, a single serving clocks in around 300 calories with about 25 grams of sugar, which isn’t bad for a full-on comfort food dessert! Remember, these numbers are just estimates, and they change depending on the brand of milk or sugar you use. You can always check out the full policy details over at our privacy page.
PrintCreamy Old-Fashioned Stovetop Rice Pudding

This recipe makes a classic, creamy rice pudding using simple ingredients cooked slowly on the stovetop.
- Prep Time: 5 min
- Cook Time: 60 min
- Total Time: 65 min
- Yield: 4 servings
- Category: Dessert
- Method: Stovetop
- Cuisine: American
- Diet: Vegetarian
Ingredients
- 1/2 cup short-grain white rice
- 4 cups whole milk
- 1/2 cup granulated sugar
- 1/4 teaspoon salt
- 1 teaspoon vanilla extract
- 1/4 teaspoon ground cinnamon (for topping)
Instructions
- Rinse the rice under cold water until the water runs clear.
- Combine the rinsed rice, whole milk, sugar, and salt in a medium saucepan.
- Place the saucepan over medium heat. Stir frequently until the mixture begins to simmer.
- Reduce the heat to low. Continue to cook, stirring every few minutes to prevent sticking, for 45 to 60 minutes. The pudding is done when the rice is tender and the mixture has thickened to your desired consistency.
- Remove the saucepan from the heat. Stir in the vanilla extract.
- Serve warm, or chill completely for a firmer texture. Sprinkle with ground cinnamon before serving.
Notes
- For a richer flavor, substitute 1/2 cup of the milk with heavy cream.
- If the pudding becomes too thick while cooling, stir in a splash of milk to reach your preferred consistency.
- This pudding can be made ahead and stored in the refrigerator for up to 3 days.
Nutrition
- Serving Size: 1 serving
- Calories: 300
- Sugar: 25
- Sodium: 150
- Fat: 7
- Saturated Fat: 4
- Unsaturated Fat: 3
- Trans Fat: 0
- Carbohydrates: 55
- Fiber: 1
- Protein: 10
- Cholesterol: 25