

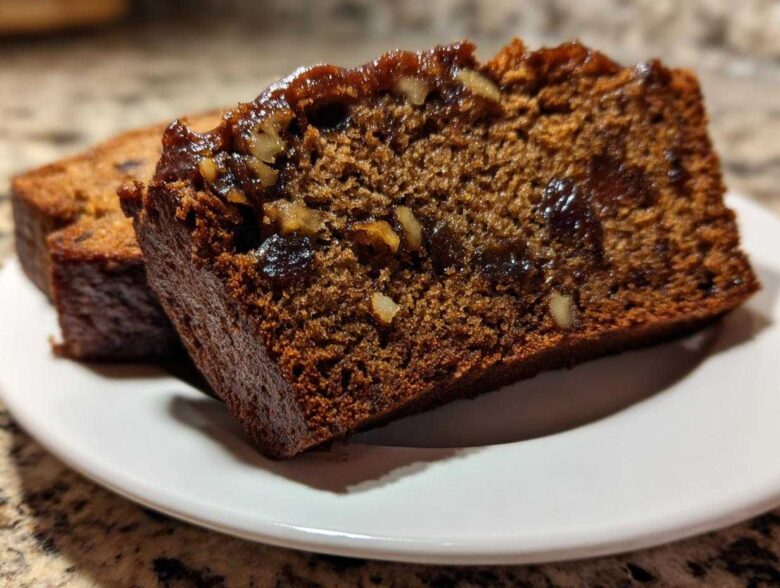
There is just something about pulling a perfectly sprung loaf out of the oven that makes the whole house feel instantly warmer, isn’t there? For Noah and me, those simple, comforting homemade quick breads were the first things we truly built together when we realized our careers were eating our connection. We needed a blueprint for happiness, and that blueprint started right here. Forget fussy cakes; this Old-Fashioned, Ultra-Moist Date Nut Bread Recipe is our absolute foundation. It’s reliable, it’s forgiving, and honestly, it’s the most moist loaf we’ve ever pulled from the oven. When I’m mixing up this specific date nut bread, I feel like we’re reinforcing the walls of our little Epicure Empire. It’s proof that the best projects are the ones we share, one sweet, sticky slice at a time. If you want to know more about how this project started, check out the story behind our Epicure Empire. Ready to get started?
Why This Old-Fashioned date nut bread Recipe Works So Well
When Noah and I first started testing quick bread recipes, we kept hitting the same wall: dryness! It’s incredibly frustrating to wait an hour for a loaf only to have it taste like a brick the next day. That’s why this recipe, our ultimate Moist Date Nut Bread Recipe, is so important to our collection. It’s designed specifically to fight dryness and deliver that rich, yielding texture you expect from a truly Classic Loaf Cake.
We studied why other recipes failed, and this one nails the chemistry needed for a perfect result every single time. We trust this blueprint because it’s been battle-tested over dozens of batches. It just works!
The Secret to Ultra-Moist date nut bread
The real magic happens even before you touch the mixer, I promise you. You need to treat those dates right! We pour boiling water directly over the chopped dates along with the baking soda. This might seem dramatic, but it’s essential because the heat softens the sticky fruit beautifully while the soda starts its work. This mixture then dissolves right into the batter, distributing moisture and sweetness evenly throughout the loaf. It ensures every single piece is gummy and tender!
Tips for Perfect Old Fashioned Quick Bread Texture
Once the moist date mixture is ready, remember the goal: tenderness, not toughness. This is where simple baking science comes in. When you add the dry flour mixture to the creamed butter and eggs, you must mix it only until you see the last streak of flour disappear. That’s it. Overmixing develops gluten, which turns your tender loaf into something rubbery. We are aiming for that signature soft, slightly dense, Old Fashioned Quick Bread texture, not a chewy yeast bread!
Gathering Ingredients for Your date nut bread Loaf
Okay, now that we know *why* this bread stays so perfectly moist, let’s talk about what you need to have ready. For this Classic Loaf Cake, you don’t need a pantry full of obscure items; it’s really about using simple, good ingredients handled correctly. Noah loves when I lay all the components out before we start—it feels like staging the set for a production!
This recipe is wonderfully straightforward. You’ll need the butter softened (not melted, remember our creaming goal!) and your nuts chopped up. Trust me, having everything measured out before you start the wet/dry assembly makes the whole process feel effortless. Here is the exact list of everything you’ll need to create this comforting bread.
Ingredient Specifications and Notes
When looking at your ingredients, pay close attention to the dates and nuts—they make all the difference in flavor here. If you can find Medjool dates, go for them; they are extra soft and caramel-y, but the firmer Deglet Noor dates work perfectly fine once they soak in the hot water.
For the nuts, we usually use walnuts because they have that slightly bitter contrast that cuts through the sweetness, but pecans work beautifully if that’s what you have on hand. Also, this is where you can sneak in a little extra holiday magic! If you want a deeper flavor—a real Spiced Date Bread—I highly recommend whisking 1/2 teaspoon of cinnamon and a tiny pinch of nutmeg right into your flour mixture when you measure it out. It adds such a cozy aroma!
- 1 cup boiling water
- 1 cup pitted, chopped dates (Medjool or Deglet Noor are great)
- 1 teaspoon baking soda
- 1/2 cup (1 stick) unsalted butter, softened
- 1 cup granulated sugar
- 2 large eggs
- 1 teaspoon vanilla extract
- 1 1/2 cups all-purpose flour
- 1 teaspoon baking powder
- 1/2 teaspoon salt
- 1 cup chopped walnuts or pecans
Step-by-Step Instructions for Easy Quick Bread Baking
Alright, engineers, time to execute the plan! When we first mapped this out, Noah insisted that the process needed to be clear, step-by-step, so there was no ambiguity—just pure, reliable baking. This is where the magic of Easy Quick Bread Baking happens. We’ve broken down the methods into actionable blueprints so you can focus on the mixing and not the worrying. If you want to see all our blueprint articles, you can check out the main blog page!
Don’t fret if you haven’t baked loaves before; this process is much more forgiving than delicate layer cakes. Just follow these simple phases, and you’ll have a gorgeous, warm loaf ready in about an hour!
Preparing the Dates and Oven for date nut bread
First things first: we need heat and softened fruit! Preheat your oven to 350°F (175°C) and take a moment to grease and flour that standard 9×5 inch loaf pan. This pan prep is non-negotiable; we don’t want to fight the bread later!
Next is that crucial softening step. In a medium bowl, pour that 1 cup of boiling water over the chopped dates and the baking soda. Give it a really good stir. You must let this sit undisturbed for a full 10 minutes. This soak softens the dates up so much, and it also kickstarts the baking soda, which is key for keeping the bread light!
Mixing Wet and Dry Components for Your Homemade Date Bread
While the dates are soaking, we focus on the structure in the big bowl. This is where we build the air! Cream together the softened butter and your sugar until it looks genuinely light and fluffy—pale yellow and airy. Then, beat in the eggs one at a time, making sure each one disappears before adding the next. Stir in that splash of vanilla.
In a separate bowl, quickly whisk your flour, baking powder, and salt. Now, for the critical part of making great Homemade Date Bread: add the dry mix to the wet mix gradually, stopping as soon as you see the flour streaks vanish. I cannot stress this enough: Do not overmix after adding the flour! We want tender, not tough.
Folding and Baking the date nut bread Loaf
Once the batter is just combined, gently fold in that dreamy date mixture and your chopped nuts. You want them totally distributed, but be gentle; this is your final chance to be delicate! Pour all that gorgeous batter into your prepared pan.
Pop it into the hot oven. It generally bakes right between 55 and 65 minutes. You’re looking for that wooden skewer poked in the center to come out clean; a few moist crumbs clinging to it are perfect, but no wet batter! Letting it cool for 10 minutes in the pan before turning it out onto a rack ensures you get that perfect slice of Wholesome Snack Bread. I usually sneak a bite before it’s completely cool—don’t tell Noah!
Serving Suggestions for Your date nut bread
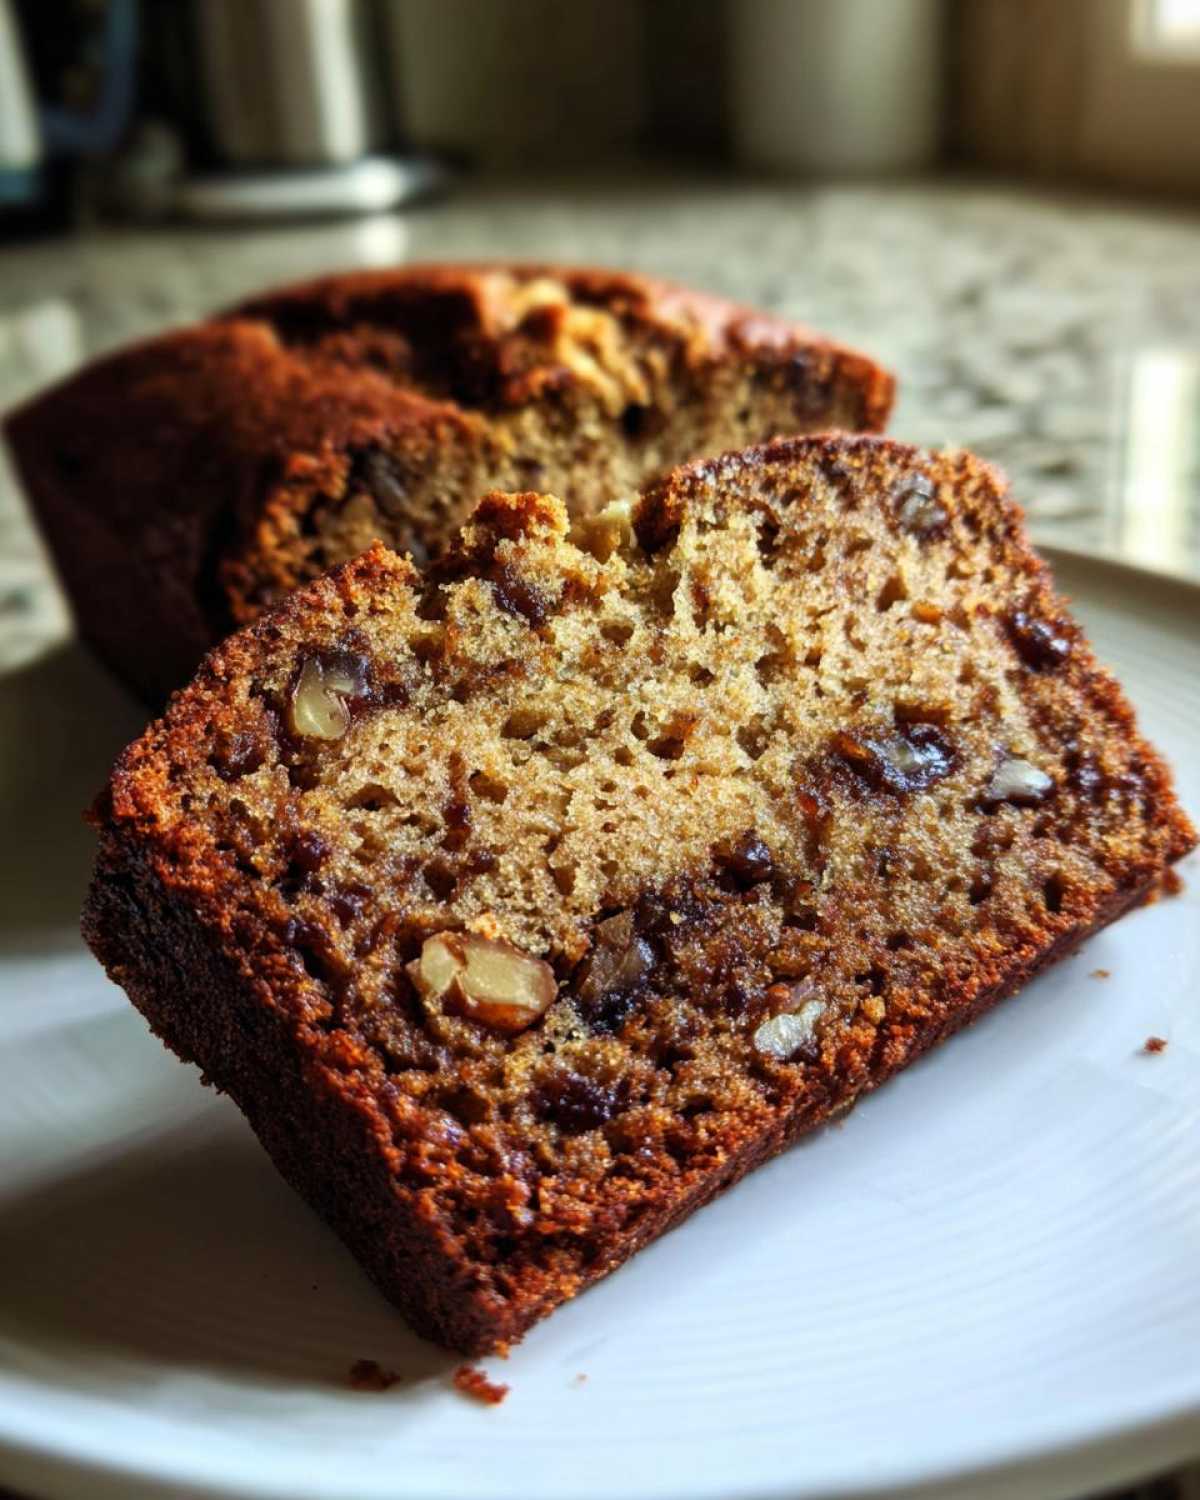
The waiting is the hardest part, right? Once that unmistakable warm, spiced aroma fills the kitchen, you’ll want to slice into that loaf immediately. While this date nut bread is fantastic eaten cold the next day (it keeps so well!), there is truly no substitute for eating the first slice while it’s still warm from the oven.
When we serve this at our weekend brunches, we usually keep it simple because the flavor of the dates and nuts is already so rich. A simple smear of good quality, softened butter melts right into the crumb, and honestly, that’s everything. Noah often grabs a slice straight out of the kitchen while it’s still steaming—I usually have to stop him!
If you are slicing this loaf for a proper spread, think elegant simplicity. This fits perfectly alongside savory items on your brunch table. You can easily serve it alongside fresh fruit or even a simple cream cheese spread if you’re feeling fancy. It’s flexible enough to be a sweet treat after dinner or the star of your next gathering of Brunch Quick Breads. If you’re looking for more breakfast superstars, check out the ideas over in our breakfast category for more inspiration!
Variations: Making Banana Date Nut Bread Variation or Spiced date nut bread
While our date nut bread recipe is perfectly balanced as is—the classic pairing of salty nuts and sweet dates is hard to beat—I know sometimes you just need to mix things up! We love how interchangeable our quick bread foundational techniques are. If you have super ripe bananas staring at you, you absolutely can adapt this recipe to create a phenomenal Banana Date Nut Bread Variation.
When we add bananas, we cut back slightly on the butter because the bananas bring so much moisture of their own. If you want the full playbook on how we handle moisture when adding bananas, you should definitely check out our notes on Blueberry Banana Bread—it covers the science of fruit in quick breads!
Don’t want to deal with another fruit? Making a heavily Spiced date nut bread is even easier! Just follow the tip from the ingredient section and double the cinnamon and nutmeg, maybe add a pinch of allspice. That simple swap moves this loaf straight into holiday baking territory. Whichever way you go, you end up with a comforting, sweet loaf!
Storage and Make Ahead Bread Tips for date nut bread
One of the things I truly appreciate about this particular date nut bread is how wonderfully it travels through time! This isn’t a bread that needs to be eaten the second it comes out of the oven, though I highly recommend sneaking a warm slice! Because of the dates and the careful balance of fat in the recipe, it keeps its moisture so efficiently. This means it’s one of our favorite breads to prepare ahead of time before a busy weekend hosting guests.
Knowing we can rely on it makes it a perfect Make Ahead Bread for holiday planning. Noah loves knowing that one of the more involved components is already done days before the actual event! If you bake it on a Monday, I guarantee it tastes just as good, if not better, on Thursday morning.
If you need to keep it longer than a couple of days on the counter, freezing is an excellent option. We usually wait until the loaf is completely cool—don’t wrap it even slightly warm or you risk condensation! Once cool, Noah wraps the whole loaf tightly first in plastic wrap, making sure he seals every edge well, and then wraps it again in aluminum foil. This double layer works wonders for preventing freezer burn.
It stays perfect in the freezer for two to three months! When you need it, just pull it out the night before and let it thaw completely on the counter. For a little extra warmth, you can even reheat slices lightly in the toaster oven—though I’d still recommend checking out this older recipe’s note on keeping things fresh, just for comparison!
Troubleshooting Common date nut bread Issues
Baking should be fun, not frustrating! Even when you follow a perfect blueprint like this one, sometimes the oven gods decide to test your patience. Noah and I have run into almost every quick bread disaster imaginable while perfecting our collection, so don’t worry if your loaf looks a little wonky coming out of the oven. Most problems come down to one of three things: temperature, mixing, or measurement.
If you find your loaf sinking mysteriously in the middle, or if the texture seems gummy instead of melt-in-your-mouth tender, we have the fixes right here to ensure your next attempt is flawless.
Why Did My Loaf Sink?
This is the most disheartening thing! A sinking middle usually means two things, and it’s almost always related to that delicate balance of leavening and heat. First, double-check your baking soda and baking powder amounts. Too little, and the structure can’t hold itself up as the air bubbles try to expand. Second, and this is incredibly common, you might have pulled the loaf out too soon. If the center isn’t fully set when it goes in, it collapses when cooling.
My solution is always to use two leavening agents (which this classic recipe does!) and always rely on the skewer test. If the skewer isn’t coming out clean or with just light, moist crumbs clinging to it, give it another five minutes and check again. Resistance is key!
Dealing with a Too-Dense or Gummy Center
If your loaf is heavy, almost like a dense little brick, or if the interior texture feels wet and slimy even after it cooled down, you’ve probably handled the flour too roughly. Remember when I stressed not overmixing in the earlier steps? This is why! Once that flour hits the liquid, the formation of gluten speeds up, creating a tight, tough network instead of the soft structure we want for this Simple Baking Recipe.
For a light, tender result, slow down when adding the dry ingredients. Fold them in gently until just combined—it’s okay if you see a few streaks of flour; they’ll disappear when you fold in the dates. Also, make sure your butter was properly creamed with the sugar beforehand; small air pockets created there are what provide the initial lift!
My Loaf Browned Too Quickly on Top
This is usually an oven temperature issue, especially common if you are baking in a darker pan or if your oven runs hot. If the top is getting dark brown well before the inside is cooked through, you need to slow down that surface heat! The easiest fix is to loosely tent the top of the loaf pan with aluminum foil about halfway through the baking time. This acts like a tiny shield, reflecting some heat away from the surface while allowing the inside to finish baking evenly. This trick is a lifesaver for any Sweet Loaf Recipes!
Frequently Asked Questions About This date nut bread Recipe
I know you might have a few lingering questions before you commit to baking this loaf—that’s perfectly normal when trying a new, slightly old-fashioned recipe! Noah and I always put together a quick FAQ section because we want your experience to be as smooth as possible. We gathered some of the most common worries people have about making a truly stellar Moist Date Nut Bread Recipe.
If you try this out and you still have questions, don’t hesitate to reach out to us through our contact page. We love hearing how our blueprints work in different kitchens!
Can I substitute the sugar in this date nut bread?
That’s a great question, especially if you are aiming for a Naturally Sweetened Bread! Since the dates provide a lot of sweetness already, you might be tempted to cut back, and that’s okay. You can try reducing the granulated sugar by a quarter cup, and the loaf will still be sweet enough for our taste. If you want to substitute it entirely, maple syrup is a lovely choice.
But here’s the operational note: if you replace granulated sugar with maple syrup or honey, you are adding liquid, not just solids. If you swap out more than half a cup of sugar, you should reduce the boiling water slightly, maybe start with 3/4 cup instead of 1 cup, just to keep that perfect crumb texture we worked so hard to achieve!
What is the best flour for a Walnut Date Loaf?
We use standard all-purpose flour because it gives us the lightest, most reliable texture for a Walnut Date Loaf, which is important when dealing with heavy ingredients like dates and nuts. However, if you are looking to make this recipe more of a regular, everyday Wholesome Snack Bread, you can definitely make a switch!
Try substituting up to one-third of your all-purpose flour with whole wheat flour. This adds a bit more fiber and that nutty, earthier flavor that pairs wonderfully with walnuts. Just don’t go over that one-third mark with the whole wheat, or you risk making the loaf too dense since the tougher bran soaks up more moisture.
What if I don’t have baking soda for the date soak?
If you don’t have baking soda specifically, this might be a problem, especially for that date-soaking step. Baking soda is an alkali, and it needs to react with the acid (which is naturally present in the dates) to create the carbon dioxide that gives your loaf its initial lift. Baking powder has both acid and alkali mixed, but it won’t react as powerfully in that initial hot water soak.
If you absolutely have zero baking soda, you can skip the soak—but you must chop your dates much finer! A good alternative, if you have it, is cream of tartar, though you’d need to use about three times the amount of baking powder to balance it out in the dry mix, and it throws the original recipe balance way off. For simplicity, just try to have baking soda on hand for this specific recipe; it’s the cornerstone of that moist texture!
Nutritional Estimates for Your Sweet Loaf Recipes
Even though this is pure comfort food baking, Noah and I believe in transparency for all our recipes. We’ve run the numbers based on the standard ingredients list provided (using all-purpose flour and unsalted butter) so you know exactly what you are enjoying in each slice of this delicious Sweet Loaf Recipe.
Remember, these are estimates, and they can change based on whether you use Medjool versus Deglet Noor dates or if you swap out butter for oil, so take them as a starting guideline! For a full rundown on how we calculate this data and what kind of variations impact the metrics, please see our official disclaimer page.
Here is the breakdown of what you can generally expect per slice (this recipe yields about 10 servings):
- Serving Size: 1 slice
- Calories: 310
- Sugar: 30g
- Sodium: 210mg
- Fat: 14g
- Saturated Fat: 5g
- Unsaturated Fat: 9g
- Trans Fat: 0g
- Carbohydrates: 45g
- Fiber: 3g
- Protein: 5g
- Cholesterol: 55mg
It’s a wonderfully rich slice, loaded with natural sugars from the dates, which is why a little bit goes a long way! We think it’s a fair trade-off for such a comforting, homemade treat.
PrintOld-Fashioned, Ultra-Moist Date Nut Bread Recipe
Bake this classic, easy date nut bread loaf. This recipe delivers a genuinely moist crumb and rich, comforting flavor perfect for breakfast or snacking.
- Prep Time: 15 min
- Cook Time: 60 min
- Total Time: 75 min
- Yield: 1 loaf (about 10 servings)
- Category: Quick Bread
- Method: Baking
- Cuisine: American
- Diet: Vegetarian
Ingredients
- 1 cup boiling water
- 1 cup pitted, chopped dates (Medjool or Deglet Noor)
- 1 teaspoon baking soda
- 1/2 cup (1 stick) unsalted butter, softened
- 1 cup granulated sugar
- 2 large eggs
- 1 teaspoon vanilla extract
- 1 1/2 cups all-purpose flour
- 1 teaspoon baking powder
- 1/2 teaspoon salt
- 1 cup chopped walnuts or pecans
Instructions
- Preheat your oven to 350°F (175°C). Grease and flour a standard 9×5 inch loaf pan.
- In a medium bowl, pour the boiling water over the chopped dates and baking soda. Stir well and let this mixture sit for 10 minutes to soften the dates.
- In a large mixing bowl, cream together the softened butter and granulated sugar until light and fluffy. This step builds the texture for your moist date nut bread.
- Beat in the eggs one at a time, mixing well after each addition. Stir in the vanilla extract.
- In a separate bowl, whisk together the flour, baking powder, and salt.
- Gradually add the dry ingredients to the wet ingredients, mixing on low speed until just combined. Do not overmix the batter.
- Gently fold in the softened date mixture and the chopped nuts until they are evenly distributed throughout the batter.
- Pour the batter into the prepared loaf pan.
- Bake for 55 to 65 minutes, or until a wooden skewer inserted into the center comes out clean.
- Let the loaf cool in the pan for 10 minutes before turning it out onto a wire rack to cool completely. Slice and serve warm with butter for the best experience.
Notes
- For an extra layer of flavor, add 1/2 teaspoon of ground cinnamon or nutmeg to the dry ingredients.
- If you prefer a sweeter topping, mix 1/4 cup powdered sugar with 1 tablespoon of milk and drizzle over the cooled loaf.
- This homemade date nut bread freezes well; wrap the cooled loaf tightly in plastic wrap and foil before freezing for up to three months.
Nutrition
- Serving Size: 1 slice
- Calories: 310
- Sugar: 30g
- Sodium: 210mg
- Fat: 14g
- Saturated Fat: 5g
- Unsaturated Fat: 9g
- Trans Fat: 0g
- Carbohydrates: 45g
- Fiber: 3g
- Protein: 5g
- Cholesterol: 55mg