

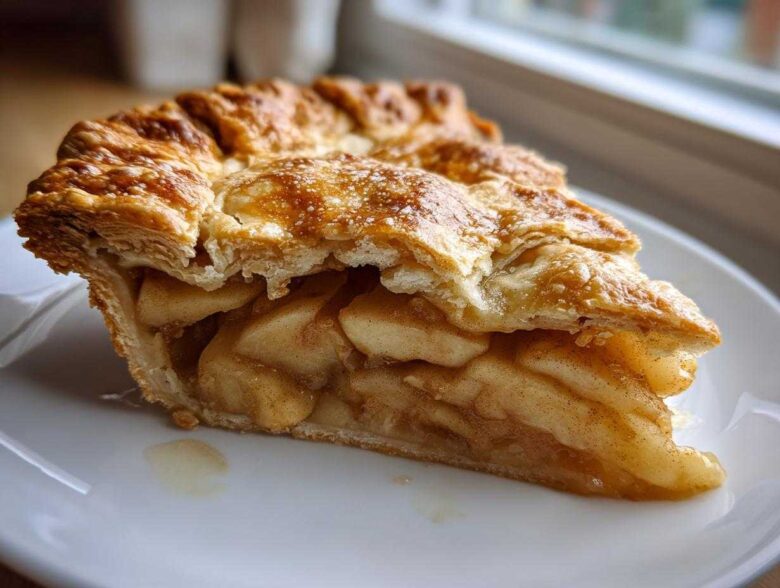
Oh, there is just nothing in the world that smells better than a truly great homemade apple pie baking in the oven, is there? That sweet, spicy warmth completely takes over the house and makes everything feel instantly cozy. I spent years wrestling with crusts that turned out tough or soggy—it was frustrating! But I finally cracked the code, and I’m sharing my secret today.
Forget those store-bought crusts, trust me on this one. This recipe delivers the ultimate easy homemade apple pie you’ve been dreaming about, featuring a flaky, all-butter double crust that shatters perfectly when you cut into it. The aroma alone is proof that hours of testing were worth it. Get ready, because this is the one you’ll keep forever!
Why This Is Your Go-To Homemade Apple Pie Recipe
If you’ve been searching for the one recipe that truly works every single time, you’ve found it. We focused on making this the easiest way to create a show-stopping pie. This isn’t just another recipe; it’s a blueprint for baking comfort!
- It delivers that famously flaky finish you only get from an all-butter crust.
- The filling is perfectly balanced—sweet, but with just enough tartness from our chosen apples.
- It’s streamlined enough that even if you’re new to baking, it feels totally manageable.
Key Features of Our Homemade Apple Pie
Really, the magic is in those core elements. Our signature buttery pie crust stays unbelievably flaky because we never skip the chilling. Plus, we insist on Granny Smith apples because they hold their shape and offer that amazing sweet-tart pop. This truly is the best apple pie recipe for beginners who want professional results on their first try.
Gathering Ingredients for Your Homemade Apple Pie
Okay, now for the fun part—shopping! Before we even think about mixing anything, I have to hammer home one very important rule for that phenomenal, flaky crust: everything must be cold. I mean, ice cold. If your butter gets soft while you’re cutting it in, you’re instantly headed toward a tough or less-than-flaky texture. We want those little icy pockets of butter to melt in the oven and create steam, which is what causes the flakiness! Trust me, if you keep your butter and water frigid, you’re halfway to winning the pie contest.
Here is exactly what you need for the best cinnamon apple dessert, divided into the two main components.
For the Flaky Double Crust
- 2 1/2 cups all-purpose flour
- 1 teaspoon salt
- 1 cup (2 sticks) cold unsalted butter, cut into small cubes
- 1/2 cup ice water, plus more if needed
For the Spiced Apple Filling
- 6 medium Granny Smith apples, peeled, cored, and sliced 1/4 inch thick
- 3/4 cup granulated sugar
- 1/4 cup packed light brown sugar
- 2 tablespoons all-purpose flour
- 1 teaspoon ground cinnamon
- 1/4 teaspoon ground nutmeg
- 1/8 teaspoon ground allspice
- 1 tablespoon lemon juice
- 1 large egg, beaten with 1 teaspoon water (for egg wash)
Step-by-Step Instructions for the Ultimate Homemade Apple Pie
Okay, seeing all those beautiful ingredients laid out is exciting! But remember, with a homemade apple pie, the process matters just as much as the components. We are going to build that incredible flaky structure first, then load it up with the spicy, sweet filling. Don’t rush the chilling, and don’t panic when it comes time to maneuver the dough!
Making the Buttery Pie Crust Dough
This is step one, and it determines everything! Take those cold butter cubes and the flour mixture. You need to cut the butter in until you have chunks about the size of tiny peas or, definitely, no larger than a kidney bean. If you don’t have a pastry blender, just use your fingertips, working fast so the butter stays cold! Then, sprinkle in that ice water, one tablespoon at a time. You’re only mixing until the dough *just* holds together when squeezed—if you try to knead it, it turns rubbery. Oops! Divide that dough into two disks, wrap them up tight, and pop them into the fridge for a full hour. That rest time is non-negotiable; it lets the gluten relax.
Mixing the Apple Pie Filling Secrets
While that crust is chilling, we tackle the fruit. Get your gorgeous Granny Smith slices into a big bowl. Now, gently toss them with all the sugars, the flour, and those warm spices—cinnamon, nutmeg, and allspice. That little bit of added flour is one of the best apple pie filling secrets because it thickens up all that juice the apples release, preventing that dreaded runny mess. A quick squirt of lemon juice brightens up the whole flavor profile. Just toss gently so you don’t mash those pretty slices!
Assembling and Baking Your Homemade Apple Pie
Preheat your oven to a blazing 425°F before you start rolling dough out. Flour your surface lightly and roll out your first disc to about 12 inches. Carefully drape it into your 9-inch pie plate; don’t stretch it! Pour in all those perfectly spiced apples. Now, roll out the top crust, lay it over the filling, and trim that overhang to match the bottom layer. Crimp those edges—I like a simple fork press—and for the love of all things delicious, cut three or four good slits on the top crust so the steam has somewhere to escape! Brush the whole top with your egg wash, sprinkle on some sugar for sparkle, and we bake. You bake it hot first, for 15 minutes at 425°F. This shock helps set the bottom crust. Then, drop the heat down to 375°F for another 40 to 50 minutes until it’s deeply golden brown.
Cooling for the Perfect Set
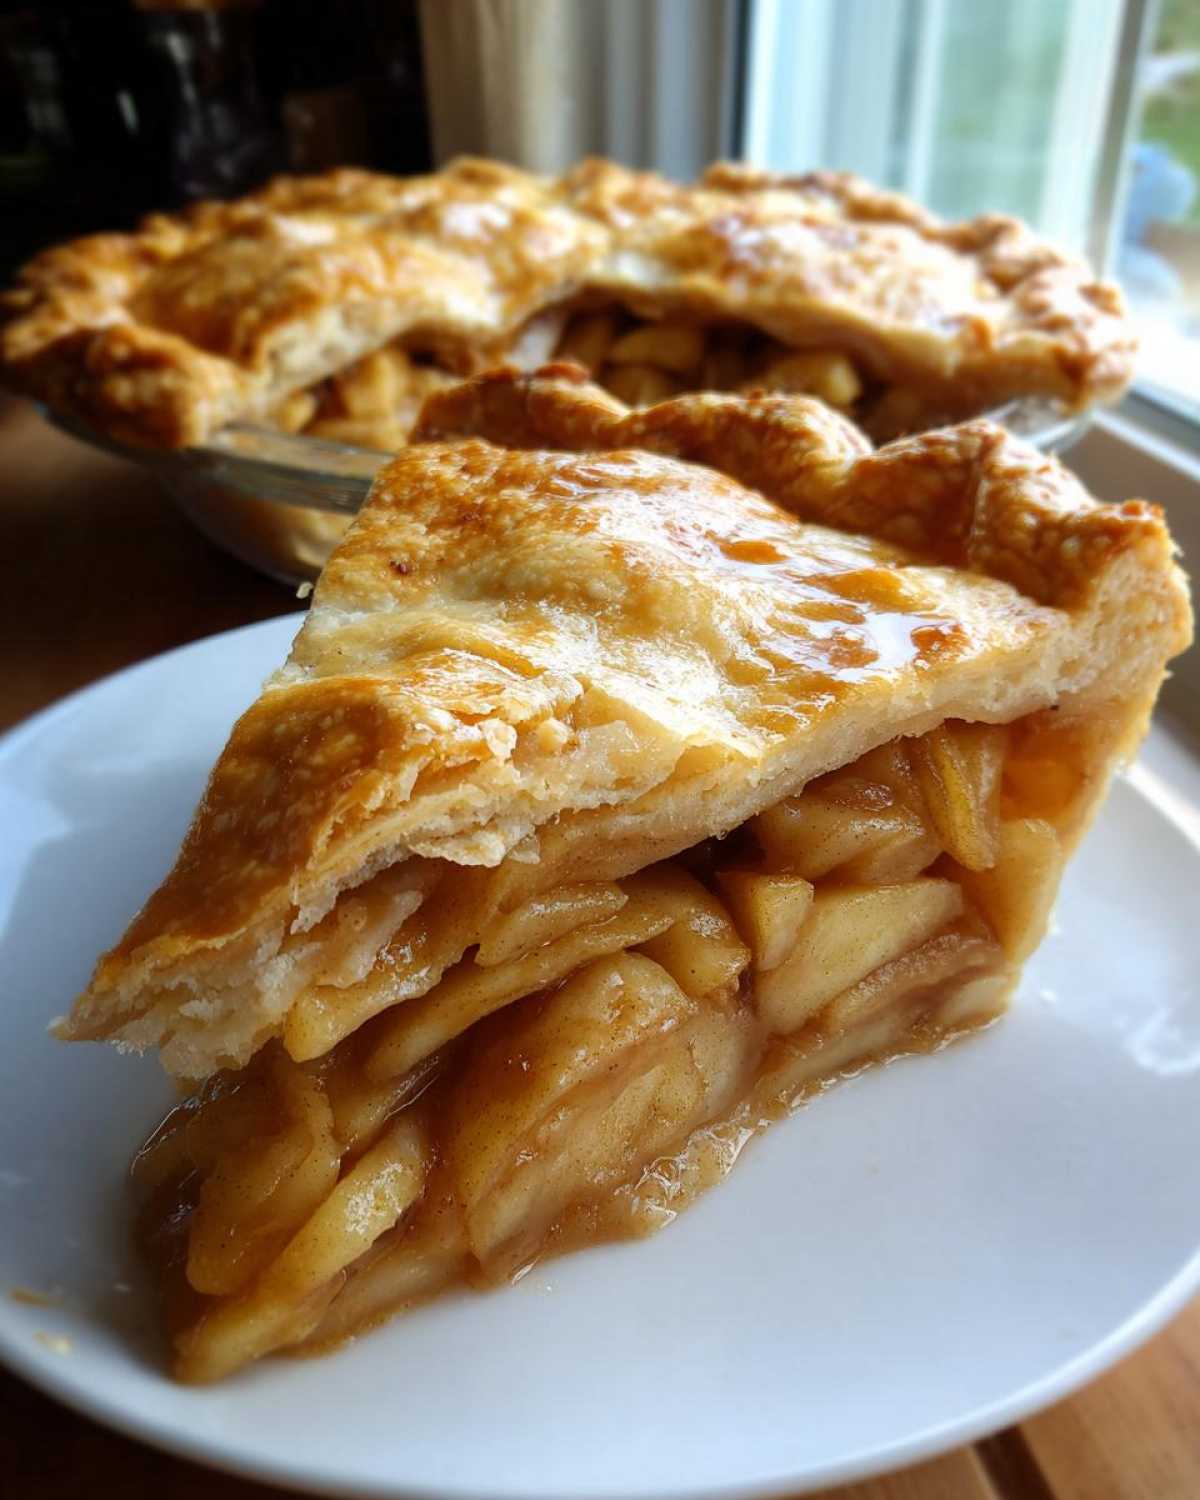
I know, I know—the smell is making you crazy, and you want a slice *now*. Please, stop! This is arguably the hardest part of making a classic apple pie from scratch. You must let that pie cool on a wire rack for a minimum of three hours. Seriously, three whole hours! If you slice it hot, all that wonderful thick liquid you worked so hard to create will just run out. Those three hours let the filling magically set up. Once it’s cool, it’s ready to be the star of the show!
Tips for a Perfect Flaky Pie Crust Tutorial
Honestly, 90% of making a successful homemade apple pie rests entirely on getting that crust right. If you nail the crust, you’ve made an amazing pie, even if the filling turned out just okay! Don’t stress about it being pretty; stress about getting it cold. That buttery, flaky texture we are chasing is all down to temperature control. If you’re baking on a hot day, try chilling your mixing bowl beforehand! I even turn the air conditioning up higher than normal when I’m doing my pastry work.
Temperature Control for Flakiness
You absolutely must keep your butter tiny, frigid cubes, and your water needs to have ice cubes floating in it until the last second before you pour it in. Those little chunks of butter are what create pocketed steam when they hit the hot oven environment. If the butter melts before baking, it just blends into the flour, and poof—no flakiness, just dense pastry. Remember what I said about the soggy bottom in the apple pie secrets? A cold crust helps prevent that too, because the butter doesn’t have time to soak into the bottom layer before it starts baking!
Variations on the Classic Apple Pie From Scratch
While I stand by our flaky double crust as the crowning jewel of this homemade apple pie, I absolutely know there are times when you want to switch things up! Sometimes you just don’t have the patience for rolling out dough twice, and that’s totally fair. You can take this incredible spiced apple filling and pair it with something else entirely. It’s all about making baking work for your schedule, not the other way around!
Alternative Toppings: Crumb vs. Double Crust
If you want to skip the second pastry round, turning this into a crisp-style top is fantastic. For a simple crumb, you just need a quick mixture. Take about a cup of flour, a half cup of brown sugar, and maybe four tablespoons of cold butter. You’ll use your fingers to quickly rub the butter into the flour and sugar until you get a beautiful, coarse mixture—think wet sand. Don’t overwork it!
Once your apple filling is nestled in your bottom crust (or even baked right in a casserole dish if you want a true crisp!), just sprinkle that crumb mixture evenly over the top. Pop it in the oven according to the original baking directions. It gives you the same warm, spiced apple flavor but with a delightfully crunchy, buttery topping instead of that firm, flaky crust. If you have time, I highly recommend trying our caramel apple crisp recipe some time too, because that topping is addictive!
Serving Suggestions for Your Homemade Apple Pie
My absolute favorite part of finishing this homemade apple pie is deciding what to serve it with! Honestly, it’s perfect on its own, still slightly warm from that three-hour cooling period. But why stop there when you have such a rich, spiced dessert on your hands?
You simply cannot argue with a scoop of really good vanilla ice cream melting slowly over that cinnamon-spiced filling. That contrast between the hot, tart apples and the cold, creamy ice cream? Divine. If you feel like being a little fancy, try a sharp cheddar cheese sliver on the side—it’s an old-fashioned move that really cuts through the sweetness. You can also check out some of my fun apple cinnamon dessert ideas if you need a light follow-up!
Storage and Reheating Instructions
So you’ve made the greatest homemade apple pie and you can’t possibly eat it all in one sitting? Good news! This sturdy pie actually keeps really well.
If you simply can’t wait, you can leave it sitting out on the counter at room temperature, covered loosely with foil or plastic wrap, for about 24 hours. Since our filling is really well-thickened with flour rather than being jam-heavy, you usually don’t have to worry about spoilage right away. But for safety, especially if you live in a warmer climate, I always recommend moving it to the fridge after that first day.
Keeping it Fresh in the Fridge
When you put the pie in the refrigerator, it will last a good three to four days. Now, here’s the catch with the fridge: that lovely flaky crust is going to get a little soft. That’s just moisture exchange, honey—it happens! Don’t just throw a cold slice on a plate, though, or you’ll be disappointed.
The Secret to Reheating Slices
If you want that crust to snap like it just came out of my oven, baking is truly the best route. Forget microwaving—that’s a fast track to total mushiness! Take your leftover slice and place it directly on a baking sheet. Pop that tray into an oven that’s preheated to 350°F for about 10 to 15 minutes. You just want it heated through gently, and that dry heat will pull the moisture right out of the crust, making it crisp up again. It honestly tastes almost as good as fresh. I usually serve that reheated slice with a tiny dollop of whipped cream just to celebrate.
Frequently Asked Questions About Homemade Apple Pie
Can I use pre-made pie crust instead of making it from scratch?
Oh, the eternal question! If you absolutely need an easy apple pie recipe for a weeknight emergency, sure, you *can* use store-bought dough. It saves so much time, there’s no denying that! However, you are going to miss out on the absolute best part of this whole process: that incredibly light, buttery pie crust we spent time making. The flavor just isn’t the same, and sometimes those store-bought ones are denser. If you use it, go ahead and roll it out thin, but prepare for a much different texture experience than the one I described!
What is the best way to prevent a soggy bottom crust?
This is the fear that keeps bakers up at night! The primary trick we talked about—baking on the lowest rack during that initial high-heat blast—works wonders because the bottom pastry gets direct heat almost immediately. The science behind it is that the intense heat starts cooking the bottom crust before the juices from your filling have a chance to fully leach out and turn it into something resembling wet sand. Also, making sure you really chill that dough helps! Cold dough hitting a hot pan resists absorbing moisture much better when the butter is still in solid, flaky little pieces.
How do I know when the apple pie filling is done?
The crust color can fool you, especially if you’ve covered the edges with foil to keep them from burning. The real indicator that your classic apple pie from scratch is finished is watching those steam vents. You aren’t looking for thin steam; you want to see the filling itself vigorously bubbling—thick, slow, heavy bubbles rolling through those slits. When the juices are boiling hard in the middle, you know the apples are tender and the flour has activated to thicken everything up perfectly. If you see that thick bubbling, pull it out!
Estimated Nutritional Data for This Homemade Apple Pie
Look, making a truly decadent homemade apple pie is definitely not low-calorie baking, but gosh, it’s worth every single bite! Since every ingredient varies slightly based on brand, apple size, and how much sugar you sprinkle on top, please take these numbers as a reasonable estimate per slice. This is for an 8-serving yield, which is a generous slice if you ask me!
- Serving Size: 1 slice
- Calories: 450
- Sugar: 35g
- Sodium: 250mg
- Fat: 25g
- Saturated Fat: 15g
- Unsaturated Fat: 10g
- Trans Fat: 0.5g
- Carbohydrates: 58g
- Fiber: 3g
- Protein: 5g
- Cholesterol: 60mg
Don’t worry too much about the numbers when you’re baking something this comforting. Just enjoy that beautiful, flaky crust and the warm, spicy filling!
Estimated Nutritional Data for This Homemade Apple Pie
Look, making a truly decadent homemade apple pie is definitely not low-calorie baking, but gosh, it’s worth every single bite! Since every ingredient varies slightly based on brand, apple size, and how much sugar you sprinkle on top, please take these numbers as a reasonable estimate per slice. This is for an 8-serving yield, which is a generous slice if you ask me!
- Serving Size: 1 slice
- Calories: 450
- Sugar: 35g
- Sodium: 250mg
- Fat: 25g
- Saturated Fat: 15g
- Unsaturated Fat: 10g
- Trans Fat: 0.5g
- Carbohydrates: 58g
- Fiber: 3g
- Protein: 5g
- Cholesterol: 60mg
Don’t worry too much about the numbers when you’re baking something this comforting. Just enjoy that beautiful, flaky crust and the warm, spicy filling!
PrintUltimate Easy Homemade Apple Pie with Flaky All-Butter Crust
Make a classic, comforting apple pie from scratch featuring a buttery, flaky double crust and a perfectly spiced sweet-tart filling using Granny Smith apples.
- Prep Time: 45 min
- Cook Time: 65 min
- Total Time: 110 min
- Yield: 8 servings
- Category: Dessert
- Method: Baking
- Cuisine: American
- Diet: Vegetarian
Ingredients
- 2 1/2 cups all-purpose flour
- 1 teaspoon salt
- 1 cup (2 sticks) cold unsalted butter, cut into small cubes
- 1/2 cup ice water, plus more if needed
- 6 medium Granny Smith apples, peeled, cored, and sliced 1/4 inch thick
- 3/4 cup granulated sugar
- 1/4 cup packed light brown sugar
- 2 tablespoons all-purpose flour
- 1 teaspoon ground cinnamon
- 1/4 teaspoon ground nutmeg
- 1/8 teaspoon ground allspice
- 1 tablespoon lemon juice
- 1 large egg, beaten with 1 teaspoon water (for egg wash)
Instructions
- Prepare the Crust: In a large bowl, whisk together the flour and salt. Cut in the cold butter using a pastry blender or your fingers until the mixture resembles coarse crumbs with some pea-sized pieces of butter remaining. Gradually add the ice water, one tablespoon at a time, mixing until the dough just comes together. Do not overmix. Divide the dough in half, form each half into a disk, wrap in plastic, and chill for at least 1 hour.
- Prepare the Filling: In a large bowl, gently toss the sliced apples with the granulated sugar, brown sugar, 2 tablespoons of flour, cinnamon, nutmeg, allspice, and lemon juice until the apples are evenly coated. Set aside.
- Assemble the Pie: Preheat your oven to 425 degrees Fahrenheit (220 degrees Celsius). On a lightly floured surface, roll out one dough disk into a 12-inch circle. Carefully transfer the dough to a 9-inch pie plate. Trim the edges, leaving a 1-inch overhang.
- Pour the apple filling into the crust. Dot the top of the apples with a few small pieces of leftover butter, if desired.
- Roll out the second dough disk. Place it over the filling. Trim the top crust overhang to match the bottom. Crimp the edges together to seal. Cut several slits in the top crust to allow steam to escape.
- Brush the top crust evenly with the egg wash. Sprinkle lightly with extra granulated sugar, if you like extra crunch.
- Bake: Place the pie on a baking sheet. Bake at 425 degrees Fahrenheit for 15 minutes. Reduce the oven temperature to 375 degrees Fahrenheit (190 degrees Celsius) and continue baking for 40 to 50 minutes, or until the crust is golden brown and the filling is bubbly. If the edges brown too quickly, cover them loosely with foil.
- Cool: Let the pie cool on a wire rack for at least 3 hours before slicing and serving. This allows the filling to set properly.
Notes
- For the flakiest crust, keep all ingredients, especially the butter and water, very cold.
- If you prefer a less tart pie, substitute two of the Granny Smith apples with Honeycrisp or Fuji apples.
- To prevent a soggy bottom crust, place the pie plate on the lowest rack during the initial high-heat bake.
Nutrition
- Serving Size: 1 slice
- Calories: 450
- Sugar: 35g
- Sodium: 250mg
- Fat: 25g
- Saturated Fat: 15g
- Unsaturated Fat: 10g
- Trans Fat: 0.5g
- Carbohydrates: 58g
- Fiber: 3g
- Protein: 5g
- Cholesterol: 60mg