

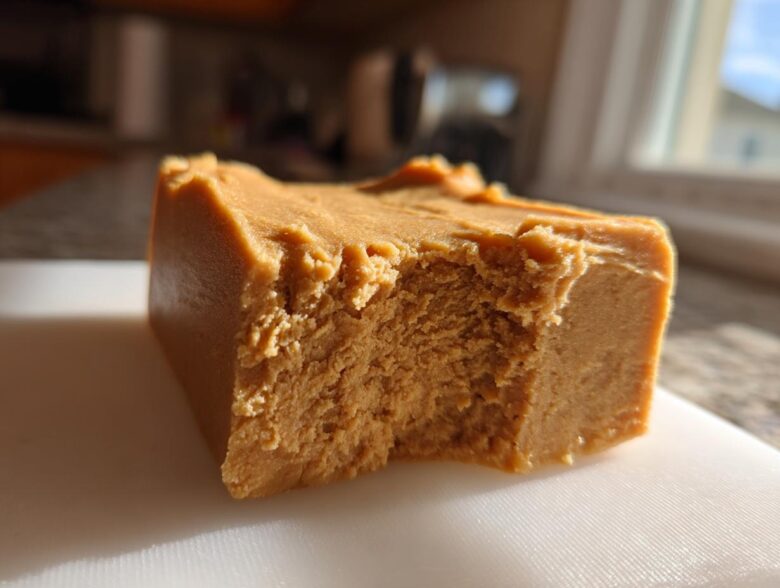
Oh my goodness, those times when you just NEED that perfect bite of sweet, salty, melt-in-your-mouth candy, right? You know the one—the kind that doesn’t scratch your throat when you swallow it? I spent way too long trying to get that ultra-creamy texture right, but I finally cracked the code for the ultimate easy peanut butter fudge.
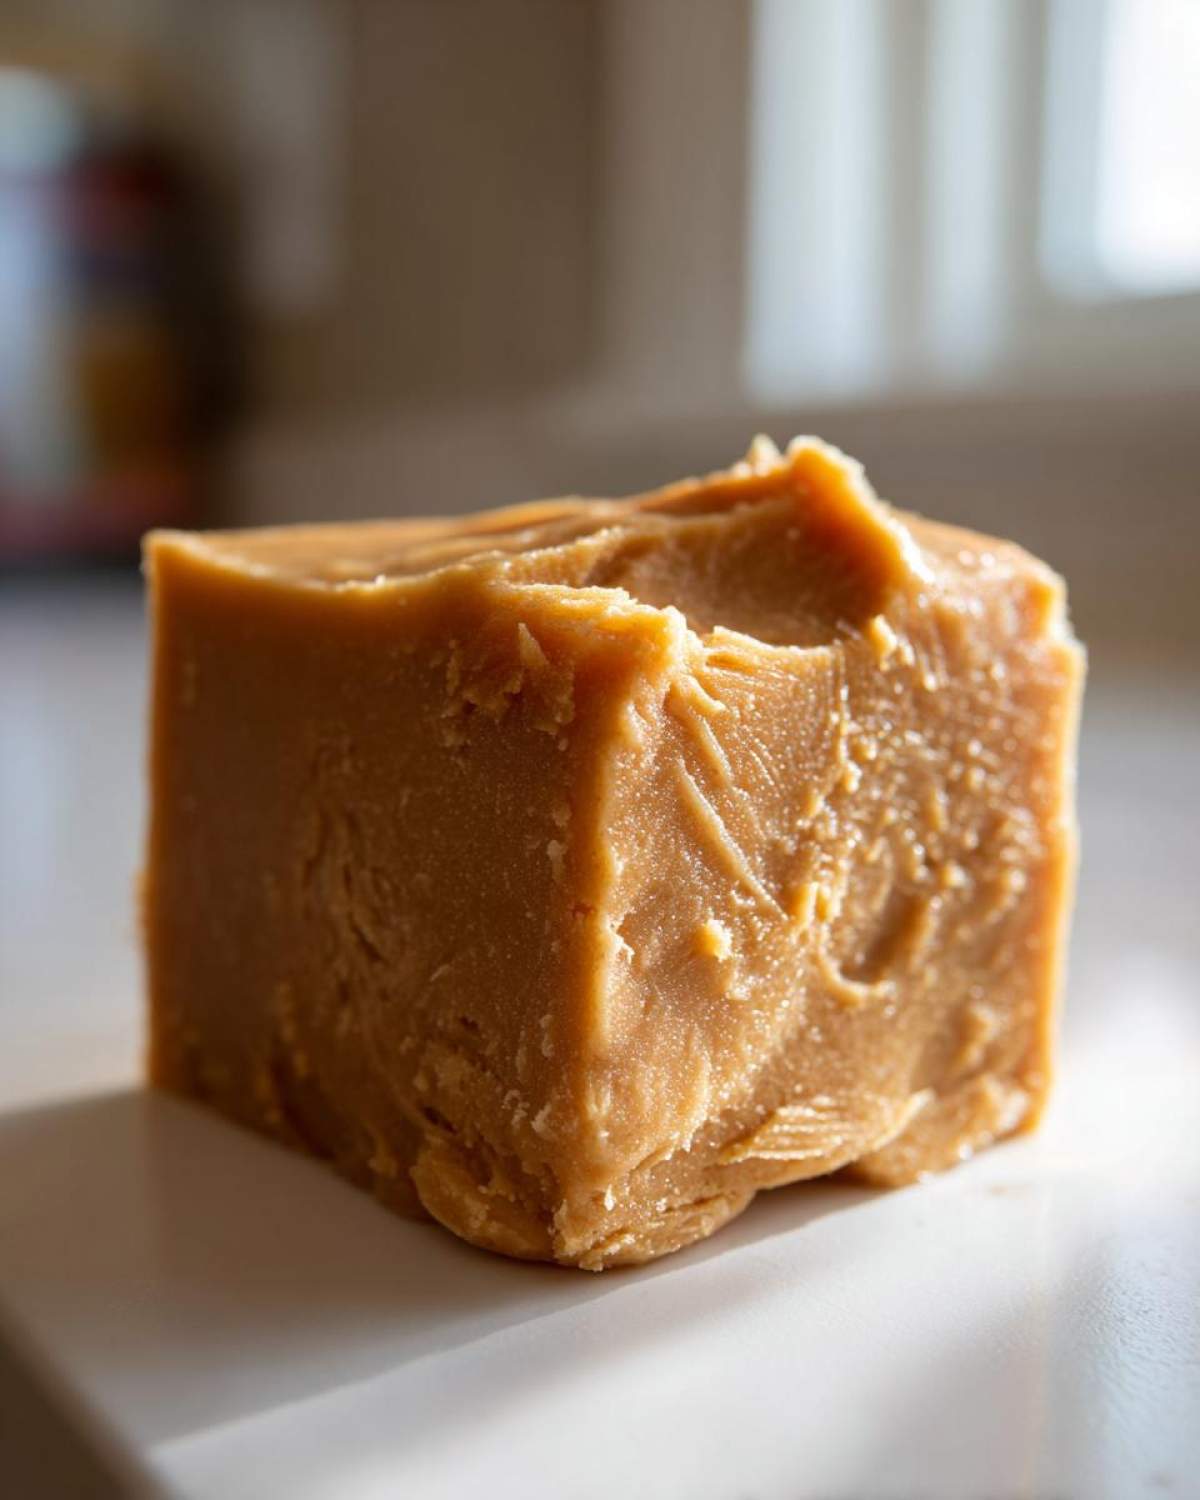
Trust me when I say this version is the real deal. It’s practically foolproof, no-bake, and honestly, it sets up so fast you’ll barely have time to clean your mixing bowl before it’s ready for the fridge. I’ve perfected the ratio so you get that beautiful, smooth, dense candy every single time.
When you click over to read more about how we approach testing recipes here, you’ll see I take texture seriously. If you’re looking for a quick dessert that tastes like it took hours, you’ve found your match. I’m so excited for you to try this! Dive in with me!
Why This Creamy Peanut Butter Fudge is Your New Go-To Recipe
I promise, this is the recipe you’ll save and come back to again and again when that sweet craving hits. It ticks every single box when it comes to easy candy making.
- It’s ridiculously fast—we’re talking less than 15 minutes of actual work.
- It’s a guaranteed no-bake dream.
- The texture is pure velvet; truly Melt in Your Mouth Fudge!
- It’s the definition of a Quick Fudge Dessert!
Achieving Perfect Melt in Your Mouth Fudge Texture
The secret to that incredible mouthfeel isn’t about cooking it on the stove, which can make fudge grainy or hard. Nope! We rely on perfectly softened fat ratios and the structure provided by sugar to stabilize everything.
Because we skip the candy thermometer and the whole heating process, the sugar crystals stay suspended beautifully in that buttery peanut butter base. It’s the cleanest, smoothest fudge you’ll ever make without ever breaking a sweat.
Essential Ingredients for Perfect Peanut Butter Fudge
The best part about this whole recipe is how minimal the ingredient list is! You probably have most of this sitting in your pantry right now, which is why it’s such a life-saver when you need a batch of creamy peanut butter fudge quickly. Don’t skimp here; the quality of these few items really shines.
For success, you need:
- One full cup of unsalted butter, and I mean *softened*. Don’t melt it, just let it chill out on the counter for an hour or so.
- A full, glorious cup of creamy peanut butter. Nope, no chunky swappers allowed here—we need smooth for this texture!
- Vanilla extract (a must for depth!).
- Four cups of powdered sugar, and this is non-negotiable: it must be sifted!
- Optional salt, but only if you’re using unsalted butter, which I recommend.
Ingredient Notes and Substitutions for Your Peanut Butter Fudge
Now, let’s talk specifics, because the devil is in the details when you’re aiming for that classic confectionery texture. The most important thing you absolutely must do is sift that powdered sugar. If you skip sifting, you risk little hard pockets of unmixed sugar, and nobody wants that in their candy!
Also, I always use unsalted butter because I like to control the saltiness myself with that optional half teaspoon. A little note on flavor: if you want to nudge this towards an Old Fashioned Fudge Recipe feel, try swapping out half of your creamy peanut butter for marshmallow fluff. It gives it an incredible lightness, almost like a classic peanut butter cup filling.
Remember, since this is a quick method, the ingredients need to be the right consistency to blend smoothly without heating them up.
Step-by-Step Instructions for Easy Peanut Butter Fudge
This is where the magic happens, and honestly, it’s almost laughably simple. Since this recipe is completely No Bake, there’s zero fussing over temperatures or potential scorching. We’re relying on elbow grease—or better yet, an electric mixer—to build that smooth structure.
Before you start mixing, you absolutely must get your 8×8 pan ready. I recommend lining it with parchment paper, leaving a little overhang on two sides. That overhang is your handle later when you need to lift the whole gorgeous slab out for cutting. Trust me, you want that easy lift later!
Preparing the Pan and Mixing the Creamy Peanut Butter Fudge Base
First thing’s first: parchment lining! Get that done while the butter has about 15 minutes left on the counter to soften up. I learned the hard way that if the butter is even slightly cold when you start, the texture suffers right away. You want it pliable, not greasy.
Grab your biggest bowl. We’re using the electric mixer here—this is where it pays off! Beat that softened butter and the creamy peanut butter together until they look pale and perfectly incorporated. If you’re rushing, you might just stir them, but the mixer pulls in a tiny bit of air that helps with the overall creaminess. Smoother base equals smoother finish!
Incorporating Sugar and Setting the Peanut Butter Fudge
Now, grab your sifter! Add that beautiful, sifted powdered sugar one cup at a time. This is important: mix on low speed after each cup. If you dump it all in at once, your mixer will throw sugar everywhere, or worse, the batter will seize up on you. I usually stop mixing right when everything comes together, even if the bowl scraping reveals a few dry spots.
Press that thick mixture firmly and evenly into your prepared pan. Use an offset spatula if you have one to make the top nice and flat. Then, into the fridge it goes! We need at least two hours minimum for this creamy peanut butter fudge to firm up. Patience for two hours means perfect squares later. If you want to see my tips for making perfect single-layer treats, check out my fudgy brownie guide!
Tips for Success When Making Homemade Peanut Butter Candy
I know I’ve said it a few times, but mastering this Homemade Peanut Butter Candy is all about respecting those key preparation steps. Seriously, these small details are what separates a decent batch from one that makes people ask for your recipe every single time they see you!
My number one pro tip, reinforcing what we already discussed, is the sifting. Sift your powdered sugar, even if you think it looks powdery fine. I always see a hidden clump or two waiting in the bottom of the sifter basket, and those clumps ruin a smooth texture instantly.
Secondly, don’t rush the chilling! Resist the urge to poke it after an hour. If you try to cut it too early, it smears everywhere, which is how you end up with sticky messes instead of perfect squares. For the cleanest cuts once it *is* chilled, grab a long, sharp knife and wipe the blade clean between every cut. That little bit of wiping makes the world of difference when you’re slicing up your beautiful candy.
If you love learning about how ingredients change texture, you should definitely check out some of my tests on how brown butter affects deep flavors!
Variations to Customize Your Peanut Butter Fudge
While this recipe stands perfectly fine on its own—a creamy, salty-sweet dream—sometimes you just want to jazz things up a bit for presentation, especially around the holidays! I love having options, and luckily, this base structure holds up beautifully to a couple of slightly different treatments.
One popular route people take is going double-decker. If you’re aiming for a look that mimics those classic chocolate and peanut butter cups, try adding a thin chocolate layer on top. This is super easy!
To do this, just melt down about one cup of semi-sweet chocolate chips along with a tiny bit of coconut oil—maybe a tablespoon. Once the peanut butter layer is set slightly—I usually pop it in the fridge for about 30 minutes until it’s firm enough that it won’t mix with the chocolate—you spread that melted chocolate right across the top. Then, back into the fridge until it’s totally hard before you slice it. It looks so professional!
The other little twist I mentioned earlier is for achieving a lighter, slightly fluffier texture that tastes super nostalgic. If you want that true Old Fashioned Fudge Recipe vibe without having to cook, swap out half of your peanut butter with marshmallow fluff. Yep, just cut the peanut butter amount in half and add an equal amount of fluff.
It changes the density slightly, making it softer, almost like a cloud holding that peanut butter flavor. You definitely need to chill this version extra well, but it’s a fantastic way to make a big batch feel different! If you love mixing chocolate and banana, you should check out my banana bread recipe—it uses that same principle of layered flavor!
Storage and Serving Suggestions for Your Quick Fudge Dessert
Since this Quick Fudge Dessert is so rich and full of fat (the good kind!), it stores like a dream. You absolutely must keep it refrigerated. Don’t leave it sitting out on the counter, especially if your kitchen gets warm, because it will get too soft and start to weep.
Pop the cut squares into an airtight container, and they’ll stay perfectly firm and delicious for a good week, maybe even ten days. They taste even better after the second day, somehow!
When you serve them up, they’re fantastic alongside a hot cup of black coffee. They also pair surprisingly well with tart fruit, like a plate of raspberries, to cut through the sweetness. If you love warm, cozy flavors, they remind me a bit of my apple cinnamon muffins—that perfect comforting bite!
Frequently Asked Questions About Classic Peanut Butter Fudge
I get so many questions about this recipe, usually centering around texture, because that’s the make-or-break thing with candy! I’ve gathered a few of the most common things folks ask me when they’re diving into making this Classic Confectionery.
Can I make this peanut butter fudge without an electric mixer?
Oh, absolutely! You totally can. I used to make this batch by hand when I first started baking back in high school. The biggest difference is the elbow grease required when you add the powdered sugar. When you’re mixing by hand, you really have to press hard to make sure everything is incorporated, and it will feel stiff much faster than it does with a mixer. Don’t worry if your hands get tired—it’s worth it for the result!
What makes this an Old Fashioned Fudge Recipe?
That phrase is tricky because a truly Old Fashioned Fudge Recipe usually involves cooking sugar to a specific temperature, right? What makes *this* version land in that nostalgic category is the flavor profile. We’re hitting those classic notes of salty peanut butter, butter, and vanilla. Even though our method is super fast and no-bake, the taste is reminiscent of the rich, dense candy our grandparents used to make.
If you want to get even closer to that traditional taste, remember that trick I mentioned about swapping half the peanut butter for marshmallow fluff! It really elevates that classic candy flavor. If you have any other questions about ingredients or need to get in touch about the recipe, feel free to reach out on my contact page!
Estimated Nutritional Data for This Peanut Butter Fudge
Because we’re working with pure, delicious fats and sugar here, it’s good to know what you’re working with! Keep in mind that these numbers are just an estimate for our recipe, based on the serving size of one tiny square (we get about 64 squares, so it goes a long way!).
Here is the general breakdown:
- Calories: Around 180
- Total Fat: About 11g
- Carbohydrates: Roughly 19g
- Protein: About 4g
Please remember these figures aren’t exact science; they really change based on the exact brands of peanut butter or sugar you use. For a full explanation on how we calculate these, you can read my nutritional disclaimer here if you’d like!
Share Your Ultimate Creamy Peanut Butter Fudge Experience
Okay, now it’s your turn! I’ve given you all my secrets for getting that unbelievably smooth, creamy peanut butter fudge that stays soft for days. I truly want to know how it turns out for you.
Did you manage to get it mixed without making a huge mess? More importantly, what was the texture like? Did it set up perfectly in the fridge, or did you have to sneak a piece out before the two hours were up (don’t worry, I won’t tell!)? Drop a comment below, please tell me what you thought!
It really helps me and others in the community to see how recipes turn out in different kitchens. If you snapped a picture, I’d absolutely love to see it! You can tag us on social media—we always cheer when we see your successes. Happy candy making, and I can’t wait to hear all about your batch of easy fudge recipe goodness!
If you want to browse more of my favorite no-bake goodies and quick desserts, feel free to head over to the main recipe index!
PrintThe Ultimate Creamy & Easy Peanut Butter Fudge: Ready in Under 15 Minutes
Make rich, melt-in-your-mouth peanut butter fudge quickly using just a few simple ingredients. This no-bake recipe yields a perfectly creamy texture every time.
- Prep Time: 10 min
- Cook Time: 0 min
- Total Time: 130 min
- Yield: About 64 small squares
- Category: Dessert
- Method: No Bake
- Cuisine: American
- Diet: Vegetarian
Ingredients
- 1 cup (2 sticks) unsalted butter, softened
- 1 cup creamy peanut butter
- 1 teaspoon vanilla extract
- 4 cups powdered sugar, sifted
- 1/2 teaspoon salt (optional, if using unsalted butter)
Instructions
- Line an 8×8 inch baking pan with parchment paper, leaving an overhang on two sides for easy removal. Lightly grease the paper.
- In a large bowl, beat the softened butter and peanut butter together using an electric mixer until the mixture is smooth and creamy.
- Beat in the vanilla extract.
- Gradually add the sifted powdered sugar, one cup at a time, mixing on low speed until fully incorporated after each addition. Scrape down the sides of the bowl as needed. If the mixture becomes too stiff to mix, you can switch to mixing by hand with a sturdy spoon.
- Once all the sugar is mixed in, the fudge will be very thick. Press the mixture evenly into the prepared 8×8 inch pan. Smooth the top with a spatula.
- Refrigerate the fudge for at least 2 hours, or until firm enough to cut.
- Lift the fudge out of the pan using the parchment paper overhang. Cut into 1-inch squares before serving.
Notes
- For a classic, old-fashioned flavor, you can substitute half of the peanut butter with marshmallow fluff.
- If you prefer a chocolate layer, melt 1 cup of semi-sweet chocolate chips with 1 tablespoon of coconut oil and spread it over the peanut butter layer once the peanut butter fudge has set slightly (about 30 minutes in the fridge). Then, chill completely before cutting.
- Sifting the powdered sugar prevents lumps and helps achieve the smoothest texture.
Nutrition
- Serving Size: 1 square (1/64th recipe)
- Calories: 180
- Sugar: 18
- Sodium: 55
- Fat: 11
- Saturated Fat: 4
- Unsaturated Fat: 7
- Trans Fat: 0
- Carbohydrates: 19
- Fiber: 1
- Protein: 4
- Cholesterol: 15