

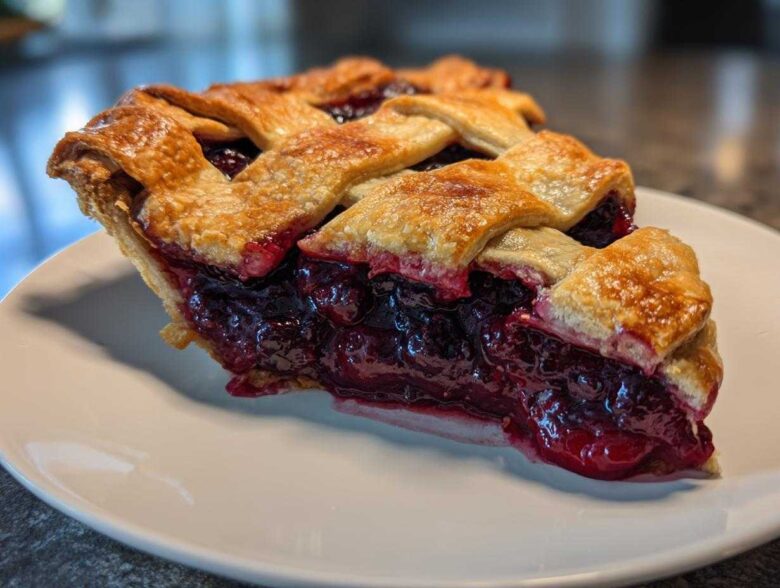
Oh, nothing screams ‘summer afternoon’ to me quite like the smell of bubbling fruit filling and buttery pastry hitting the oven. Honestly, when those plump, juicy berries start to smell like heaven baking, I’m transported right back to my grandmother’s porch swing. That’s why I spent years trying to nail down the perfect recipe for an easy homemade blackberry pie that tastes like it took all day! Forget those runny disappointments; this recipe guarantees a wonderfully thick, sweet and tart filling hugged by the flakiest crust you can imagine, complete with that gorgeous lattice top.
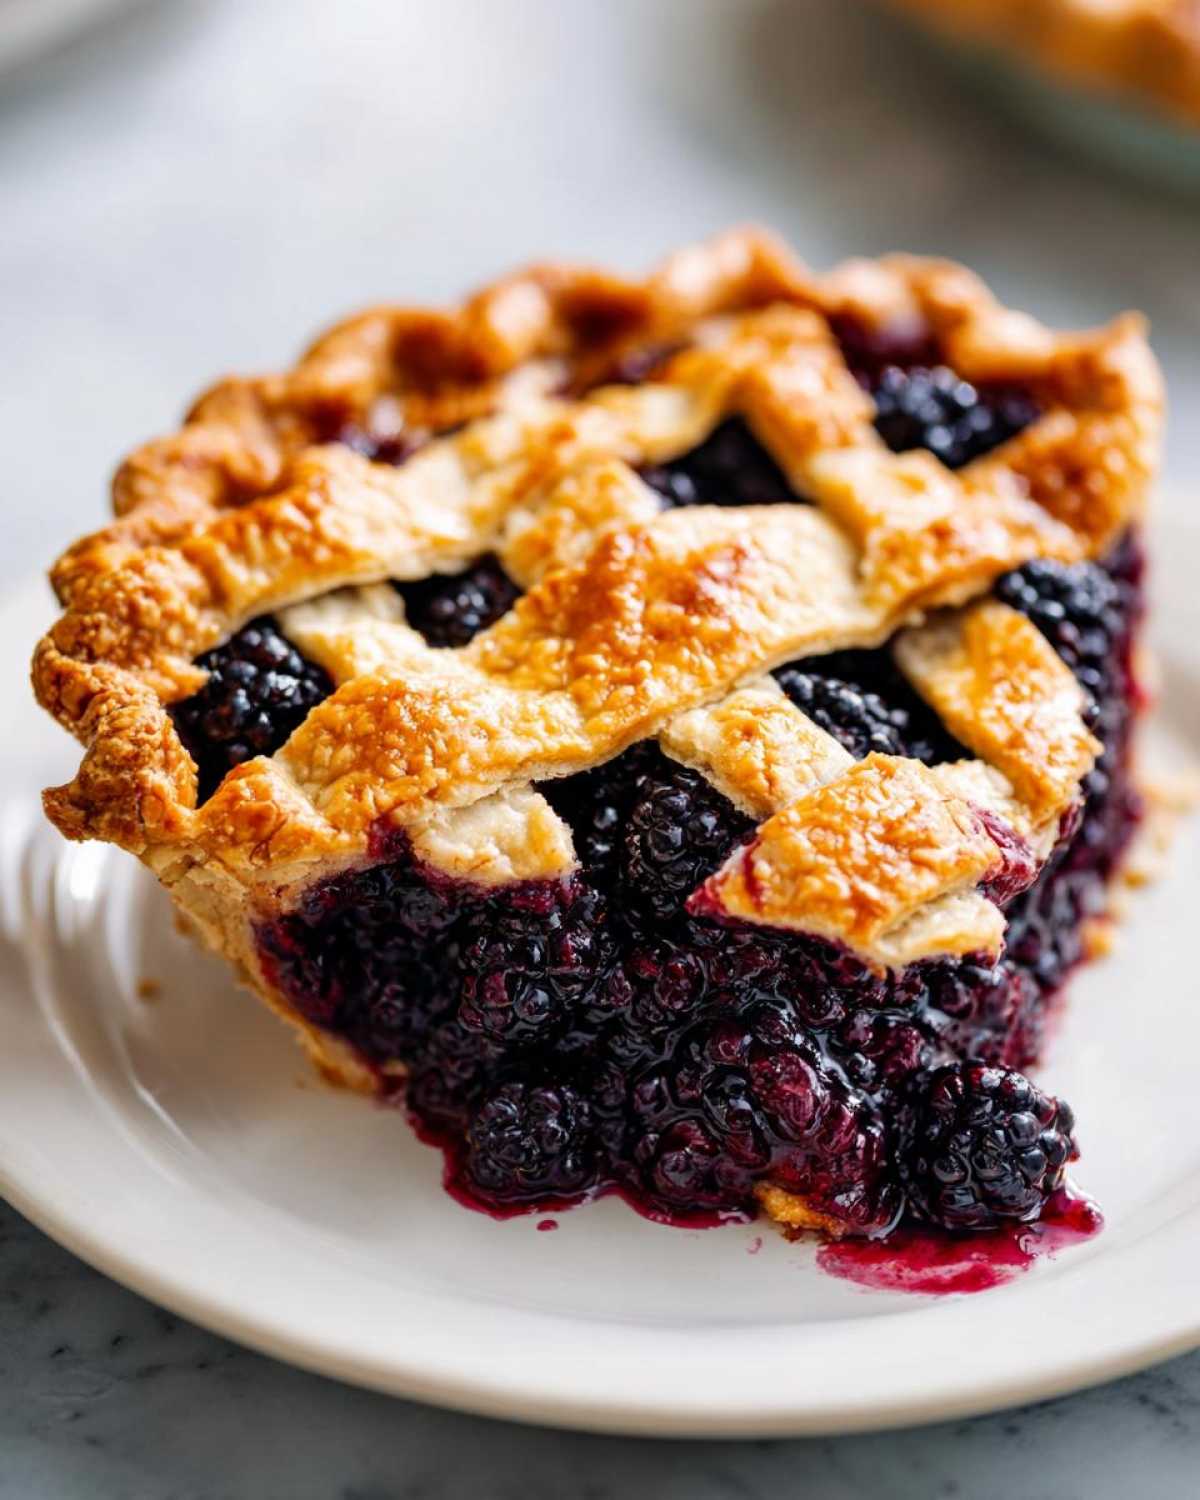
We are focusing on texture here. The secret sauce—or rather, the secret crust technique and the perfect ratio of starch—makes this pie truly the best, putting it right up there with any classic blackberry pie recipe out there. Trust me, once you try this version, you won’t bother looking for another one. You can learn a bit more about our baking philosophy over at our story page, but for now, let’s get baking!
Why This is the Best Easy Homemade Blackberry Pie
It’s not just another recipe; it’s structured for success! I know you want that gorgeous, fruit-filled pie without spending all day stressing about the bottom getting soupy. This recipe cuts through the complicated stuff while delivering old fashioned blackberry pie quality.
Here’s what makes this version the absolute winner:
- It streamlines the process, making it an easy homemade blackberry pie.
- The crust is rich, unbelievably buttery, and shatters beautifully.
- The filling sets up perfectly, so you get those jewel-like berries in every slice, not puddles on your plate!
Achieving a Flaky Pie Crust Recipe Every Time
The key to making a spectacular flaky pie crust recipe is temperature management, plain and simple. We need tiny, distinct pockets of butter distributed throughout the flour. When those cold butter chunks hit the hot oven air, they create steam! That steam is what pushes the layers apart, giving you that amazing flaky texture.
My one non-negotiable tip? When you cut the butter into the flour, don’t let your hands warm things up too much. If it starts feeling tacky, just pop the whole bowl into the freezer for five minutes before you start adding the water. Cold equals flaky, always!
The Secret to a Juicy Blackberry Filling
We are aiming for sweet and tart blackberry pie perfection, not a watery mess! The secret weapon here is cornstarch—it’s reliable, doesn’t change the flavor profile, and works like magic binding those berry juices as they simmer gently. This technique ensures that when you slice into your pie hours later, the filling stays put.
We balance the natural tartness of the blackberries with just the right amount of sugar and a bright splash of lemon juice. It’s that sweet-tart harmony that keeps you coming back for just one more bite!
Ingredients for Your Classic Blackberry Pie Recipe
Okay, gathering up your ingredients is one of the most satisfying parts of starting any recipe, right? Before we even touch the flour, make sure everything is ready to go. Remember, for this classic blackberry pie recipe, keeping things cold is absolutely vital for that gorgeous, shatteringly crisp pastry we talked about! Don’t substitute the cold butter; it’s the heart of the richness.
Here are the exact things you need to pull out of your pantry and fridge. Having everything measured and ready means the assembly goes super fast!
For the Buttery Pie Crust
This is where the magic happens, so don’t skimp on good, cold butter! When you see the instructions mentioning it, remember these need to be ice-cold for that amazing buttery pie crust. You’ll need enough for both the bottom and the decorative lattice top!
- 2 1/2 cups all-purpose flour
- 1 teaspoon salt
- 1 cup (2 sticks) cold unsalted butter, cut into cubes
- 1/2 cup ice water, plus more if needed
For the Sweet and Tart Blackberry Filling
The berries must be plentiful! Six cups is what gives you that truly abundant, jewel-toned look inside. The cornstarch is our little helper here to make sure you get that perfect, thick, sweet and tart blackberry pie texture that holds its shape when sliced.
- 6 cups fresh or frozen blackberries
- 1 1/2 cups granulated sugar
- 1/4 cup cornstarch
- 1 tablespoon lemon juice
- 1 teaspoon vanilla extract
- 1 large egg, beaten (for egg wash)
- 1 tablespoon coarse sugar (for sprinkling)
How to Make Blackberry Pie From Scratch: Step-by-Step Instructions
Alright, let’s dive into the real action! Making your blackberry pie from scratch doesn’t have to be intimidating, especially when you take it one step at a time. We’ll start with the foundation—that crust—and move right into the beautiful top. Don’t forget those important wait times; the dough needs its beauty rest! If you want an in-depth look at the dough process, check out my full guide on making pie dough.
Tips for Success Making Your Blackberry Pie
Baking is chemistry, but pie making is pure instinct, right? I’ve gathered all those little things my readers always ask about into this quick list. These aren’t giant steps, just small adjustments that guarantee you pull out a winner every time.
First, remember the notes right from the recipe! If the edges start looking too brown while the middle is still cooking, grab a strip of aluminum foil—wrap it loosely around the rim—and let it keep going. That stops those beautiful outer pieces from burning up before the center sets.
Also, about those berries: If you are using frozen blackberry pie recipe batches because fresh berries aren’t available, that’s totally fine! Do not thaw them first! Just gently toss them with the sugar mixture, and you might need to add about 5 to 10 extra minutes to your total baking time. Patience is key.
Finally, and this is a bonus tip for preventing that dreaded soggy bottom: place your pie dish on a preheated baking sheet inside the oven. That blast of direct heat seals the bottom crust instantly, keeping it crisp while the filling bubbles up perfectly underneath!
Variations on the Classic Blackberry Pie Recipe
While this double-crust, lattice-topped creation is my go-to blackberry pie, I totally get that sometimes you want something a little different! We all have those days where a standard pie just won’t cut it, and thankfully, this recipe dough is super adaptable. It transitions beautifully into other incredible formats, fulfilling nearly every craving you might have!
If you are really loving cream cheese, you can easily pivot this filling into a decadent blackberry cream cheese pie. After you blind-bake your bottom crust, just pour in a layer of slightly sweetened, softened cream cheese first, and then immediately top it with the berry mixture. It gives such a rich background flavor! For inspiration on handling cream cheese fillings, check out my thoughts on muffin adaptations.
Transforming into Blackberry Pie Bars Recipe
For everyone who loves the flavor without the fuss of slicing a round pie? We turn it into blackberry pie bars recipe! You simply press about two-thirds of your prepared dough into the bottom of a greased 9×13 inch pan. Pour the filling over that, then crumble or lattice the remaining dough on top. You can find my favorite square-pan technique guidance over here for inspiration!
Serving Suggestions for Blackberry Pie with Vanilla Ice Cream
Look, I know the temptation is real, but before you even think about slicing this beauty, you have to practice restraint! The best way to enjoy this pie? Let it cool completely—at least four hours—so that filling sets up nicely. Serving it at room temperature lets you appreciate the flaky crust’s texture.
BUT, if you simply can’t wait, a lukewarm slice is divine with a giant scoop of creamy, high-quality vanilla ice cream. That cold-meets-warm contrast is everything, isn’t it? I’ve got a fun smoothie recipe using similar flavors if you want a different treat right here! A light dusting of powdered sugar right before serving really takes the presentation up a notch.
Storage and Reheating Instructions for Homemade Blackberry Pie
The hardest part about making this perfect blackberry pie is saving leftovers, because honestly, it rarely lasts! If you have any slices left after the first day, you need to treat them right. Because of the fruit filling, your best bet is covering the uncovered pie tightly with plastic wrap and popping it straight into the fridge. It’ll stay fresh for about three days!
To bring back that crisp snap to the crust without turning the berries mushy, skip the microwave! I reheat slices in a low oven—about 325°F—on a foil-lined tray for about ten minutes. That little bit of heat gets the pastry crispy again, making it taste almost freshly baked!
Frequently Asked Questions About Blackberry Pie
I get so many lovely notes after people make this, and sometimes the questions get repeated! So, I thought I’d create a quick spot to clear up any lingering doubts you might have about making this amazing summer berry pie. It’s all about setting you up for success so you don’t waste any of those beautiful berries!
Can I use frozen blackberries in this blackberry pie recipe?
Yes, absolutely! I mentioned it in the baking tips, but it bears repeating because it saves so much time. Don’t bother thawing them first; toss them straight from the freezer into your sugar mixture. Just remember they release a tiny bit more liquid, so you might want to keep an eye on that thickener. You will likely need to bake it for about 5 to 10 minutes longer than the recipe says.
What makes this a ‘classic blackberry pie recipe’?
For me, a classic blackberry pie recipe means embracing tradition! It’s all about the double crust—you need that sturdy bottom to hold all the juices, and you need that flaky top, whether you do a full sheet or opt for a simple lattice like we did here. It relies on simple, wholesome ingredients—just berries, sugar, and a thickener—without any fancy additions. It’s pure, comforting American baking.
If you have any more questions about our techniques or ingredients, please check out our site policies, or drop me a line!
Estimated Nutritional Data for Blackberry Pie
Now, I know we bake for love and flavor, not usually for the numbers, but sometimes it’s good to have an idea of what we’re serving up! Remember, these figures are just estimates based on the ingredients listed in the recipe card. If you use super sweet berries, or maybe swap out butter for a different fat—which I wouldn’t recommend, by the way!—these numbers are definitely going to shift a bit.
I had my calculator out when I was typing up the full recipe details, and here is a rough breakdown for one slice of this amazing blackberry pie, assuming you get 8 nice, even slices:
- Serving Size: 1 slice
- Calories: 420
- Sugar: 45g (Berries have natural sugars, of course!)
- Fat: 22g (That’s the glorious butter doing its work!)
- Saturated Fat: 14g
- Trans Fat: 0g (Hooray for real butter!)
- Carbohydrates: 58g
- Protein: 5g
Think of this as comfort food, pure and simple! Because we are using natural fruit sugars and relying on that flaky crust for texture rather than tons of additives, I feel really good about this classic dessert. But please take this as a gentle guideline. The real magic isn’t the macros; it’s the smiles you get when you serve up that perfect slice!
Share Your Perfect Blackberry Pie
Well, that’s it! You’ve made the ultimate easy homemade blackberry pie, and I sincerely hope the aroma coming from your kitchen is currently making your whole house smell incredible. Now for the fun part—I absolutely live to see how your pies turn out!
I really want to know how that lattice weaving went for you. Seriously, drop a comment down below! Tell me if you went the traditional route or got creative with the strips. Did you serve it warm with that mountain of ice cream we talked about? Your feedback helps other bakers feel brave enough to tackle their first from-scratch pie, too.
And if you’ve snapped a picture of your beautiful, juicy creation, please tag me on social media! I’d be thrilled to admire your handiwork. If you have any lingering recipe questions, don’t hesitate to reach out using the contact form. Happy baking, everyone!
PrintEasy Homemade Blackberry Pie with Flaky Lattice Crust
Make a classic blackberry pie from scratch featuring a buttery, flaky crust and a sweet and tart juicy filling, topped with a simple lattice design.
- Prep Time: 45 min
- Cook Time: 65 min
- Total Time: 110 min
- Yield: 8 servings
- Category: Dessert
- Method: Baking
- Cuisine: American
- Diet: Vegetarian
Ingredients
- 2 1/2 cups all-purpose flour
- 1 teaspoon salt
- 1 cup (2 sticks) cold unsalted butter, cut into cubes
- 1/2 cup ice water, plus more if needed
- 6 cups fresh or frozen blackberries
- 1 1/2 cups granulated sugar
- 1/4 cup cornstarch
- 1 tablespoon lemon juice
- 1 teaspoon vanilla extract
- 1 large egg, beaten (for egg wash)
- 1 tablespoon coarse sugar (for sprinkling)
Instructions
- Prepare the Crust: In a large bowl, whisk together the flour and salt. Cut in the cold butter using a pastry blender or your fingers until the mixture resembles coarse crumbs with some pea-sized pieces of butter remaining. Gradually add the ice water, one tablespoon at a time, mixing until the dough just comes together. Divide the dough in half, form each half into a disk, wrap in plastic, and chill for at least 1 hour.
- Prepare the Filling: In a separate bowl, gently combine the blackberries, granulated sugar, cornstarch, lemon juice, and vanilla extract. Set aside while you roll out the bottom crust.
- Assemble the Bottom Crust: On a lightly floured surface, roll out one dough disk into a 12-inch circle. Carefully transfer the dough to a 9-inch pie plate. Trim the edges, leaving a 1-inch overhang. Place the pie plate in the refrigerator.
- Create the Lattice Top: Roll out the second dough disk into an 11-inch circle. Cut the dough into even strips, about 3/4 inch wide.
- Fill and Top: Pour the blackberry filling into the chilled bottom crust. Arrange the dough strips over the filling in a lattice pattern, weaving them over and under each other. Trim the strips, fold the bottom crust overhang over the lattice edges, and crimp the edges to seal.
- Bake: Preheat your oven to 400°F (200°C). Brush the lattice top with the beaten egg wash and sprinkle with coarse sugar. Place the pie on a baking sheet. Bake for 20 minutes at 400°F. Reduce the oven temperature to 375°F (190°C) and continue baking for another 35 to 45 minutes, or until the crust is golden brown and the filling is bubbling thickly.
- Cool: Let the pie cool completely on a wire rack for at least 4 hours before slicing to allow the filling to set properly.
Notes
- If using frozen blackberries, do not thaw them first, but you may need to add 5 to 10 minutes to the total baking time.
- If the crust edges start browning too quickly during baking, cover them loosely with aluminum foil strips.
- For an extra flaky crust, keep all ingredients, especially the butter and water, very cold.
Nutrition
- Serving Size: 1 slice
- Calories: 420
- Sugar: 45g
- Sodium: 250mg
- Fat: 22g
- Saturated Fat: 14g
- Unsaturated Fat: 8g
- Trans Fat: 0g
- Carbohydrates: 58g
- Fiber: 4g
- Protein: 5g
- Cholesterol: 60mg