

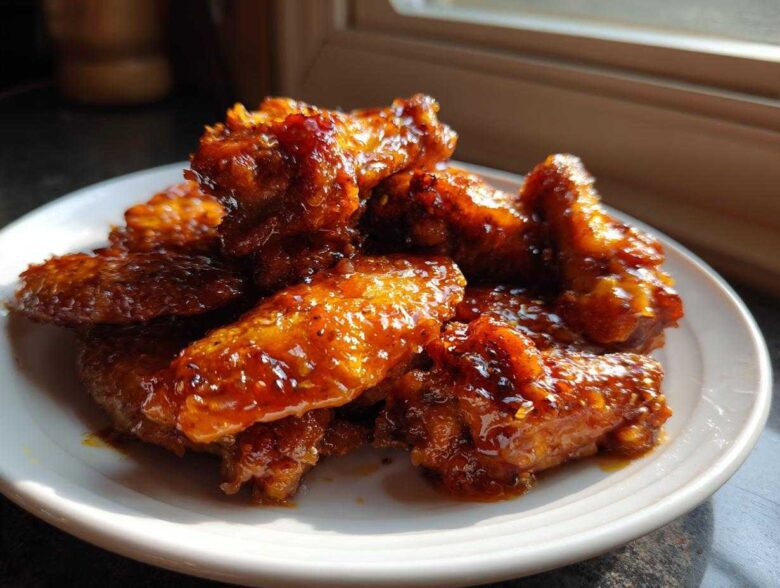
Let’s be honest, when you’re hosting a gathering or just settling in for a big game, you need an appetizer that everyone dives for immediately. Forget dry, lifeless wings—we’re making crispy, sticky perfection here! My absolute favorite thing about this recipe for Sticky Orange Chicken Wings with Honey Glaze is hitting that perfect flavor spot: sweet enough from the honey, but bright and tangy from the good, fresh orange. After years of messes and sticky stovetops, I finally figured out the secret to getting that glaze right—it has to cling, not run off!
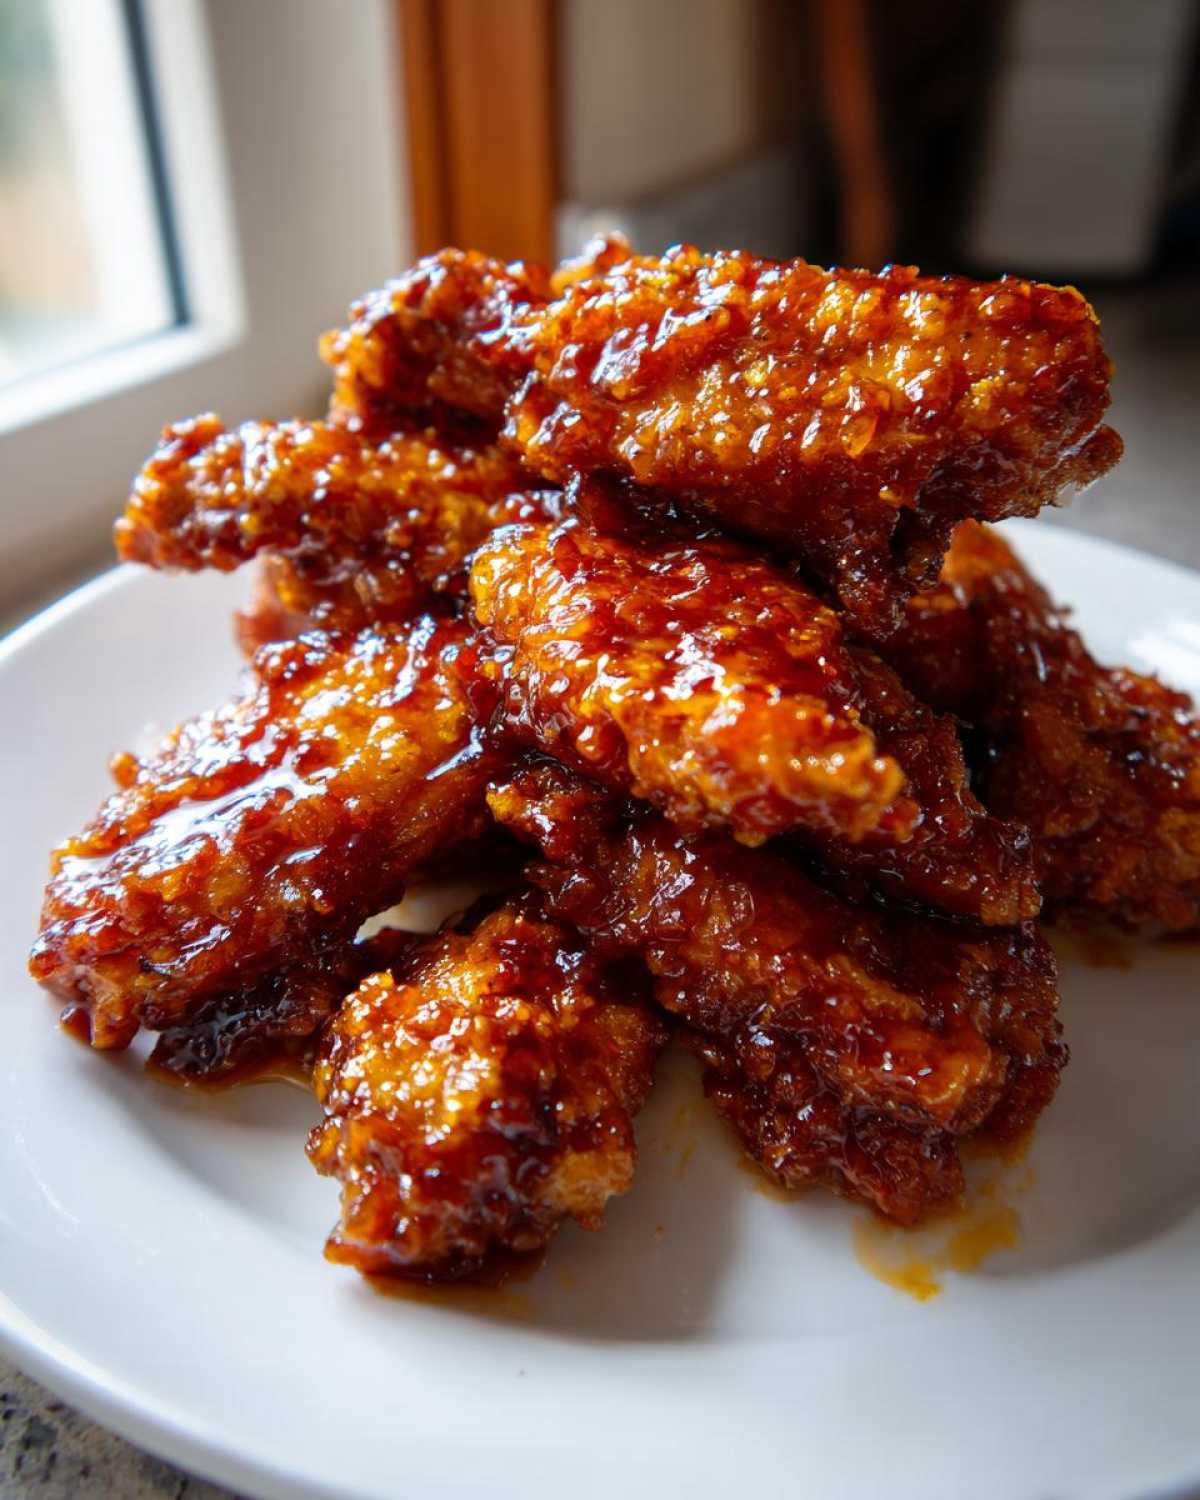
I’ve spent way too much time perfecting the technique to ensure that the skin crisps up beautifully in the oven *before* the sauce even touches it. That upfront crispiness is the key to truly amazing, caramelized wings that don’t turn soggy later. Trust me, once you try this sweet and tangy glaze, you won’t look back. It’s become our go-to party food chicken wings recipe, and everyone always asks for the details after they devour them!
Why You Will Love These Sticky Orange Chicken Wings with Honey Glaze
Look, these aren’t your standard, messy takeout wings. We are leveling up Game Day Chicken Wings Appetizer status here! These Sticky Orange Chicken Wings with Honey Glaze check all the boxes we need for a truly spectacular snack. They are genuinely simple to make, even with the deep flavor profile.
- Incredible Texture: That initial high-heat bake locks in crispiness. The finished product has a satisfying crunch beneath that perfect sticky coating.
- Balanced Flavor: It’s the ideal sweet and tangy chicken wings experience. The honey sweetness plays perfectly off the sharp, bright orange zest.
- Foolproof Glaze: I swear, this homemade chicken wing glaze is foolproof once you nail the cornstarch slurry.
Quick Prep for the Best Honey Orange Glaze Recipe
Seriously, the whole sauce comes together while the wings are getting their first bake cycle. This is an incredibly Easy Sticky Chicken Wings recipe because the sauce cooks in about five minutes flat. You won’t believe how quickly this flavor comes to life!
Essential Ingredients for Sticky Orange Chicken Wings with Honey Glaze
Okay, when we make our Glazed Chicken Wings Recipe, I insist on quality ingredients because that’s what makes the difference between okay wings and legendary ones. For the wings themselves, you definitely need about two pounds of them, separated into the flats and the drumettes—I like them to cook evenly! We toss them simply with a little olive oil, salt, and pepper to get them started.
Now for the sauce magic! You need half a cup of honey, half a cup of fresh orange juice—please, use fresh! That bottled stuff just tastes flat next to the real deal. We add soy sauce, rice vinegar, fresh grated ginger (don’t skimp!), and minced garlic. And finally, the sneaky thickening agent: cornstarch mixed with cold water for that all-important slurry.
Ingredient Notes and Substitutions
If you’re out of rice vinegar, a tiny splash of apple cider vinegar works in a pinch, but the rice vinegar brings that specific tang I love. For the honey, use the best quality you have; it’s the star sweetener! Remember, that cornstarch slurry—mixing it perfectly before adding it to the simmering sauce—is mandatory. It’s what turns that liquid into that glorious, thick coating that absolutely nails the texture.
Preparing Crispy Baked Orange Wings: The Key to Success
Listen, if you skip this step when making Sticky Orange Chicken Wings with Honey Glaze, you end up with rubbery wings swimming in sauce. We want crispiness first! The very first thing I do—and I mean before even preheating the oven—is grab a huge stack of paper towels and pat those wings bone dry. Seriously, moisture is the enemy of crisp skin. Get them as dry as possible; it makes a huge difference in texture, just like when I make my crispy baked chicken thighs.
Next, get yourself a wire rack and line it on top of a foiled baking sheet. This allows air to circulate all around the wing, which is crucial for even cooking and maximum crisp. Toss them lightly with just a touch of oil, salt, and pepper.
We are hitting the oven hard to start! Preheat to 400°F (200°C) and let them bake for a good 25 minutes, then flip and cook for another 15 to 20 minutes. They need to look golden and feel firm before they ever see the glaze. Trust me, this initial high-heat bake sets us up for the best caramelized finish later!
Making the Homemade Chicken Wing Glaze for Sticky Orange Chicken Wings with Honey Glaze
While those wings are getting perfectly crispy in the oven, it’s time to build the flavor base for our Sticky Orange Chicken Wings with Honey Glaze. This sauce is what makes these Sweet and Tangy Chicken Wings absolutely irresistible. First, grab a small saucepan—nothing fancy needed! Toss in the honey, that fresh orange juice, soy sauce, rice vinegar, and those flavor powerhouses: the ginger and garlic. If you need some inspo on handling garlic flavor, check out my tips for easy homemade garlic butter recipe.
Get this simmering over medium heat, just stirring occasionally so the honey doesn’t stick to the bottom. Let it bubble gently for about five minutes. This step is crucial because it helps the ginger and garlic really infuse their flavor into the liquids. Now, pay close attention here, because this is where we build the stickiness! You need to make the cornstarch slurry absolutely separately.
In a tiny bowl, whisk the cornstarch and cold water together until it’s totally smooth—no lumps allowed! Then, while constantly whisking the sauce in the pan (yes, keep whisking!), slowly pour that slurry in. Keep that whisk going for just another minute or two until the sauce thickens up enough to actually coat the back of your spoon. When it does? Pull it right off the heat! That perfect thickness is what guarantees a sticky coating.
Achieving the Perfect Caramelized Honey Chicken Wings Finish
Once those hot, baked wings are tossed in about half of that beautiful, thick glaze, they aren’t finished yet! We need to caramelize that coating. Send them right back onto that wire rack and into the oven for a quick five to seven minutes. This second bake is pure magic; it sets the sauce onto the skin through gentle heat, transforming it from just a sticky coating into a delightfully chewy, caramelized layer. It seriously elevates the whole experience!
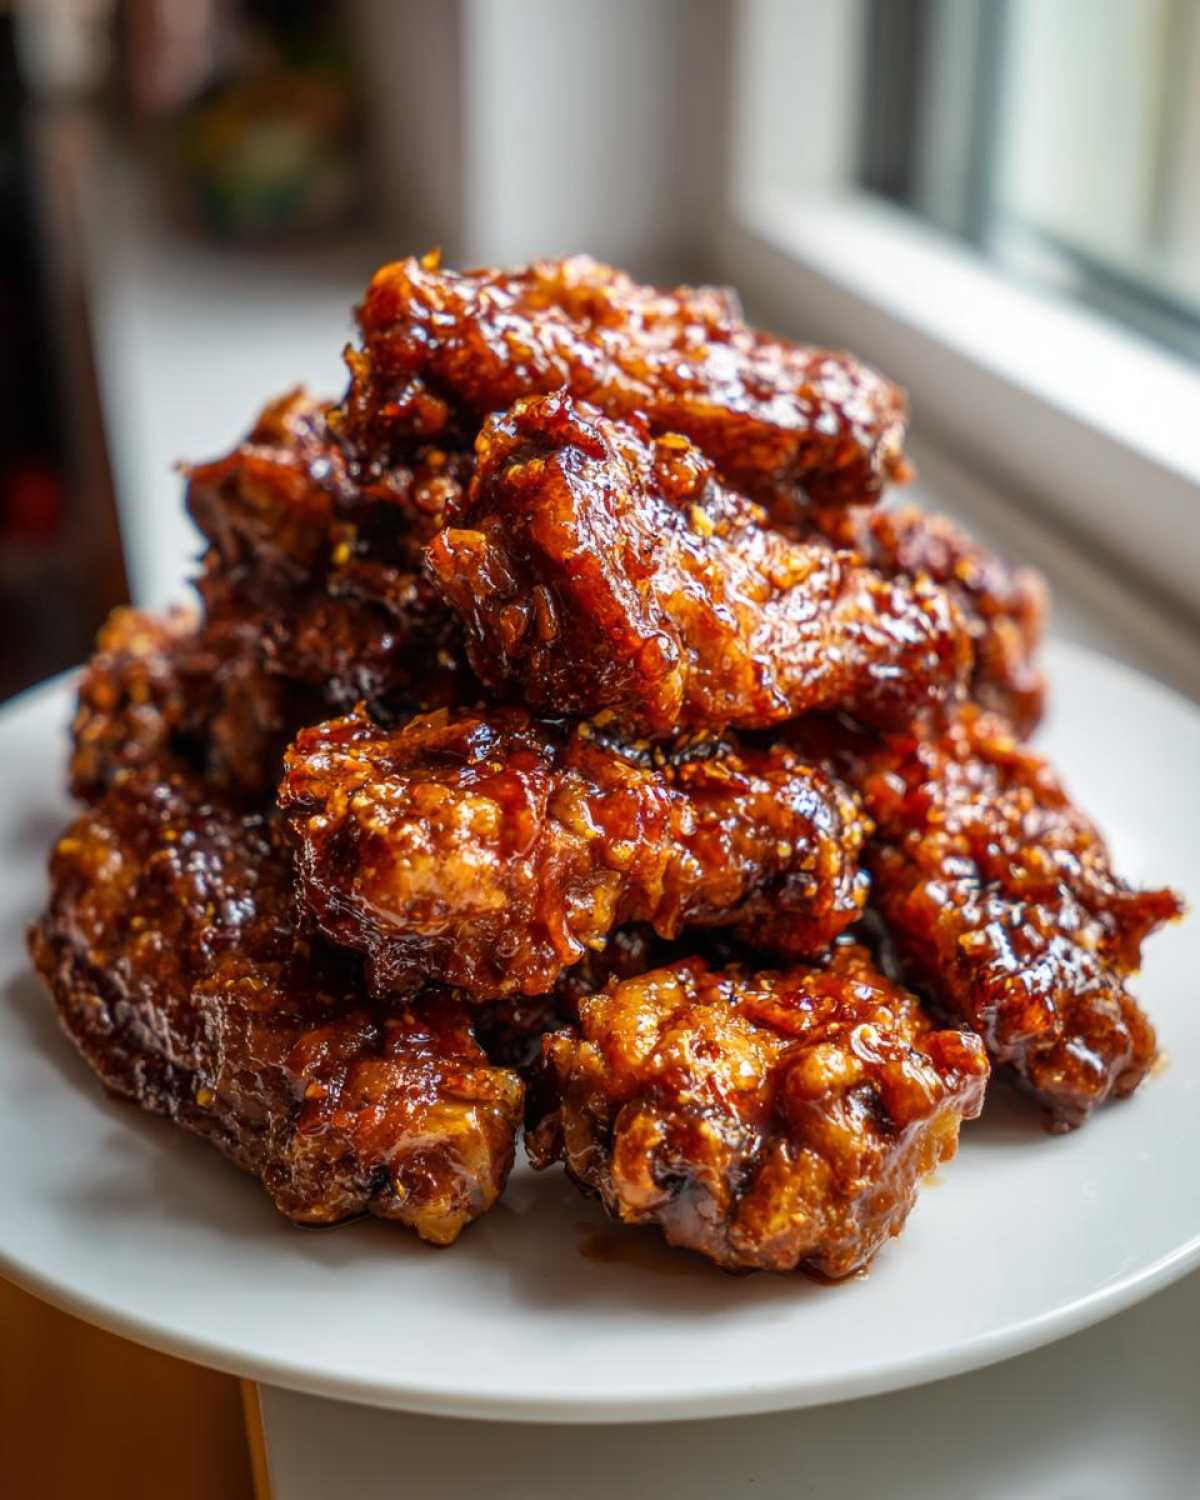
Step-by-Step Instructions for Glazed Chicken Wings Recipe
Okay, ready to put it all together? This process moves fast once the sauce is made, so make sure your wings are close to finishing their first bake. We want everything hot and ready to go! This flow guarantees you get that amazing, set glaze on your Glazed Chicken Wings Recipe.
- Preheat and Prep (Do this first!): We need the oven nice and hot at 400°F (200°C). Line a baking sheet with foil and put a wire rack on top—remember, air circulation means crispier skin!
- Wing Prep: Pat those two pounds of wings super dry. Seriously, use those paper towels! Toss them with just the olive oil, salt, and pepper. Lay them out on the rack single file.
- The First Bake: Slide them in and bake for 25 minutes. Pull them out, flip every single wing over (that’s important!), and stick them back in for another 15 to 20 minutes until they look golden brown and cooked through.
- Sauce Time: While they bake, make your sauce! Simmer the honey, orange juice, soy sauce, vinegar, ginger, and garlic for about 5 minutes. Whisk in that cornstarch slurry and cook until it coats your spoon beautifully. Take it off the heat!
- The Initial Glaze Toss: When the wings come out of the oven, immediately put them in a big bowl. Pour about half of that prepared glaze over them and toss them gently but quickly until every wing is slicked and coated.
- Caramelization Bake: Put the newly glazed wings back on the rack on the baking sheet. Slide them into the oven one last time for only 5 to 7 minutes. You are just setting that glaze and letting it get sticky and caramelized!
- The Final Touch: Pull them out, and before you serve these beauties, give them one last toss with the remaining fresh glaze. Don’t bake them again on this coat; you want that fresh, shiny look. Serve immediately for the best experience! If you want to see another similar technique, check out my tips for crispy fried chicken wings!
Alternative Cooking Methods: Air Fryer Sticky Chicken Wings
I totally get it—sometimes you just don’t want to heat up the whole house with the oven, or maybe you only have a small batch. So, if you’re looking for even faster prep, we can absolutely use the air fryer for these Sticky Orange Chicken Wings with Honey Glaze! The air fryer is fantastic because it gives you that super crisp texture with less fuss.
If you choose this route, you want to set your air fryer basket to 380°F (195°C). Toss those patted-dry, seasoned wings in there and cook them for about 20 minutes total. Make sure you pull the basket out and flip those babies halfway through! That ensures every side gets a chance to crisp up nicely. Once they look done, toss them with half the glaze, and then pop them back in for just about 3 more minutes. That quick blast of hot air adheres that sweet honey orange glaze beautifully. Don’t forget you can check out my air fryer frozen shrimp guide for general air fryer tips!
Tips for Perfect Sticky Orange Chicken Wings with Honey Glaze
You’ve seen the steps, but let me give you my few extra little secrets that make these Sticky Orange Chicken Wings with Honey Glaze truly stand out. Remember that first step? Patting the wings *bone dry*—I can’t emphasize that enough! That’s how you get that beautiful crispiness that holds up to the sauce later. If you want serious texture, try using the higher baking temp of 425°F for that initial cook, just like my advice on marinades for juicy grilling.
Also, remember that double-glaze technique? Toss them halfway through the baking process, give them that sear, and then toss them in the remaining sauce right before serving. That final bit of fresh sauce gives you that incredible, glossy shine! A little sprinkle of toasted sesame seeds or some thinly sliced green onions right at the end makes them look like they came from a fancy restaurant. Seriously, they are just the best!
Serving Suggestions and Storage for Citrus Glazed Wings
These Citrus Glazed Wings are phenomenal as a main course, but I usually make a double batch because they disappear so fast as an appetizer! Since they have that lovely Asian Inspired Chicken Wings vibe, they pair really wonderfully with something that can soak up some of that extra glaze.
My go-to serving platter always includes a side of fluffy white rice—easy peasy! Or, if you want to balance out all that sweetness, a simple, crisp shredded cabbage slaw tossed with a light rice vinegar dressing is perfect. It gives you that refreshing crunch right next to the sticky sauce.
Now, if you happen to have leftovers—which is rare in my house, honestly—storage is key to keeping that texture. You want to store them in an airtight container in the fridge. The texture will soften a bit, that’s just the sugar in the glaze reacting, but they are still tasty!
- Reheating Best Practice: To bring back some of that crispness, skip the microwave entirely! Seriously, it turns them rubbery. Reheat them in a toaster oven or a regular oven set to about 350°F (175°C) for maybe 8 minutes. That helps dry out the skin slightly.
- Quick Tip: If you’re making them ahead for a party, cook the wings until just done (Step 3 in the main instructions), let them cool, and store them plain. Glaze them right before you need to serve them, or you risk them getting gummy before guests arrive.
For other great pairings that complement the sweet and savory flavor profile, you should definitely check out my guide on making a super quick teriyaki chicken stir-fry; those flavors vibe perfectly with these wings!
Frequently Asked Questions About Sticky Orange Chicken Wings with Honey Glaze
I get so many questions every time I post these beauties online! They really are foolproof once you know a couple of tricks. Here are some of the things I hear most often about making these Sticky Orange Chicken Wings with Honey Glaze.
Can I use bottled orange juice instead of fresh for the glaze?
You absolutely *can*, especially if you’re rushing and need an Easy Sticky Chicken Wings fix! But wow, does the flavor change. Freshly squeezed orange juice gives you that bright zing that cuts through the honey perfectly. Bottled juice often has extra preservatives or sugars that can dull that vibrancy, so I highly recommend making the effort for fresh if you can manage it. If you have any other burning questions, feel free to reach out via my contact page!
What if my glaze ends up too thin or too thick?
This comes down to the cornstarch slurry, which is the secret ingredient for perfect thickness! If your sauce isn’t coating the spoon after simmering, you can mix up a little bit more of that cornstarch slurry (say, half a teaspoon of starch with one tablespoon of cold water) and whisk it in slowly over low heat until you get that perfect coating texture. If it goes too thick—oops!—just stir in a splash of extra orange juice or water to loosen it up until it’s glossy and coats the wings nicely.
Is this recipe something I can make ahead of time?
That’s a great question for party planning! For the absolute best texture, I suggest you stick to the two-stage cooking process. You want to bake the wings until they are fully cooked but *before* the first glaze toss. Store those plain, cooked wings in the fridge. Then, just before serving, toss them with the glaze and pop them back in the oven for that final caramelization step. If you glaze them too early, they won’t be the best Sweet Chicken Wing Recipes!
Can I make these in the oven or do I have to air fry them?
The recipe is written primarily for the oven because it manages that double-glaze setting process so well for those amazing Caramelized Honey Chicken Wings. However, I included detailed instructions for the air fryer method in the notes section if you prefer that method for quicker cooking! Both work great, depending on your time limits.
Nutritional Disclaimer
Just a quick note! All the nutritional estimates provided for this recipe are based on standard measurements and average ingredient breakdowns. The exact nutritional value for your specific batch of Citrus Glazed Wings will vary depending on the brands of honey, soy sauce, and the fat content of the chicken wings you choose to use.
PrintSticky Orange Chicken Wings with Honey Glaze
Make easy, sticky chicken wings coated in a sweet and tangy glaze featuring orange and honey flavors. This recipe yields perfectly caramelized wings.
- Prep Time: 15 min
- Cook Time: 50 min
- Total Time: 65 min
- Yield: 4 servings
- Category: Appetizer
- Method: Baking
- Cuisine: Asian Inspired
- Diet: Low Fat
Ingredients
- 2 lbs chicken wings, separated into flats and drumettes
- 1 tablespoon olive oil
- 1 teaspoon salt
- 1/2 teaspoon black pepper
- 1/2 cup honey
- 1/2 cup orange juice, fresh squeezed preferred
- 1/4 cup soy sauce
- 2 tablespoons rice vinegar
- 1 tablespoon grated fresh ginger
- 2 cloves garlic, minced
- 1 teaspoon cornstarch
- 2 tablespoons cold water
Instructions
- Preheat your oven to 400°F (200°C). Line a baking sheet with foil and place a wire rack on top.
- Pat the chicken wings very dry with paper towels. Toss the wings with olive oil, salt, and pepper. Arrange them on the wire rack in a single layer.
- Bake the wings for 25 minutes. Flip the wings and bake for another 15-20 minutes until they are cooked through and starting to crisp.
- While the wings bake, prepare the glaze. In a small saucepan, combine the honey, orange juice, soy sauce, rice vinegar, ginger, and garlic.
- Bring the mixture to a simmer over medium heat, stirring occasionally. Let it simmer for 5 minutes to allow the flavors to meld.
- In a small bowl, whisk together the cornstarch and cold water to create a slurry. Pour the slurry into the simmering sauce while whisking constantly.
- Continue to cook and whisk until the sauce thickens enough to coat the back of a spoon, about 1-2 minutes. Remove from heat.
- Once the wings are done baking, place them in a large bowl. Pour about half of the glaze over the hot wings and toss to coat them completely.
- Return the glazed wings to the baking sheet. Bake for an additional 5-7 minutes to set the glaze and caramelize the exterior.
- Remove from the oven. Toss the wings with the remaining glaze just before serving.
Notes
- For extra crispy wings before glazing, bake them at 425°F (220°C) for the initial baking time.
- If you prefer an air fryer method, cook wings at 380°F (195°C) for 20 minutes, flipping halfway, before tossing with the glaze and cooking for 3 more minutes.
- Garnish with sesame seeds or sliced green onions if desired.
Nutrition
- Serving Size: 4 wings
- Calories: 350
- Sugar: 22
- Sodium: 550
- Fat: 18
- Saturated Fat: 5
- Unsaturated Fat: 13
- Trans Fat: 0
- Carbohydrates: 25
- Fiber: 1
- Protein: 22
- Cholesterol: 85