

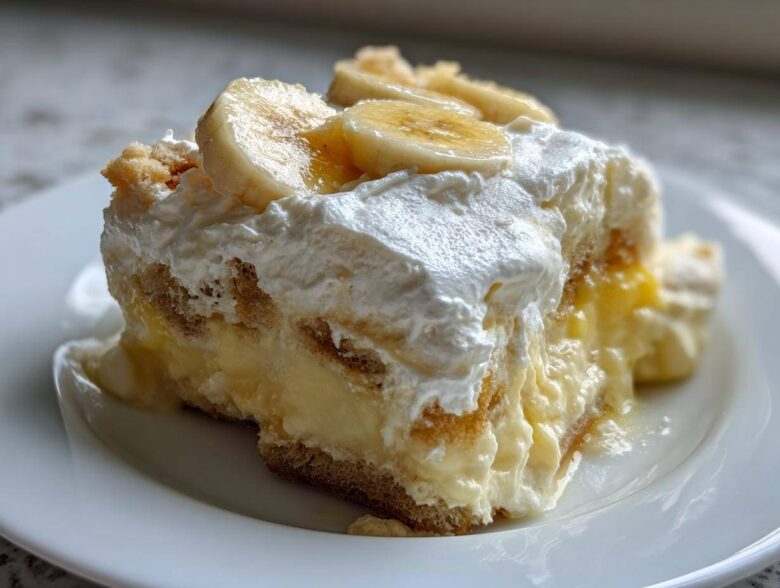
Oh, honey, when the heat is on and you need a dessert that tastes like a warm hug from your favorite relative, nothing beats a rich, creamy scoop of homemade goodness. Forget complicated baking! This, right here, is my absolute favorite **banana pudding** recipe—the one that disappears first at every family reunion. It’s the Best Old-Fashioned Southern Banana Pudding you will ever stick a spoon into. Why is it the best? Because it’s incredibly easy to assemble (truly no-bake!), and that signature creamy texture just melts in your mouth. I grew up eating this layered dessert, and pulling out this serving dish always brings everyone running to the table. Trust me, once you try this, you won’t go back to using those little boxes of mixes ever again.
If you want to know a little more about the folks behind these tried-and-true recipes, check out our story here.
Why This Old-Fashioned Southern Banana Pudding Recipe Works
We aren’t messing around when it comes to comfort food that truly hits the spot. This recipe focuses on pure indulgence without demanding hours away from the couch. It’s everything you want in a fantastic Southern **banana pudding**.
- It achieves that incredible, thick, creamy texture we all crave.
- Assembly is lightning fast—zero actual cooking required!
- It relies on the perfect marriage of soft bananas and classic vanilla wafers.
- It’s the ultimate make-ahead dessert for busy holidays or potlucks.
Key Features of Our Creamy Banana Pudding Dessert
The texture is what sets this apart. It’s rich, deeply flavorful, and perfectly balanced where the wafers just begin to dissolve into the sweet pudding. This is the authentic southern style banana pudding that Southerners fight over!
Gathering Ingredients for Your Classic Banana Pudding Recipe
Okay, getting the right stuff is half the battle, right? For this perfect classic banana pudding recipe, every measurement matters. We are aiming for that perfectly soft, sweet, and structural filling. The most important thing you bring to the table? Bananas that are perfectly ripe—just starting to get those little brown sugar spots on the peel!
Essential Components for Layered Banana Dessert
- 1 (14 ounce) can sweetened condensed milk
- 1 (5 ounce) box instant vanilla pudding mix
- 1 (12 ounce) container frozen whipped topping, thawed
- 4 large ripe bananas, sliced
- 1 box (11 ounces) vanilla wafers
- 4 cups cold water
Ingredient Notes and Substitutions for Great Banana Pudding
Now, I know some folks are purists and swear by making cooked vanilla custard from scratch, and if that’s you, go for it! You can absolutely swap out the instant mix for your homemade banana pudding from scratch custard if you want that extra depth of flavor. Either way, you must, must, must slice your bananas right before you assemble the layers. If you slice them too early, oxidation happens, and we end up with sad, grey islands in our beautiful dessert. Don’t let that happen!
Trust me, good ingredients make this banana pudding sing!
Step-by-Step Instructions for Easy No Bake Banana Pudding
Since this is the king of easy no bake banana pudding, your job mostly involves gentle folding and strategic layering. Remember that standing time is important—don’t rush it! We want that pudding mix to fully start setting up before we add the fluffiness from the whipped topping. It’s all about achieving that beautiful, dense, creamy final texture.
Preparing the Creamy Pudding Base
First things first: grab your cold water and pour it right into your mixing bowl. Dump in that instant vanilla pudding mix! Now you whisk. Don’t take a break for two full minutes—really get some air in there until it starts looking thick. Then, you let it sit quietly on the counter for five minutes. This is non-negotiable! Once that time is up, gently fold in your thawed whipped topping. We want to be delicate here; you don’t want to knock all the air out. Fold until you don’t see any streaks remaining.
Assembling Your Vanilla Wafer Banana Pudding Layers
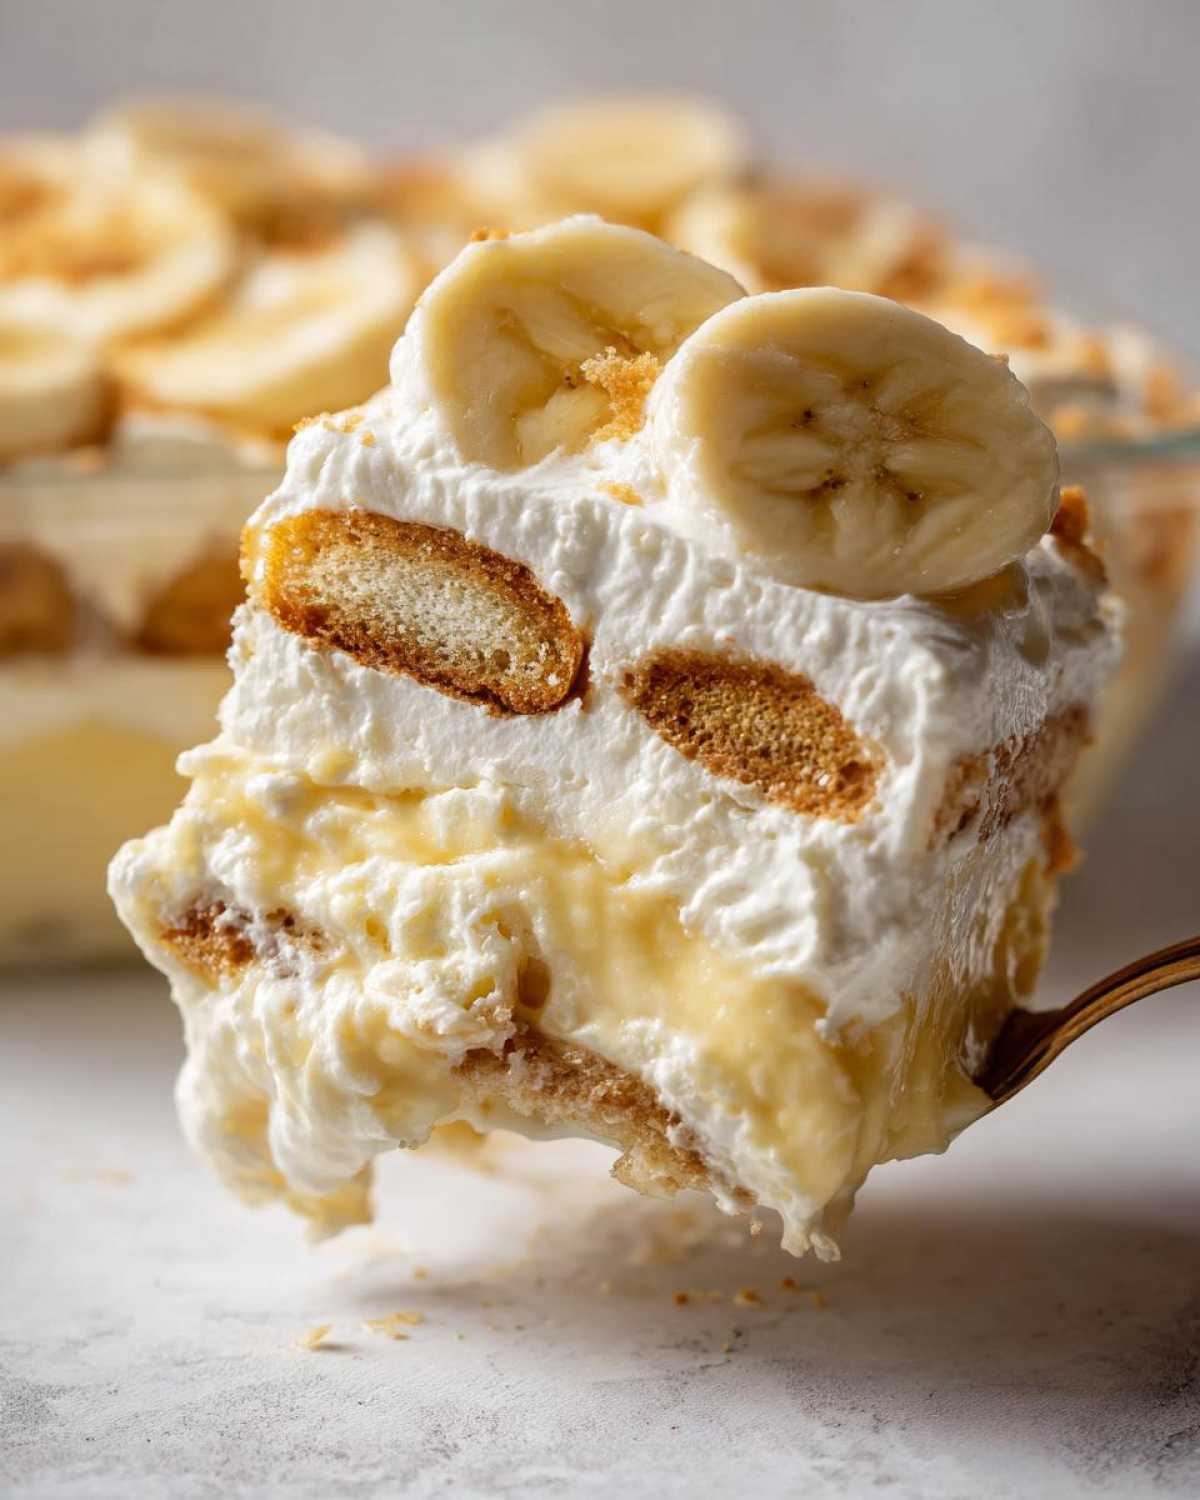
Time for the fun part—building those gorgeous strata! Grab your large serving dish. Start with one-third of your vanilla wafers spread out evenly on the bottom layer. That’s your foundation! Next, arrange half of your sliced bananas right over those wafers. Don’t be shy. Now, pour half of your creamy pudding mixture over the bananas, making sure you cover every banana edge. Then, we repeat it: another layer of wafers, the rest of the bananas go on top, and finally, spread out the rest of that amazing vanilla wafer banana pudding mix over everything.
Chilling and Serving the Banana Pudding
Don’t even think about touching this yet! Seriously! Cover your dish tightly. This beautiful creation needs to hang out in the fridge for a minimum of four hours, but if you can manage it, overnight is where the magic happens. That chilling time is essential because it allows the vanilla wafers to absorb just enough moisture to soften perfectly. You can top it with your remaining wafers right before you serve it, or you can layer those on top during assembly—I just like saving a few to keep them crisp!
For the scoop on making this ahead, I always find myself linking back to our main recipe index to remind myself of other great tips!
Tips for the Best Banana Pudding Ever
You’ve got all the creamy filling and the wafers ready to go, but here are the little tricks I learned over years of making this dessert for crowds. Getting the timing and staging right is how you move from good banana pudding to the absolute best banana pudding ever. These aren’t in the main instructions because they are professional secrets!
First, let’s talk structure. If you use bananas that are too soft—you know, the kind that are nearly black—they might turn to mush before they even soak into the wafers. I prefer bananas that are yellow but have a few good, dark sugar spots. They offer the right sturdiness.
For layering, the dish size really matters for visual appeal. This recipe fills my standard 9×13 glass dish perfectly, leaving enough depth for three distinct layers of wafers, bananas, and pudding. If your dish is shallower, you might only get two layers, which is fine, but the visual payoff isn’t as great. Remember to keep that pudding layer spread evenly edge-to-edge so every single wafer gets saturated!
If you want to see what else I’m baking when I’m not working on puddings, check out my banana bread recipe—it’s a show-stopper!
Making This Comfort Food Pudding Recipe Ahead of Time
This recipe is a gift because it’s designed to be a make ahead dessert! Honestly, I find that the extra chill time actually improves the overall experience. If you’re serving it for a big Sunday lunch, you absolutely need to assemble it Saturday night. That four-hour minimum we talked about? It’s really better as an overnight sit.
The wafers need that time to fully soften into that cake-like consistency. Now, how far in advance can you push it? You don’t want to go more than 24 hours ahead because the bananas will start getting just a little too soft, even submerged in the pudding. If you need more time, assemble everything except the top layer of wafers—you can add those on right before serving so they stay a tiny bit crispier. This comfort food pudding recipe is so forgiving!
If you are planning your whole week’s menu, I have a great guide on making other casseroles ahead of time that might give you inspiration for your main dishes!
Storage and Reheating Instructions for Banana Pudding
So you have leftovers—lucky you! Don’t even think about putting this luxurious layered dessert out on the counter hoping it will stay good. Since we are dealing with a lot of fresh dairy and ripe fruit here, proper storage is key to food safety and texture.
You must store any leftover pudding in the refrigerator. Make sure you use a container with a tight-fitting lid—plastic wrap works in a pinch if you press the wrap directly onto the surface of the pudding to avoid that awful skin forming, but a proper airtight container is always better.
How long does it last? Honestly, it’s *best* eaten within 48 hours. After that, the texture really starts to change as the vanilla wafers turn totally mushy. By day three, it becomes more like a pudding porridge than a layered dessert. Don’t even bother trying to ‘reheat’ this at all! It’s meant to be served cold, straight from the fridge. If you find the top layer of wafers got too soft, just scrape them off and add a few fresh, crisp ones before serving the next day. Easy peasy!
Frequently Asked Questions About Southern Style Banana Pudding
I get so many great questions about tweaks and variations for this recipe! It seems like everyone has that one cousin who makes their pudding just a little bit differently. Here are the top things people ask me about when they’re making this southern style banana pudding.
Can I use fresh bananas instead of frozen whipped topping in this banana pudding?
Oh, goodness no! Please don’t try to swap those out. The recipe absolutely requires your 4 large, ripe, fresh bananas because that’s where the fresh fruit flavor comes from. The whipped topping is what you call an ‘enhancer’—it lightens up the pudding base made from the instant mix and condensed milk, giving us that airy, luxurious texture. If you skip the whipped topping, you won’t get that beautiful fluffiness this banana pudding is famous for.
How do I prevent the bananas from turning brown in my layered dessert?
This is the eternal battle sticker! As I mentioned before, slicing them last minute makes a huge difference. But if you are making this as a real make-ahead dessert—which you should—I have a little trick my sister taught me. After you slice your bananas and just before they go into the layers, toss them super gently in a bowl with about a tablespoon of lemon juice. Lemon juice is acidic, and it holds off the browning process really well without affecting the taste much. Just make sure you use just enough to coat them lightly so you don’t have a tart layered banana dessert!
Is this recipe similar to the Magnolia Bakery banana pudding copycat?
That’s a great question! Yes, in spirit, because the layering technique is identical—vanilla wafers, bananas, pudding—and they both rely on that wonderful absorption period in the fridge. However, the true Magnolia Bakery banana pudding copycat usually uses a base made from mixing the whole can of sweetened condensed milk with cold water and then whisking in instant pudding. Our recipe is slightly richer because we use the full can of condensed milk *plus* the instant pudding. So ours tends to set up a little thicker, which I prefer for a true old-fashioned dessert!
Nutritional Snapshot of This Banana Pudding
Now, I always like to include a little breakdown of what you’re taking in when you dive into a big bowl of this amazing dessert. Remember, this is just an estimate based on the general ingredients listed in the recipe and what I typically buy at the store. If you use different brands or add extra goodies, the numbers will change on you!
This is a rich, classic comfort dish, so we aren’t pretending it’s low-calorie! Here’s the overview for one generous serving:
- Serving Size: 1 cup
- Calories: 350
- Sugar: 45g (Yep, all that sweet goodness!)
- Sodium: 280mg
- Total Fat: 14g
- Saturated Fat: 7g
- Carbohydrates: 55g
- Protein: 4g
It’s worth every single bite, I promise you that. Just treat it as the special occasion dessert it is!
For full details on how we approach information like this on the site, please take a peek at our standard nutrition disclaimer.
Share Your Old Fashioned Southern Banana Pudding Creations
Now that you’ve made the best banana pudding, I honestly want to see it! Did you serve it in a big glass dish or maybe little individual cups? Tell me everything!
Please leave a rating down below—five stars if it tastes like pure grandma love—and drop any comments about how you customized your old fashioned southern dessert. If you made any fun tweaks, share them so the rest of us bakers can try them next time! You can reach out anytime via the contact page!
PrintBest Old-Fashioned Southern Banana Pudding
A creamy, layered banana pudding featuring vanilla wafers, fresh bananas, and a rich, homemade custard. This recipe is easy to assemble and perfect for sharing.
- Prep Time: 20 min
- Cook Time: 0 min
- Total Time: 4 hr 20 min
- Yield: 8 servings
- Category: Dessert
- Method: No Bake
- Cuisine: American
- Diet: Vegetarian
Ingredients
- 1 (14 ounce) can sweetened condensed milk
- 1 (5 ounce) box instant vanilla pudding mix
- 1 (12 ounce) container frozen whipped topping, thawed
- 4 large ripe bananas, sliced
- 1 box (11 ounces) vanilla wafers
- 4 cups cold water
Instructions
- In a large bowl, whisk together the cold water and instant vanilla pudding mix for two minutes. Let the mixture stand for five minutes to thicken.
- Gently fold the thawed whipped topping into the pudding mixture until fully combined.
- In a large serving dish, create a base layer using one-third of the vanilla wafers.
- Arrange half of the sliced bananas over the wafer layer.
- Spread half of the pudding mixture evenly over the bananas.
- Repeat the layers: wafers, remaining bananas, and then the remaining pudding mixture.
- Top the pudding with the remaining vanilla wafers.
- Cover the dish and refrigerate for at least four hours, or preferably overnight, before serving.
Notes
- For a richer flavor, you can substitute the instant pudding mix with a homemade cooked vanilla custard.
- Slice bananas just before assembling to reduce browning.
- This dessert tastes best after chilling for several hours, allowing the wafers to soften.
Nutrition
- Serving Size: 1 cup
- Calories: 350
- Sugar: 45g
- Sodium: 280mg
- Fat: 14g
- Saturated Fat: 7g
- Unsaturated Fat: 7g
- Trans Fat: 0g
- Carbohydrates: 55g
- Fiber: 1g
- Protein: 4g
- Cholesterol: 15mg