

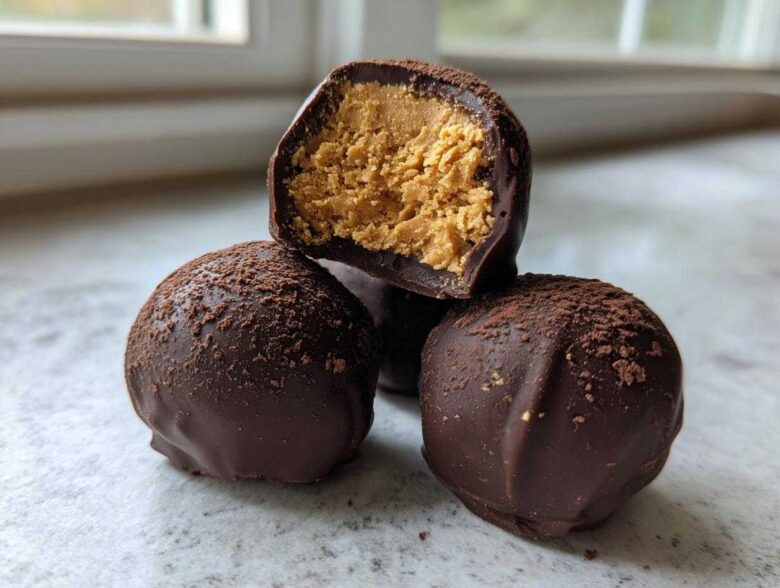
If you’re anything like me, when the holidays roll around, the oven just gets too hot and too crowded! That’s when I turn to my absolute favorite stash recipe: the no-bake, chocolate-covered peanut butter balls. Seriously, these things vanish first at every single party I bring them to, and they taste just like those candies you can’t resist at the grocery store—but better, because you made them!
We always call them Buckeyes because I like leaving that little kiss of peanut butter peeking out, but homemade is just superior. You only need a handful of staple ingredients, no oven time required, and they come together fast. I’ve perfected this recipe over years of needing Quick Dessert Bites without the hassle. Get ready to meet your new favorite tradition!
Why You Will Love These Easy Peanut Butter Balls Recipe
I’m not kidding when I say these are foolproof. The reason I keep coming back to this recipe, especially when I’m swamped during the busy months, is just how ridiculously simple they are. They are the definition of Simple Peanut Butter Desserts that deliver maximum flavor for minimal effort.
- They are genuinely no-bake! Nothing heats up the kitchen, and there’s no standing around waiting for eggs to set or crusts to brown.
- The texture is unbelievable—rich, creamy filling contrasting beautifully with that snappy chocolate shell. Pure bliss!
- They make the perfect gift. Wrap them up in pretty little cellophane bags, and you have instant Holiday Peanut Butter Candies ready to go.
- You can make them days ahead of time, which is a lifesaver before any big event.
- These are wonderful Quick Dessert Bites; they satisfy that deep peanut butter craving instantly.
- The recipe is easily doubled or tripled if you’re hosting a huge crowd. Trust me, you’ll need the extras! Check out my other snack favorites while you’re thinking about party food!
Essential Ingredients for Perfect Peanut Butter Balls
Whenever I pull out my mixing bowl for these, I always make sure everything is ready to go first. It’s a no-bake recipe, so prep is everything! This measurement game is key to getting that perfect texture that makes these the star of any dessert table. You should end up with about 30 beautifully formed treats, depending on how big you roll them.
For the Peanut Butter Filling
This filling is the heart of the candy, so you need the right stuff. Grab one full cup of creamy peanut butter—none of that natural, oily kind, trust me! You also need half a cup of unsalted butter, and it absolutely has to be softened. Finally, weigh out three full cups of powdered sugar. This sugar builds the base and makes the mixture hold its shape perfectly once chilled.
For the Chocolate Peanut Butter Balls Coating
To get that glossy, easy-to-dip chocolate, we need two things. First, a 12-ounce bag of semi-sweet chocolate chips—classic flavor is the best here! Crucially, we add one tablespoon of vegetable shortening. This is my secret weapon for smooth chocolate; it keeps the coating from getting stiff or dull once it sets. It’s what makes dipping a dream!
Step-by-Step Guide to Making No Bake Peanut Butter Balls
Okay, now for the best part—turning those simple ingredients into amazing, melt-in-your-mouth magic! This whole process moves pretty quickly once you start rolling, so having your baking sheet lined is a big help. Remember, we are making incredible peanut butter balls here, and the texture is everything!
Mixing and Forming the Creamy Peanut Butter Candy Base
First things first, make sure your butter isn’t cold! It needs to be soft enough to blend right into the peanut butter without having to really fight it. In your big bowl, beat the peanut butter and the softened butter together until it’s totally smooth—no lumps allowed here. Then comes the powdered sugar. Add it gradually, mixing on low speed. Seriously, don’t dump it all in at once or you’ll wear sugar dust for a week! Mix until it just comes together into a stiff dough. If you mix this final step too long, your final candy can get a little tough, so stop as soon as it’s uniform.
Chilling the Peanut Butter Balls for Easy Dipping
This step is non-negotiable, my friends. If you try to dip warm dough, it turns into a melted, chocolatey nightmare. Scoop out your dough and roll it into small balls, about one inch across—this recipe should give you around 30 of them. Pop them onto a sheet lined with parchment paper. Now, they need a minimum of 30 minutes in the refrigerator to chill and firm up completely. Time flies when you’re cleaning up the mixing bowl, though!
Melting Chocolate for the Chocolate Peanut Butter Balls With Chocolate Coating
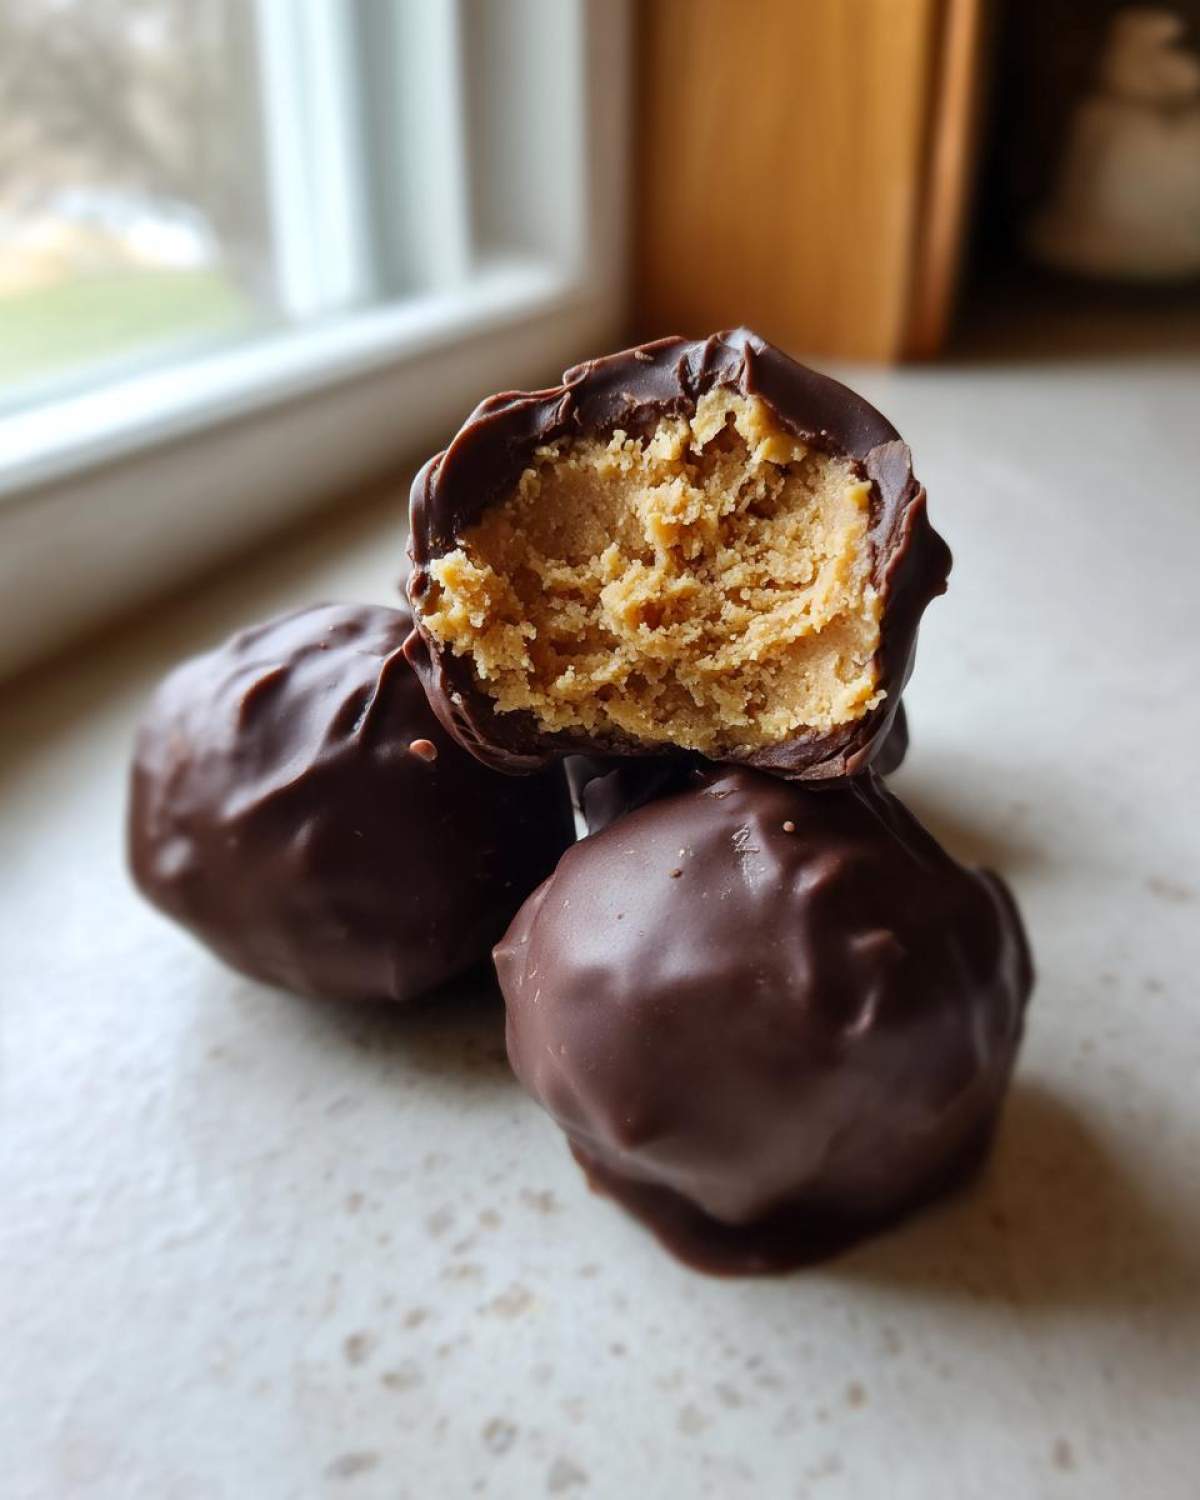
While those babies are chilling, we tackle the chocolate coating. Get your chocolate chips and that tablespoon of shortening in a microwave-safe bowl. The shortening is key because it keeps the chocolate beautifully fluid, making the dipping experience smooth—it really helps achieve that classic, shiny finish for your Chocolate Peanut Butter Balls. Heat it in short bursts, 30 seconds at a time, stirring well between each session. You want it melted and completely smooth; if you see any tiny lumps, keep going a little longer!
The Dipping Technique for Classic Peanut Butter Balls
When the balls are firm, it’s dipping time! This is where you decide if you want the traditional look or full coverage. I like to dip the ball almost all the way in the chocolate, leaving a small circle of the peanut butter filling exposed at the top—that’s the true ‘Buckeye’ look, which is what most people mean when they search for this classic candy. If you want them fully coated, just use a toothpick to hold it and dip the whole thing, pulling the toothpick out carefully at the end. Place them back on the parchment paper and back into the fridge for about an hour until the chocolate sets hard.
Tips for Success with Your Peanut Butter Balls
Even though this is a super easy recipe, there are a few little things that can go wrong if you rush, especially when dealing with chocolate. I learned these the hard way when I tried to rush these out for a neighborhood potluck last year! I mean, who wants crumbly Peanut Butter Truffles when they expect smooth, creamy perfection?
Here are my absolute must-do tips to make sure your chocolate coating is beautiful and your filling stays perfectly shaped:
- If the dough is too soft: This usually means your butter was too warm or you skipped the chill time. Don’t panic! If you roll them and they immediately melt in your hands, stick the whole batch back in the fridge for another 15 minutes before trying to shape them again. It buys you the time you need to get a nice, tight ball.
- Fixing seizing chocolate: If your melted chocolate suddenly gets thick and grainy while you’re dipping, it means a tiny splash of water or steam got into it. I try to fix it by stirring in just a half teaspoon of liquid coconut oil or extra shortening—it often loosens it right back up so you can finish dipping without ruining the whole batch.
- The secret to a clean chocolate edge: When you lift the ball out of the chocolate, give the dipping tool (I usually use a fork that fits just right) a gentle tap on the side of the bowl. This vibrates off any excess chocolate puddling at the bottom, leaving you with that perfect, clean line if you’re going for the Buckeye look.
When my big batch went sideways last Christmas, the dough was just too sticky to handle, and I almost threw the whole thing out! I remembered my friend telling me about chill time, so I took a break, made a cup of coffee, and let them firm up. When I came back, they rolled like a dream! Taking a quick pause always saves my batches. If you use high-quality ingredients like we talked about, the texture is already halfway there, but the chilling is what seals the deal between a good candy and a great one. If you want another technique for perfectly textured treats, check out my brown butter cookie post!
Ingredient Notes and Simple Peanut Butter Desserts Substitutions
I get asked all the time if you can mess with this formula, and honestly, you can—but only if you know what you’re doing! This recipe is built around creamy peanut butter because it has the lowest oil separation, which helps keep those balls from getting messy while they chill. But if you’re dealing with nut allergies or just want to try something different, I have a couple of foolproof swaps to keep your Simple Peanut Butter Desserts exciting.
The biggest thing to remember is that swapping the main binder changes the texture drastically. If you use natural peanut butter, you are going to need way more powdered sugar, which can make the final candy grainy. If you have to use it, drain off some of the oil first, or you’ll be mixing for ages!
For the chocolate coating, semi-sweet is the way to go for that classic flavor that balances the sweetness of the filling. But if you want to mix things up for a holiday platter, try these changes:
- White Chocolate Coating: Swap the semi-sweet chips for white chocolate chips. You will absolutely need the shortening here or it gets super stiff! These look lovely next to the darker ones.
- Milk Chocolate: This tastes sweeter, so you might want to slightly reduce the powdered sugar in the base by about a quarter cup if you use milk chocolate.
- Nut Butter Swaps: Almond butter works beautifully in place of peanut butter! Sunflower seed butter is a fantastic option if you need to avoid tree nuts entirely. Both will work just fine with the butter and sugar ratio specified.
Remember, these are just starting points! Experimentation is part of the fun, but if you want classic results, stick to the recipe above. If you try a substitution, let me know how your new version of the Peanut Butter Balls turned out in the comments below!
Storing and Serving Your Holiday Peanut Butter Candies
Once you’ve finished dipping and chilling these gorgeous Holiday Peanut Butter Candies, you might wonder how long they keep. The good news is that because they’re mostly peanut butter and sugar, they last a surprisingly long time! But really, who are you kidding? They won’t last more than a day or two in my house!
For making batches ahead of time—which is my usual strategy for holiday baking chaos—you must store them correctly. Pop the finished, set chocolate peanut butter balls into an airtight container. I like using one of those flat plastic containers so they don’t slide around and smudge the pretty chocolate coating. Keep them in the refrigerator.
They will stay perfectly fresh and firm for up to two weeks in the fridge. If you need them longer, you can actually freeze these babies! Lay them in a single layer on a baking sheet, freeze until solid, then transfer them to a freezer-safe bag. They thaw quickly right on the counter, usually within an hour.
When it comes time to serve them up as Party Peanut Butter Treats, let them sit out on the serving platter about 15 minutes before guests arrive. This lets the chocolate soften up just a tiny bit so you get that lovely snap when you bite in, rather than shattering the shell!
They are fantastic served all on their own, of course. But if you’re putting together a spread, they pair wonderfully with salty snacks to balance out the sweetness. They look so elegant next to mini sausage rolls or my spicy jalapeño poppers. The salty-sweet dynamic is just unbeatable when you’re entertaining!
Frequently Asked Questions About Peanut Butter Balls
I always get so many questions when I post pictures of these because everyone wants to make sure their version turns out just like mine! It’s exciting to see how many people are looking for Easy Peanut Butter Balls Recipe ideas. Here are the questions I hear most often about getting these perfect every time!
Can I make these peanut butter balls without chilling them first?
Oh, please don’t try to skip the chill time! While I know you’re eager to get these done, if you try to roll the warm or room-temperature dough, it just turns into a sticky mess that gums up your hands. Trust me, I’ve tried to rush it, and the balls just flatten out instead of holding that nice round shape. Chilling for that solid 30 minutes makes them firm enough to roll tightly and handle the dipping process without melting when they hit the hot chocolate.
What is the difference between these and Buckeye Balls Recipe?
This is such a great question! Honestly? Very little! The term Buckeye Balls Recipe specifically refers to the fact that you leave a small circle of the peanut butter dough exposed on the top when you dip it in chocolate. It’s meant to look like the nut from the Ohio Buckeye tree. If you coat them completely, they are technically just Peanut Butter Truffles or just great Chocolate Peanut Butter Balls. For me, the exposed top is the classic look, but it’s completely up to you!
Can I use natural peanut butter in this Easy Peanut Butter Balls Recipe?
I strongly advise using standard, processed creamy peanut butter for this recipe. Natural peanut butter is just too oily and unstable; you’ll spend ages stirring in extra powdered sugar just to get it firm enough to roll, and even then, the balls tend to soften too quickly at room temperature. If you absolutely must use it, drain off as much of the separated oil as you possibly can first. For the best, most reliable texture in your Easy Peanut Butter Balls Recipe, stick to the kind where the oil doesn’t separate!
Reviewing Your Homemade Peanut Butter Balls
Now that you’ve got a platter full of the richest, easiest candies you’ve ever made, I’d absolutely love to hear what you think! Seriously, these peanut butter balls are my go-to, but I want to know if they became your new favorite too. Don’t be shy about sharing your results!
Did you try leaving the little peek-a-boo chocolate rings, or did you go for the full chocolate coating? Did you add a sprinkle of sea salt on top while the chocolate was still wet? Tell me everything down in the comments!
If you followed along and loved how simple this was, please consider taking a quick second to leave a rating for the recipe—it helps other folks find this amazing treat! If you want to share pictures of your platter, you can always reach out to me directly through my contact page, too. Happy snacking, everyone!
Estimated Nutritional Data for Peanut Butter Balls
I always feel a little bad sharing the nutrition facts on decadent things like homemade candy, but knowledge is power, right? Since these Peanut Butter Balls are best enjoyed as a special treat rather than an everyday snack, it’s good to know what you’re indulging in! This information is based on making approximately 30 servings from the batch size listed in the recipe.
Keep in mind that values can shift a little depending on the exact brand of peanut butter or chocolate you grab off the shelf. This is just a guide to help you see what’s in your delicious little bites!
- Serving Size: 1 ball
- Calories: 180
- Fat: 11g
- Saturated Fat: 5g
- Carbohydrates: 19g
- Sugar: 18g
- Protein: 4g
See? Mostly sugar and fat, which is exactly what you expect when you combine peanut butter, butter, and chocolate coating! That’s why they are so incredibly satisfying. But hey, they are homemade, and we control the quality, so that counts for something! Enjoy them guilt-free in moderation, especially when you’re sharing them with loved ones during the holidays.
PrintClassic No-Bake Chocolate Covered Peanut Butter Balls

Make simple, no-bake peanut butter balls dipped in chocolate. This recipe is quick to prepare and great for holidays or parties.
- Prep Time: 20 min
- Cook Time: 5 min
- Total Time: 55 min
- Yield: About 30 balls
- Category: Dessert
- Method: No-Bake
- Cuisine: American
- Diet: Vegetarian
Ingredients
- 1 cup creamy peanut butter
- 1/2 cup (1 stick) unsalted butter, softened
- 3 cups powdered sugar
- 12 ounces semi-sweet chocolate chips
- 1 tablespoon vegetable shortening
Instructions
- Combine the peanut butter and softened butter in a large bowl. Beat them together until smooth.
- Gradually add the powdered sugar to the peanut butter mixture, mixing on low speed until fully incorporated and a stiff dough forms.
- Roll the dough into small balls, about 1 inch in diameter. Place them on a parchment-lined baking sheet.
- Chill the peanut butter balls in the refrigerator for at least 30 minutes until firm.
- In a microwave-safe bowl, combine the chocolate chips and shortening. Microwave in 30-second intervals, stirring well after each interval, until the chocolate is completely melted and smooth.
- Dip each chilled peanut butter ball into the melted chocolate, leaving a small circle of peanut butter exposed at the top (like a buckeye), or coat completely if you prefer.
- Return the coated balls to the parchment-lined sheet.
- Refrigerate the finished peanut butter balls until the chocolate sets, about 1 hour.
Notes
- For a smoother dipping chocolate, you can use candy coating wafers instead of chocolate chips and shortening.
- If you want to coat them completely, use a toothpick to dip the balls and then remove the toothpick carefully.
- Store these candies in an airtight container in the refrigerator.
Nutrition
- Serving Size: 1 ball
- Calories: 180
- Sugar: 18
- Sodium: 65
- Fat: 11
- Saturated Fat: 5
- Unsaturated Fat: 6
- Trans Fat: 0
- Carbohydrates: 19
- Fiber: 1
- Protein: 4
- Cholesterol: 15