

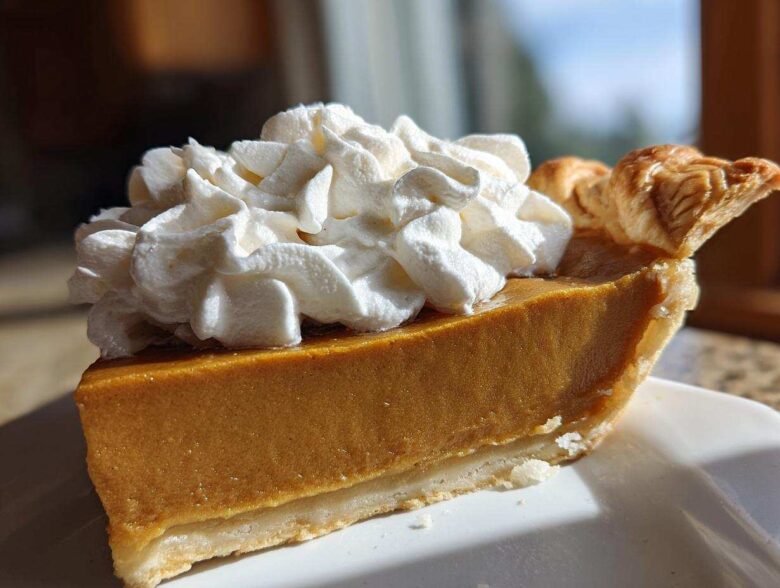
When I think about truly comforting, classic American desserts, my mind always drifts straight to the big, beautiful pies you always see on holiday tables. We all have a few tried-and-true recipes we rely on, and for gatherings, my absolute go-to is this Creamy Old-Fashioned Homemade Butterscotch Pie. Forget those thin, bland versions you sometimes find! This isn’t just any dessert; it’s creamy, it’s rich, and the buttery flavor just sings.
It took me years—and yes, a few batches that ended up tasting like scrambled eggs—to perfect the filling, but trust me when I say this recipe nails that velvety smooth pie filling every single time, nestled right into a crisp, flaky pie crust. This recipe for butterscotch pie is the one I use when I want people to ask for the recipe immediately. It’s decadent, totally indulgent, and it never fails to disappear first at any potluck, especially once you know how simple making a truly great custard pie can be.
I’m so glad you’re here because I want to share everything I learned, including a shortcut or two. If you head over to my About Page, you can see why I take making these classic desserts so seriously. This recipe is my absolute favorite Southern comfort dessert!
Why This Creamy Old-Fashioned Homemade Butterscotch Pie Stands Out
Out of all the sweet dessert pies I’ve mastered over the years, this one holds a special spot, truly. It’s not fancy, but it delivers on pure, rich flavor. People often search for an easy butterscotch pie, and while this one requires a little attention on the stovetop, the result is miles away from any quick mix. You end up with something worthy of any Thanksgiving pie ideas board!
- It has that deep, almost caramelized flavor that only comes from using plenty of good brown sugar.
- It sets up perfectly every time—no wobbling or weeping.
- It’s the definition of a holiday baking classic that feels totally homemade.
Achieving That Velvety Smooth Pie Filling
The biggest fear when making a custard-style pie is getting lumps or, worse, ending up with scrambled egg bits! Not here. The secret to that velvety smooth pie filling is twofold: you must whisk your dry ingredients thoroughly *before* adding milk, and you absolutely have to temper those egg yolks correctly. You slowly introduce the hot sugar mixture to the yolks instead of dumping them in. It’s a little extra step, but it guarantees a silky-smooth texture you can slice clean.
Perfect Pairing: Flaky Pie Crust for Your Butterscotch Pie
The buttery richness of the filling absolutely demands the counterpoint of a crisp, flaky pie crust. It’s the old-fashioned way, and it just tastes right! While I adore this recipe with a classic crust because it keeps the whole thing true to its roots, I know convenience matters sometimes. If you’re rushing, you can totally swap in a pre-baked shell. That’s how you turn this into an easy chilled pie, though I still think the baked crust makes the ultimate butterscotch pie experience.
Gathering Ingredients for the Best Butterscotch Pie
Alright, now that you know this butterscotch pie is going to be legendary, we need to talk about pulling everything together. For a truly spectacular dessert, especially one that leans toward that rich butterscotch pudding pie flavor, ingredient quality really matters. Don’t worry, it’s mostly pantry staples, but precision is key here.
Trust me on this—that cornstarch needs to be measured exactly, as it’s what ensures we get that perfect set and avoid the dreaded weeping pie! This list has everything you need to make the ultimate homemade dessert.
Ingredient Notes and Substitutions for Rich Butterscotch Pie
We are aiming for that signature caramel richness, so stick to light brown sugar—pack it tightly into your measuring cup! Using dark brown sugar can make things taste a little too heavy, and white sugar won’t give you that deep butterscotch color we’re looking for. For the creamiest texture in this creamy butterscotch pie recipe, please use whole milk and heavy cream.
Low-fat milk just doesn’t have the necessary fat content to create that luxurious mouthfeel. If you’re looking to speed things up, I won’t judge you for grabbing a quality pre-made, fully-baked pie shell. That instantly turns this into an easy chilled pie you can pull together fast!
Step-by-Step Instructions for Your Homemade Butterscotch Pie
Okay, deep breath! This is the exciting part where we turn those beautiful ingredients into magic. While making a custard-based butterscotch pie seems intimidating, it’s really all about watching the pot and trusting the process. If you start this when you have about an hour free before dinner, you’ll be golden.
First things first: make sure your pie crust is either pre-baked according to package directions or completely cooled if you used a homemade one. A warm crust will melt the beautiful filling right away! Once your crust is ready, we move straight to the stovetop—that’s where the actual cooking happens. Don’t forget to check out my latest blog post for some quick baking tips while the oven is warming up!
Preparing the Silky-Smooth Butterscotch Pie Filling
We are going to build that incredible flavor base on the stove. Grab your saucepan and whisk those sugars, cornstarch, and salt together until they look like one single, pale sandy pile. Then, whisk in the milk and cream slowly. Heat this over medium heat, and—here’s the most important part—you must stir it constantly. I mean it, keep that whisk moving until it starts to look thick and heavy, showing big bubbles. Once it boils, let it roll for just one minute while you stir like crazy!
Once it boils, kill the heat right away. Now for tempering! Take about a cup of that hot goo and drizzle it *very slowly* into your beaten egg yolks while you whisk them non-stop in a separate bowl. If you rush this, you’ll end up with sweet, buttery bits floating in your pie, and we don’t want that. Once tempered, pour that yolk mixture back into the main pan and stir it over low heat for just a minute or two until it’s thick enough to coat the back of a spoon. Last bit of stovetop magic: stir in that lovely butter and vanilla until melted. Wow, the smell alone is incredible!
Assembling and Chilling the Classic Butterscotch Pie
The filling is done, and it looks so glossy and perfect! Pour that hot custard immediately into your cooled, prepared crust. Don’t waste a second scraping the sides of the pan, either; get every bit in there!
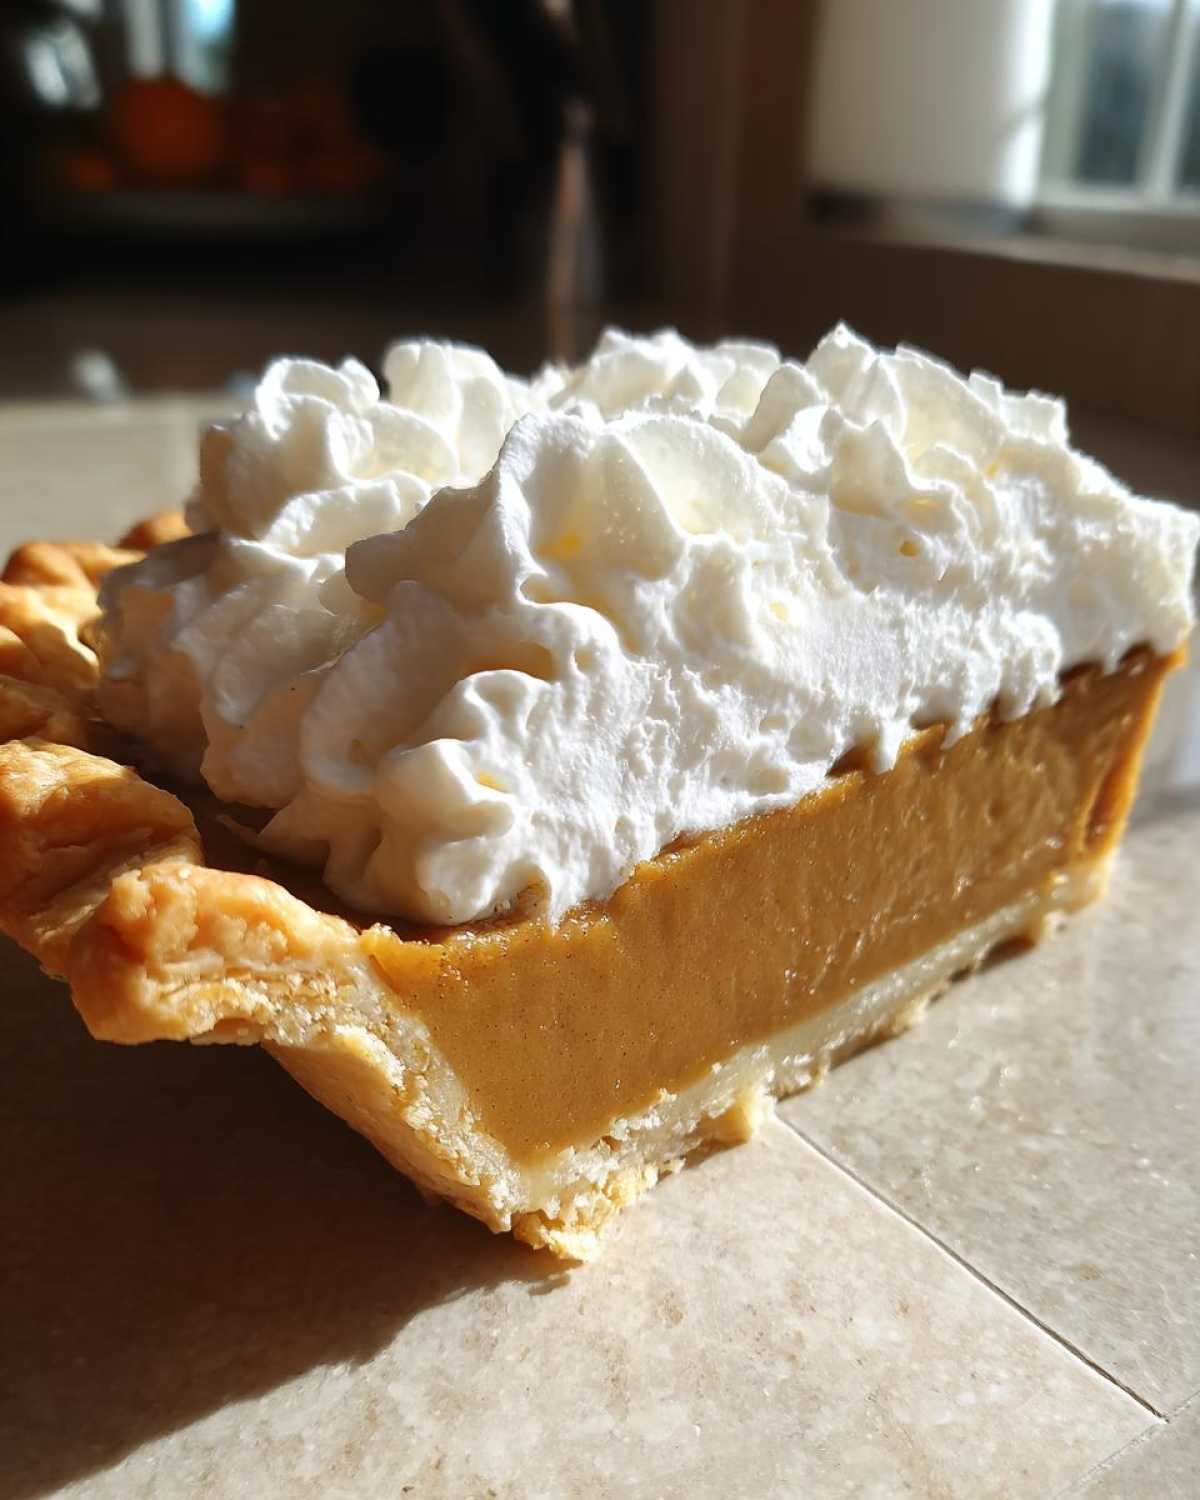
Now, listen closely to this next tip, because it’s a game-changer for any pudding-style pie: take a sheet of plastic wrap and gently press it *directly* onto the surface of the filling. If you leave a gap, you’ll get that weird, rubbery skin forming on top when it chills. Once it’s snug, pop the whole thing into the fridge. You need at least four hours, but honestly? Overnight is better. This ensures your butterscotch pie sets up firm enough to get those clean, glorious slices you dream about.
Tips for the Absolute Best Butterscotch Pie Success
Even with a great recipe, sometimes things go sideways, right? I’ve been there! I remember one year making a butterscotch pie for a big family dinner, and I thought I was being clever by leaving the yolks in the bowl while I grabbed the cream; big mistake! When I stirred it back in, the yolks seized up instantly. Never again! That failure taught me the absolute necessity of the tempering step we talked about earlier.
To ensure your filling is always thick and glossy—not grainy or scrambled—make sure your stove heat stays honest. Medium heat seems high when milk is involved, so watch it carefully. Also, for presentation, whipping your topping fresh is a must. That canned stuff just doesn’t stand up to this level of indulgence. Speaking of indulgence, if you want more caramel goodness in your life, check out my favorite apple crisp recipe!
Finally, don’t try to rush the chill time. It’s torture waiting, but if you cut into it too early, you’ll have sweet soup. Patience makes a perfect slice!
Variations on the Traditional Butterscotch Pie
While I’ll always swear by this old fashioned butterscotch pie recipe, I know everyone’s kitchen runs a little differently, and sometimes you just need an easy butterscotch pie that doesn’t involve fussing with pastry!
If you’re craving something really fun, swapping the bottom crust is the easiest route. Skip the flaky dough and press a mixture of crushed Biscoff cookies or even vanilla wafers mixed with melted butter right into the bottom of your dish. Chill that until firm, and you have a fantastic cookie crust base. It’s such a yummy twist!
And for toppings? Beyond the classic whipped cream, sometimes I’ll stir a tiny pinch of cayenne pepper into my sugar mixture—it just cuts through the sweetness beautifully. If you love those caramel flavors, you absolutely must check out my recipe for Caramel Apple Cupcakes next!
Storage and Make Ahead Tips for Your Butterscotch Pie
Baking holiday desserts can be a marathon, right? That’s why I always plan my main dishes around which pies I can completely finish ahead of time. The great news is that this butterscotch pie is actually better when made a day ahead! Once the filling is totally firm, cover the whole pie loosely with plastic wrap—but make sure the wrap isn’t touching the whipped cream topping, or it’ll get messy.
It stays perfectly good in the fridge for about three days. If you’re using the flaky crust, it holds up beautifully. If you use a crumb crust, I’d try to keep it to two days maximum for the best crunch.
My favorite make-ahead move is baking the pie crust completely in advance, perhaps even the day before you plan to make the filling. Once it’s totally cooled, slide it into a large zip-top bag. Then, the day before your event, you just make the filling and pour it right in. It makes the final bake day so much less stressful! For more great scheduling ideas, check out my post on essential make ahead dessert strategies.
Frequently Asked Questions About Creamy Butterscotch Pie
Can I make this a no bake butterscotch pie using a chilled crust?
Oh yes, you absolutely can! If you want to skip baking the crust, just use one of my favorite tricks for an easy butterscotch pie. You can use a store-bought, ready-to-use crust, or make a crumb crust from crushed vanilla wafers mixed with melted butter. Once the crust is set in the fridge, you pour in the hot filling right as the recipe says. Because we use an ample amount of cornstarch, the filling will still set up beautifully when chilled!
How do I prevent that annoying skin from forming on top of my rich butterscotch pudding pie?
This is a classic custard pie problem, and it happens because the starches dry out on the surface while cooling in the fridge. The secret weapon here is plastic wrap, but you have to use it correctly! After pouring the hot filling into the shell, immediately take a sheet of plastic wrap and gently press it down so it’s physically touching the surface of the pie. Don’t leave any air space between the wrap and the filling! It will trap the condensation underneath, keeping the top perfectly smooth until you’re ready to add the whipped cream.
I heard evaporates milk works—can I substitute it for the whole milk in this recipe?
While you *can* substitute it in a pinch, I really advise against it for this specific creamy butterscotch pie recipe. Evaporated milk is actually concentrated, and while it might thicken, it changes the delicate flavor profile we are aiming for with this rich butterscotch pudding pie. I love whole milk and heavy cream here because they give us the fat content needed for that truly velvety smooth texture. If you’re looking for other quick desserts, check out my energy bites!
Is this recipe suitable for holiday baking classics?
It is the ultimate holiday baking classic! Because it’s a make-ahead dessert that tastes even better the next day, it takes a lot of pressure off your big cooking day. The rich flavor profile makes it perfect alongside lighter desserts. It’s one of the best Thanksgiving pie ideas, honestly!
Nutritional Estimates for This Indulgent Dessert Recipe
Now, I know when we’re diving into an indulgent dessert recipe like this incredible butterscotch pie, we aren’t exactly focused on counting every single calorie! But for those of you who like to plan, I wanted to share my best guess at what’s in each big slice. Please remember these are just estimates based on the ingredients I listed, so yours might be slightly different depending on your exact crust choice.
Each generous serving of this rich butterscotch pudding pie clocks in around 450 calories. You’re getting a good amount of sweetness, about 55 grams of sugar, and 22 grams of fat, which is what delivers that amazing richness! It’s what makes this recipe shine as a true classic American pie favorite, meant for special occasions.
Share Your Perfect Butterscotch Pie Experience
I poured my heart into making sure this butterscotch pie turns out silky and wonderful for you. Now it’s your turn! Please, please leave me a comment down below telling me how it went. Did you stick to the flaky crust, or did you try a fun variation?
I absolutely love seeing your creations! Knowing that you’re enjoying this homemade dessert with your family means the world to me. If you want to send me a picture of your slice, you can always reach out through my Contact Page. Happy baking!
PrintCreamy Old-Fashioned Homemade Butterscotch Pie
Make a rich, velvety smooth butterscotch pie with a classic flaky crust. This recipe delivers a creamy, indulgent dessert perfect for holidays.
- Prep Time: 20 min
- Cook Time: 15 min
- Total Time: 4 hours 35 min
- Yield: 8 servings
- Category: Dessert
- Method: Stovetop Cooking
- Cuisine: American
- Diet: Vegetarian
Ingredients
- 1 pre-made or homemade flaky pie crust (9-inch)
- 1 1/2 cups packed light brown sugar
- 1/2 cup granulated sugar
- 1/4 cup cornstarch
- 1/4 teaspoon salt
- 1 1/2 cups whole milk
- 1/2 cup heavy cream
- 4 large egg yolks, lightly beaten
- 4 tablespoons unsalted butter, cut into pieces
- 1 teaspoon vanilla extract
- Whipped cream, for topping
Instructions
- Preheat your oven according to your pie crust instructions if baking the crust. If using a pre-baked crust, skip this step.
- In a medium saucepan, whisk together the brown sugar, granulated sugar, cornstarch, and salt.
- Gradually whisk in the milk and heavy cream until smooth.
- Cook the mixture over medium heat, stirring constantly, until it thickens significantly and begins to bubble. This takes about 8 to 10 minutes. Boil for 1 minute while stirring.
- Remove the saucepan from the heat. In a separate small bowl, whisk the egg yolks lightly.
- Temper the yolks by slowly pouring about 1 cup of the hot sugar mixture into the yolks while whisking constantly.
- Pour the tempered yolk mixture back into the saucepan with the remaining sugar mixture, whisking well to combine.
- Return the saucepan to medium-low heat. Cook, stirring constantly, for 1 to 2 minutes until the filling is very thick. Do not boil after adding the yolks.
- Remove from heat. Stir in the butter until completely melted and smooth. Stir in the vanilla extract.
- Pour the hot filling immediately into your prepared pie crust.
- Press plastic wrap directly onto the surface of the filling to prevent a skin from forming.
- Chill the pie in the refrigerator for at least 4 hours, or until the filling is firm.
- Before serving, top generously with whipped cream.
Notes
- For a no-bake crust, press crushed vanilla wafers or Biscoff cookies mixed with melted butter into the pie plate and chill until firm.
- If you prefer a silkier filling, strain the finished custard through a fine-mesh sieve before pouring it into the crust.
- You can use a store-bought pie crust to make this an easy chilled pie.
Nutrition
- Serving Size: 1 slice
- Calories: 450
- Sugar: 55g
- Sodium: 250mg
- Fat: 22g
- Saturated Fat: 13g
- Unsaturated Fat: 9g
- Trans Fat: 0.5g
- Carbohydrates: 60g
- Fiber: 1g
- Protein: 6g
- Cholesterol: 120mg