

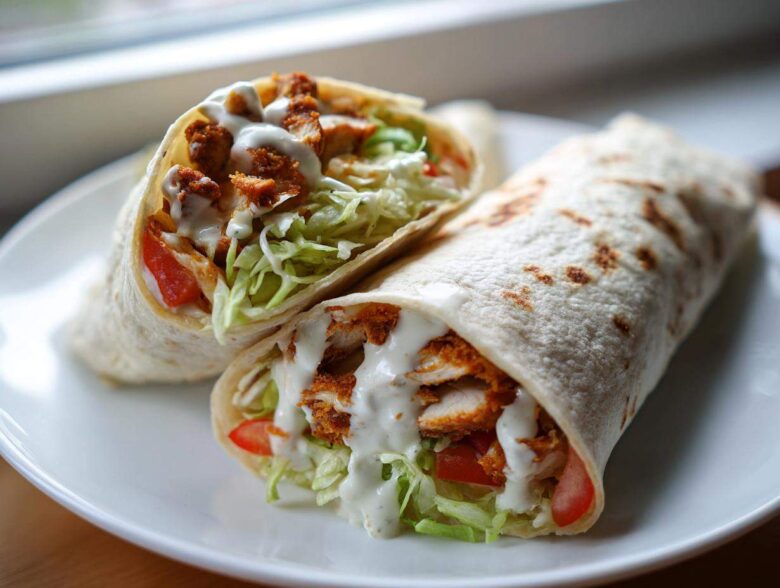
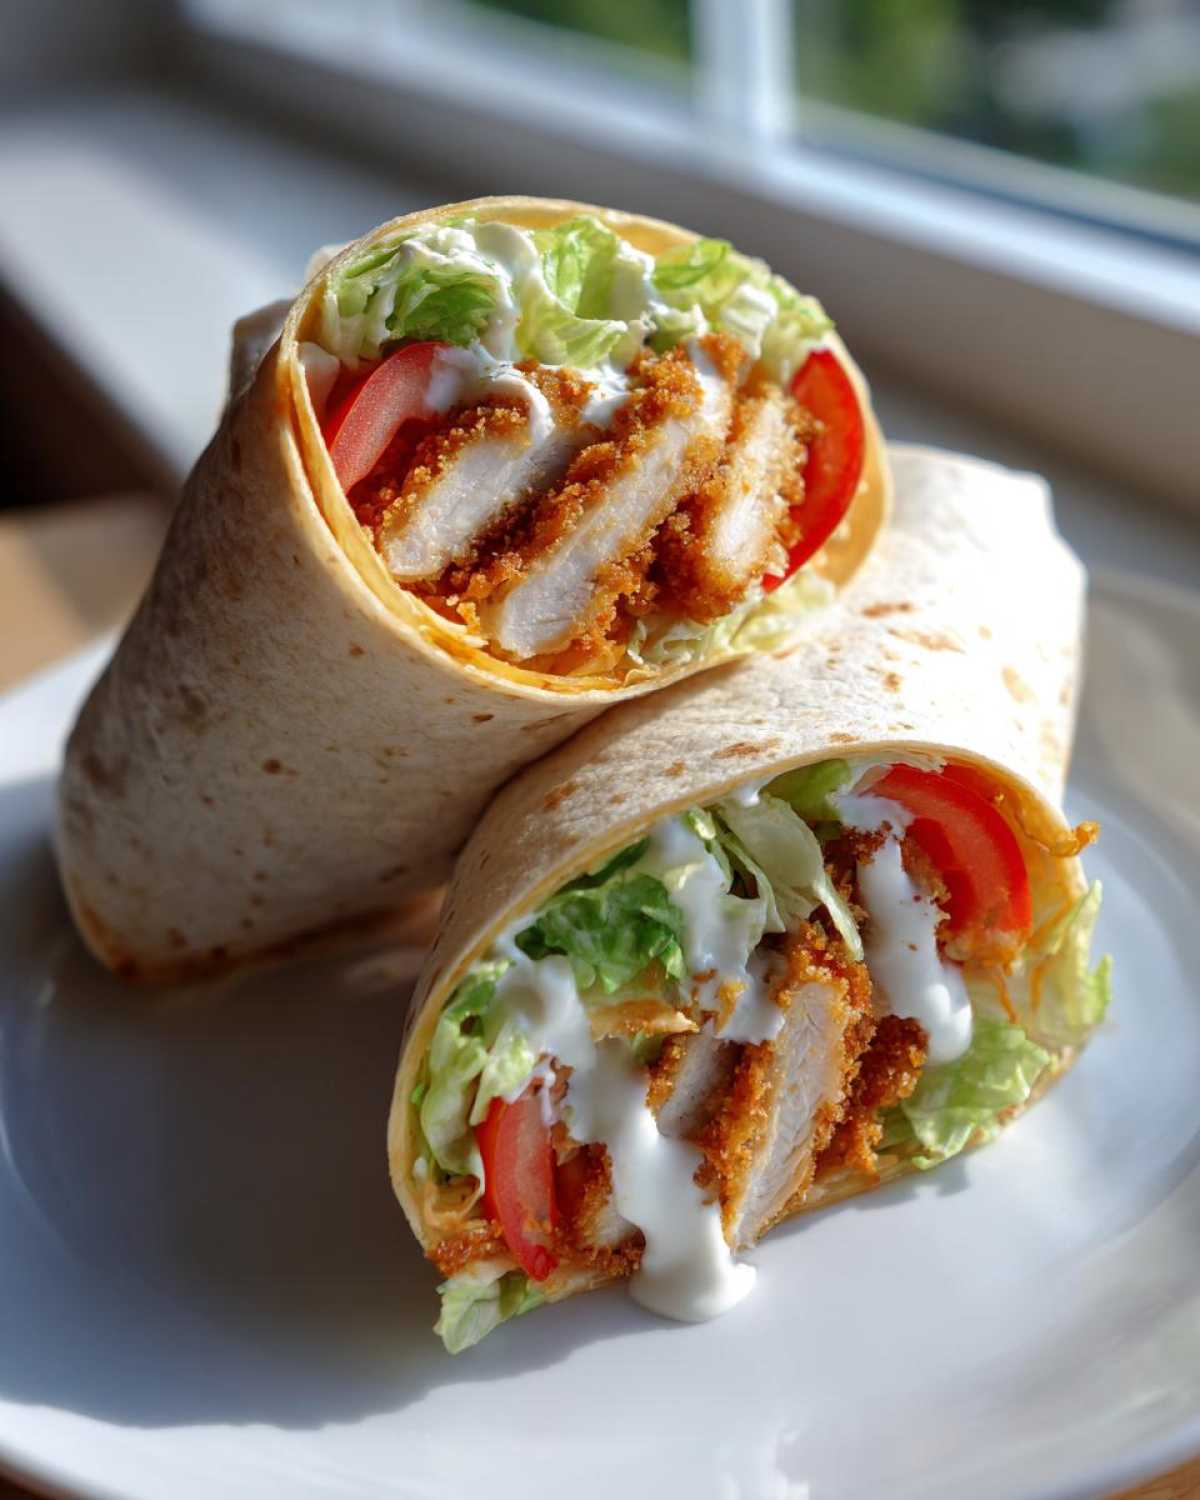
Oh, sometimes you just *need* that perfect crunch, right? I’m talking about that moment where the chicken crumbles perfectly when you bite into it, followed immediately by this unbelievably rich, garlicky softness. That’s the craving my ultimate Crispy Chicken Wrap with Creamy Garlic Sauce solves every single time. Forget those soggy supermarket versions; we are making restaurant-level texture happen right here in your kitchen!
For ages, I struggled to get my chicken strips truly crispy without them burning on the outside before the inside cooked. It was frustrating! But I finally cracked the code using a double-dredge method that locks in the crunch, even inside a soft tortilla. Pair that perfectly crunchy chicken with a homemade creamy garlic sauce that tastes like it took hours to perfect—but trust me, it takes five minutes. I promise this easy, satisfying meal will become your new go-to lunch or quick dinner. You can see more of my favorite kitchen wins over at the main blog page!
Why This Crispy Chicken Wrap with Creamy Garlic Sauce Stands Out
This isn’t just another wrap; it’s an experience! We focus on texture above all else. You get that satisfying crackle from the chicken, balanced by the cool, rich tang of the sauce. And the best part? It comes together so fast!
-
Achieving Maximum Chicken Crunch
The secret weapon here is our special double-dredge breading. We soak the chicken first, then coat it twice. That’s how you get that restaurant-quality crunch that lasts!
-
Rich and Flavorful Homemade Creamy Garlic Sauce
Skip the bottled stuff! Our creamy garlic sauce is made fresh with real garlic and Dijon. It just elevates the whole Crispy Chicken Wrap with Creamy Garlic Sauce from basic to absolutely gourmet, honestly.
Essential Ingredients for Your Crispy Chicken Wrap with Creamy Garlic Sauce
Okay, gathering your ingredients is half the battle, and I like to keep everything organized before I even think about turning on the stove. Having your components laid out makes creating this Crispy Chicken Wrap with Creamy Garlic Sauce a total breeze. You’ll notice we have three distinct zones: the chicken prep, the magic sauce, and the finishing touches for wrapping.
Don’t forget, if you ever need awesome bread for wraps that isn’t a tortilla, you can check out how my friend makes amazing naan—it’s another great base! See the garlic naan recipe here.
For the Perfectly Breaded Chicken
This is where the crunch starts! Make sure you have your buttermilk ready for soaking.
- 2 boneless, skinless chicken breasts, cut into strips
- 1 cup buttermilk
- 1 teaspoon salt
- 1/2 teaspoon black pepper
- 1 cup all-purpose flour (for the first dredge)
- 1/2 cup panko breadcrumbs
- 1/2 cup all-purpose flour (for the final coating)
- Vegetable oil, for frying
For the Creamy Garlic Sauce Chicken Wrap Topping
This sauce is non-negotiable; it makes the entire wrap sing!
- 1/2 cup mayonnaise
- 2 tablespoons sour cream
- 2 cloves garlic, minced (make sure they’re freshly minced!)
- 1 tablespoon lemon juice
- 1/2 teaspoon Dijon mustard
- A tiny pinch of salt and pepper
Wrap Assembly Components
- 4 large flour tortillas
- 1 cup shredded lettuce
- 1/2 cup sliced tomato
- 1/4 cup shredded cheddar cheese
How to Make the Crispy Chicken Cutlets for This Crispy Chicken Wrap with Creamy Garlic Sauce
Listen up, because this is the most important part! If you want that genuine crunch that screams “restaurant quality” every single time you bite into your Crispy Chicken Wrap with Creamy Garlic Sauce, you cannot skip the soaking and the specific dredging sequence. This technique builds up layers that fry up beautifully and keep the inside juicy. If you’re interested in other crunchy poultry goodness, I have a killer recipe for crispy wings too, check out that juicy recipe right here!
We have three major stations set up here: the wet bath, the light coat, and the crunchy finish. It takes a little extra time, but oh my gosh, the payoff is worth every second. I’ve got my go-to method for making perfect cutlets ready for wraps detailed in this guide!
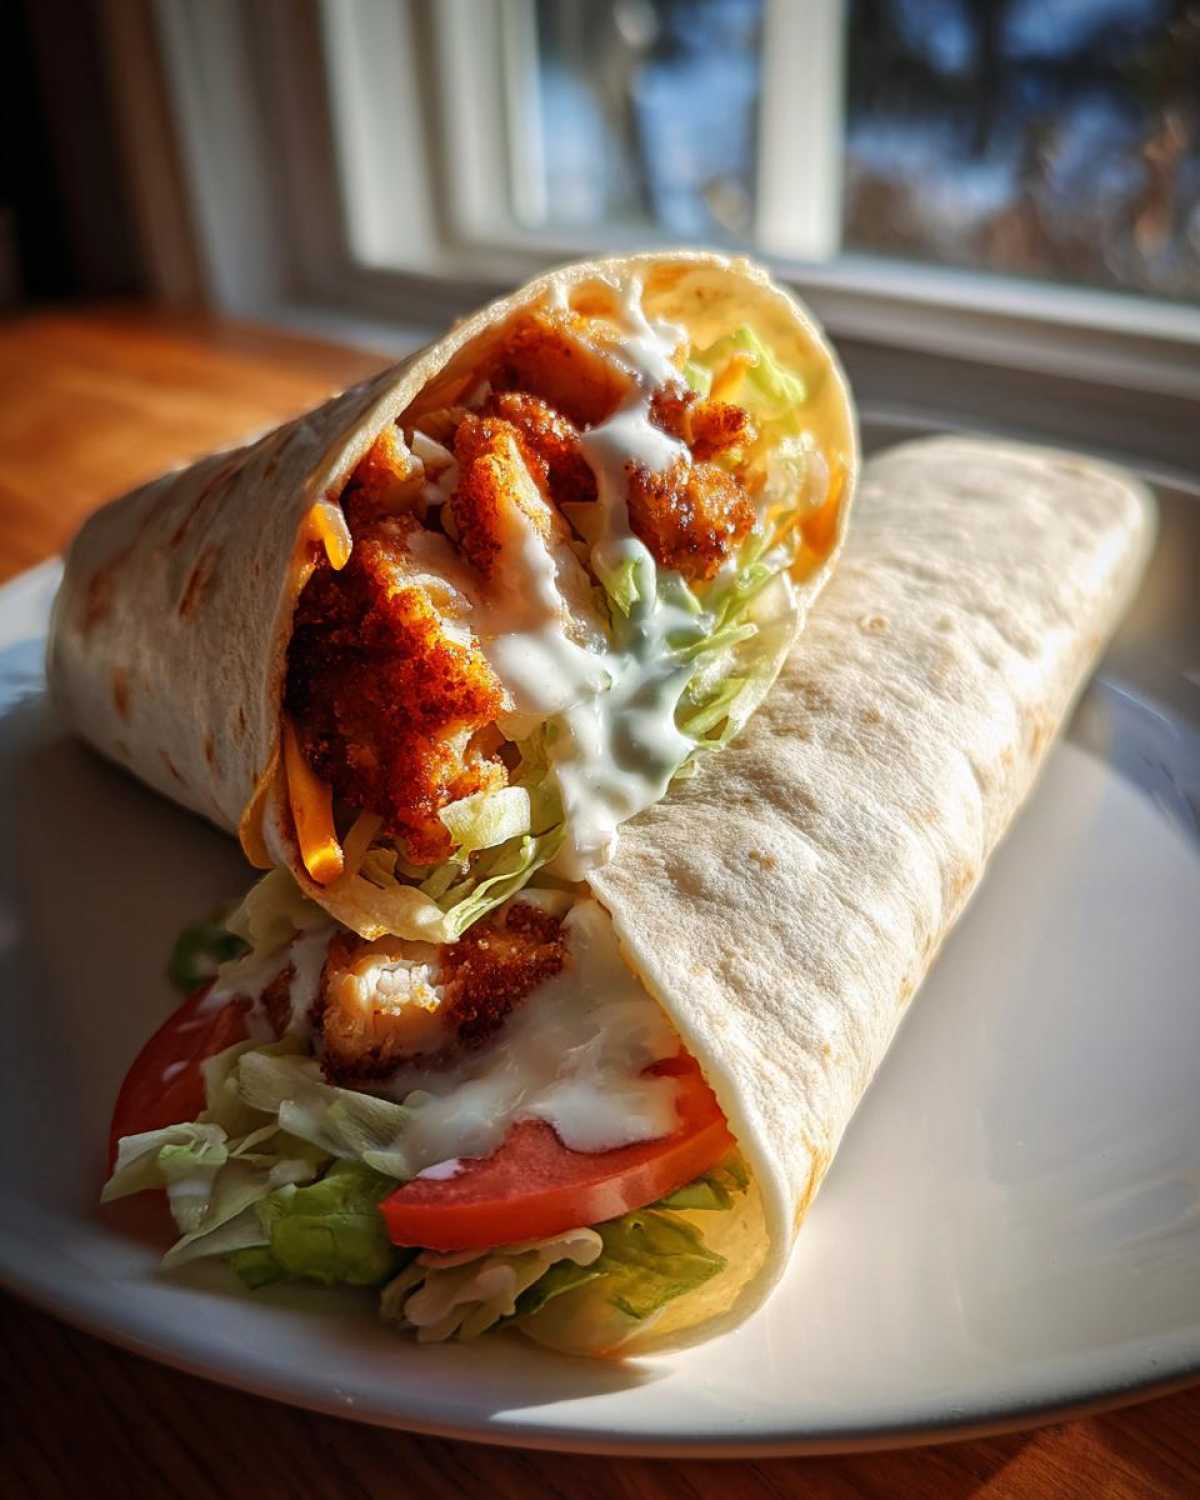
Buttermilk Soak and Breading Technique
First things first: those chicken strips need to relax! Put them in that buttermilk mixture—complete with salt and pepper—for at least 30 minutes, or longer if you have time. That acid tenderizes the meat beautifully.
Now for the layering! You’ll set up three dishes side-by-side. Take a strip out of the buttermilk, letting the excess drip off—we don’t want soggy breading! First step: give it a light, quick dust in the separate shallow dish of plain flour. Don’t pack it on, just coat it.
Second step: Plunge it right back into the buttermilk for just a quick dip. This re-moisturizes the surface. Third and most crucial step: Press that wet chicken firmly into the flour and panko breadcrumb mix. You need total coverage here, packing that crunchy coating on! This double-dredge is what gives your chicken that super-textured, extra-crispy shell that holds up in the wrap.
Frying the Chicken Strips Perfectly
Time for the hot oil! You want about an inch of vegetable oil in a deep skillet, heated up to a happy 350°F. If it’s too cold, the chicken soaks up grease and gets floppy; too hot, and the outside burns before the inside is safe to eat.
Work in batches; crowding the pan drops that precious oil temperature down way too fast. Fry those glorious, breaded strips for about 3 to 4 minutes per side. You want them deep golden brown and cooked all the way through. Always double-check internal temperature to make sure it hits 165°F. Seriously, safety first when we’re dealing with poultry!
When they are done, pull them out immediately. Here’s an expert tip I learned the hard way: drain them on a wire rack set over a baking sheet instead of paper towels. Why? Paper towels trap steam underneath, and steam is the mortal enemy of crispiness! The rack lets air circulate, keeping that amazing crunch locked in until you’re ready to build your Crispy Chicken Wrap with Creamy Garlic Sauce.
Preparing the Homemade Creamy Garlic Sauce for Your Wrap
Now that you have perfectly crispy chicken resting, let’s get to the star flavor maker: the sauce! Honestly, this homemade creamy garlic sauce makes the difference between a good wrap and the best homemade chicken wrap you’ve ever had. It’s so easy, you’ll never buy a jarred garlic mayo again, I swear.
In a small bowl, all you need to do is bring everything together. Take that mayonnaise, the sour cream, your beautifully minced garlic, lemon juice, Dijon, and just a tiny shake of salt and pepper. Get your whisk out and just go to town whisking it all together until it’s completely unified and smooth. You’re aiming for something rich—you want it thick enough to hug the chicken, not run off the tortilla and drip everywhere. If it looks a little too stiff, maybe add the tiniest splash of water, but usually, it’s perfect right off the mix! If you’re curious about making the base of this sauce yourself, check out my homemade mayonnaise guide!
Assembling the Ultimate Crispy Chicken Wrap with Creamy Garlic Sauce
Okay, we have our crunchy chicken jewels and our dreamy garlic sauce ready—time for the grand finale! This is where we turn ingredients into the ultimate chicken dinner sandwich experience, but in wrap form. Assembly order matters here, trust me. Don’t just throw things in the middle; we stack strategically to avoid blowout!
First, let’s make sure those tortillas are happy. If you try to roll a cold one, it’s going to crack right when you least expect it! For the best fried chicken wrap assembly, you want them pliable and soft. You can see my favorite quick methods for making these wraps easy over on my wrap assembly guide.
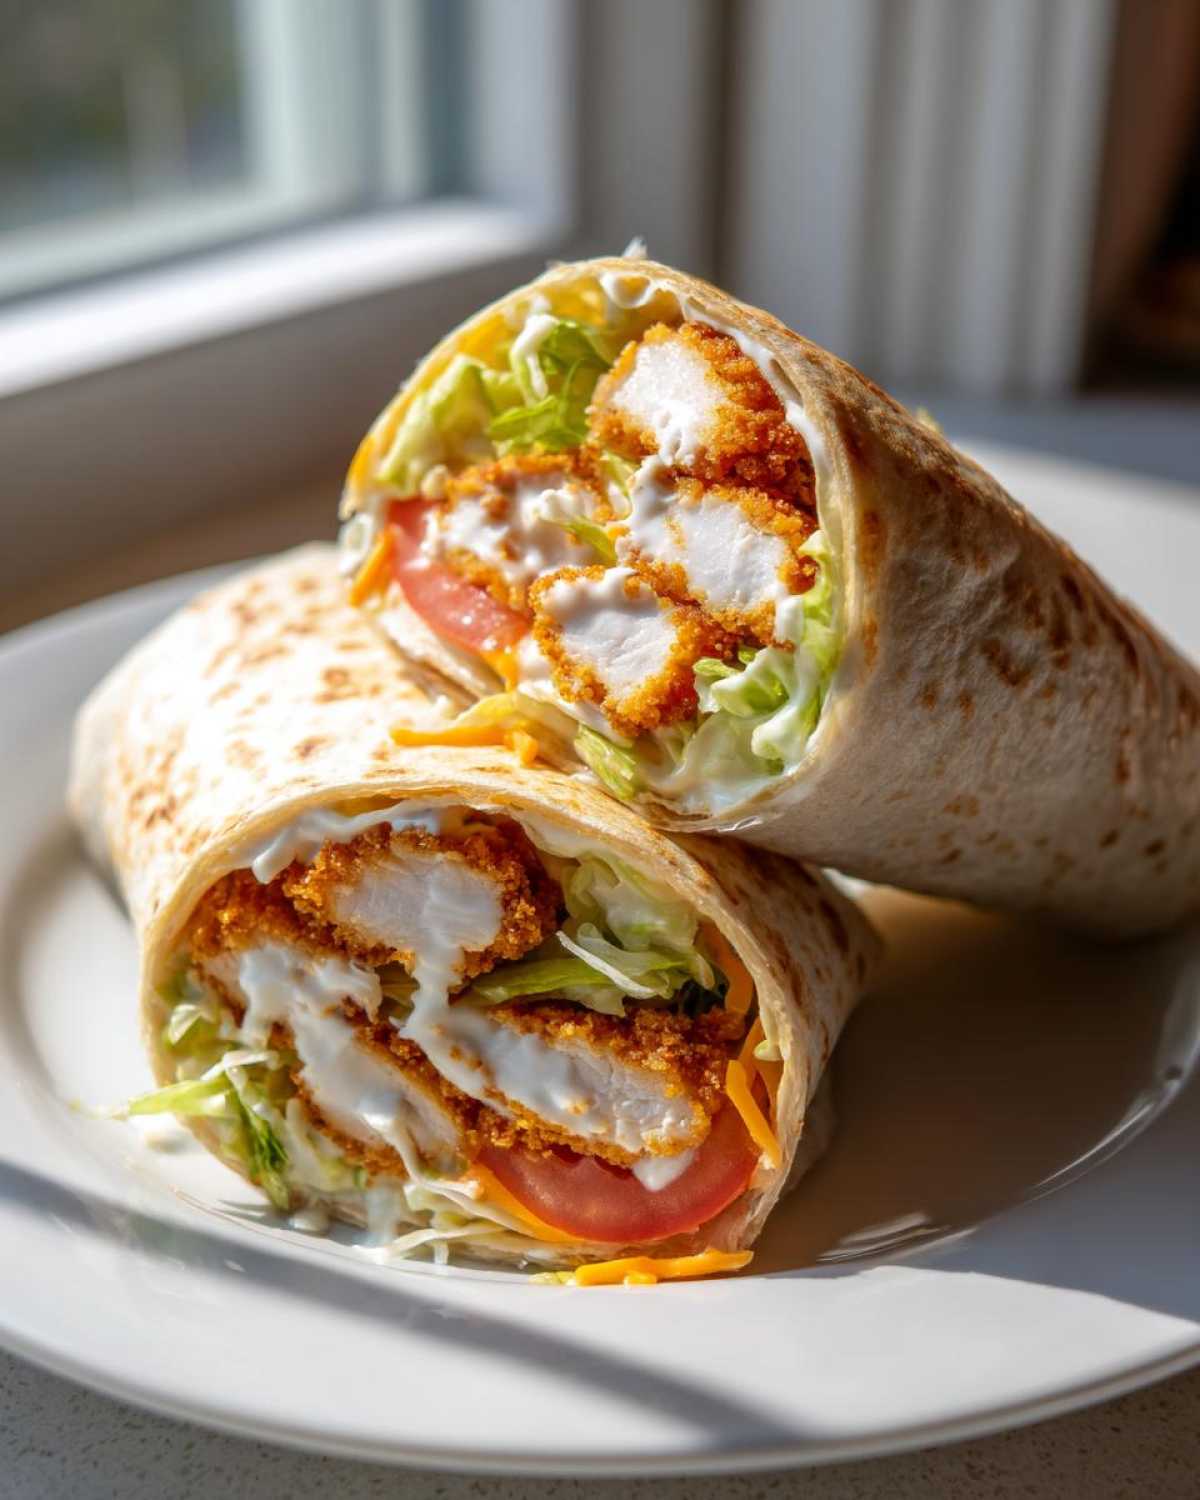
Warming Tortillas for Flexibility
I just toss my large flour tortillas into a dry skillet over medium heat for about 20 seconds per side, or you can zap them in the microwave wrapped in a damp paper towel for 15 seconds. This wakes them up, makes them stretchy, and ensures a tight, clean roll for your Crispy Chicken Wrap with Creamy Garlic Sauce without any nasty rips.
Once warm, lay your tortilla flat! Spread a generous swipe of that amazing creamy garlic sauce right down the center strip—this acts as a glue, but mostly, it just tastes fantastic. Then, layer on your crisp lettuce first—this acts as a moisture barrier between the hot chicken and the soft tortilla! Top that with your sliced tomatoes, a sprinkle of cheese, and lay your golden, crispy chicken strips right on top. Remember to fold the sides in first, then roll tightly from the bottom up. Slice it diagonally, and you’re ready!
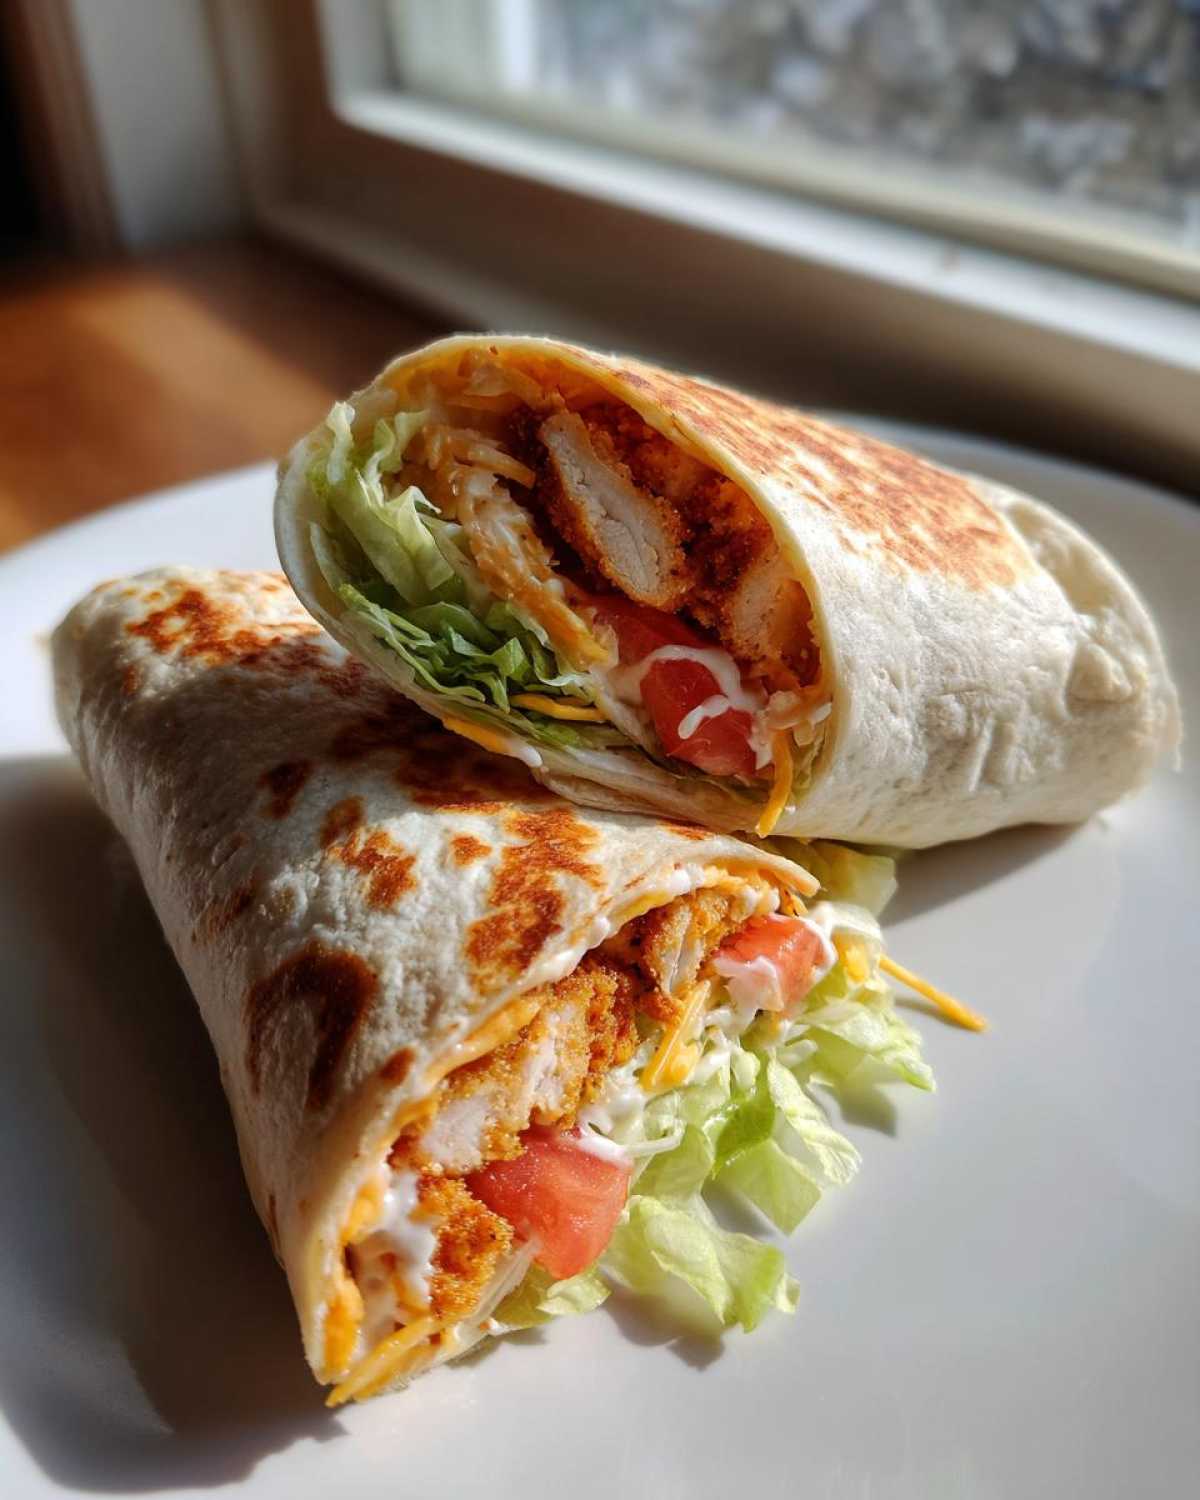
Tips for the Best Crispy Chicken Wrap with Creamy Garlic Sauce Results
We’ve got the technique down, but sometimes you need a little flexibility, right? I’ve tested this recipe exhaustively—because, well, I love eating it! These little tweaks ensure that whether you’re in a rush or just trying to lighten things up a bit, your Crispy Chicken Wrap with Creamy Garlic Sauce is still a total winner. I even have some tips for baking chicken that rivals frying, if you happen to be checking out my crispy baked chicken guide!
Air Fryer Alternative for Crispy Chicken
I know not everyone wants to deal with a pan of hot oil, and honestly, the air fryer is fantastic here if you prep right. It keeps the crunch without adding much extra fat. For an air fryer method, after you finish that crucial double-dredge step, you need to give the breaded chicken strips a good, even spray all over with cooking oil—don’t skimp here, that fat helps it brown!
Pop them into your air fryer basket, making sure they aren’t touching, and set the temperature to 400°F. Most batches will be perfectly golden and cooked through in about 12 to 15 minutes total. Just make sure you pull them out halfway through—maybe around the 7-minute mark—to flip them over. This ensures both sides get that beautiful, crunchy finish for your Crunchy Chicken Wrap Tutorial.
Ingredient Swaps for the Creamy Sauce
We love the combination of mayo and sour cream for that perfect richness, but I often have folks ask if they can adjust that. If you’re looking to add a little tang and cut back on the richness just slightly, swapping the sour cream for plain Greek yogurt is an excellent move. It works beautifully!
The Greek yogurt adds a nice, bright counterpoint to all that garlic and savory chicken. It still emulsifies wonderfully into the mayonnaise, giving you that thick, coating texture we want for the Creamy Garlic Sauce Chicken Wrap. Remember, you can always make a bigger batch of this sauce; it stores great on its own!
Variations on Your Crunchy Chicken Wrap Tutorial
So you nailed the basic Crispy Chicken Wrap with Creamy Garlic Sauce—awesome! But half the fun of cooking is messing around and making it truly *yours*, right? This recipe is such a solid base that you can twist it in so many directions without messing up that crucial crunch or the creamy sauce!
If you’re looking to shake things up next time, I highly recommend diving into some different vegetable mixes or cranking up the heat a notch. I’ve gathered a few of my favorite ideas for new toppings and flavor profiles in this quick guide, which you can find right here!
First off, let’s talk spice. If you like things with a little kick, don’t just sprinkle hot sauce on top later! Mix a teaspoon of smoked paprika and a half teaspoon of cayenne pepper right into that flour/panko breading mix before you flour your chicken. It fries up beautifully, and you get a gentle, smoky heat throughout the entire piece of chicken!
For a seriously fresh take, ditch the cheddar and swap in some crunchy, thinly sliced red cabbage mixed with a squeeze of lime juice. It adds amazing color and texture contrast! Or, if you’re feeling like going slightly Southwest, leave the lettuce out and add some black beans and corn to the filling. Remember, the sauce is so powerful, it ties even the wildest flavor combination together perfectly!
Storage and Make Ahead Creamy Sauce for Wraps
You know I love making things ahead of time, especially for busy weeknights, but when it comes to something as glorious as a Crispy Chicken Wrap with Creamy Garlic Sauce, crispiness is key! You’ve got two main components to worry about storing: the cooked chicken and that heavenly sauce.
Let’s talk about the delicious make ahead creamy sauce first because that’s the easiest win! You can mix up that creamy goodness completely, cover it tightly, and tuck it into the fridge for up to three full days. It tastes just as bright and punchy on day three as it did when you first whipped it up, maybe even a little more married in flavor! If you want to get ahead on all your sauce needs, I have some general sauce storage tips here.
Now, the chicken is trickier. You *can* store the fully cooked, breaded chicken strips in an airtight container in the fridge, but I won’t lie—they will lose a bit of that fresh, just-fried crunch. If you’re meal prepping, the absolute best advice I can give you for maximizing crispness is to cook the chicken the day you plan to eat, wrap it fresh, and go! That’s how you get the true experience.
If you absolutely must prep the chicken ahead, don’t even think about the microwave! That will turn your golden crust instantly sad and soggy. If you need to reheat, use the oven or an air fryer. Pop the strips on a baking sheet (make sure they aren’t touching!) in a preheated oven at 375°F for about 8 to 10 minutes, or in the air fryer around 380°F for 5 minutes. This shocks the crust back into being crunchy while gently warming the inside. Once they are hot and crispy, slice them up, warm your tortillas, and build your easy chicken wrap with dipping sauce right away!
Frequently Asked Questions About This Recipe
I always get so many great questions after folks try making this wrap for the first time! It’s a recipe with a few key steps, so I want to make sure everyone gets that perfect, satisfying result every time they build their Crispy Chicken Wrap with Creamy Garlic Sauce. Here are the things I get asked about the most!
Can I bake the chicken instead of frying for this Crispy Chicken Wrap with Creamy Garlic Sauce?
That’s a great question, especially if you’re trying to keep things lighter! While frying gives you that unmatched, deep, crunchy coating, you absolutely can use the air fryer method I mentioned earlier; it gets super close! Baking on a sheet pan in a regular oven is possible, but honestly, it tends to dry out the crust a little more than the air fryer does. If you do bake, make sure you still use lots of cooking spray on the outside of that breading so it has the best chance of crisping up! For the full air fryer details, go ahead and check out the tips section.
How do I prevent the wrap from getting soggy?
Sogginess is the enemy of the perfect wrap, isn’t it? This is where assembly order makes a huge difference—it’s all about creating little protective barriers! When you lay out your warm tortilla, don’t put the chicken directly onto the dough. First, spread your creamy garlic sauce down the middle. Then, use your crisp lettuce as the next layer. That lettuce acts like armor, protecting the flour tortilla from getting soaked by the chicken juices or extra sauce. Layer your chicken on top of the lettuce, and you’ll have a beautiful, structurally sound satisfying lunch wrap idea!
Can I use pre-made garlic aioli instead of the homemade creamy garlic sauce?
Look, if you are in a real pinch and need an easy chicken wrap with dipping sauce, sure, you can grab a good quality garlic aioli from the store. It will certainly work in a pinch! But if you’re looking for the absolute *best* experience, you just can’t beat that fresh sauce we whisked together. Our homemade version has a brighter fresh garlic punch and the perfect balance of tang from the sour cream and lemon juice. It’s what takes this wrap from good to genuinely memorable, so I always encourage making the sauce fresh if you can!
For more quick-fix wrapping ideas, take a look at my guide on easy chicken wraps with dipping sauce!
Estimated Nutritional Data for One Crispy Chicken Wrap with Creamy Garlic Sauce
I always like to give you a ballpark look at what’s in this awesome wrap, just so you know what you’re getting into! Now, please remember, this is just an estimate for *one* serving—that’s one wrap, built exactly the way the recipe suggests. Since we’re frying, the fat content will vary based on how much oil you soak up versus how well you drain it. And if you use Greek yogurt instead of sour cream, those numbers will shift a little bit, too!
This data is based on using the deep-fried chicken method. If you use the air fryer option, your fat and calorie counts will definitely trend lower, which is something to keep in mind for a lighter lunch!
- Serving Size: 1 wrap
- Calories: 650
- Protein: 40g
- Carbohydrates: 45g
- Fat: 35g
- Saturated Fat: 7g
- Trans Fat: 0g
- Sugar: 6g
- Sodium: 950mg
- Fiber: 3g
We’re putting a lot of good stuff in here, especially protein! But because we are frying and using mayo in the sauce, that fat number is relatively high. It’s totally worth it for the crunch, but definitely something to balance out with a lighter meal the next day!
PrintCrispy Chicken Wrap with Creamy Garlic Sauce

Follow these steps to make a satisfying wrap featuring extra crispy breaded chicken and a rich, homemade creamy garlic sauce.
- Prep Time: 20 min
- Cook Time: 15 min
- Total Time: 35 min
- Yield: 4 servings
- Category: Lunch
- Method: Frying
- Cuisine: American
- Diet: Low Fat
Ingredients
- 2 boneless, skinless chicken breasts, cut into strips
- 1 cup buttermilk
- 1 teaspoon salt
- 1/2 teaspoon black pepper
- 1 cup all-purpose flour
- 1/2 cup panko breadcrumbs
- 1/2 cup all-purpose flour (for dredging)
- Vegetable oil, for frying
- 4 large flour tortillas
- 1 cup shredded lettuce
- 1/2 cup sliced tomato
- 1/4 cup shredded cheddar cheese
- For the Creamy Garlic Sauce:
- 1/2 cup mayonnaise
- 2 tablespoons sour cream
- 2 cloves garlic, minced
- 1 tablespoon lemon juice
- 1/2 teaspoon Dijon mustard
- Pinch of salt and pepper
Instructions
- Prepare the chicken: Place chicken strips in a bowl and cover with buttermilk, salt, and pepper. Let soak for at least 30 minutes.
- Set up the breading station: In one shallow dish, mix the 1 cup flour and panko breadcrumbs. In a second shallow dish, place the remaining 1/2 cup flour.
- Dredge the chicken: Remove chicken from buttermilk, letting excess drip off. First, coat the chicken lightly in the plain flour. Second, dip it back into the buttermilk briefly. Third, press firmly into the flour/panko mix to coat completely.
- Cook the chicken: Heat about 1 inch of vegetable oil in a large skillet over medium-high heat (about 350°F). Fry the chicken strips in batches for 3-4 minutes per side until golden brown and cooked through (internal temperature of 165°F). Remove and drain on a wire rack.
- Make the sauce: In a small bowl, whisk together the mayonnaise, sour cream, minced garlic, lemon juice, Dijon mustard, salt, and pepper until smooth.
- Warm the tortillas: Heat the flour tortillas briefly in a dry skillet or microwave until pliable.
- Assemble the wraps: Lay a warm tortilla flat. Spread a generous amount of the creamy garlic sauce down the center. Layer with lettuce, tomato, shredded cheese, and 3-4 pieces of crispy chicken.
- Fold and serve: Fold in the sides of the tortilla, then roll tightly from the bottom up. Slice in half if desired and serve immediately.
Notes
- For an air fryer method, spray the breaded chicken with cooking spray and cook at 400°F for 12-15 minutes, flipping halfway.
- You can substitute Greek yogurt for sour cream in the sauce for a slightly tangier flavor.
- To make the sauce ahead, store it in an airtight container in the refrigerator for up to 3 days.
Nutrition
- Serving Size: 1 wrap
- Calories: 650
- Sugar: 6
- Sodium: 950
- Fat: 35
- Saturated Fat: 7
- Unsaturated Fat: 28
- Trans Fat: 0
- Carbohydrates: 45
- Fiber: 3
- Protein: 40
- Cholesterol: 110