

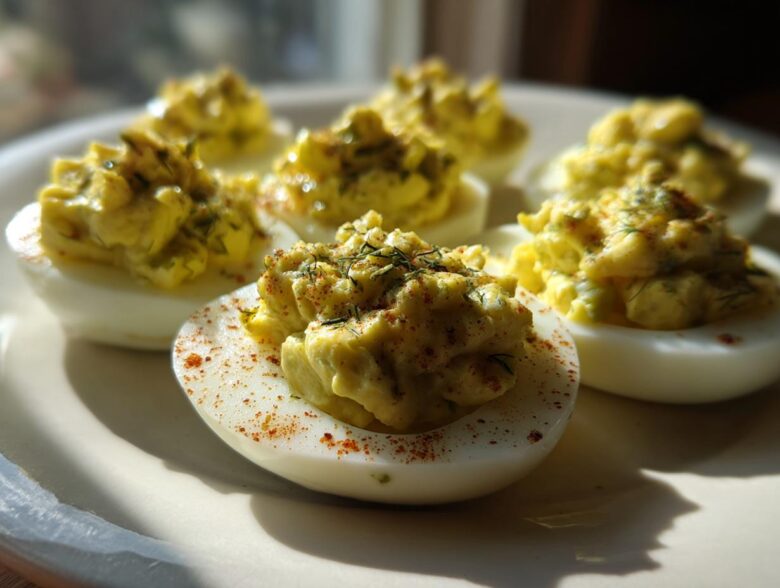
When I’m planning a barbecue, a holiday spread, or just a Tuesday when I have way too many eggs, there’s only one thing that truly steals the show: deviled eggs. Seriously, if you don’t bring deviled eggs, you’re bringing disappointment! Now, you can’t just serve any plain mayonnaise-and-mustard version, oh no. We need that extra ‘oomph.’ That’s why I’ve perfected my **Classic Deviled Eggs with Dill Pickle Relish** recipe. It takes that familiar creamy, rich filling and gives it a bright, punchy kick that cuts right through the fat. Trust me, the slightly tangy flavor from the relish and the splash of pickle juice is exactly what your spread is missing. People always ask for this one! If you’re looking for another great way to use up those hard-boiled beauties, check out my creamy five-minute avocado egg salad too.
Why You Will Make These Classic Deviled Eggs with Dill Pickle Relish Again and Again
I promise you, once you add the dill pickle relish to your standard deviled egg mix, you’ll never go back. It’s a game-changer! We focus on quality here, and these five reasons are why this recipe has become my go-to for every single cookout and holiday.
- The Flavor Pop: Forget boring yolks! The finely chopped dill pickle relish, combined with just a touch of juice, gives these a zesty, addictive tang that regular recipes just don’t have.
- Texture Perfection: We nail that secret creamy yolk filling every single time. They are velvety smooth and hold their shape beautifully—no dry, crumbly messes here!
- Party Ready and Stable: These are fantastic picnic and party appetizers because they stay looking great longer once you give them that crucial chill time.
- Foolproof Classic Base: Even though we added the relish twist (hello, Dill Pickle Deviled Egg recipe!), the base technique is pure, reliable classic American cooking.
- Zero Waste Hero: This recipe is perfect for using up those extra eggs right after Easter or when you’ve made a big batch of boiled eggs for salads.
These little bites are just so satisfying, and honestly, they disappear first off the platter every time. They just scream ‘easy appetizer’ even though they taste super gourmet!
Essential Ingredients for Classic Deviled Eggs with Dill Pickle Relish
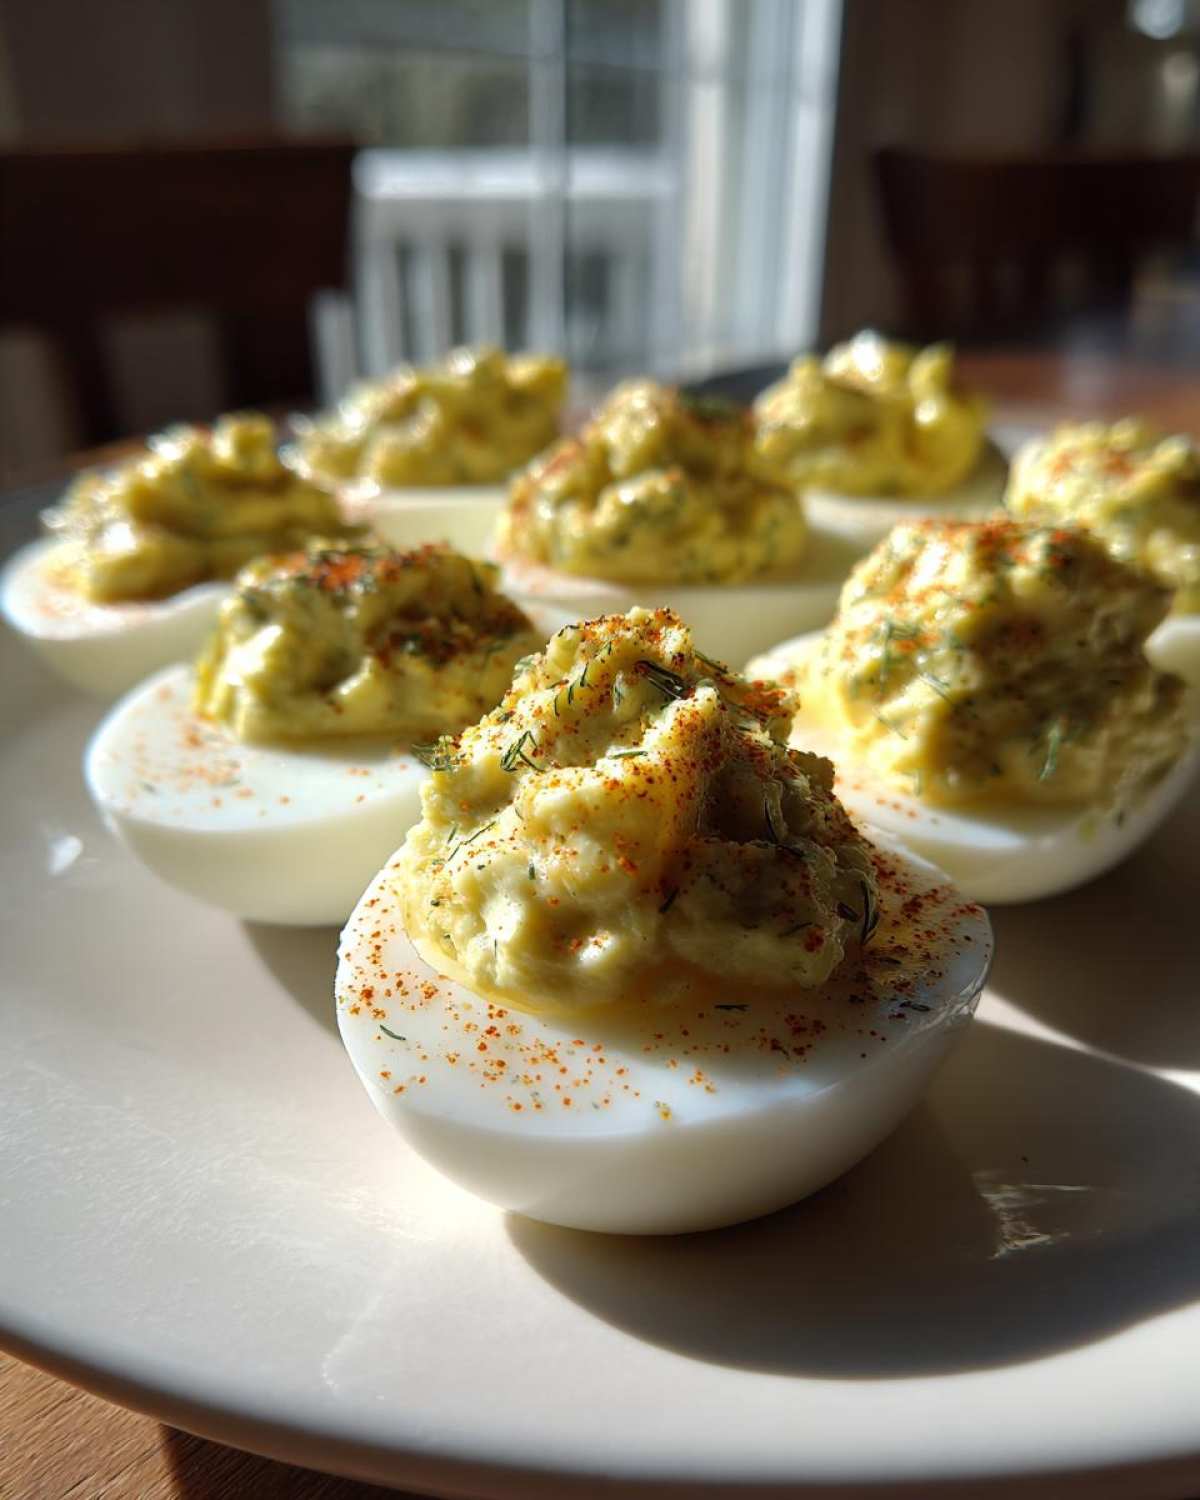
You don’t need a huge pantry for this recipe, but the quality of what you use really shines through. You’re generally starting with a dozen large eggs, which gives you a fantastic yield for any gathering. The creamy base comes from good old American mayonnaise—use the best one you have, or better yet, make your own! If you’re interested in learning how to whip up a batch of silky smooth homemade mayonnaise, check out my blender trick.
The stars of this show, though, are the two pickle components. You need about a quarter cup of dill pickle relish, and you have to chop it finely so it blends seamlessly into that perfect creamy yolk filling. Don’t forget that tablespoon of salty pickle juice! It brightens everything up. And finally, we keep it classic with humble yellow mustard, salt, and pepper.
Step-by-Step: How to Prepare Classic Deviled Eggs with Dill Pickle Relish
This process is totally straightforward, which is why it’s one of my favorite appetizers to make for a crowd. But like any good Southern style deviled eggs recipe, the technique for the egg itself is what separates the wow-factor from the ‘meh.’ We follow three basic stages: boil ’em perfect, mix ’em smooth, and chill ’em right!
Perfecting the Hard-Boiled Eggs
This is where people often mess up, and it’s always because they over-boil the egg! We need perfectly cooked yolks that aren’t green or rubbery. First, put your dozen large eggs in a saucepan and cover them with cold water, making sure the water sits about an inch over the top of the eggs.
Bring that water up to a hard, rolling boil over high heat. The second it hits that rolling boil—stop! Immediately pull the pan off the burner, slap a lid on tight, and set a timer for exactly 12 minutes. That resting time is the trick; it steams them perfectly. When the timer dings, you drain all the hot water and flood the pot with ice water. Keeping them submerged in that ice bath for a good 10 minutes stops the cooking immediately. Why? Easy peeling! Trust me, a cold egg peels so much better than a warm one.
Creating the Perfect Creamy Yolk Filling for Classic Deviled Eggs with Dill Pickle Relish
Once your whites are peeled and sliced in half, scoop those yolks into a medium bowl. Now, take a fork and mash them down until they look like fine, soft sand. I mean it—no lumps! If you leave lumps, you’ll never get that wonderfully smooth texture that makes these the Best Deviled Eggs Recipe. If you’re aiming for ultra-smoothness, try running those mashed yolks through a fine-mesh sieve before you add anything wet. It takes an extra minute, but wow, the result is worth it!
Once they are lump-free, it’s time to add the flair. Dump in the mayo, that trusty yellow mustard, the salt, and pepper. Then, add your chopped dill pickle relish and the tablespoon of that precious pickle juice. Mix it all up until it’s just uniform. Taste it now! This is your chance to balance the tang. If you want it sharper, add a tiny bit more pickle juice. If it feels too wet, add a pinch more mayo. Mix until it’s looking glossy and ready for piping.
Filling and Chilling Your Classic Deviled Eggs with Dill Pickle Relish
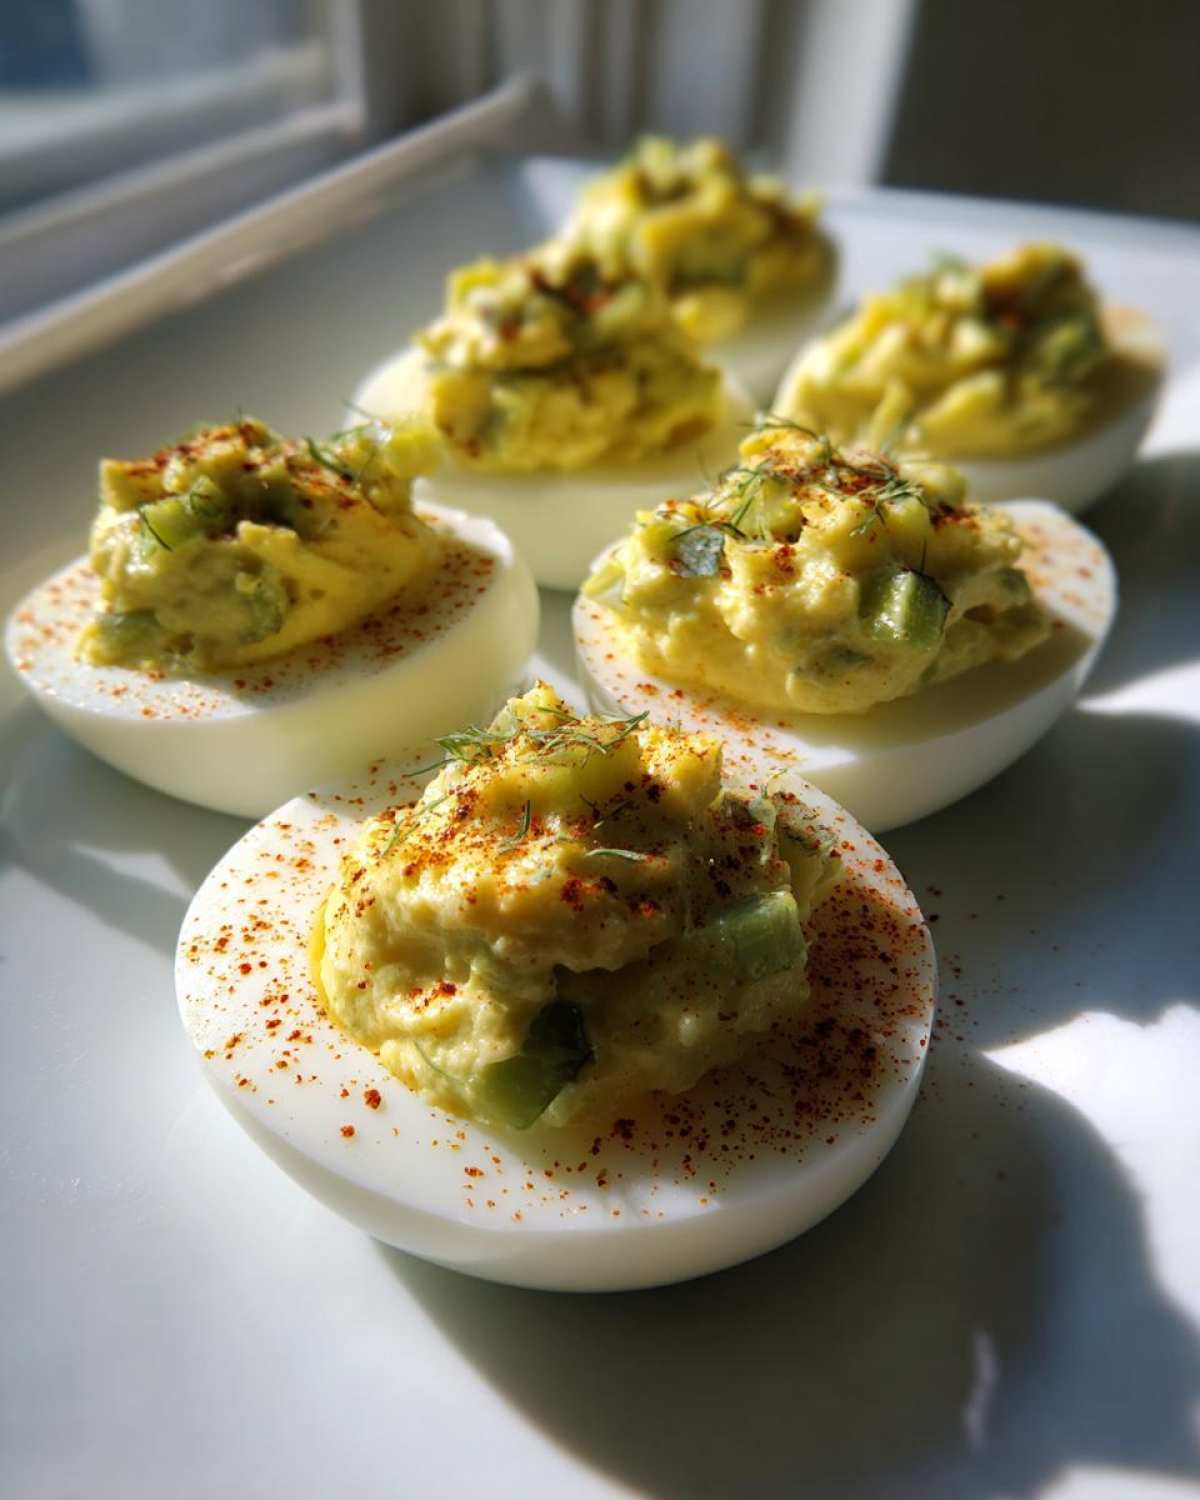
You’ve got your beautiful, tangy yolk mixture, and you’ve arranged your empty white halves on your serving platter. Now, we fill ‘em up! You can just use a small spoon to mound the filling high, which gives a nice, rustic look. But, if you want that classic presentation, carefully transfer your filling into a zip-top bag, snip a corner off with scissors—don’t cut too big a hole!—and pipe the filling back into the whites. It looks so professional!
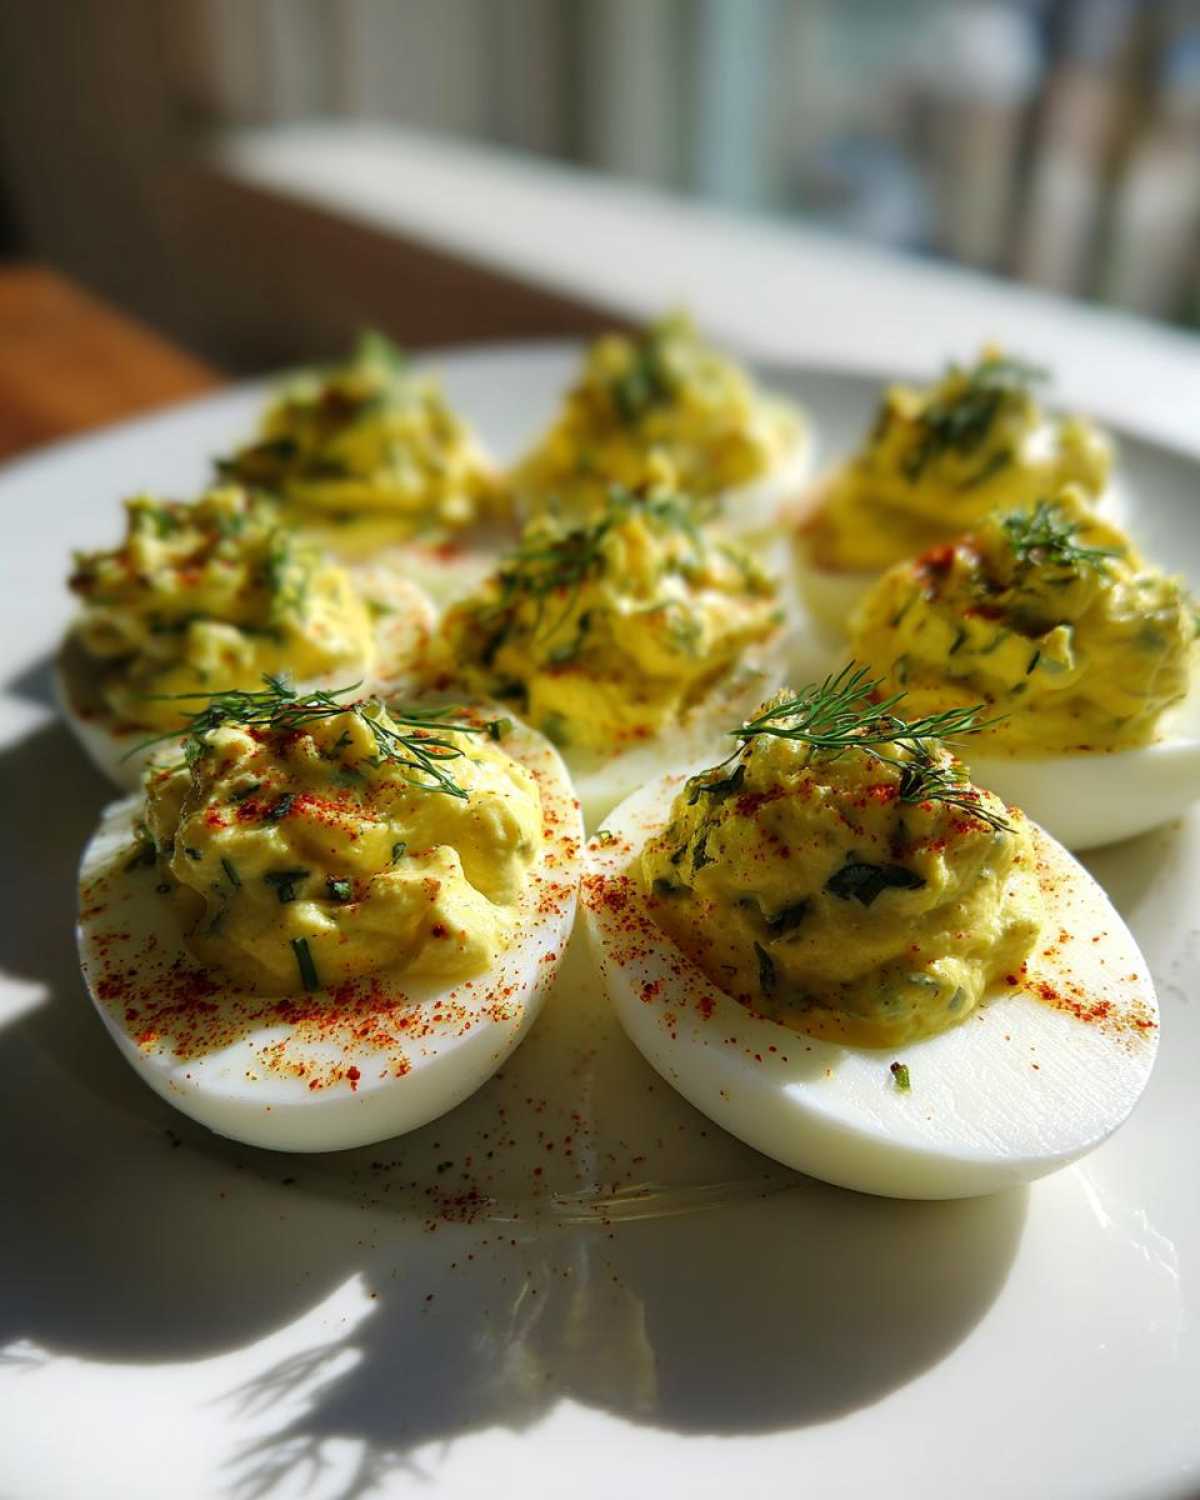
Here is the final, non-negotiable step: chilling! You must let these chill in the fridge for at least 30 minutes before anyone sees them. This isn’t just to make them cold; it lets the dill pickle liquid meld with the creaminess. If you skip this, they can look saggy fast. Once they’re chilled and firm, you can add your paprika and your fresh dill garnish.
If you need a deeper dive on making egg salad later, I’ve got you covered on my classic egg salad recipe notes, though these deviled eggs are certainly fussier—in a good way!
Tips for the Best Texture in Your Classic Deviled Egg Filling
Achieving that silky, mousse-like texture in the yolk filling is what separates a decent deviled egg from the absolute best! If you skimp on the mashing, you end up with a crumbly mess, and that’s just not acceptable for a party appetizer. My number one tip for that professional mouthfeel—the one you get at fancy brunches—is to press your mashed yolks through a fine-mesh sieve. Yes, it sounds extra, but trust me, it catches any stubborn little bit of uncooked white or dry yolk chunk, resulting in the smoothest filling of your life.
Also, try to let your hard-boiled yolks sit out on the counter for about 20 minutes before you mash them. That slight warmth makes them much easier to break down evenly. Cold yolks fight you! Once you add the mayonnaise, mustard, and that crucial dill pickle relish, mix slowly at first. You want that beautifully creamy yolk filling to come together without splattering everywhere. If you’re looking for other ways to make creamy mixtures, check out my ideas for creamy avocado egg salad; the mixing principles are similar!
Presentation: Elevating Your Classic Deviled Eggs with Dill Pickle Relish
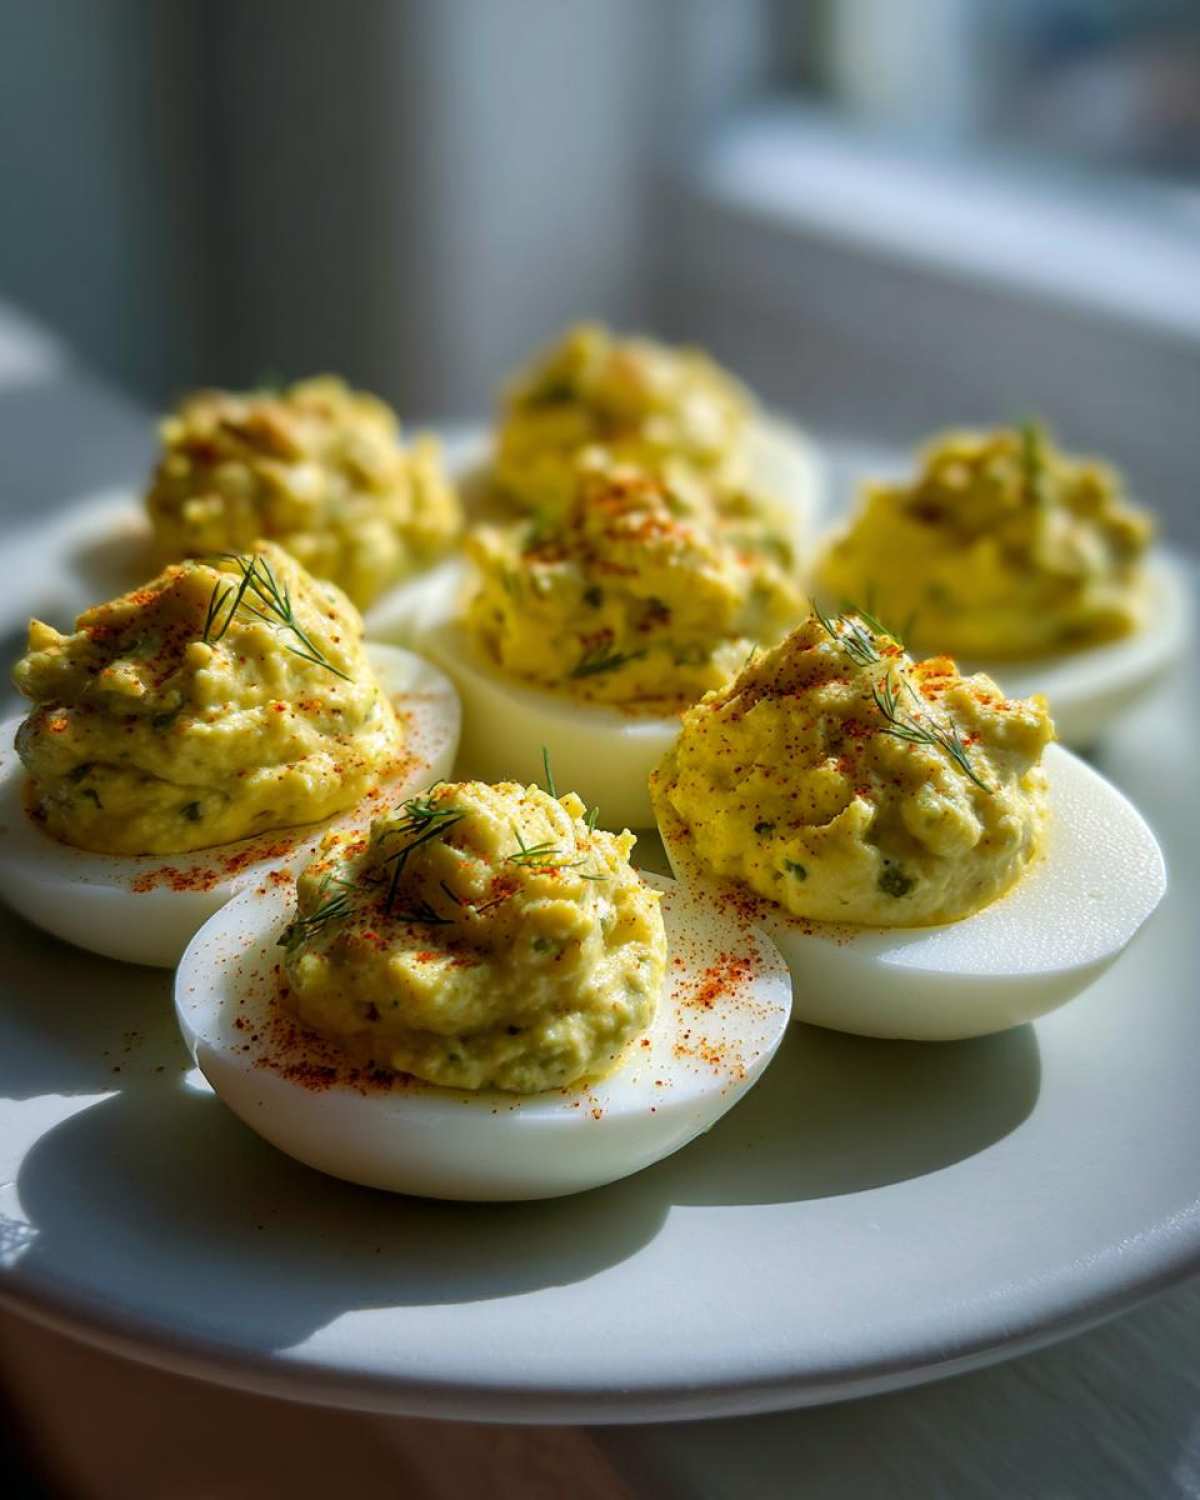
Okay, so we’ve nailed the flavor—that perfect punch of dill pickle relish cutting through the creamy yolk. But presentation matters, right? These little guys can look so dull if all you do is sprinkle sad, dusty paprika on top. While paprika is a non-negotiable classic finisher for me, we can certainly step it up, especially since we’re already going bold with the pickle flavor!
My absolute favorite way to serve these, particularly when I bring them to summer cookouts, is to lean into the dill theme. Instead of just a tiny pinch of paprika, I dust it on lightly, and then I grab some fresh dill sprigs I keep in the garden. Placing a teeny, tiny, perfectly placed sprig on top of each mounded filling just makes them look so fresh and intentional. It really highlights that we aren’t just making regular deviled eggs; these are gourmet!
If you want to really highlight that dill pickle twist, try this: use a sharp knife to cut the thinnest little slivers of actual dill pickle you can manage. You only need one tiny sliver, barely bigger than a fingernail clipping, perched right on top. It shows everyone immediately what flavor they are getting!
Another great trick, which leans into that Southern style deviled eggs quality, is a dash of celery salt instead of pepper on top. The salinity and slight savory crunch pair brilliantly with the pickle tang. I usually have a little tray where I put the paprika down one side, and celery salt or maybe even some finely chopped green onions down the other, so guests can choose their own adventure. Whatever you pick, make sure that filling is mounded nicely—it looks so much better than a flat layer pressed into the white!
Make Ahead and Storage for Classic Deviled Eggs with Dill Pickle Relish
Planning a big party or a long drive to the annual picnic? That’s smart thinking! Luckily, these little beauties are fantastic make ahead deviled eggs tips veterans love. You absolutely should not fill the eggs the night before, though. If you do, that beautiful, tangy yolk filling starts to weep a little moisture, and they just look sad and soggy by the time you serve them. Bleh!
The real secret, which I learned after ruining a platter once, is batch prepping components separately. You can completely cook and peel your dozen eggs ahead of time. Store those empty whites in an airtight container in the fridge. Then, mix up your entire creamy yolk filling—mayonnaise, mustard, that essential dill pickle relish, and seasoning—and store it in a separate airtight container.
Both the peeled whites and the filling will keep happily in the refrigerator for up to two full days. This buys you so much time on the day of the event! You just need about 15 minutes right before the guests arrive to spoon or pipe the filling back into the whites.
Tip: If you are making these for a tailgate or a long road trip, put the filled eggs on your serving platter, cover it tightly with plastic wrap, and keep the whole thing refrigerated until the very second you walk out the door. Speaking of planning ahead, if you’re looking for more make-ahead hacks for breakfast or brunch, you should take a peek at my easy egg muffin prep!
Remember, chilling the assembled eggs for that final 30 minutes before serving is key. It firms everything up so they are sturdy, taste their best, and you don’t have to worry about them melting while sitting out on the buffet table.
Frequently Asked Questions About Making Classic Deviled Eggs
When you dive into making deviled eggs—especially a flavored version like this one—I always get a few questions popping up. It’s totally normal! Here are the things folks ask me most often about getting these Classic Deviled Eggs with Dill Pickle Relish just right.
Can I use sweet pickle relish instead of dill in this Classic Deviled Eggs with Dill Pickle Relish recipe?
You technically *can*, but you shouldn’t if you’re aiming for this specific recipe! Sweet pickle relish uses sugar and lacks that sharp, bracing tang that dill provides. If you swap it in, you are turning this into a sweet-and-sour egg, which is a different vibe entirely. We are keeping this recipe true to the classic savory profile, just enhanced by the brightness of dill. If you love sweet relish, you’ll need to rethink the mustard and maybe add a touch more vinegar to balance that sugar!
What makes this the Best Deviled Eggs Recipe for a picnic or party appetizer?
Honestly, what makes this the Best Deviled Eggs Recipe is its stability and that incredible flavor payoff. Since we emphasize chilling the filling before piping the mixture back into the whites, the mixture holds its shape wonderfully, even on a warm day. Plus, because the dill pickle relish enhances the tanginess, the flavor doesn’t fade when the egg sits out for a bit. Unlike some very rich, mayo-heavy Southern style deviled eggs recipes that can feel heavy, the pickle keeps these feeling lighter and very refreshing for a crowd.
How do I prevent the filling from tasting too vinegary?
That’s where the pickle juice comes in—you have to go easy! That tablespoon measured in the recipe is my maximum suggestion. The pickle juice is potent, and you can always add, but you can’t take it out! Make sure you taste the yolks before you add all the pickle juice, especially because the relish itself is briny. If you love that strong vinegar in deviled eggs balance, add half the juice, mix, taste, and only then add the remaining juice if you still feel it needs more punch. It’s all about adjusting that tanginess to your personal palate!
If you are interested in learning more about balancing flavors, checking out my notes on classic egg salad might give you some extra inspiration on customizing fillings!
Estimated Nutritional Data for Classic Deviled Eggs with Dill Pickle Relish
Now, I’m not exactly tracking every single calorie when I’m whipping up a batch of this delicious appetizer, but I know many of you need the numbers! Based on standard USDA measurements for the ingredients listed above, here’s a quick rundown. Remember, these numbers are just estimates for one half of an egg.
- Calories: Around 75 per half
- Fat: About 6.5 grams
- Protein: A solid 3.5 grams
- Carbohydrates: Very low, around 0.8 grams
- Sodium: This is the highest point, understandably, due to the relish and added salt, totaling about 120mg.
These are surprisingly protein-packed little bites, which I think is just another reason they are such an excellent snack for parties!
Share Your Perfect Classic Deviled Eggs with Dill Pickle Relish
I truly hope you give these a try the next time you need a standout appetizer! They are so fun to make, and that little zing from the relish puts them over the top. Once you’ve tried this variation, please hop back over to the post and leave me a star rating below. I love hearing how your gatherings went and if your family loved the dill pickle addition as much as mine does. Did you try sprinkling them with celery salt? Did you use a piping bag? Drop all your thoughts and photos over on my blog—I can’t wait to see your beautiful platters!
Estimated Nutritional Data for Classic Deviled Eggs with Dill Pickle Relish
Now, I’m not exactly tracking every single calorie when I’m whipping up a batch of this delicious appetizer, but I know many of you need the numbers! Based on standard USDA measurements for the ingredients listed above, here’s a quick rundown. Remember, these numbers are just estimates for one half of an egg.
- Calories: Around 75 per half
- Fat: About 6.5 grams
- Protein: A solid 3.5 grams
- Carbohydrates: Very low, around 0.8 grams
- Sodium: This is the highest point, understandably, due to the relish and added salt, totaling about 120mg.
These are surprisingly protein-packed little bites, which I think is just another reason they are such an excellent snack for parties!
Share Your Perfect Classic Deviled Eggs with Dill Pickle Relish
I truly hope you give these a try the next time you need a standout appetizer! They are so fun to make, and that little zing from the relish puts them over the top. Once you’ve tried this variation, please hop back over to the post and leave me a star rating below. I love hearing how your gatherings went and if your family loved the pickle addition as much as mine does.
Did you try sprinkling them with celery salt? Did you use a piping bag? Drop all your thoughts and experiences—especially about that amazing creamy yolk filling— over on my blog! I can’t wait to see your beautiful platters of Classic Deviled Eggs with Dill Pickle Relish!
PrintClassic Deviled Eggs with Dill Pickle Relish
A recipe for traditional deviled eggs enhanced with the bright, tangy flavor of chopped dill pickle relish.
- Prep Time: 20 min
- Cook Time: 12 min
- Total Time: 32 min
- Yield: 24 halves
- Category: Appetizer
- Method: Boiling and Mixing
- Cuisine: American
- Diet: Vegetarian
Ingredients
- 12 large eggs
- 1/2 cup mayonnaise
- 2 tablespoons yellow mustard
- 1/4 cup finely chopped dill pickle relish
- 1 tablespoon pickle juice (from the relish jar)
- 1/2 teaspoon salt
- 1/4 teaspoon black pepper
- Paprika, for garnish
- Fresh dill sprigs, for garnish
Instructions
- Place eggs in a large saucepan and cover with cold water by about one inch. Bring the water to a full, rolling boil over high heat.
- Once boiling, immediately remove the pan from the heat, cover it, and let the eggs stand for exactly 12 minutes.
- Drain the hot water and immediately cover the eggs with ice water to stop the cooking process. Let them cool completely, about 10 minutes.
- Peel the cooled eggs. Slice each egg in half lengthwise and carefully scoop the yolks into a medium bowl. Place the empty white halves on a serving platter.
- Mash the yolks thoroughly with a fork until no lumps remain.
- Add the mayonnaise, mustard, chopped dill pickle relish, pickle juice, salt, and pepper to the mashed yolks. Mix until the filling is completely smooth and creamy.
- Taste the mixture and adjust salt or pickle juice if needed for your preference.
- Spoon or pipe the yolk mixture back into the hollowed egg white halves. For a classic look, use a spoon to mound the filling slightly.
- Chill the filled eggs for at least 30 minutes before serving.
- Just before serving, sprinkle the tops lightly with paprika and garnish each egg with a small sprig of fresh dill.
Notes
- For the smoothest filling, press the mashed yolks through a fine-mesh sieve before mixing in the other ingredients.
- If you do not have a piping bag, use a small spoon to fill the whites, or place the filling in a zip-top bag, snip off a corner, and pipe it in for a professional look.
- You can make the hard-boiled eggs and store the peeled whites and the yolk filling separately in the refrigerator for up to 2 days. Fill just before serving.
Nutrition
- Serving Size: 1 half
- Calories: 75
- Sugar: 0.5
- Sodium: 120
- Fat: 6.5
- Saturated Fat: 1.8
- Unsaturated Fat: 4.7
- Trans Fat: 0.1
- Carbohydrates: 0.8
- Fiber: 0.1
- Protein: 3.5
- Cholesterol: 75