

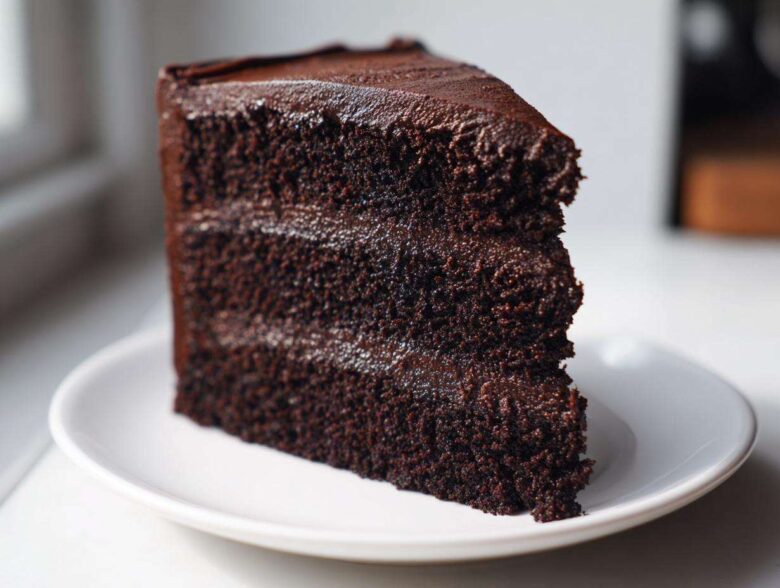
Are you tired? I mean, truly exhausted by the endless search for that one, perfect chocolate cake? You know the one I mean—the one moist enough to make you close your eyes on the first bite, but still simple enough that you don’t need a culinary degree to make it. Believe me, I’ve been there! After my little cousin’s eighth birthday demanded a showstopper, I stopped messing around and finally perfected what I now call the Ultimate Moist & Easy Homemade Chocolate Layer Cake. This is truly the homemade chocolate cake recipe that changed my entire outlook on baking chocolate desserts forever. Forget those dry, crumbly failures; this one is rich, decadent, and surprisingly quick to whip up. I actually keep the written master copy from my early tests tucked safely next to my About Us page because it represents finding that perfect balance of flavor and texture.
Why This Homemade Chocolate Cake Recipe is Your New Favorite
Honestly, I think this is going to overthrow every other chocolate recipe you have saved on your phone. It’s the kind of homemade chocolate cake that tastes like it took all day, but it really comes together fast. We nailed the texture and flavor balance, which is why it’s my go-to for every celebration now. It’s unbelievably rich without being fussy!
- It delivers on the promise of a truly moist chocolate cake—no dry corners allowed!
- It’s designed to be an easy chocolate cake from scratch, perfect even if you’re nervous about baking.
- The flavor is deeply decadent chocolate cake thanks to a little secret ingredient we dive into next.
Achieving the Ultimate Moist Chocolate Cake Texture
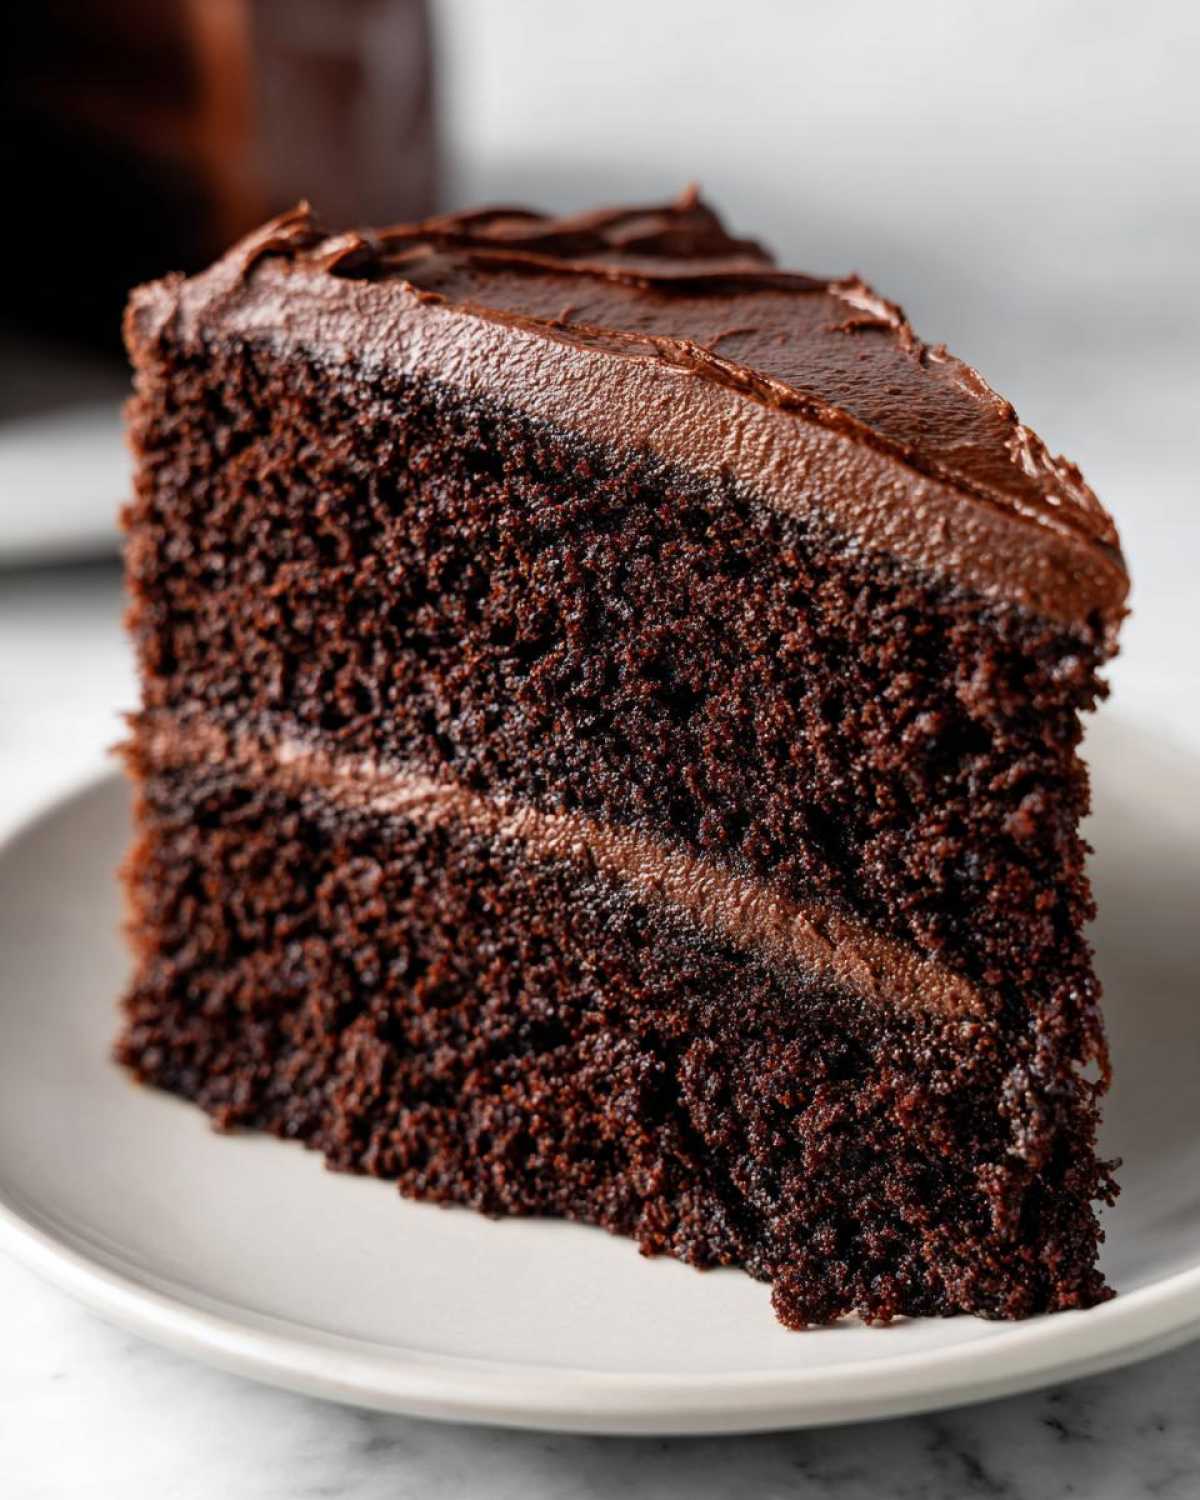
The moistness isn’t luck, I promise you! It’s the science working for us here. We use buttermilk, which keeps everything tender because of its acidity, and oil instead of just butter for added staying power. But the real kicker? That cup of hot coffee or water poured in right at the end. It basically blooms the cocoa powder, making the chocolate flavor huge while locking in incredible moisture. Trust me on this; it’s the key to the ultimate moist chocolate cake.
Simple Steps for an Easy Chocolate Cake From Scratch
If you’re looking for an easy chocolate cake from scratch, look no further. We only dirty one bowl for most of the mixing, which cuts down on cleanup time majorly. You just whisk your dry stuff, dump in the wet stuff, mix it up, and boom—you’re ready for the oven. No need for fancy equipment or complicated folding techniques. That’s what makes this the perfect accessible homemade chocolate cake for busy weekends!
Ingredients for the Best Homemade Chocolate Cake Recipe
Okay, so getting the shopping list right is half the battle when you’re aiming for the best chocolate cake recipe. Because this is a homemade chocolate cake, you want to make sure you have everything ready to go before you even turn on the oven. I generally lay everything out on the counter—you know, my version of mise en place? Having the right ingredients makes all the difference in achieving that deep, rich flavor profile we’re after, especially with the liquids. If you’ve already checked out my post on brown butter chocolate chip cookies, you know I’m serious about quality!
We break the ingredients down into two parts: the cake itself, which relies on those wet elements for moisture, and the frosting, which needs that perfect creamy consistency.
Cake Layer Ingredients
This is where the magic for the moist chocolate cake happens. Make sure you have these specific ratios right:
- 2 cups all-purpose flour
- 2 cups granulated sugar
- 3/4 cup unsweetened cocoa powder
- 2 teaspoons baking soda
- 1 teaspoon baking powder
- 1 teaspoon salt
- 1 cup buttermilk (vital for tang and texture!)
- 1/2 cup vegetable oil
- 2 large eggs (room temperature is best!)
- 1 teaspoon vanilla extract
- 1 cup hot water or hot brewed coffee (Seriously, try the coffee for a deeper flavor!)
Rich Chocolate Buttercream Frosting Ingredients
For the frosting, the temperature of your butter is non-negotiable for a beautifully smooth finish. You want it softened, but definitely not melty or greasy!
- 1 cup unsalted butter, softened
- 3 1/2 cups powdered sugar
- 1/2 cup unsweetened cocoa powder
- 1/2 cup milk or heavy cream
- 1 teaspoon vanilla extract
How to Prepare Your Homemade Chocolate Cake
Alright, let’s get baking! This is where we turn those gorgeous ingredients into the genuinely moist chocolate cake we’ve been dreaming about. Since this is the homemade chocolate cake recipe, taking a moment to prep correctly really pays off. Before we even touch the flour, please do me a favor: preheat your oven to 350°F (175°C). A little trick I learned from my baking mentor is to always check your oven temperature with a separate thermometer. Ovens lie! Calibrating ensures those 30 minutes in the heat do exactly what they’re supposed to do. Once that’s going, grease and flour up two 9-inch round pans. I use a little bit of my leftover batter remnants mixed with oil to grease them thoroughly, then a good dusting of cocoa powder instead of flour to prevent those white streaks on the dark cake.
Mixing the Batter for a Perfect Homemade Chocolate Cake
We’re focusing on efficiency here, which makes this an easy chocolate cake from scratch. Start by grabbing your big mixing bowl. Whisk together all your dry stuff first—the flour, sugar, cocoa powder, baking soda, baking powder, and salt. Whisking dry ingredients together is essential; it acts like a pre-sifting step and makes sure those leaveners are evenly distributed. Now, add in your buttermilk, oil, eggs, and vanilla. Beat this with your mixer on medium speed for precisely two minutes. That two minutes is important for getting air into the structure!
Here’s the important part for that amazing texture: carefully stir in the hot water or coffee until everything is smooth. And when I say thin, I mean it—the batter will look super watery. Don’t panic! That liquid is how we get that incredibly tender crumb in the final homemade chocolate cake. Just stir until no streaks remain; remember, overmixing at this stage kills the lightness.
Baking and Cooling the Chocolate Layer Cake
Once your batter is mixed, pour it evenly between those two prepared pans you coated earlier. They should look about half full. Pop them into your preheated oven and let them bake for 30 to 35 minutes. You want to watch them closely, especially near the 30-minute mark. The giveaway sign is that wooden pick test. Poke the very center; if it comes out clean or with just a few moist crumbs attached, they are done. If it’s sticky, give them five more minutes.
Cooling is crucial for a clean removal! Let the cakes rest in the pans on a wire rack for about 10 minutes exactly. Not longer, or they can start to sweat a bit. After those ten minutes, flip them out gently onto the rack to cool completely. Do not, I repeat, do not try to frost them when they are even slightly warm, or you’ll end up with a melted, sad puddle of frosting instead of a beautiful chocolate layer cake.
Assembling the Rich Chocolate Cake with Chocolate Frosting
While the layers cool, whip up that rich frosting—it’s super simple, just creaming that room-temperature butter until it looks fluffy, then slowly adding the powdered sugar and cocoa powder alternately with the milk. Beat until it’s velvety smooth. Once your cakes are completely cool—and I mean stone cold—it’s time to layer up! Put your first layer down on your serving plate. Scoop about a third of the frosting right onto the top and spread it evenly. Seriously, put a good layer on there; you want that rich chocolate cake experience!
Set the second layer on top and then do the sides. Now, here’s my pro tip for making this look bakery-worthy: do a thin “crumb coat” first. Just take a tiny bit of frosting and lightly brush all over the cake to trap any loose crumbs. Pop the whole thing in the fridge for 15 minutes to set that layer. Then, go ahead and apply the rest of that gorgeous chocolate cake with chocolate frosting smoothly. You’ll find you get such a clean finish when you build up layers like that. You can find a great video reference for crumb coating if you check out the steps on my post about one-bowl fudgy brownies—the technique is the same!
Expert Baking Tips for a Truly Moist Chocolate Cake
Okay, now that you know the steps for making this homemade chocolate cake, let’s talk about elevating it past just ‘good’ to ‘absolutely unforgettable.’ These little tips are what separate folks who occasionally bake from people who bake consistently great cakes, year after year. I’ve learned these lessons the hard way—usually by having to throw out a collapsed or dry cake!
Ingredient Temperature and Quality for Homemade Chocolate Cake
This is probably the easiest way to bump up the quality of your homemade chocolate cake. Room temperature eggs and buttermilk are crucial! When cold ingredients hit the creamed butter and sugar, it seizes up and tightens the batter, resulting in a denser, less airy cake. Take them out about an hour before you plan to start mixing. Also, please don’t skimp on the cocoa powder. Using a high-quality Dutch-processed cocoa makes a shocking difference in the depth of that rich chocolate cake flavor.
The Role of Hot Liquid in This Classic Chocolate Cake Recipe
I know it feels weird adding near-boiling water or coffee to cake batter, but it’s critical for our classic chocolate cake recipe. Heating the liquid ‘blooms’ the cocoa. That means the heat unlocks all the cocoa solids’ deep, beautiful flavor compounds that usually stay locked away. When the cocoa blooms, you get that intensely satisfying, almost fudgy chocolate taste we look for in the ultimate chocolate cake, without having to add extra fat or sugar to compensate for flatness.
Making This Easy Chocolate Cake From Scratch Ahead of Time
Planning a big party or just want to save yourself the stress on a busy birthday morning? I totally get it. The good news is that this homemade chocolate cake is actually even better when you let it rest a little! It’s perfect for making ahead. You can bake the layers and have them stored safely a full day before you even think about mixing up that glorious frosting. This organizational trick helps immensely when aiming for a showstopper.
For the layers, you must let them cool completely, like I stressed before. Once they are cool, wrap each one tightly—I mean TIGHTLY—in a layer of plastic wrap, and then give them a second wrap in aluminum foil. They are basically sealed for freshness!
You can store these wrapped layers at room temperature for about 24 hours, but if you’re making them further out, the freezer is your best friend. They freeze beautifully for up to two months! It’s amazing; just let them thaw on the counter, still wrapped, for several hours before unwrapping them to frost. Storing them chilled before frosting really helps them stay sturdy for that beautiful layering we did earlier, which is something I talk about when managing make-ahead meals like my make-ahead casserole recipe.
What about the finished cake? If you have leftovers of this easy chocolate cake from scratch (which I doubt you will, honestly), just store it under a cake dome or loosely covered with foil at room temperature for two or three days. If you need longer, the fridge works, but remember, cold temperatures can sometimes make chocolate cakes a little firm. If you do refrigerate it, just remember to let a slice sit out on the counter for about 30 minutes before serving so it can soften back up into that perfect, ultimate moist chocolate cake texture!
Frequently Asked Questions About This Homemade Chocolate Cake
I know when you are embarking on making a homemade chocolate cake, especially when it’s going to be the star of a birthday party, questions pop up! It’s totally normal. I’ve gathered the ones I get asked most often about this specific recipe. Don’t worry if you’re new to baking; this is meant to be easy!
Can I use regular milk instead of buttermilk in this moist chocolate cake?
You absolutely can, sweetie! If your fridge is staring back at you empty of buttermilk, don’t panic and run to the store. Buttermilk is what gives this moist chocolate cake that slight acidity that tenderizes the crumb, but you can fake it in a pinch. Just take one cup of regular milk—whole milk is best if you have it—and stir in one tablespoon of white vinegar or lemon juice. Let that sit on the counter for about five to ten minutes until it looks slightly curdled. That’s your homemade buttermilk substitute, and it works just fine for this rich chocolate cake!
What is the best way to store leftover rich chocolate cake?
Oh, leftover rich chocolate cake? What is that? (Just kidding, my husband always tries to sneak slices the next day!) The best way to keep this cake fresh is actually at room temperature, provided your kitchen isn’t scorching hot. Keep it in an airtight container or under a sealed cake dome for two to three days. It stays incredibly moist thanks to the oil content. If you added cream cheese frosting, or if you need to keep it longer than three days, then yes, put it in the fridge, but remember to pull out the slices about 30 minutes before serving so the texture softens up again.
Is this suitable as a beginner chocolate cake recipe?
Yes, yes, and a thousand times yes! This is the definition of a beginner chocolate cake recipe, honestly. We stuck to the core principle of making this an easy chocolate cake from scratch by using the wet-into-dry method in one main bowl. There’s no tricky folding, no separating eggs, and no complicated techniques. If you can measure ingredients and use an electric mixer for two minutes, you can conquer this homemade chocolate cake and wow everyone at the table!
Estimated Nutritional Data for This Homemade Chocolate Cake
Now, I know some of you amazing bakers out there are curious about the numbers, and I totally respect that! Having an idea of what’s in the delicious thing you just made is smart. Remember, because this is a massive, deeply satisfying slice of the homemade chocolate cake, things like sugar and fat are going to be there—that’s what makes it so gloriously rich!
I ran these standard ingredients through a basic calculator to give you a rough idea of what’s in one generous slice suitable for celebrating a birthday chocolate cake moment. These numbers are just estimates based on the recipes I provided. If you use different brands or heavier cream in the frosting, those numbers will shift a little bit, so consider this your ballpark figure!
Here is the estimated nutritional breakdown per slice:
- Serving Size: 1 slice
- Calories: 450
- Sugar: 55g
- Sodium: 300mg
- Fat: 25g
- Saturated Fat: 14g
- Unsaturated Fat: 11g
- Trans Fat: 0.5g
- Carbohydrates: 58g
- Fiber: 2g
- Protein: 5g
- Cholesterol: 75mg
So, while it’s definitely a little treat, it’s homemade, and you know exactly what went into it—no weird stabilizers or ingredients you can’t pronounce! That’s the beauty of making your own ultimate chocolate cake!
Share Your Ultimate Chocolate Cake Experience
Whew! We made it through the oven timer, frosting smears, and layer stacking marathon. Now, this is the part I love most: hearing from you! If you just pulled this homemade chocolate cake out of the oven, or if you managed to decorate it perfectly for a big event, I absolutely need to know!
Did you try the hot coffee trick, and did it give you that deep, mysterious chocolate flavor I promised? Was this the easiest chocolate layer cake you’ve ever assembled? Please take a moment to leave a star rating right below this post. Seeing those high ratings is like the best compliment I could ever receive because it means my family’s hard work translating this recipe is paying off for you, too.
And if you’re on social media, snap a picture of your finished masterpiece! Tag me! I am always scrolling through, looking at all your gorgeous spreads, frosting swirls, and happy faces gathered around that perfect slice of rich chocolate cake. If you’ve got any other genius little tips for keeping this moist chocolate cake ultra-fresh for leftovers, drop those in the comments below, too. We’re all in this baking adventure together! For more of my favorite tried-and-true recipes and baking adventures, feel free to browse around my main blog page!
PrintUltimate Moist & Easy Homemade Chocolate Layer Cake
A simple recipe for a rich, moist chocolate layer cake with homemade chocolate buttercream frosting, perfect for any occasion.
- Prep Time: 20 min
- Cook Time: 35 min
- Total Time: 55 min
- Yield: 12 servings
- Category: Dessert
- Method: Baking
- Cuisine: American
- Diet: Vegetarian
Ingredients
- 2 cups all-purpose flour
- 2 cups granulated sugar
- 3/4 cup unsweetened cocoa powder
- 2 teaspoons baking soda
- 1 teaspoon baking powder
- 1 teaspoon salt
- 1 cup buttermilk
- 1/2 cup vegetable oil
- 2 large eggs
- 1 teaspoon vanilla extract
- 1 cup hot water or hot brewed coffee
- 1 cup unsalted butter, softened (for frosting)
- 3 1/2 cups powdered sugar (for frosting)
- 1/2 cup unsweetened cocoa powder (for frosting)
- 1/2 cup milk or heavy cream (for frosting)
- 1 teaspoon vanilla extract (for frosting)
Instructions
- Preheat your oven to 350°F (175°C). Grease and flour two 9-inch round cake pans.
- In a large bowl, whisk together the flour, sugar, cocoa powder, baking soda, baking powder, and salt.
- Add the buttermilk, oil, eggs, and vanilla extract to the dry ingredients. Beat with an electric mixer on medium speed for two minutes.
- Carefully stir in the hot water or coffee until the batter is smooth. The batter will be thin.
- Pour the batter evenly into the prepared cake pans.
- Bake for 30 to 35 minutes, or until a wooden pick inserted into the center comes out clean.
- Let the cakes cool in the pans for 10 minutes before inverting them onto a wire rack to cool completely.
- While the cakes cool, make the frosting: Beat the softened butter until creamy. Gradually add the powdered sugar and cocoa powder, alternating with the milk or cream. Beat until smooth. Stir in the vanilla extract.
- Once the cakes are completely cool, place one layer on a serving plate. Spread about one-third of the frosting over the top. Place the second layer on top and frost the top and sides of the entire cake.
Notes
- Using hot coffee instead of hot water deepens the chocolate flavor without making the cake taste like coffee.
- Do not overmix the batter after adding the wet ingredients to keep the cake tender.
- For extra moistness, wrap cooled cake layers tightly in plastic wrap and chill them before frosting.
Nutrition
- Serving Size: 1 slice
- Calories: 450
- Sugar: 55g
- Sodium: 300mg
- Fat: 25g
- Saturated Fat: 14g
- Unsaturated Fat: 11g
- Trans Fat: 0.5g
- Carbohydrates: 58g
- Fiber: 2g
- Protein: 5g
- Cholesterol: 75mg