

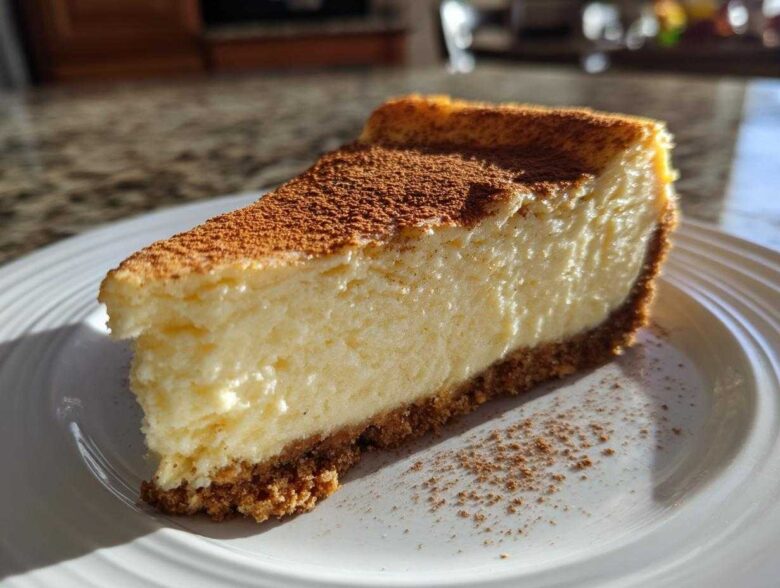
Oh, when the air gets crisp and the scent of pine starts floating around, you *know* I’m breaking out my dairy supplies for the best holiday treats. Forget those fussy cookies that crumble the second you look at them! If you want a real show-stopper that screams Christmas elegance, you absolutely need a show-stopping winter dessert on your table. Trust me, this baked eggnog cheesecake recipe is the crowned jewel of my December baking schedule. It’s impossibly rich, wonderfully creamy, and perfectly spiced. I’m going to walk you through exactly how I get that perfectly smooth top every single time. Get ready!
Why This Baked eggnog cheesecake recipe is Your Ultimate Holiday Centerpiece Desserts
I’ve tried every holiday dessert under the sun, but nothing stops a party like a gorgeous, tall cheesecake. Sure, you could make a quick ultimate Christmas cheesecake that comes together in an hour, but for me, the baked version is worth the time. It’s sturdy enough to handle slicing, yet melts in your mouth. This commitment to texture is what makes it one of my top show stopping winter desserts.
- The spice blend sings—nutmeg, cinnamon, and just a hint of vanilla.
- It looks absolutely stunning on a pedestal stand.
- The rich, full-fat filling ensures incredible depth of flavor.
It’s simply one of the best cheesecake recipes for Christmas because it feels incredibly decadent without being overly sweet.
Achieving That Perfect Creamy Holiday Baking Texture
The real secret to keeping this dessert soft and avoiding those awful cracks is the water bath, which professional bakers call a *bain-marie*. Don’t panic about the foil wrapping; it’s just insurance so no hot water sneaks into your crust!
The hot water creates gentle, humid heat all around the pan. This slows down the baking process right where it matters—the edge of the cake. When the edges cook too fast, they firm up and shrink, pulling the center down and causing cracks. We want slow, even heat for that luxurious, creamy holiday baking texture you expect.
Also, and this is always my first rule of cheesecake club: make sure your cream cheese and eggs are room temperature! It helps them blend into one perfectly smooth batter.
Essential Ingredients for the Best eggnog cheesecake recipe
Okay, let’s talk about what goes into making this masterpiece. I’ve listed the exact quantities needed below, but let’s cover the dairy situation! If you want that truly decadent mouthfeel that screams ‘Holiday Party Centerpiece,’ you must use full-fat eggnog. Don’t reach for the low-fat stuff here; we need that richness!
The other big secret—and you saw this in my other baking posts, like when I make that amazing frosting on my pumpkin spice cake—is bringing your cream cheese and eggs out about an hour before you start. Cold ingredients fight each other in the mixer, which leads to lumps. We want smooth sailing!
Here’s what you need:
- 1 1/2 cups graham cracker crumbs
- 1/4 cup packed light brown sugar
- 6 tablespoons unsalted butter, melted
- 3 (8 ounce) packages cream cheese, softened (That’s 24 ounces total, folks!)
- 1 1/2 cups granulated sugar
- 1 teaspoon vanilla extract
- 1/2 teaspoon ground nutmeg
- 1/4 teaspoon ground cinnamon
- 4 large eggs
- 1 cup eggnog (full fat recommended for flavor!)
- 1/4 cup heavy cream
Spiced Crust Variations and Substitutions
The specified crust here is a classic graham cracker base, and you won’t need much—just enough to cover the bottom nicely after you press it down. The brown sugar and butter melt around those crumbs and bake up beautifully crisp. This base holds all that creamy filling hostage, in the best way possible!
Now, if you are looking for a bit more punch, I sometimes switch this out, especially if I’m making a more rustic dessert. You can swap the graham crackers for finely crushed ginger snap cookies. When you do that, you get exactly what you’d expect from a wonderful Gingerbread Crust Cheesecake. It adds such a warm, spicy note that plays off the eggnog filling perfectly. Just use the same amount of crumbs and the same amount of melted butter—easy swap!
Step-by-Step Instructions for a Perfect eggnog cheesecake recipe
Okay, now that we have all our lovely ingredients waiting patiently, it’s time to assemble this beauty. You absolutely must preheat your oven to 325 degrees F first—no fudging that temperature! Make sure you wrap that 9-inch springform pan really, really well with heavy-duty foil. I always do two or three layers because the last thing we want is soggy crust!
First, get that crust mixed up—graham crumbs, brown sugar, melted butter—press it down firmly into the pan bottom, and give it a short ten-minute bake. Just enough to set it. Let it cool while you start the filling.
For the filling, remember what I said about room temperature cream cheese? Beat that until it’s silky smooth, then add the sugars and spices. Add those four eggs in one by one, mixing *just* until they disappear. Seriously, don’t overdo it here, or you’ll incorporate too much air and ruin the smooth eggnog cheesecake recipe texture we’re aiming for.
Finally, gently fold in your full-fat eggnog and the heavy cream. Pour that glorious batter right over your slightly cooled crust. Then, we move immediately to ensuring a proper bake!
Water Bath Technique for Smooth eggnog cheesecake recipe
This is where the magic—and the trouble-shooting—happens! You need a large roasting pan, and you’ll place your foil-wrapped cheesecake pan inside it. Now, carefully pour hot water into the roasting pan until it comes halfway up the sides of your springform pan. This setup protects your beautiful cheesecake with nutmeg flavor from cracking.
Bake for about 60 to 75 minutes. You want the edges set, but you should see a little wobble in the very center—that’s how you know it’s perfect. Now, resist the urge to pull it out right away! Turn the oven off, prop the door open just a crack, and let it hang out in that warm, steamy environment for a full hour. This slow, gradual cooling is key to preventing sunken tops. After the hour, take it out of the water bath, remove the foil, let it cool on a wire rack, and then cover and chill it for at least six hours. Overnight is always better for the best results!
Tips for Success with Your Creamy Holiday Baking
Even with the water bath working its magic, there are a few little secrets I use to take this from just ‘good’ to ‘absolutely legendary.’ When you’re deep into winter spiced baking, these small steps make a huge difference in the final product’s texture and overall holiday impact. You’ll want to focus on ingredient temperature and that amazing nutmeg boost.
First up, let’s reiterate: room temperature ingredients are non-negotiable! I know we touched on it, but seriously, your cream cheese and eggs need to be soft. If your cream cheese is cold, you’ll end up over-beating the mixture trying to smooth it out, and that introduces air, which equals cracks later on. It’s a vicious cycle we want to avoid!
My absolute favorite flavor enhancement comes from the nutmeg. The recipe calls for half a teaspoon of ground nutmeg in the filling—which is good—but if you want that ‘wow’ factor and really lean into those traditional eggnog flavors, you have to grate your own!
- Grab a whole nutmeg (they look like little brown gnarly pebbles) and a microplane grater.
- The smell when you grate it fresh is intoxicating; it’s totally different from the jarred stuff.
- A little dusting on top right before serving really wakes up the whole dessert!
Also, don’t be tempted to bump up the spice amounts too much just because you love spice. Too much ground spice—even nutmeg—can sometimes throw off the structure of the delicate cheesecake batter. I found that out the hard way mixing my pumpkin spice overnight oats last year when I nearly tripled the cinnamon!
Finally, when you’re beating in those eggs, use the lowest speed on your mixer. It sounds silly, but you’re just trying to combine, not whip air into the batter. Slow and steady mixing is how you guarantee that perfectly smooth, dense final product.
Make Ahead Christmas Desserts: Storing Your eggnog cheesecake recipe
The absolutely best thing about this creamy eggnog cheesecake? It’s designed for holiday hosting sanity! You know those days right before Christmas where you’re running around trying to whip up five different things? Well, this happens to be one of the best make ahead Christmas desserts you can choose.
I insist that you let it chill for a minimum of six hours, but honestly, overnight is where this recipe truly shines. When those spices have time to really marry with the cream cheese overnight in the fridge, the flavor deepens so much! It tastes more intense, more festive, and just better overall.
Once your cheesecake is completely chilled—and I mean, stone cold—you need to protect it properly. Since it’s going to be sitting in the fridge for a while, you want to trap all that beautiful creamy texture in without letting it absorb any fridge smells. I carefully wrap the *uncut* cheesecake directly in plastic wrap first. Then, I put it inside a proper cake carrier or a large, sealable container. That double layer is my standard protection plan against stray onion odors from dinner prep!
Now, can you freeze it? Yes, you absolutely can, but I usually save that for the New Year’s Eve leftovers! If you must freeze it, make sure you chill it solid first. Wrap it tightly with plastic wrap, then add a layer of aluminum foil. Freezing can sometimes change the texture slightly once thawed, making it a bit softer, which is why I prefer only chilling it for holiday gatherings.
When you’re ready to serve after chilling, just let it sit on the counter for about 20 or 30 minutes before slicing. That little bit of warmth takes the chill off the firmness and brings back that incredible, buttery smoothness. It makes serving your stunning eggnog cheesecake recipe a breeze!
Serving Suggestions for This Festive Creamy Desserts
We’ve spent hours making this gorgeous, creamy cheesecake, so we absolutely can’t skimp on the finish! Presentation here is everything. This is one of those gorgeous festive creamy desserts that almost looks too pretty to eat—*almost*. A plain cheesecake can be lovely, but adding a few simple textures on top elevates it to that ‘show-stopper’ status we were talking about earlier.
My go-to topping, which enhances that delicate nutmeg flavor already in the filling, is a simple homemade nutmeg whipped cream. Don’t even think about grabbing that canned stuff from the grocery store; my recipe is so fast, I promise you won’t miss the aerosol can!
To make the whipped cream, you just need one cup of *very* cold heavy cream. Throw it into a clean, cold bowl. Add about two tablespoons of powdered sugar (icing sugar works best here) and about a quarter teaspoon of fresh nutmeg—remember how I said grate it fresh? Do it now!
Whip it until you get stiff peaks. You want it firm enough to hold its shape when you dollop it on the slice. It should look light, airy, and smell amazing!
Once you’ve sliced your perfectly chilled eggnog cheesecake recipe, place a generous cloud of that whipped cream right on top of each piece. I often use a piping bag here if I’m feeling fancy, but a big spoon works just as well.
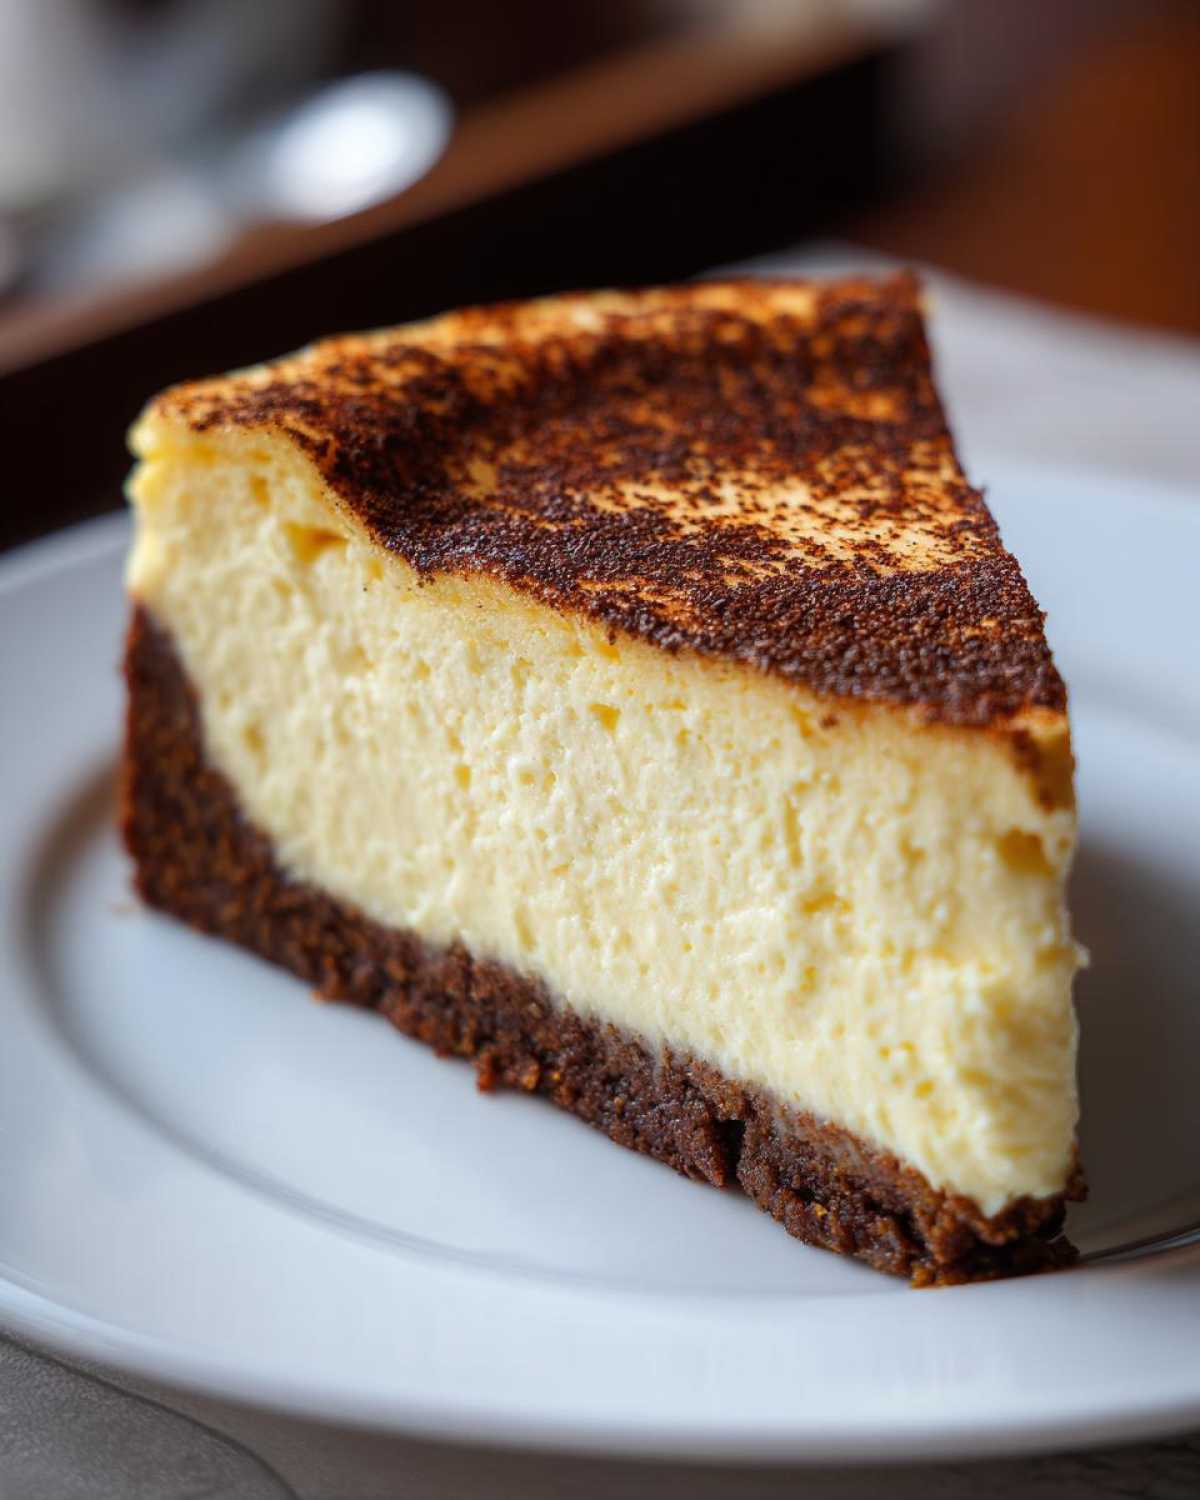
For the final aesthetic touch, you have a couple of choices depending on how festive you want to go:
- For elegant simplicity: Dust the entire slice very lightly with cinnamon or extra nutmeg right before serving. This is my favorite way when I want the eggnog flavor to shine the most.
- For a real pop of color and texture: Scatter a few sugared cranberries from my apple cinnamon muffins recipe trials around the base of the slice on the plate. They look like little jewels!
Just remember, whenever you serve this, make sure you’re using a warm, sharp knife to cut the slices. Wipe the knife clean between each cut. That’s the professional secret to a clean edge, ensuring every single serving looks as amazing as the one before it!
Frequently Asked Questions About the eggnog cheesecake recipe
I know baking a whole cheesecake can feel a little intimidating, especially when you want it perfect for a big holiday gathering. So, let’s tackle a few things I always get asked about this wonderful eggnog cheesecake recipe! It’s usually about structure, starting ingredients, or trying to shortcut the baking process.
Don’t worry about making mistakes; cheesecake is sturdy, and a little imperfection is part of the charm for any home-baked creation!
Can I make a No Bake Eggnog Treats version of this cheesecake?
That’s a great question! While I adore a chilled, simple no bake eggnog treats recipe when I’m feeling low-energy, this particular recipe is designed for the baked, dense, and creamy texture that I obsess over. A no-bake version relies on different stabilizers—usually gelatin or a different ratio of whipped cream—to set up firm.
Since we are using eggs here, this structure is set by the oven. If you are dead set on no-bake, you’ll need a recipe specifically designed for that, usually utilizing whipped topping or softened gelatin mixed into the dairy base before chilling. Those versions are great, but they aren’t quite as rich as this baked stunner!
What kind of eggnog works best for this cheesecake with Nutmeg Flavor?
When it comes to the eggnog, you want the best flavor payoff possible, right? That means **full fat**, hands down. The higher fat content in full-fat eggnog translates directly into a richer, smoother texture in your final cheesecake filling. Low-fat versions often have more water content, which can make your cheesecake slightly less creamy or even contribute to cracking because the water cooks out unevenly.
What about the alcohol content? That’s the other big question! If you use standard store-bought eggnog, it might have just a tiny bit of alcohol to preserve it. That’s totally fine; it won’t cook off completely, but it won’t hurt the set or the flavor—it just adds a tiny traditional undertone. If you are making your own spiked version, just be mindful that too much pure liquor can sometimes inhibit the eggs from setting properly, so stick close to the one-cup recommendation for your dairy liquid ratio.
Another thing: if you can find it, a high-quality, thick eggnog works best. Skip any runny, watery versions. We want thick, luxurious dairy for the best cheesecake with nutmeg flavor imaginable!
How do I prevent my cream cheese from getting lumpy when mixing?
This is the most common fear when making any baked cheesecake! Lumps happen when cold cream cheese meets sugar and mixer blades—it just doesn’t want to blend smoothly.
The absolute key here is patience and temperature. Take your cream cheese out at least an hour, maybe 90 minutes, before you plan to start. It should give easily when you gently press the middle with your finger; it shouldn’t feel cold or hard at all. It should feel soft, like room-temperature butter.
When you start mixing, use a paddle attachment if you have one, and start on medium-low speed just for the cheese until it’s totally smooth. You can try scraping down the sides of the bowl every minute or so. Once it’s creamy smooth, *then* you can add your sugars and spices. A smooth start means a smooth finish, which means no ugly bumps showing through on your beautiful top!
And remember that tip about the eggs? Add them one at a time after the cheese and sugar are blended, mixing *just* until the yolk disappears, then stop. Don’t beat the volume in; you want density, not airiness!
Estimated Nutritional Data for the eggnog cheesecake recipe
Now, I’m the first person to say I don’t look at the numbers when I’m diving into a holiday classic like this—I look at how fast the plate gets scraped clean! But if you’re someone who tracks things or is planning out a big holiday meal, it’s smart to have a rough idea of what you’re serving. Remember, this is a rich dessert; we aren’t skimping on the cream cheese or the eggnog here, so the numbers reflect that delightful decadence!
This breakdown is based on dividing the entire recipe, which yields 12 generous slices, using standard ingredient brands and preparation methods. Things like adding extra cream to the topping, or using a lighter eggnog, will shift these figures, so treat these figures as a general guide for your planning.
Here’s what you can generally expect per slice of this beautiful baked eggnog cheesecake:
- Calories: Around 450
- Total Fat: About 30g (Watch out for that Saturated Fat, that’s where the richness is!)
- Carbohydrates: Roughly 40g
- Protein: About 8g
- Sugar: Approximately 35g
Take those numbers with a grain of salt, though! That’s my official disclaimer. If you use low-fat cream cheese or skip the crust, those carbs and fat numbers will drop nicely. If you add a mountain of that nutmeg whipped cream on top, well, you’ll need to add a little extra to those figures! But seriously, for the sheer joy this eggnog cheesecake recipe brings to a chilly evening, who’s really counting?
Share Your Holiday Cheesecake Ideas
And there you have it! That’s my complete guide to perfecting the baked eggnog cheesecake recipe. From wrapping that springform pan tight for the water bath to grating fresh nutmeg over the top, I hope you feel armed and ready to tackle this show-stopper for your own holiday table. I truly believe that once you make this, it will become a yearly staple—it’s just that decadent and satisfying.
Now, I really, *really* want to know what you think! Did you try the ginger snap crust swap? Did you make the homemade whipped topping, or did you just go for a simple dusting? Please don’t be shy; details matter! Drop a comment below and let me know how your cheesecake set up and if it managed to survive long enough to get sliced at your party!
If you loved making this creamy holiday delight, I have tons of other festive inspiration over on the main blog page. We’ve got savory casseroles that make mornings easier and plenty of other holiday cheesecake ideas if you need a second dessert for your gathering. Don’t forget to tag me on social media if you snap a picture of your finished product—seeing your gorgeous desserts makes all this recipe testing worth it!
Happy baking this season, friends. Enjoy every rich, creamy bite!
PrintClassic Baked Eggnog Cheesecake with Spiced Crust
Make a rich, creamy baked cheesecake flavored with traditional eggnog spices, set on a crisp, spiced graham cracker crust.
- Prep Time: 25 min
- Cook Time: 75 min
- Total Time: 8 hours 40 min
- Yield: 12 servings
- Category: Dessert
- Method: Baking
- Cuisine: American
- Diet: Vegetarian
Ingredients
- 1 1/2 cups graham cracker crumbs
- 1/4 cup packed light brown sugar
- 6 tablespoons unsalted butter, melted
- 3 (8 ounce) packages cream cheese, softened
- 1 1/2 cups granulated sugar
- 1 teaspoon vanilla extract
- 1/2 teaspoon ground nutmeg
- 1/4 teaspoon ground cinnamon
- 4 large eggs
- 1 cup eggnog (full fat recommended)
- 1/4 cup heavy cream
Instructions
- Preheat your oven to 325 degrees F. Wrap the outside of a 9-inch springform pan tightly with heavy-duty aluminum foil.
- Prepare the crust: Combine graham cracker crumbs, brown sugar, and melted butter in a bowl. Press the mixture firmly and evenly into the bottom of the prepared springform pan. Bake for 10 minutes. Remove from the oven and let cool slightly.
- Prepare the filling: In a large bowl, beat the softened cream cheese with an electric mixer until smooth. Gradually beat in the granulated sugar until fully combined. Mix in the vanilla extract, nutmeg, and cinnamon.
- Beat in the eggs one at a time, mixing just until each egg is incorporated. Do not overmix.
- Gently stir in the eggnog and heavy cream until the batter is smooth.
- Pour the filling over the cooled crust in the springform pan.
- Place the foil-wrapped springform pan into a larger roasting pan. Carefully pour hot water into the roasting pan until the water reaches halfway up the sides of the springform pan (this creates a water bath).
- Bake for 60 to 75 minutes, or until the edges are set but the center still has a slight jiggle.
- Turn off the oven, prop the door open slightly, and let the cheesecake cool in the water bath for 1 hour.
- Remove the cheesecake from the water bath, remove the foil, and let it cool completely on a wire rack.
- Cover the cooled cheesecake and refrigerate for at least 6 hours, or preferably overnight, before serving.
- Serve chilled, topped with whipped cream and extra grated nutmeg.
Notes
- For the best texture, bring your cream cheese and eggs to room temperature before starting.
- If you prefer a stronger spice flavor, add 1/4 teaspoon of ground cloves to the filling mixture.
- To make a simple topping, whip 1 cup of cold heavy cream with 2 tablespoons of powdered sugar and 1/4 teaspoon of nutmeg until stiff peaks form.
Nutrition
- Serving Size: 1 slice
- Calories: 450
- Sugar: 35
- Sodium: 280
- Fat: 30
- Saturated Fat: 18
- Unsaturated Fat: 10
- Trans Fat: 0.5
- Carbohydrates: 40
- Fiber: 1
- Protein: 8
- Cholesterol: 120