

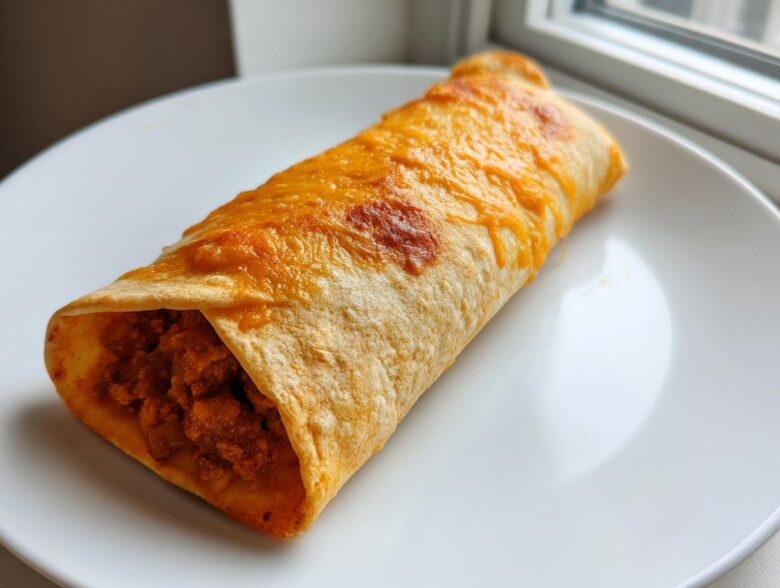
Oh my gosh, some nights are just surviving, right? You walk in the door, everyone’s hungry *now*, and you have zero energy for complicated cooking projects. This is where my absolute favorite dinner hero steps in: **cheesy pocket tacos**! Seriously, these things saved my sanity last Tuesday when soccer practice ran late and homework was piling up. Forget rolling out a million tiny things; these handheld pockets are fast, they are packed with that savory, seasoned ground beef, and best of all, they create the most gloriously gooey cheese explosion when you bite into them. If you need a Taco Night revolution that takes less than 30 minutes, you’ve found your winner.
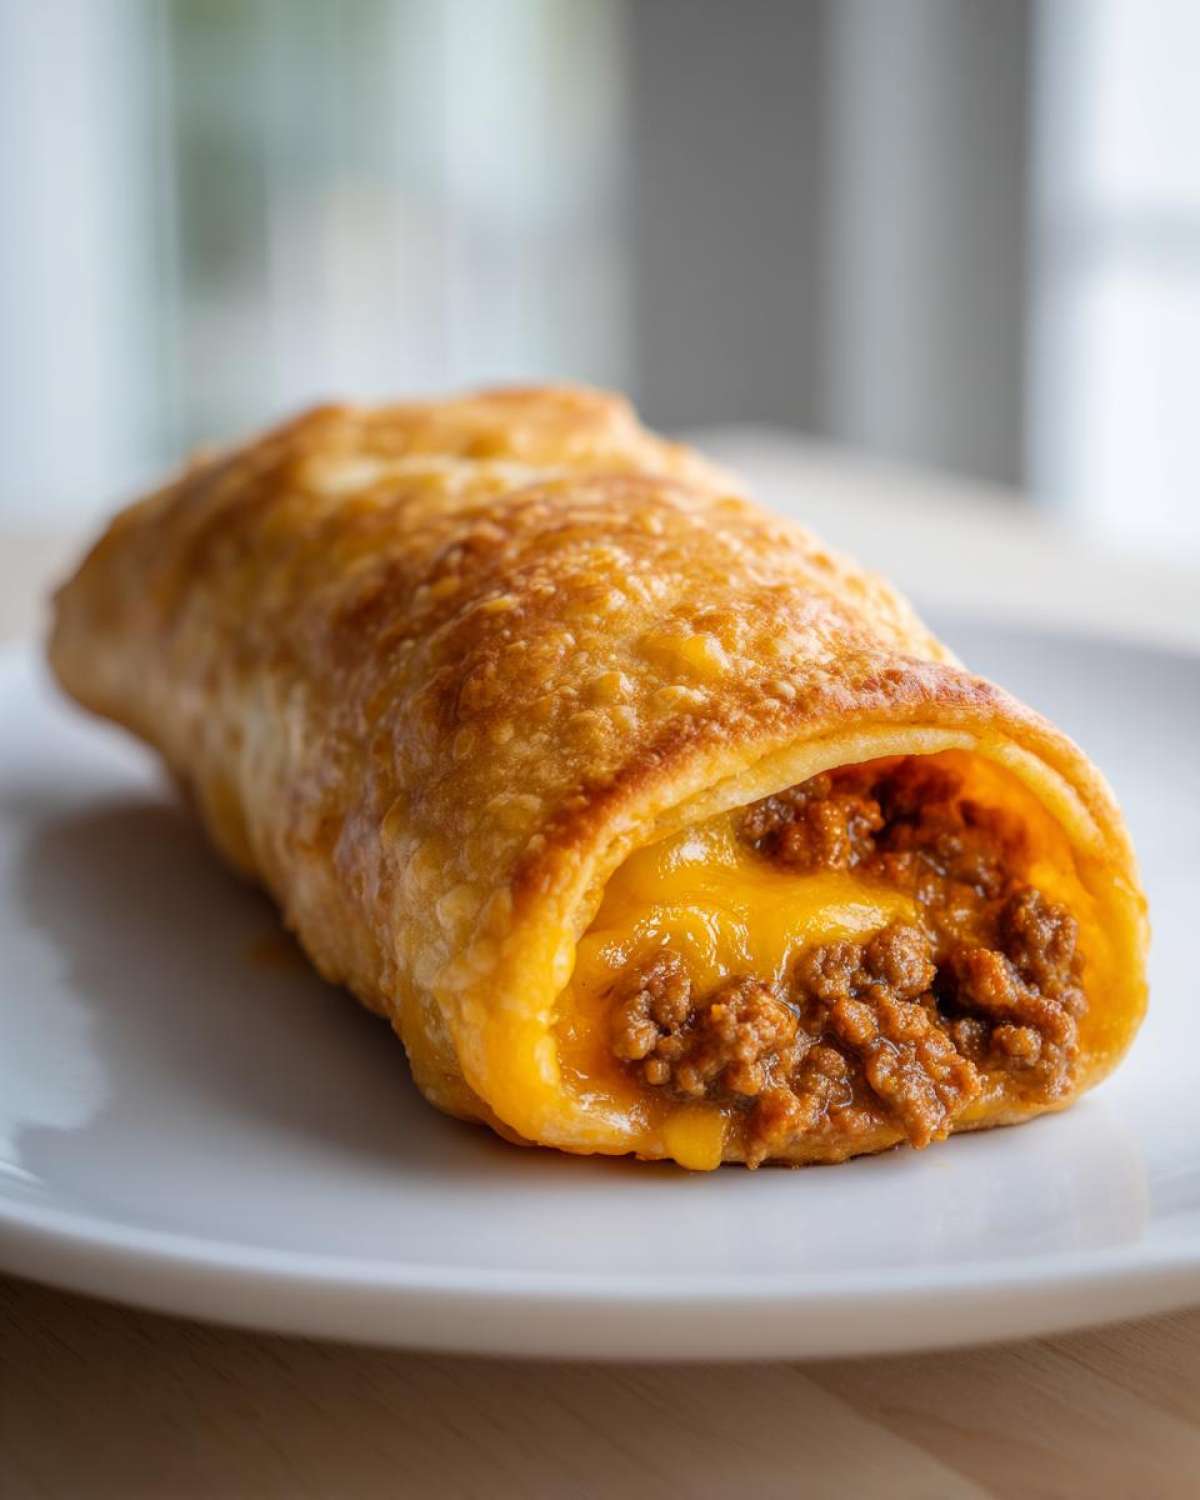
Why This Cheesy Pocket Tacos Recipe is Your New Weeknight Taco Night Game Changer
Look, I love a good, slow-cooked meal, but when you’re staring down the barrel of 6 PM with hungry faces staring back, you need speed and flavor, not fussy techniques. That’s why this recipe jumped right to the top of my rotation.
- Speed and Simplicity for Busy Evenings: Seriously, the total time is only about 25 minutes from start to finish! If you can brown meat, you can nail this Easy Taco Pockets Dinner. It’s perfect for those nights when you need a win fast.
- The Ultimate Gooey Cheese Filled Tortillas Experience: We aren’t just sprinkling a wisp of cheese here, folks. We are *layering* it with that creamy base. It melts beautifully, creating these pockets of savory, melty goodness that truly satisfy that craving for Gooey Cheese Filled Tortillas.
You can find more quick meal ideas over in my dinner category, but trust me, none are quite as comforting as these handheld wraps!
Essential Ingredients for Perfect Cheesy Pocket Tacos
I always say that following a recipe is 80% knowing what you need and 20% knowing what to do with it! For these Ground Beef Pockets, the ingredient list is short, but those small details matter—especially the cheese situation. We are using two kinds of cheese for two different jobs, so make sure you pay attention to that division!
Ground Beef Pockets Filling Components
- 1 lb ground beef – make sure you drain that fat well!
- 1 packet taco seasoning mix – the store-bought kind is totally fine for speed.
- 1/2 cup water.
- 4 oz cream cheese, softened – and I mean softened! Cold cream cheese will just shred when you try to mix it in. Leave it on the counter while you brown the meat.
Assembling the Loaded Tortilla Pockets
These items give us the structure and the crispy finish we are aiming for:
- 8 large flour tortillas – make sure they are fresh so they don’t crack when you fold.
- Cooking spray – this is how we get that beautiful golden exterior!
- 1 cup shredded cheddar cheese, divided – half for the creamy mix, half for the top crunch.
Step-by-Step Guide: How To Make Pocket Tacos
Okay, now that we have all our glorious ingredients ready, it’s time to put this together. Watching these come together is honestly the best part because they look so substantial, yet they come together so fast! You need less than 15 minutes of actual cooking time, which is fantastic for a Handheld Taco Dinner Idea that feels way more satisfying than actual tacos.
Preparing the Creamy Cheesy Taco Filling Base
First things first, get your oven fired up to 400 degrees Fahrenheit—we want that baking sheet hot! Now, tackle the meat. Brown your pound of beef in a skillet over medium heat. When it’s totally cooked through, you MUST drain all that extra grease off; nobody wants oily Cheesy Pocket Tacos Recipe! Pop it back on the heat, stir in the seasoning packet and that half-cup of water. Let that simmer gently for about five minutes; you want the liquid to reduce down a bit so the filling isn’t watery.
While that’s simmering, do your creamy mix. In a separate little bowl, beat that softened cream cheese with exactly half of your shredded cheddar until it’s smooth. That’s our gooey binder!
Assembling and Sealing Your Cheesy Pocket Tacos
Lay out those large flour tortillas flat. Take your cream cheese mixture and spread it evenly, but here’s the trick: only cover *one half* of the tortilla. Don’t spread it right to the edges, leave a little breathing room! Then, spoon your seasoned meat mixture right on top of the cream cheese layer, keeping it in that same half section.
Fold the empty side over the meat to create that perfect half-moon shape. Now, you’ve got to press those edges together HARD. Use the tines of a fork if you need to seal them really well. We want to lock all that goodness inside so none of that cheesy filling escapes during baking. You can check out some basic tips on my blog for general prepping advice!
Baking for a Crispy Taco Wraps Finish
Place those sealed pockets onto your baking sheet—make sure the sheet has been lightly sprayed with cooking spray! This is key for getting those crispy results we love. Brush the tops of the folded pockets lightly again with a touch of spray or even melted butter if you have it. Then, sprinkle that remaining half-cup of cheddar cheese right over the top of everything!
Bake them for 12 to 15 minutes. The goal is for the outside to look golden brown and crinkly, and for that melted cheese on top to be bubbling happily. Pull them out, let them cool for just a minute (the filling will be lava-hot!), and enjoy those homemade Crispy Taco Wraps!
Expert Tips for Perfect Cheesy Pocket Tacos Success
Seriously, once you master the basics, you start tweaking things, right? That’s how these recipes become truly *yours*. I’ve found a few little tricks over the years that take these Ground Beef Pockets from great to absolutely incredible, especially when you’re trying to get that perfect crunch factor or switch things up for a different night!
Achieving Maximum Crispiness
Sometimes the oven just doesn’t give you that satisfying crackle, especially if you’re using thicker tortillas. If you have an air fryer, use it! Those little beauties are amazing for achieving perfect crispness. Pop your assembled pockets in there at 375 degrees Fahrenheit and let them run for about 6 to 8 minutes. Remember to flip them halfway through that time so you get even golden-brown color all over.
Here’s an extra thing I started doing when I bake them: I lightly brush the bottom half of the tortilla, the part that will be pressed against the pan, with a tiny bit of olive oil right before I spoon the filling on. It seems minimal, but it creates a subtle barrier and helps that bottom layer get just as golden as the top! You can see how I use baking sheets for other things, like my sheet pan chicken, and the principle of getting good airflow underneath for crispness is the same!
Ingredient Flexibility for Your Ground Beef Pockets
Don’t feel chained to cheddar! While cheddar melts beautifully and has that great color, feel free to experiment. Monterey Jack melts like a dream and gives you an even silkier texture in the creamy filling. My sister actually prefers a Mexican blend because it already has a little bit of everything in there—it’s less fuss for her!
Another easy switch involves the seasoning. If you find a packet of smoky chipotle seasoning or maybe some adobo seasoning you love, use that instead of standard taco mix. Just check the salt content, because pre-mixed seasonings vary widely. This little bit of flexibility makes these Quick Cheesy Mexican Pockets fun to make again and again!
Make Ahead Pocket Tacos and Storage Instructions
I absolutely love having these ready to go, especially when I know I’m going to have zero time the next day. You can definitely prep these ahead of time! I generally chop up my advice into two camps: assembling the filling first, or building the whole pocket.
If you only make the beef filling, you can pop that cooked ground beef mixture into an airtight container and treat it like leftovers—it stays great in the fridge for about two days. It reheats perfectly in the microwave before you start assembling.
For the fully assembled, unbaked pockets, the best way is to place them on a baking sheet (just like you would for baking) and freeze them completely flat. Once solid, transfer them to a freezer bag. You can bake directly from frozen, but add about 8 to 10 minutes to the baking time. You can check out my general tips for freezing things like breakfast burritos—the same rules about airtight storage apply here!
Serving Suggestions for Your Handheld Taco Dinner Idea
Now, even though these Cheesy Pocket Tacos are a full meal stuffed inside a crispy, golden shell, they practically beg for a little something cool and fresh on the side to cut through that richness. If you just serve them plain, you’re missing out on half the fun! My rule is that you need something creamy, something spicy, and something super fresh.
For the creamy side, you absolutely need sour cream or maybe a drizzle of plain Greek yogurt if you’re watching the fat content. Serve it right alongside the plate; it’s perfect for dipping those crispy corners.
When it comes to heat, a vibrant salsa is non-negotiable. Whether you reach for store-bought or use my recipe for classic guacamole (which adds creaminess AND freshness!), having something tangy brightens the whole plate up.
If the kids are eating, a simple shredded iceberg lettuce mix tossed with a squeeze of lime juice keeps things light and gives everyone something crunchy that isn’t fried! Honestly, the contrast between the piping hot, gooey center and that cool, crisp topping is what makes this such a satisfying Weeknight Taco Pockets experience.
Frequently Asked Questions About Cheesy Pocket Tacos Recipe
I get so many questions after people try these for the first time! It’s totally normal; once you find a recipe this good, you want to make sure you’re handling it perfectly every time. Here are some of the things folks ask me most often about making these the best Ground Beef Pockets they’ve ever had.
Can I use chicken or beans instead of ground beef in these cheesy pocket tacos?
Oh, absolutely! These are really flexible as long as you remember the goal: a filling that isn’t too wet. If you use shredded rotisserie chicken, it works perfectly as a direct swap. If you’re using canned beans, make sure you rinse them really well and then simmer them with the taco seasoning mix for a few extra minutes to cook off any excess liquid before mixing them with the cream cheese. You want that creamy, cheesy interior, not soup!
How do I prevent the tortillas from tearing when folding?
This is such an important question, especially if your tortillas have been sitting on the counter for a while. Flour tortillas get brittle! My favorite trick for ensuring they stay pliable—and turn into perfect, sealed pockets without cracking—is to stack five or six of them together on a microwave-safe plate and zap them for just 10 to 15 seconds. They get warm and flexible immediately. This small step makes folding them over those thick fillings so much easier. It’s a fantastic tip for any filled tortilla recipe you try!
What is the best way to make these Quick Cheesy Mexican Pockets spicy?
If you prefer some heat in your Quick Cheesy Mexican Pockets, you have a few easy routes. First, swap out that cheddar cheese blend for Pepper Jack cheese when mixing the cream cheese base and when sprinkling the top. That brings a nice slow burn. My preferred method, though, is to add diced fresh jalapeños or even a spoonful of canned green chiles directly into the cooked ground beef mixture when you add the taco seasoning. That way, you get pockets of heat spreading all through your Family Friendly Mexican Food!
If you try these out and have a variation that works for your family, please let me know! You can always send me a message through the contact page!
Sharing Your Weeknight Taco Pockets Creations
Alright, that’s it! We’ve covered everything you need to know to whip up the ultimate batch of these super satisfying, easy, and cheesy taco pockets. I am so excited for you to try them on your next chaotic weeknight when you realize dinner needs to happen five minutes ago.
Once you’ve pulled these golden, bubbling beauties out of the oven or air fryer, I really want to know what you thought! Did you stick exactly to the recipe, or did you try a different cheese blend? Tell me! Head down to the comments section below and leave your star rating—five stars if they saved your dinner plan, of course!
Don’t hold back on sharing any variations you invent. We are all about making life easier and tastier around here, so sharing your twists on these Weeknight Taco Pockets helps everyone else out too. Happy cooking, friends!
Nutritional Estimates for Your Cheesy Pocket Tacos
Now, look, I am a cook, not a nutritionist, okay? I focus on making things taste amazing for Taco Tuesday, not counting every single macro! But since so many of you ask about the details of our favorite cheesy pocket tacos recipe, I put together the ballpark figures based on the ingredients listed.
Keep in mind these are just estimates based on using standard ingredients like 80/20 ground beef and standard cheddar cheese. If you swap that beef for lean turkey, or use reduced-fat cheese, your numbers are going to shift, so treat this as a helpful guide, not gospel!
I always suggest heading over to my disclaimer page for the full rundown on why these numbers are just approximations based on serving size.
Here is the breakdown per one single pocket:
- Serving Size: 1 pocket
- Calories: 350
- Fat: 18g (with 9g being saturated fat)
- Carbohydrates: 30g (with 2g of fiber)
- Protein: 18g
- Sugar: 2g
- Sodium: 550mg (This is one to watch! Taco seasoning can be salty.)
Overall, for a satisfying Supper Ideas Cheesy Tortillas dinner that stuffs you up nicely, those numbers aren’t too bad at all. Enjoy these handheld delights!
PrintQuick Cheesy Ground Beef Pocket Tacos
Make fast, handheld taco pockets filled with seasoned ground beef and a creamy, cheesy mixture. Bake these for a crispy exterior and a gooey center.
- Prep Time: 10 min
- Cook Time: 15 min
- Total Time: 25 min
- Yield: 8 servings
- Category: Dinner
- Method: Baking
- Cuisine: Mexican-Inspired
- Diet: Low Lactose
Ingredients
- 1 lb ground beef
- 1 packet taco seasoning mix
- 1/2 cup water
- 4 oz cream cheese, softened
- 1 cup shredded cheddar cheese, divided
- 8 large flour tortillas
- Cooking spray
Instructions
- Preheat your oven to 400 degrees Fahrenheit. Lightly spray a baking sheet with cooking spray.
- Cook the ground beef in a skillet over medium heat until browned. Drain off any excess fat.
- Stir the taco seasoning mix and water into the cooked beef. Simmer for 5 minutes until the liquid reduces. Remove from heat.
- In a small bowl, mix the softened cream cheese with 1/2 cup of the shredded cheddar cheese until combined.
- Spread an equal amount of the cream cheese mixture onto one half of each flour tortilla.
- Spoon the seasoned ground beef mixture over the cream cheese layer on each tortilla.
- Fold the empty half of the tortilla over the filling to create a half-moon shape. Press the edges firmly to seal.
- Place the sealed pockets onto the prepared baking sheet. Brush the tops lightly with cooking spray or melted butter.
- Sprinkle the remaining 1/2 cup of cheddar cheese over the tops of the pockets.
- Bake for 12 to 15 minutes, or until the tortillas are golden brown and the cheese is melted and bubbly.
Notes
- For extra crispness, you can air fry these pockets at 375 degrees Fahrenheit for 6 to 8 minutes, flipping halfway through.
- You can prepare the filling ahead of time and store it in the refrigerator for up to two days.
- Use your favorite type of cheese, such as Monterey Jack or a Mexican blend, instead of cheddar.
Nutrition
- Serving Size: 1 pocket
- Calories: 350
- Sugar: 2
- Sodium: 550
- Fat: 18
- Saturated Fat: 9
- Unsaturated Fat: 9
- Trans Fat: 0
- Carbohydrates: 30
- Fiber: 2
- Protein: 18
- Cholesterol: 60