

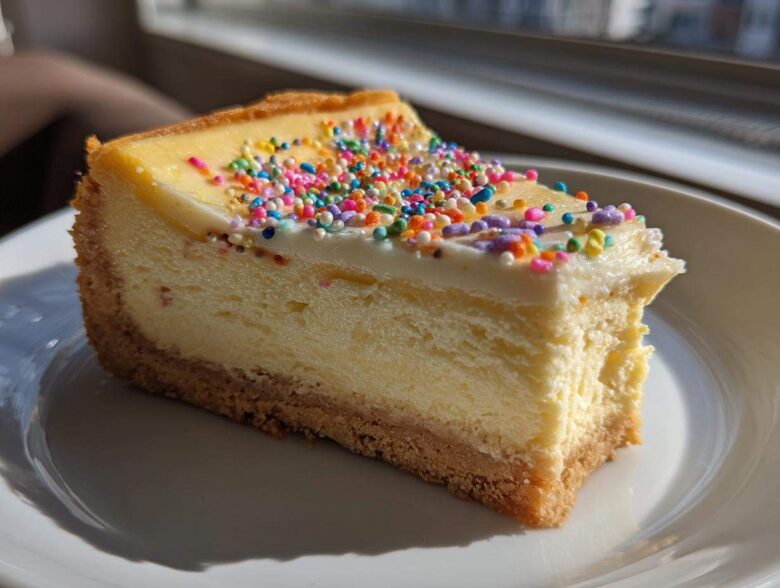
If you’re anything like me, the holidays aren’t truly official until you’ve pulled something truly spectacular out of the oven. Forget the fussy pies and the dry cakes; we are leveling up our dessert game this year! I spent nearly three full holiday seasons testing and tweaking to get this baked masterpiece just right to share with you. I’m talking about the ultimate creamy sugar cookie cheesecake. It’s everything wonderful about that buttery, soft sugar cookie, but wrapped around the richest, silkiest vanilla filling imaginable. Trust me, perfecting that water bath technique so it never cracks was an adventure, but now we have a fool-proof, show-stopping recipe ready for your table!
Why This Sugar Cookie Cheesecake is Your Next Showstopper Dessert
Honestly, this isn’t just a dessert; it’s the centerpiece of any party! People think gourmet cheesecakes are impossible, but this one really delivers that ‘wow’ factor with surprising simplicity. If you need a guaranteed hit for your next big gathering, this recipe is it. It tastes like holiday magic!
Key Attributes of the Ultimate Sugar Cookie Cheesecake
- Incredibly Smooth Filling: Thanks to the room-temperature dairy and careful mixing, the texture is unbelievably creamy—never grainy!
- Buttery Cookie Crust: We use real crushed sugar cookies, not graham crackers, so you get that rich, buttery snap in every single bite.
- Festive Potential: It’s the perfect canvas if you love decorating! Think colored sugar, sprinkles, or even a light citrus glaze. It screams, “I baked something special!”
- Manageable Process: Despite looking fancy, the steps are totally straightforward, making this a fantastic Dessert for Gatherings that won’t stress you out.
Essential Ingredients for Your Sugar Cookie Cheesecake
When we’re making something this decadent, every ingredient matters! I’ve written down exactly what you need below, but pay close attention to the state of things—especially the dairy and eggs. If you try to rush and use cold cream cheese, I guarantee you’ll end up with lumps, and that’s just not the vibe we’re going for with a creamy cheesecake recipe.
- 1 1/2 cups all-purpose flour
- 1 teaspoon baking powder
- 1/2 teaspoon salt
- 1 cup (2 sticks) unsalted butter, softened (This is key for the crust!)
- 3/4 cup granulated sugar
- 1/2 cup packed light brown sugar
- 1 large egg (for the cookies)
- 1 teaspoon vanilla extract
- 1/4 cup milk
- 1 cup reserved baked sugar cookie pieces (for the crust—use ones that baked up nice and buttery!)
- 3 (8 ounce) packages cream cheese, softened
- 1 1/2 cups granulated sugar (for the filling)
- 1/4 cup all-purpose flour (again, for the filling structure!)
- 1 teaspoon vanilla extract (Go for the good stuff here!)
- 1/4 teaspoon almond extract
- 3 large eggs, room temperature (Seriously, don’t skip this!)
- 1/2 cup sour cream
- 1/4 cup heavy cream
- 1/2 cup crumbled baked sugar cookies (if you want that fun swirl)
- 1/4 cup festive sprinkles (totally optional, but highly recommended for holiday fun!)
Ingredient Notes and Substitution Tips
Let’s talk about why we need things room temperature. Cold dairy and eggs don’t emulsify, meaning they won’t blend smoothly into that gorgeous Vanilla Cheesecake base. The cream cheese, sour cream, and eggs need about an hour on the counter before you even think about starting your mixer.
If you’re worried about the almond extract, don’t stress! It just adds that little background note that makes the whole thing taste gourmet, but if you absolutely can’t stand it, just use an extra half teaspoon of your high-quality vanilla. Also, if you’re having trouble getting the crust to bind, try melting just an extra tablespoon of butter, or even using a small amount of the melted butter from your chocolate chip cookies recipe, though I usually find the butter in the cookies is enough!
Preparing the Buttery Cookie Crust Dessert Base
Okay, this is where we build the foundation for our amazing Cookie Crust Dessert. You absolutely *have* to bake the sugar cookies first and let them cool completely. If you try to crush warm cookies, you end up with goopy, greasy dough, and nobody wants that sort of mess in their springform pan!
Once those cookies are completely cool—and I mean totally room temperature—it’s time to get crushing. Remember, we need some for the crust and some for the optional filling swirl, so keep them separate!
Prepping the Sugar Cookie Pieces
For the crust base, you’ll take that 1 cup of reserved cookies and pulse them in your food processor until they look like coarse sand. If you don’t have a food processor, put them in a zip-top bag and bash them with a rolling pin—that’s what I use when I’m feeling dramatic! You want coarse crumbs, not powder.
For the swirl, you just need about a half cup, and you want these a little finer, almost like small pea-sized crumbles. Set those aside for a minute. We’ll come back to them when we assemble the filling.
Now, preheat your oven to 350 degrees F. You’ll mix those coarse crust crumbs, and I know the ingredient list is a little tight on butter, but you are going to take about 1/4 cup of that softened butter we already accounted for, melt it down quickly, and mix it in. Press that buttery mixture firmly into the bottom of your 9-inch springform pan. Don’t just sprinkle it in!
Here’s my little trick for a perfectly flat base: After you press most of it down with your fingers, grab the bottom of a dry, flat measuring cup and use it like a tamper. Press down hard across the entire surface. This gives you that beautiful, even foundation.
Bake that crust for exactly 10 minutes. This sets it so it doesn’t get soggy when we add that rich filling later. Once it’s done, pull it out, let it cool just a touch, and then drop your oven temperature down to 325 degrees F—we need it cooler for that slow, gentle bake!
Mastering the Creamy Cheesecake Recipe Filling
This is where the magic happens, and honestly, where most people accidentally ruin their dessert! We are aiming for that incredible, cloud-like texture that defines a truly great Creamy Cheesecake Recipe. Remember how we talked about having everything at room temperature? That matters now more than ever.
Start by getting that cream cheese, the 1 1/2 cups of sugar, and the 1/4 cup of flour mixed up in your large bowl. Beat this until it looks perfectly smooth—no lumps allowed! Stir in the vanilla and that little hint of almond extract. This blend is the flavor backbone of your entire dessert. You can find more of my favorite Sweet Cream Cheese Desserts ideas linked right here!
Now listen closely: Add your three room-temperature eggs one at a time. As soon as the yolk disappears, stop the mixer and scrape down the sides. You want these combined, yes, but if you overmix once the eggs are in, you whip in too much air, and that air creates bubbles that result in cracks later. We want dense richness, not airy volume!
The final touch for texture is the sour cream and heavy cream. These are your secret weapons for moisture beyond the crust. Gently fold those in by hand until everything just comes together. When you pour this beautiful, smooth batter over your pre-baked crust, you’ll realize why this sugar cookie cheesecake is going to be famous at your holiday parties!
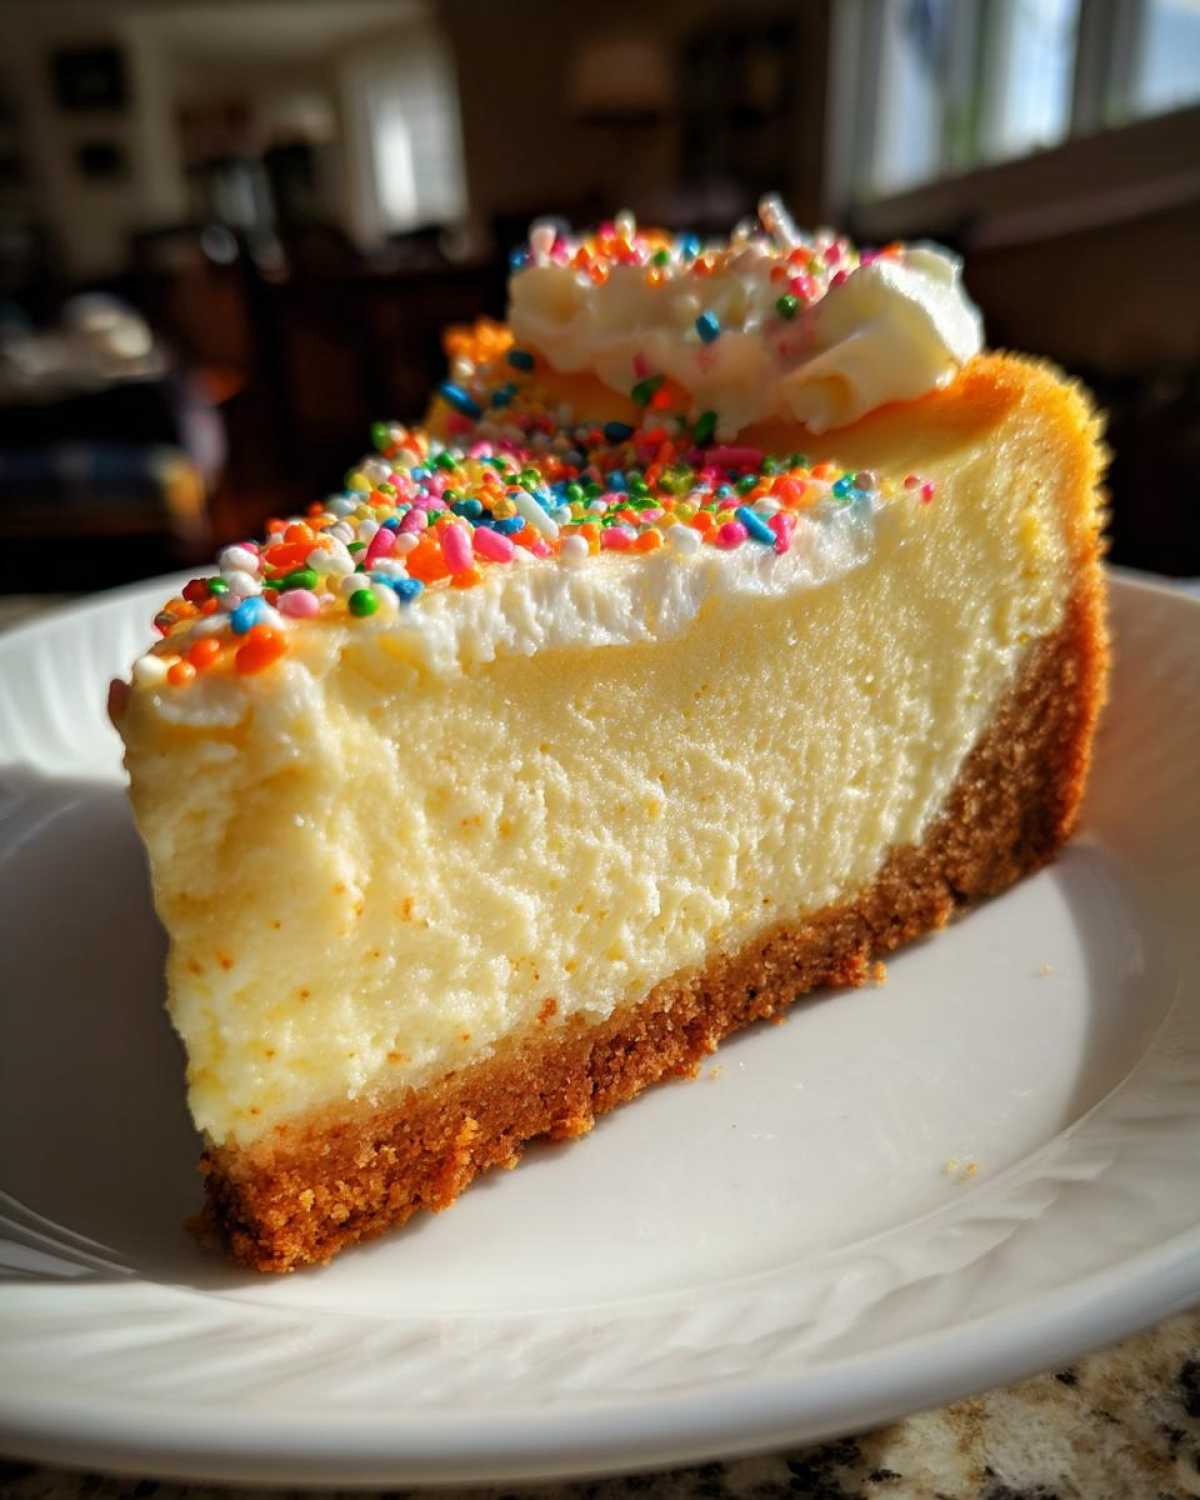
Baking the Sugar Cookie Cheesecake: Water Bath Technique
If you want to achieve that perfect, unblemished top for your sugar cookie cheesecake while locking in incredible moisture, you absolutely must embrace the water bath. I know it sounds fussy—like something only professionals do—but I promise it’s the single best way to ensure you get a beautiful slice of Baked Cheesecake Recipe perfection. The water bath, or *bain-marie*, is basically a cozy, steamy oven hug for your pan. It keeps the temperature around the cheesecake even and gentle, which stops the edges from overbaking before the center sets. This eliminates the dreaded cracking!
Remember how we dropped the oven temperature down to 325 degrees F after the crust baked? Keep it there for this crucial step. Before you put the pan in, you need to wrap the bottom and sides of your 9-inch springform pan *really* well. I mean heavy-duty aluminum foil, covering it twice, because you do not want any water seeping in and making your beautiful cookie crust soggy!
Once wrapped, set your springform pan inside a larger, sturdy roasting pan. Now, boil some water on the stove. Carefully pour that hot water into the *roasting pan*—not the cheesecake pan!—until the water comes about halfway up the sides of the springform. It should look like a little boat in a tub!
Slide the whole setup carefully into the oven. Bake this beauty for about 60 to 75 minutes. You’ll know it’s close when you give the oven door a quick peek: the edges should look set and creamy, but the very middle third should still have a noticeable, gentle jiggle when you carefully nudge the roasting pan.
The Essential Slow Cooling Process
This next step is what separates the rookies from the cheesecake masters! Once the time is up and you’ve confirmed that jiggle, you must resist the urge to pull it out. Thermal shock causes cracking, period. We have to let the cheesecake adjust slowly to the cooler air in the kitchen.
So, turn the oven off completely. Push the oven door open just a crack—just enough to let some heat escape slowly. Leave the cheesecake sitting right there in the cooling water bath for a full hour. That hour of gentle, gradual cooling is the secret trick that guarantees a smooth, crack-free top every single time. It builds trust between you and the cake, you know? Once that hour is up, you can gently lift the pan out of the water, take off the foil, and let it finish cooling completely on a wire rack before it heads to the fridge overnight.
Tips for Perfect Sugar Cookie Cheesecake Presentation
You’ve made it! Your baked sugar cookie cheesecake is out of the oven, it’s cooled slowly, and now it needs its beauty sleep. The most important step for texture right now is chilling this down. You have to be patient here; I know the smell is driving you crazy, but it requires a minimum of six hours in the refrigerator, but honestly, overnight is always better. This rest time lets the filling firm up beautifully so that when you slice it, the edges are clean and sharp.
Speaking of clean slices, here’s my tip for removal. If you haven’t already, run a thin metal knife or offset spatula around the inside edge of the pan before you even try to release the spring. That slight gap prevents the filling from sticking to the ring as it contracts while chilling. Once it’s fully chilled the next day, run the knife around one last time, and then release the clasp. Instant, perfect results!
Now for the fun part: decoration! Since this is basically the definition of a Holiday Cheesecake dessert, don’t be shy with the toppings. If you used the optional cookie crumble swirl inside, you might only need a light dusting of powdered sugar. But if you left the top smooth, this is your moment to make it shine! Those festive sprinkles you bought back in step two? This is where they come out to play.
A simple dusting combined with a border of bright sprinkles around the edge looks stunning and really highlights that buttery, cookie flavor we worked so hard to achieve. You can also always drizzle on a little something extra, like a simple vanilla glaze, or even a light drizzle of the frosting from my Cream Cheese Frosting recipe if you need a little extra decadence!
Frequently Asked Questions About This Recipe
When you nail a recipe this good, you know you’re going to get questions! It’s totally normal, especially with layered desserts that look this impressive. I’ve gathered a few of the things folks ask me most often about making sure this sugar cookie cheesecake turns out perfectly every single time. If you have a quick question, check here first—it might already be answered!
Can I make this a Sugar Cookie Cheesecake Bars recipe?
Oh, absolutely! That’s a fantastic way to serve these, especially if you’re making a huge batch for a crowd or you just want smaller portions to snack on later. Remember the note in the instructions? Instead of using a 9-inch springform pan, you’ll press that cookie crust mixture into a standard 9×13 inch baking dish. You’ll want to use parchment paper lining it, leaving some overhang on the sides so you can just lift the entire block out later!
Because the pan is wider and shallower, the bake time for the filling drops significantly—usually down to about 40 to 50 minutes at that same 325 degrees F. You’re looking for the same center jiggle, just faster. They become perfect, easy-to-serve cookie crust dessert squares!
How long does this creamy cheesecake last in the fridge?
Because we used the water bath, the texture stays incredibly stable and moist. Once it’s fully chilled—preferably overnight—this creamy cheesecake recipe will hold up beautifully in the refrigerator for about 4 to 5 days. Just make sure it’s covered tightly with plastic wrap or foil once you slice into it. If you leave it uncovered, the edges can start to dry out, and we sure don’t want that!
If you wanted to attempt a no-bake version, I haven’t tested it for this specific recipe structure, but if you used a stabilized base (like gelatin or whipped heavy cream instead of eggs and sour cream), you could probably treat it like a No Bake Cheesecake Options recipe and keep it firm for about 3 days. But honestly, the baked version is where all the rich flavor is!
For more easy eating ideas perfect for snacking, check out my collection of Snacks recipes over on the blog!
Storage and Reheating Instructions
Storing leftovers of this rich dessert is super easy, but remember this is a baked cheesecake, so it needs proper cold storage. Keep any leftover slices covered tightly with plastic wrap or put them into an airtight container. It keeps wonderfully; I’ve had slices last me nearly a week in the fridge.
If you somehow had a massive baking day and ended up with too much—which I wouldn’t blame you for!—you can freeze it. Wrap individual slices well, then freeze for up to a month. Thaw them overnight in the fridge before serving. It comes back like it was baked just yesterday!
Share Your Festive Baked Goods Creations
Now that you hopefully have a stunning, crack-free sugar cookie cheesecake cooling in your fridge, I desperately want to see what you’ve made! This recipe really does feel like one of those showstoppers, perfect for any occasion, especially when you’re brainstorming Christmas Dessert Ideas.
When you finally get to slice into this beauty, please hop back over here and leave me a rating! Stars are great, but I live for the comments telling me how your family reacted to that buttery crust. Did you go heavy on the sprinkles or keep it minimalist? Let me know!
If you snap a picture of your finished dessert—maybe it’s sitting on your table ready for a gathering, or maybe you just took the first amazing slice—tag me on social media! Seeing your bakes truly makes my day. Knowing that a recipe born in my kitchen is now showing up at your family celebrations is the absolute best feeling. If you need to send pictures privately, you can always reach out through my contact page, but I prefer the public shout-outs!
Happy baking, and please share your success!
PrintUltimate Creamy Sugar Cookie Cheesecake
A rich, creamy baked cheesecake featuring a thick, buttery sugar cookie crust and a smooth vanilla filling. This dessert is perfect for holiday gatherings.
- Prep Time: 30 min
- Cook Time: 75 min
- Total Time: 120 min (plus chilling time)
- Yield: 12 servings
- Category: Dessert
- Method: Baking
- Cuisine: American
- Diet: Vegetarian
Ingredients
- 1 1/2 cups all-purpose flour
- 1 teaspoon baking powder
- 1/2 teaspoon salt
- 1 cup (2 sticks) unsalted butter, softened
- 3/4 cup granulated sugar
- 1/2 cup packed light brown sugar
- 1 large egg
- 1 teaspoon vanilla extract
- 1/4 cup milk
- 1 cup reserved baked sugar cookie pieces (for crust)
- 3 (8 ounce) packages cream cheese, softened
- 1 1/2 cups granulated sugar
- 1/4 cup all-purpose flour
- 1 teaspoon vanilla extract
- 1/4 teaspoon almond extract
- 3 large eggs, room temperature
- 1/2 cup sour cream
- 1/4 cup heavy cream
- 1/2 cup crumbled baked sugar cookies (for filling swirl, optional)
- 1/4 cup festive sprinkles (for topping, optional)
Instructions
- Prepare the sugar cookie base: Bake your favorite sugar cookie recipe until lightly golden. Cool completely. Reserve 1 cup of whole cookies for the crust and 1/2 cup crumbled for the filling swirl.
- Make the crust: Preheat your oven to 350 degrees F (175 degrees C). In a food processor, pulse the reserved 1 cup of cooled sugar cookies until they form coarse crumbs. Mix the crumbs with 1/4 cup melted butter (not listed in main ingredients, add if needed for binding, otherwise use 1/4 cup of the initial butter amount if possible) and press firmly into the bottom of a 9-inch springform pan. Bake the crust for 10 minutes. Remove and let cool slightly. Reduce oven temperature to 325 degrees F (160 degrees C).
- Prepare the filling: Beat the softened cream cheese, 1 1/2 cups sugar, and 1/4 cup flour in a large bowl until smooth. Mix in vanilla extract and almond extract. Beat in eggs one at a time, mixing just until combined after each addition. Gently stir in sour cream and heavy cream. Do not overmix.
- Assemble the cheesecake: Pour half of the cheesecake batter over the cooled crust. Sprinkle half of the crumbled sugar cookies (if using for swirl) over the batter. Pour the remaining batter on top. If desired, gently swirl the top with a knife.
- Bake using a water bath: Wrap the outside bottom of the springform pan tightly with heavy-duty aluminum foil. Place the pan in a larger roasting pan. Pour hot water into the roasting pan until it reaches halfway up the sides of the springform pan.
- Bake for 60 to 75 minutes, or until the edges are set but the center still jiggles slightly.
- Cool the cheesecake: Turn off the oven, crack the door open slightly, and let the cheesecake cool inside the oven for 1 hour. Remove from the water bath, remove the foil, and let it cool completely on a wire rack.
- Chill: Refrigerate the cheesecake for at least 6 hours, or preferably overnight, before serving. Top with festive sprinkles before serving.
Notes
- For a crack-free cheesecake, ensure all dairy ingredients (cream cheese, eggs, sour cream) are at room temperature before mixing.
- If you prefer a bar format, press the cookie crust into a 9×13 inch pan and bake the filling for 40-50 minutes at 325 degrees F.
- Use high-quality vanilla extract for the best flavor in the filling.
Nutrition
- Serving Size: 1 slice
- Calories: 450
- Sugar: 35
- Sodium: 250
- Fat: 30
- Saturated Fat: 18
- Unsaturated Fat: 10
- Trans Fat: 0.5
- Carbohydrates: 40
- Fiber: 1
- Protein: 8
- Cholesterol: 110